
Art Week was a great time to explore colors. It only made sense to follow it with Color Mixing Week. We started off with one of my son’s favorite interactive book, ‘Mix It Up’ by Hervé Tullet. It is a cheerfully interactive book that teaches about colors in a uniquely engaging way. Follow the artist's simple instructions, and suddenly colors appear . . . mix . . . splatter . . . and vanish in a vivid world powered only by the reader's imagination.
Activity 1: Washable color Pens and Kitchen Paper
Best for (2 years and up) simple science, color mixing, color exploration and recognition
Material Needed: Kitchen Paper (we used Bounty), Crayola Color Pens (washable), two glasses and water.
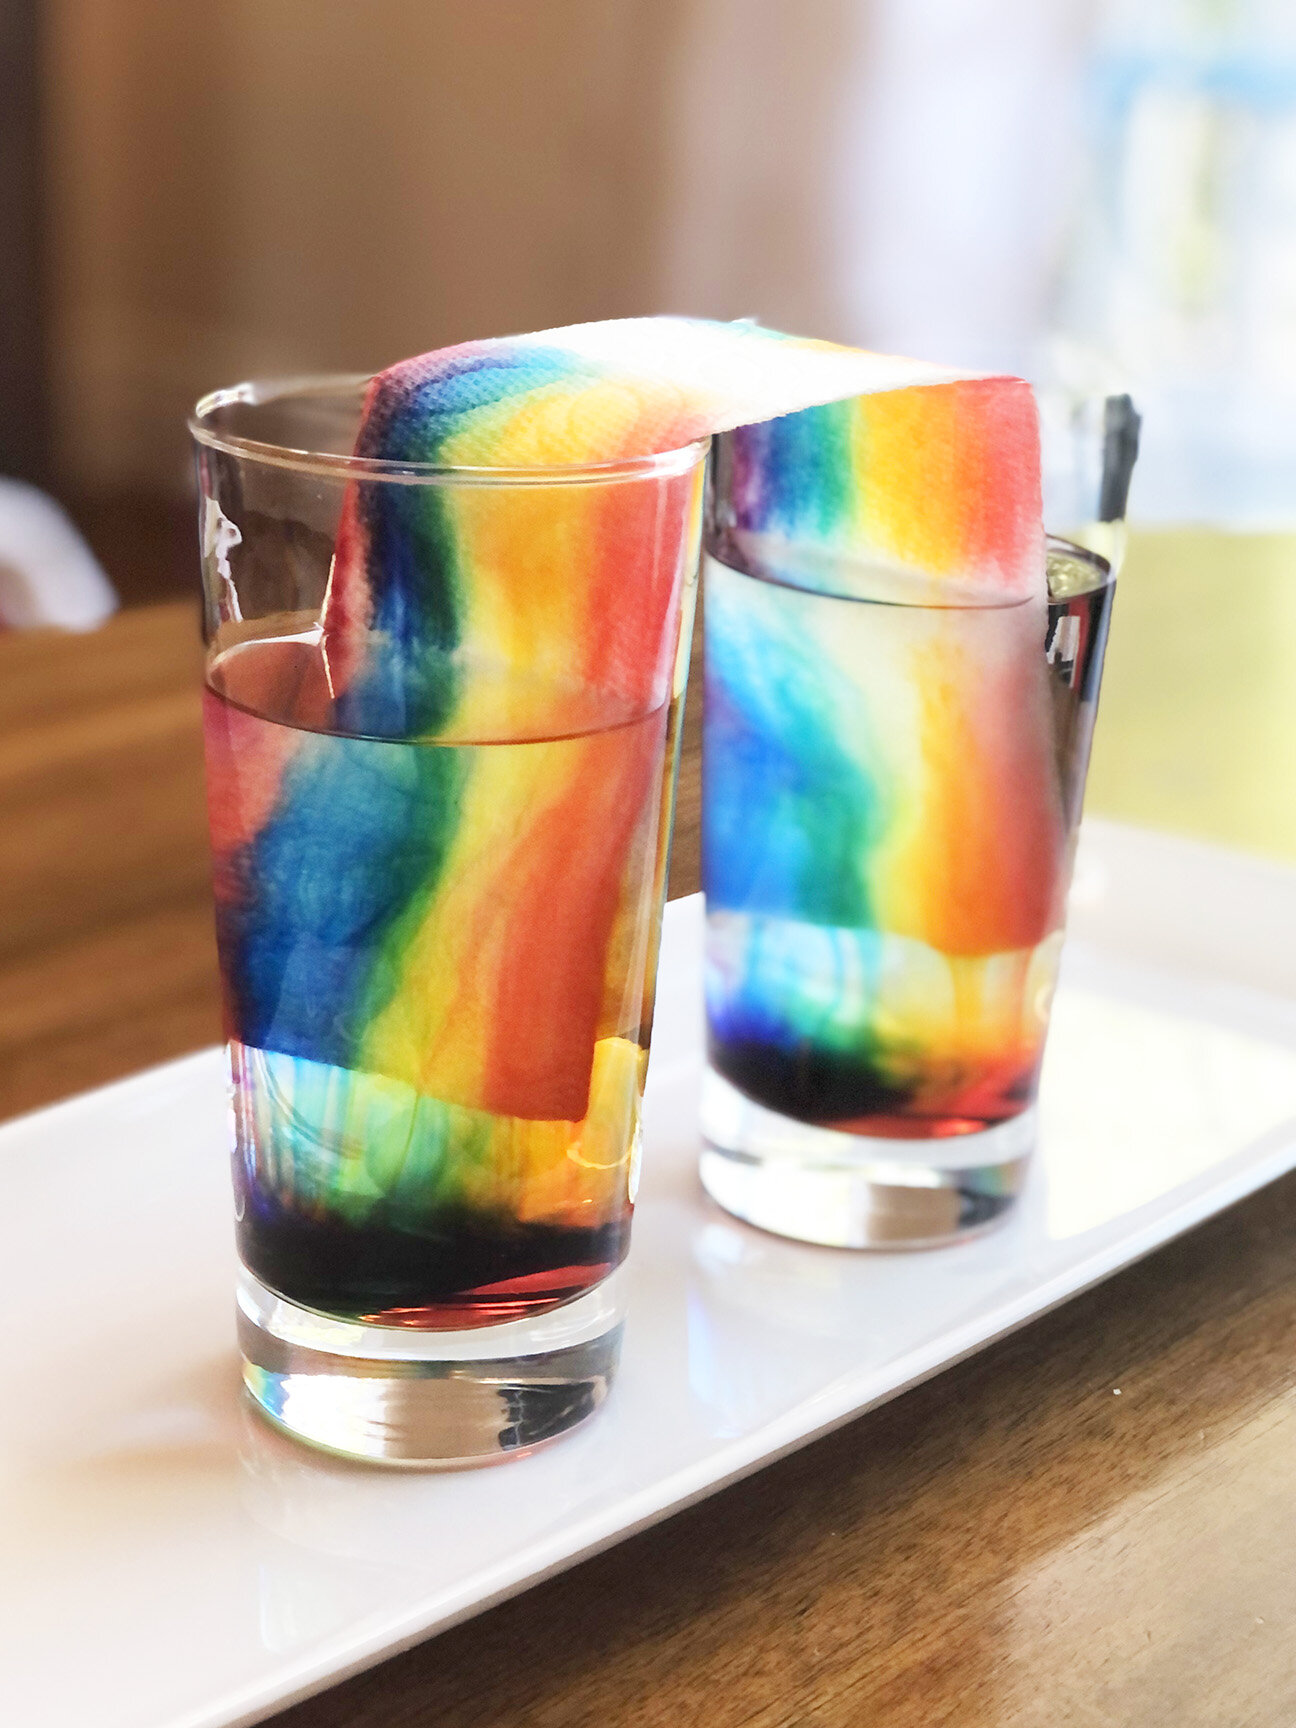
Barack Obama said, ‘Ordinary people, when working together, can do extraordinary things’. This activity kind of reminded me of his speech from 2017. See how you can make a magical rainbow come to life with just three basic colors. When these three colors work together (mixing with other colors to form more colors) they give us a bright and vibrant rainbow.
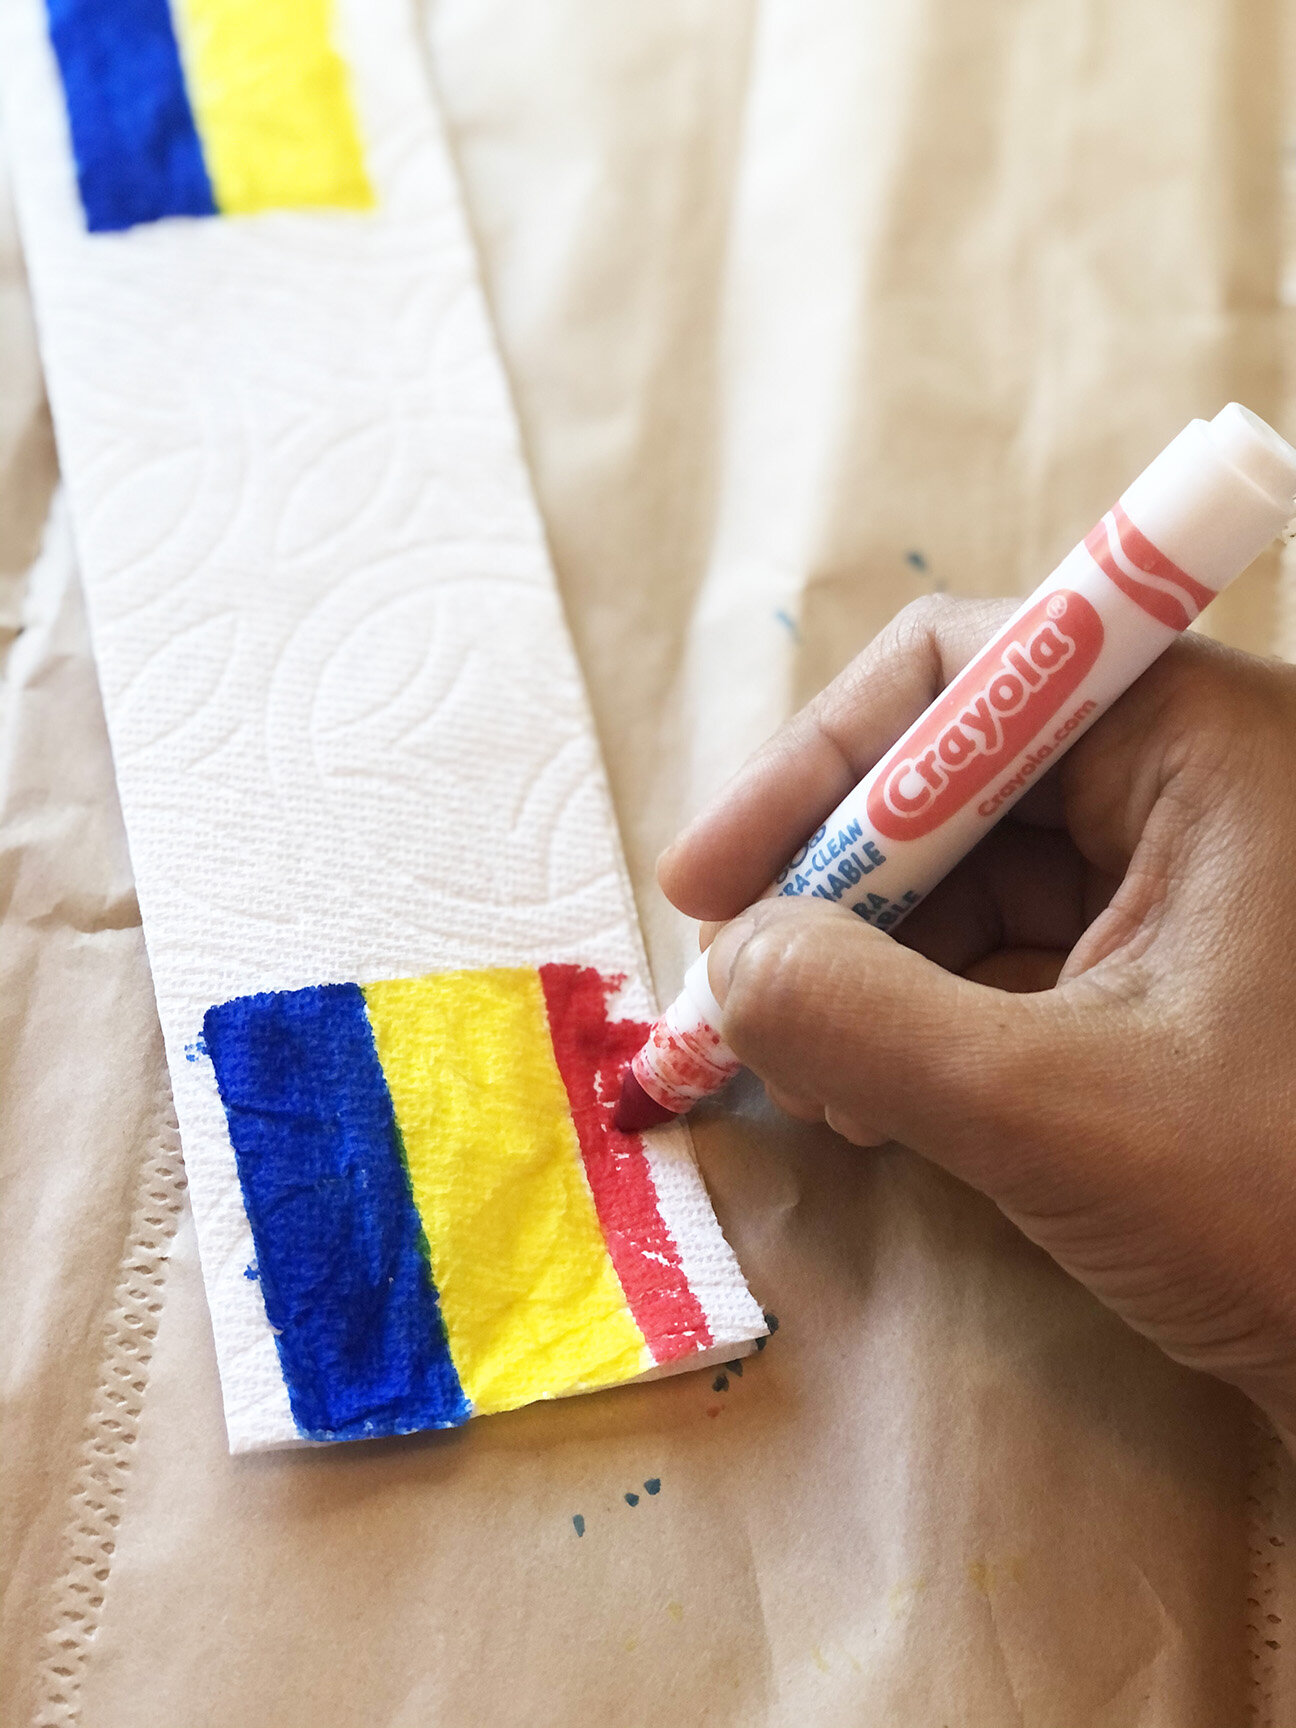

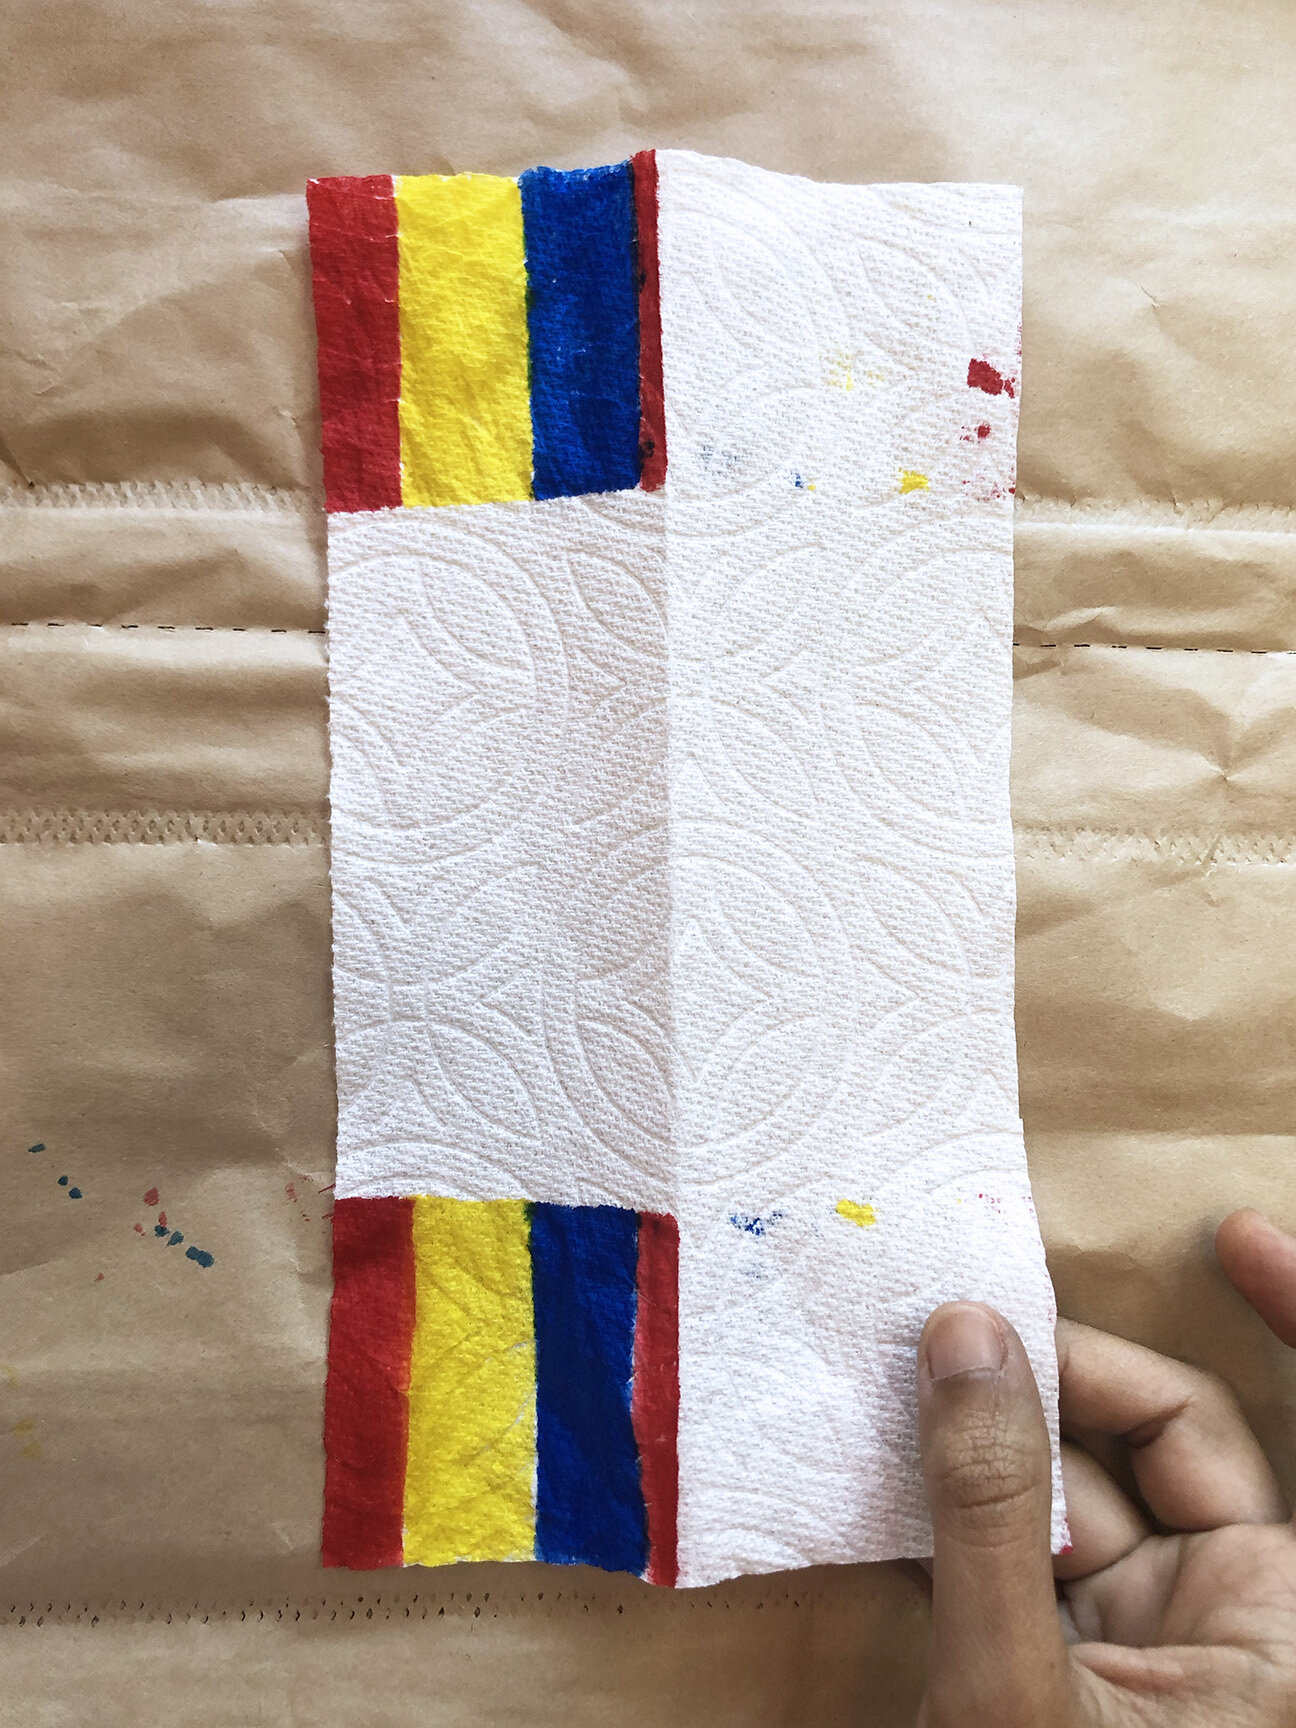
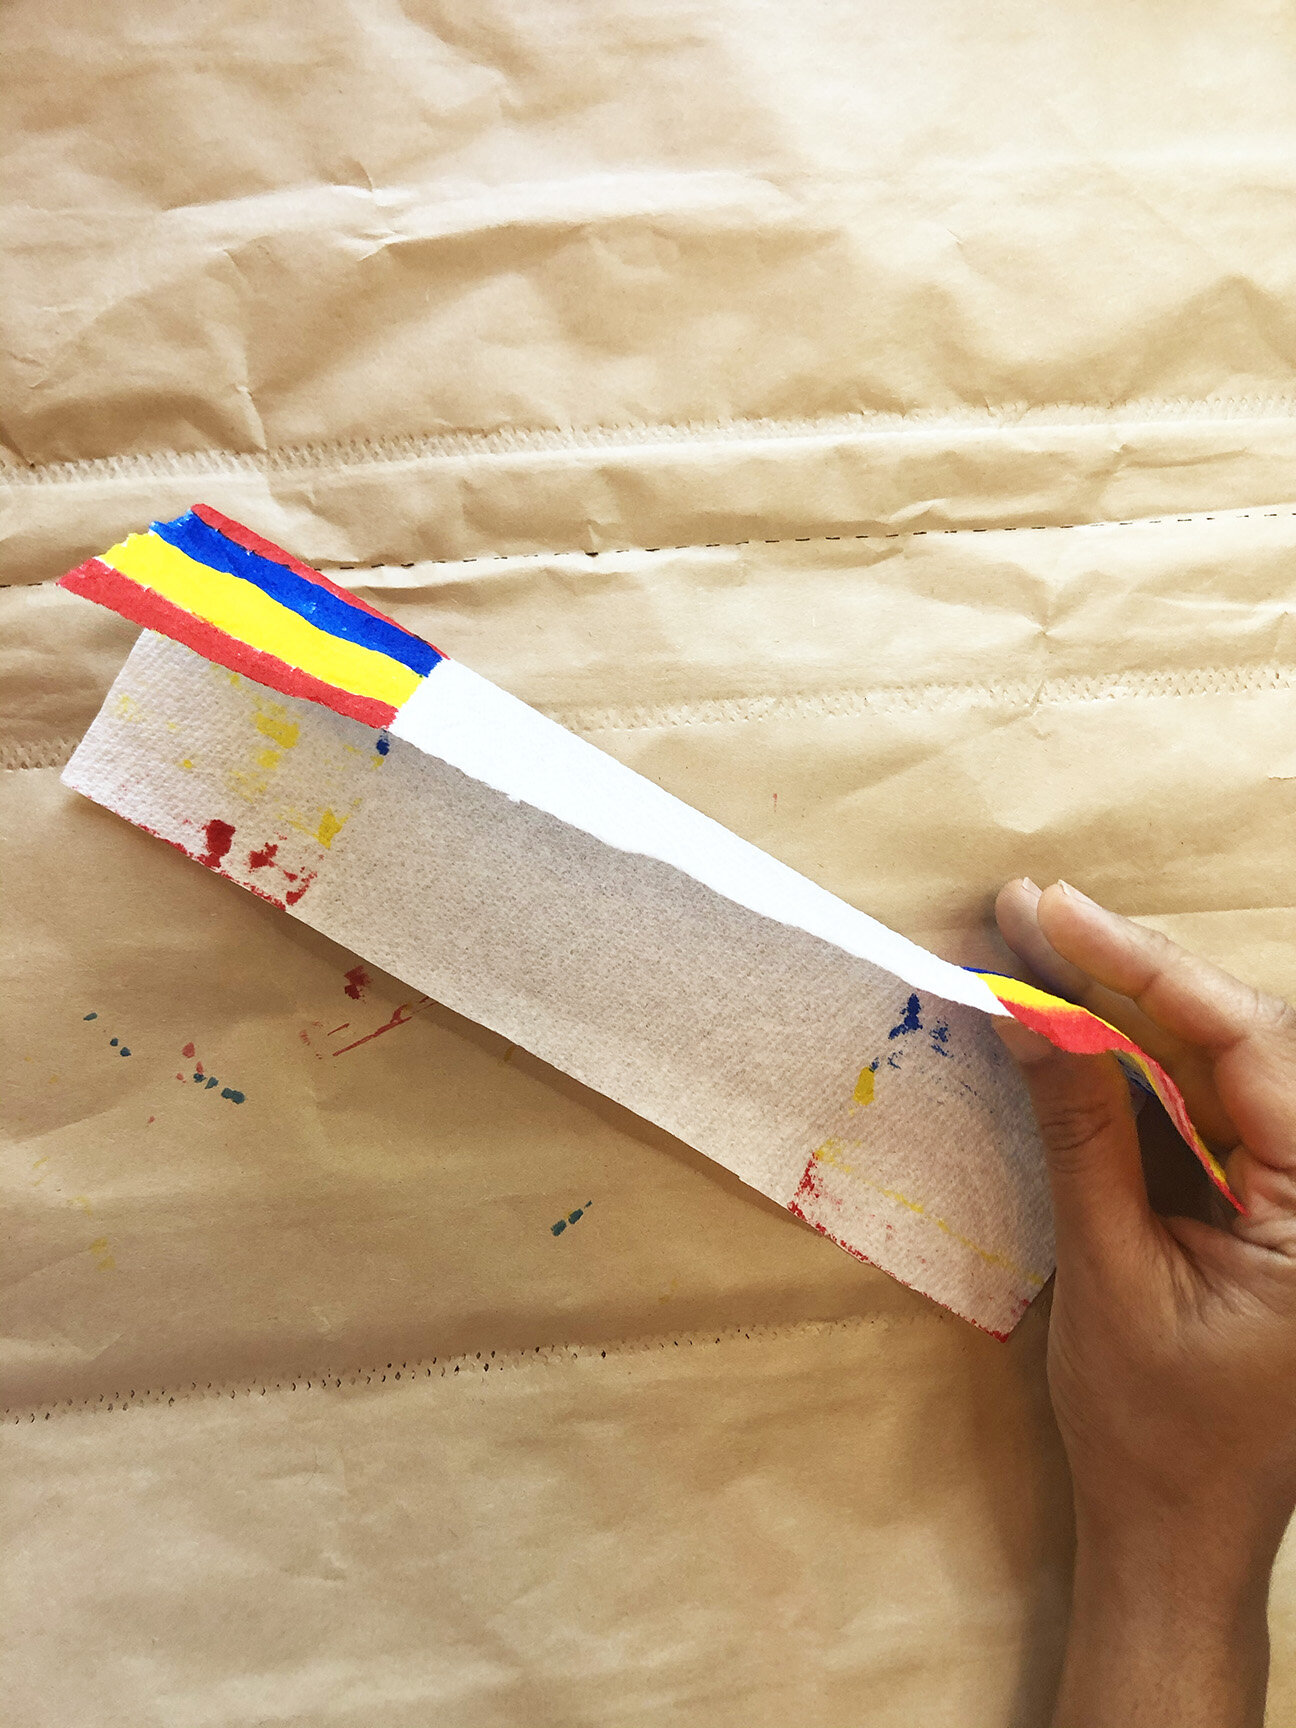
You will need a Kitchen Paper (any high absorbent paper works best). I tried toilet paper, paper napkins and watercolor paper, but nothing worked as good as the Kitchen Paper. You will need to fold the paper once, to make it extra durable. We kept the width to 2.5” after folding and length around 8”. It took some trial and error to get this right.
Now use the color pens (not permanent markers) on the Kitchen Paper in this pattern; Red, Yellow, Blue, Red. This order is important to get the rainbow right. These when mixed will give you the following colors in order; Red, Orange (red+yellow), Yellow, Green (yellow+blue), Blue, Purple (blue+red). When you color the Red after Blue, make sure it’s a narrower rectangle than the others. When the colors merge with one another the Red towards the end won’t be seen, it will change to purple (more like indigo and violet). Fill in the colors well, so that you can see a vibrant rainbow.
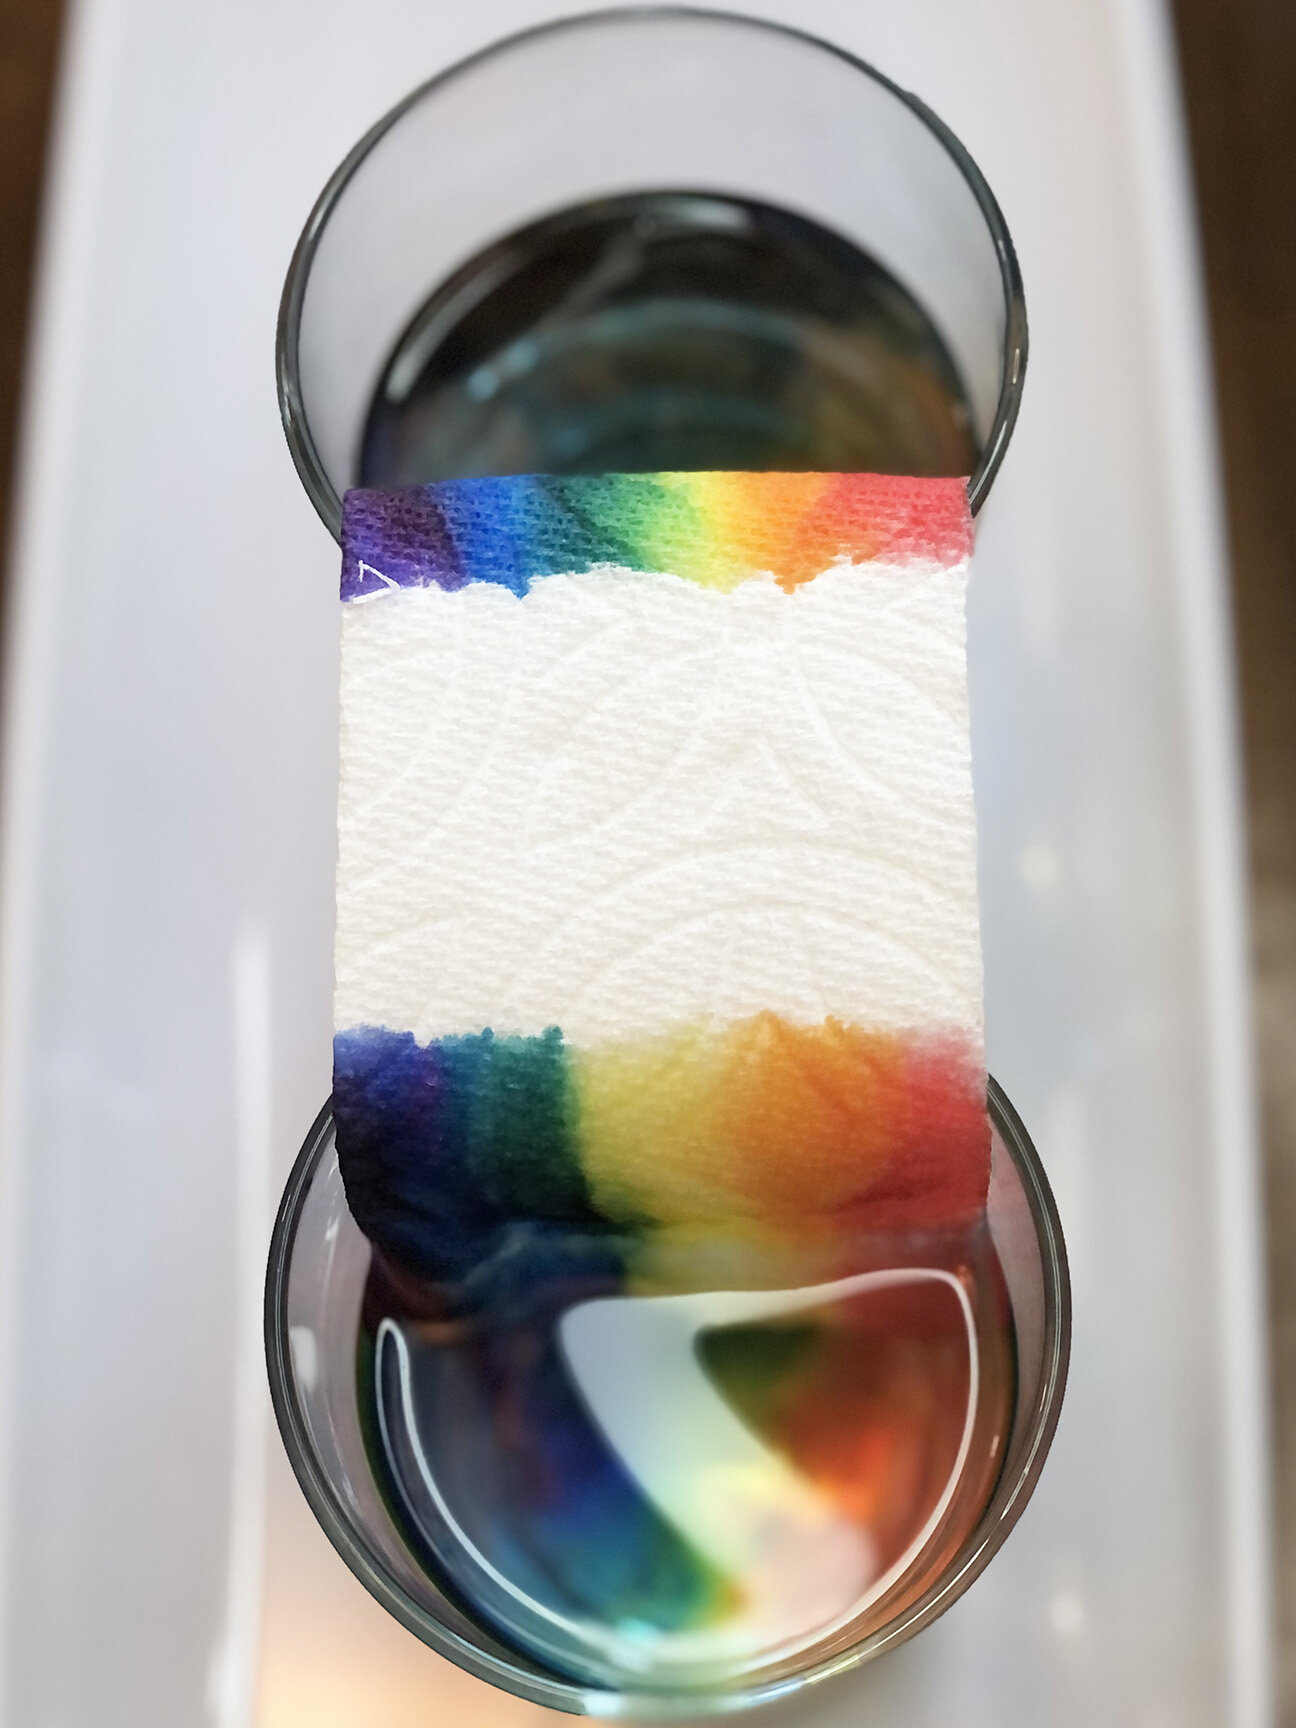
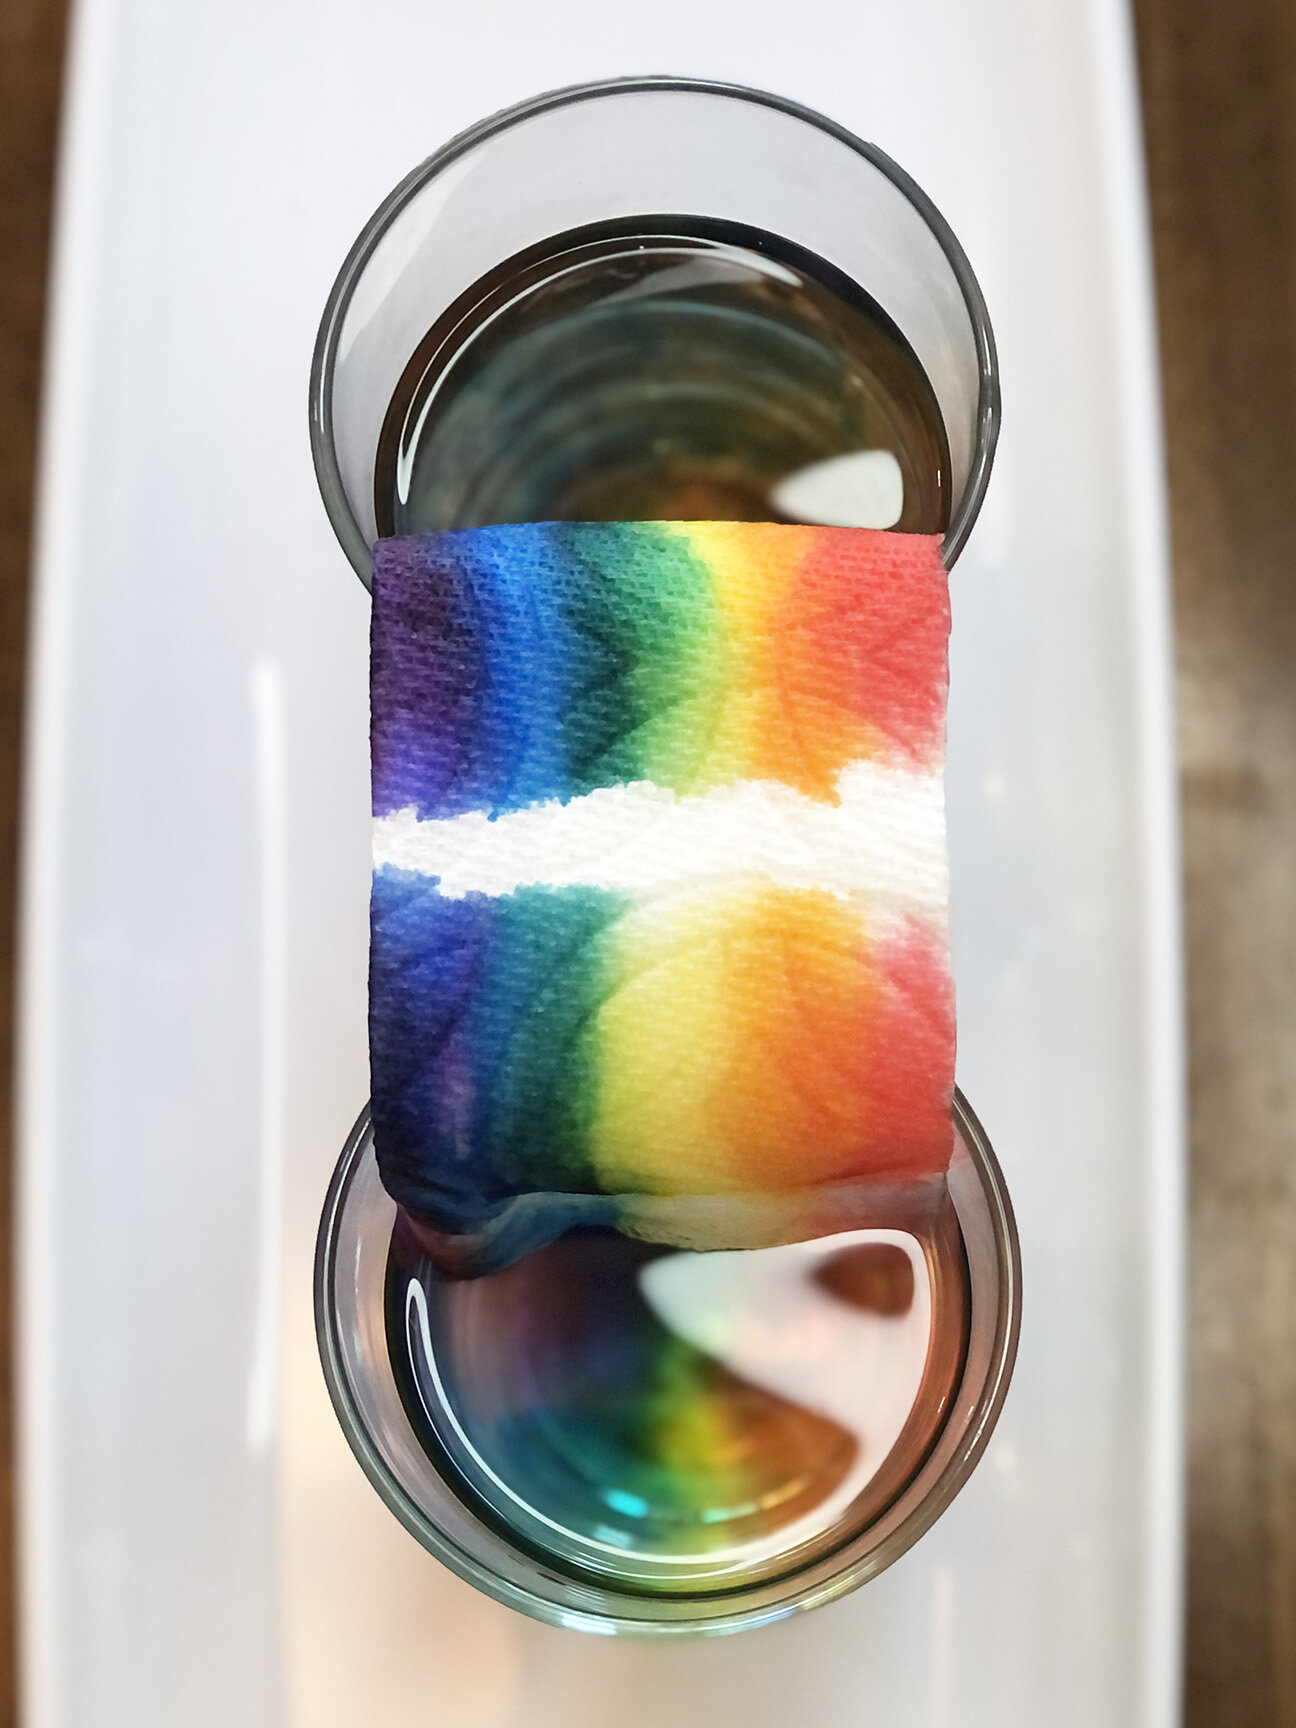
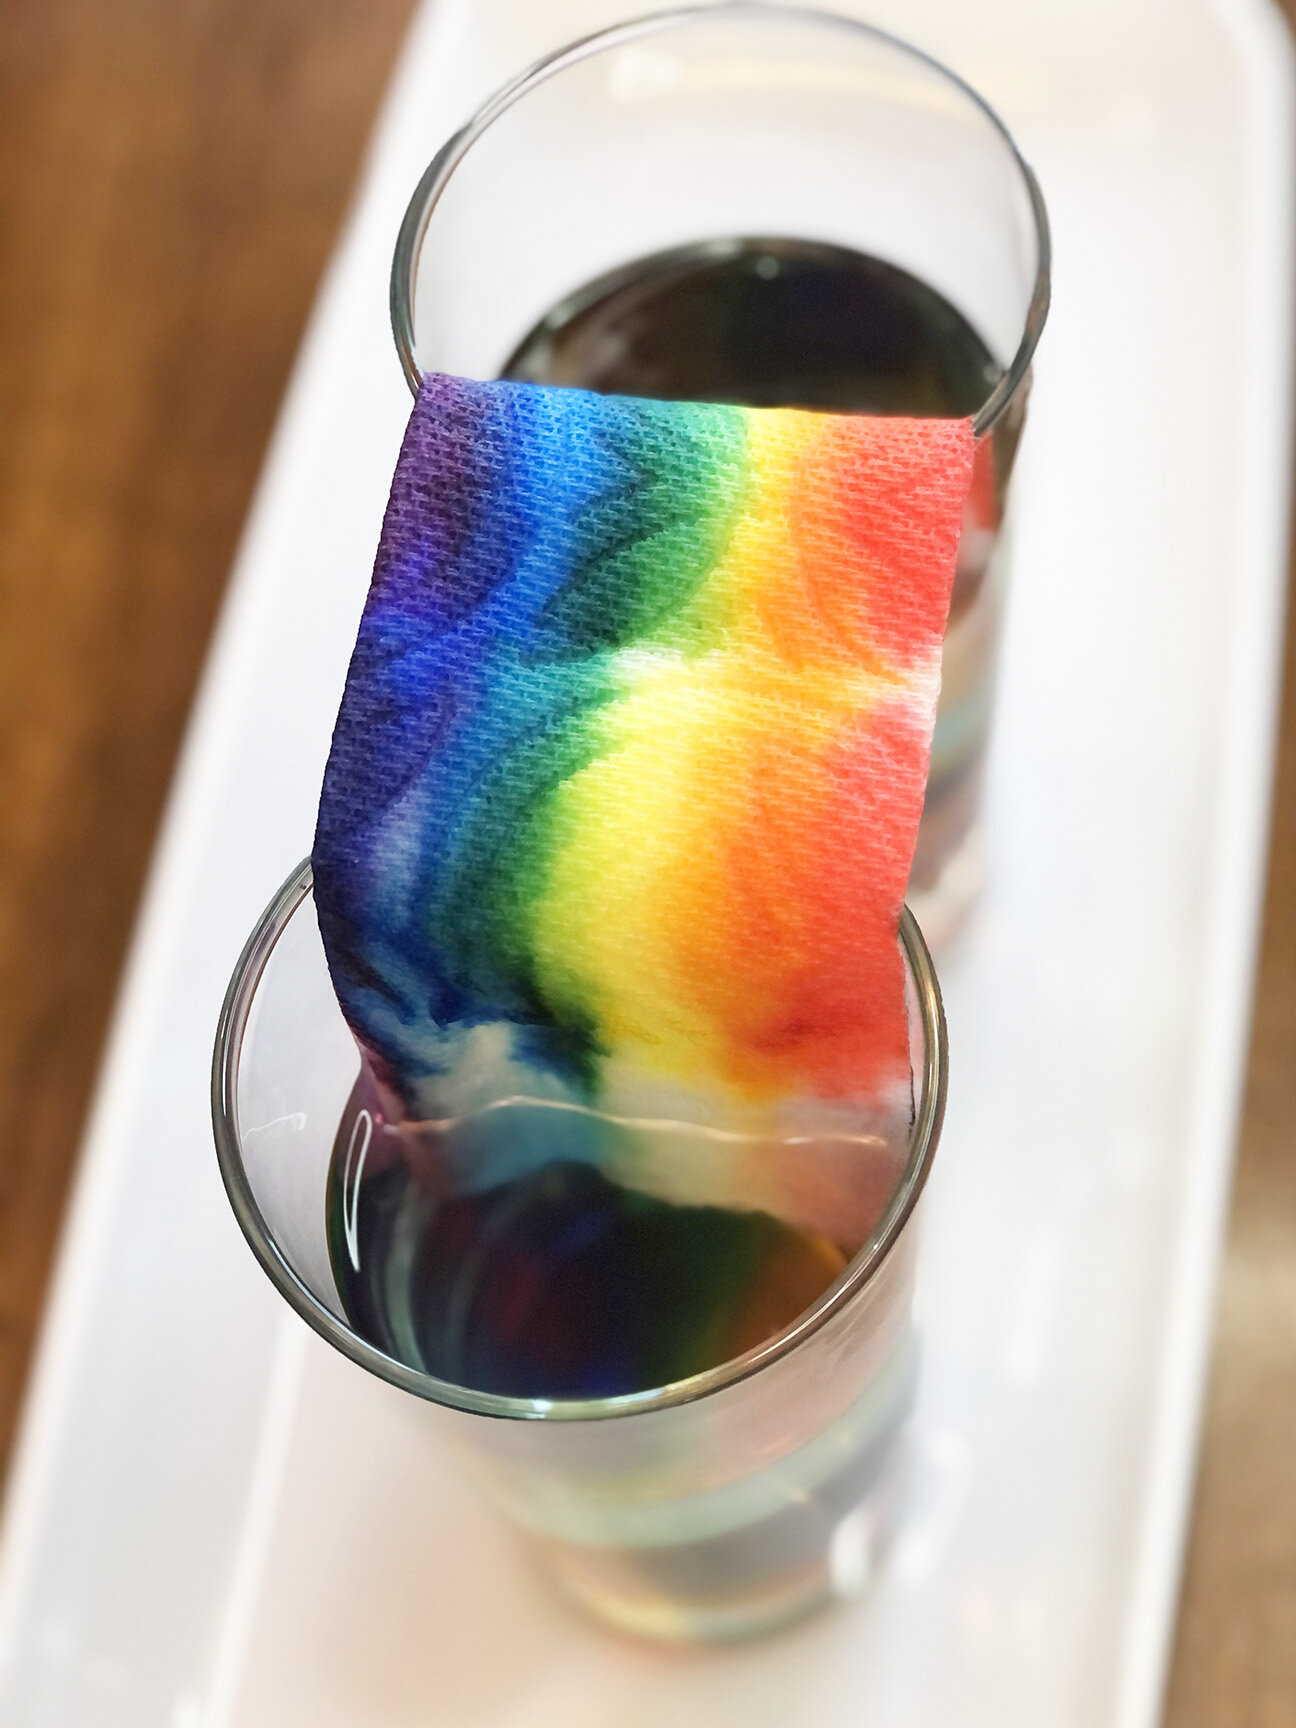
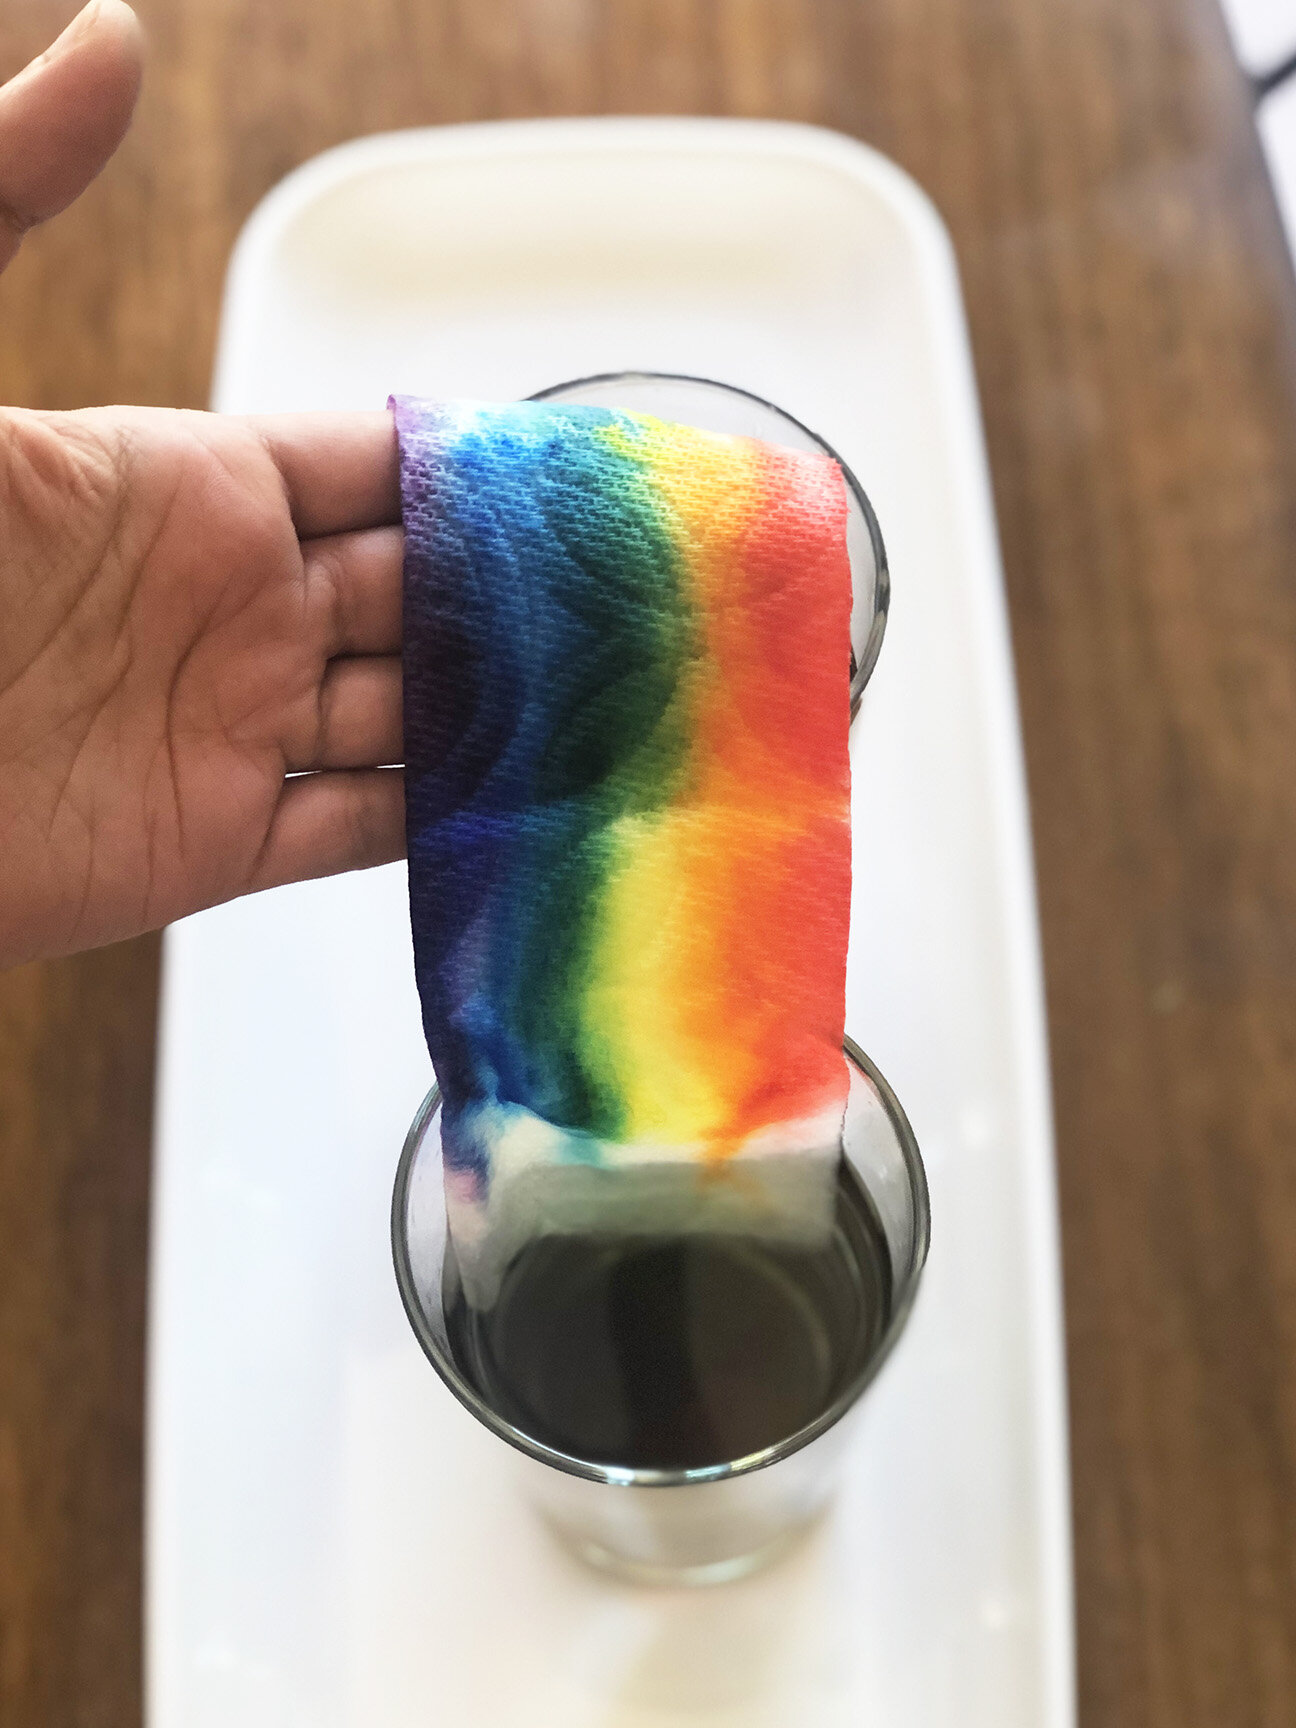
Now comes the best part. Kids will love to see this rainbow coming to life. Take two glasses of water (don’t fill it up to the brim). The idea is to get the ends of the paper in water. When the paper absorbs the water the colors will blend and it will look like the two ends of the rainbow are joining.
Once you dip the ends of the paper (one end in each glass), the rainbow takes anywhere from 10 to 15 mins to fully form. This activity is a great simple science activity on how water is absorbed by the paper and how it make the colors merge and travel. I hope you enjoy this small time-lapse we created.
Activity 2: Camera and Color Filters!
Best for (2 years and up) simple science, color mixing, color exploration, fine motor skills

Material Needed: Cardboard, Scissor/Cutter, Black Pen, Camera Template (free download below), Glue and Magnetic Tiles in Red, Yellow and Blue
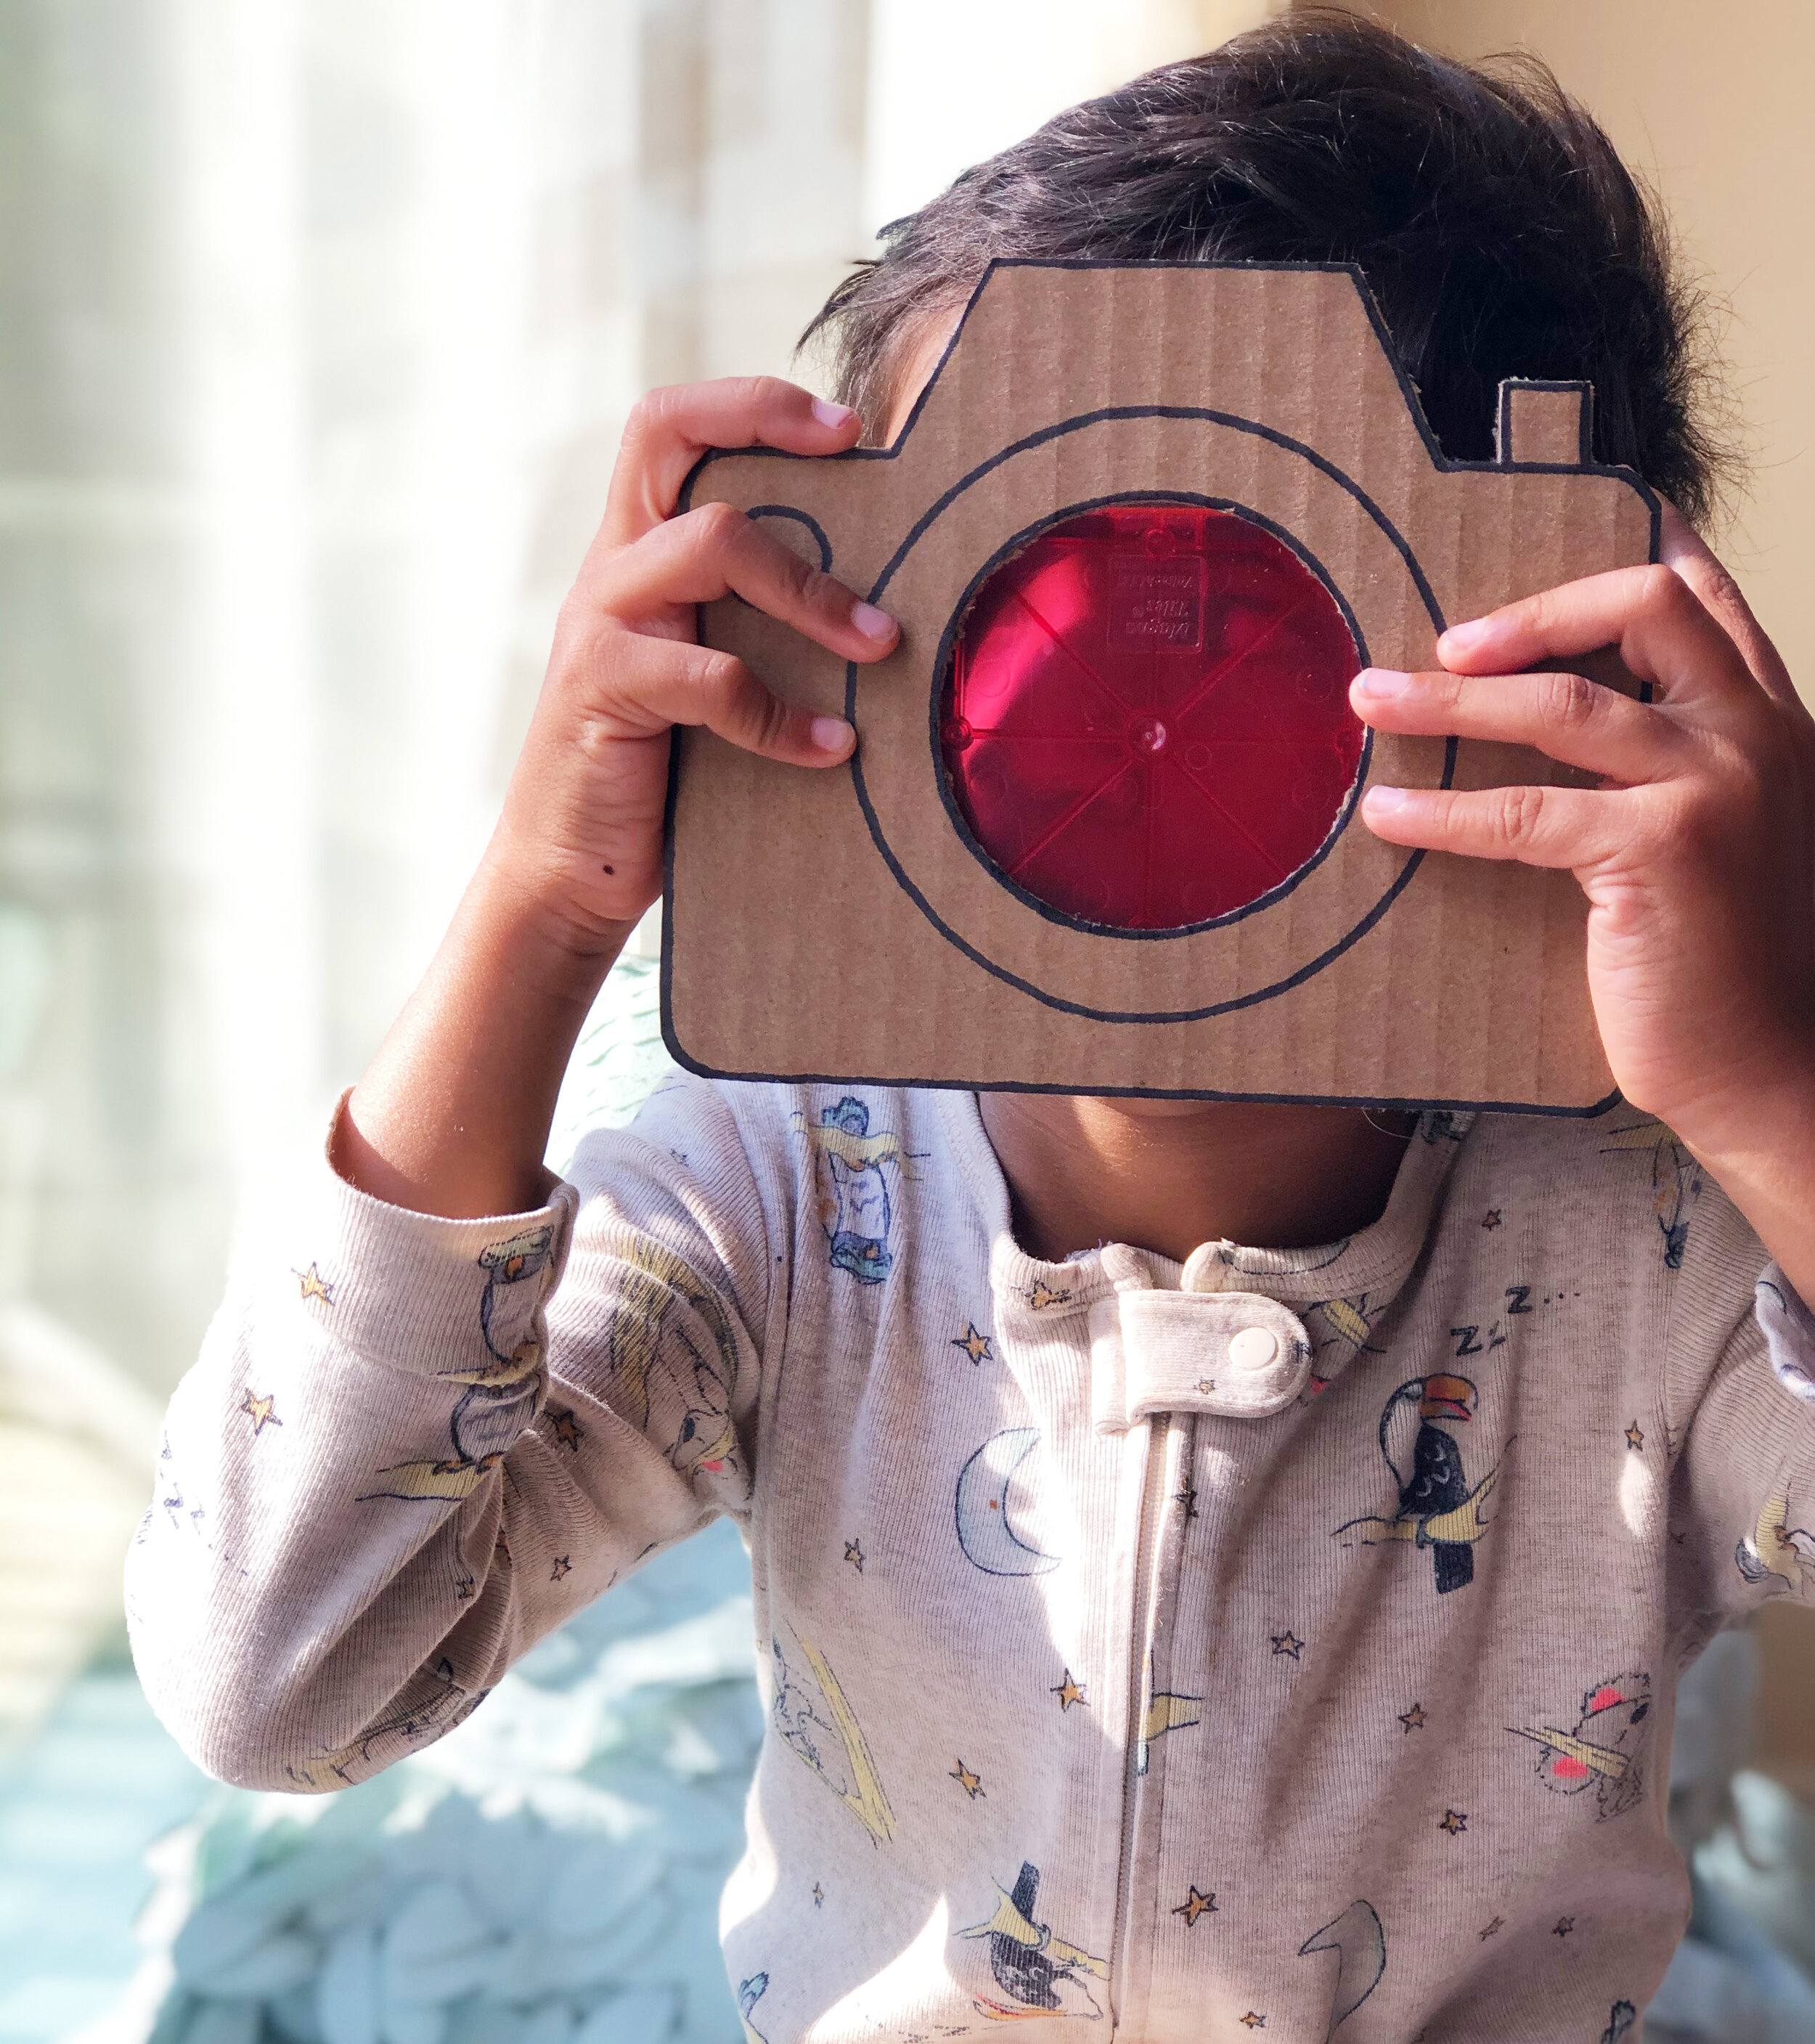
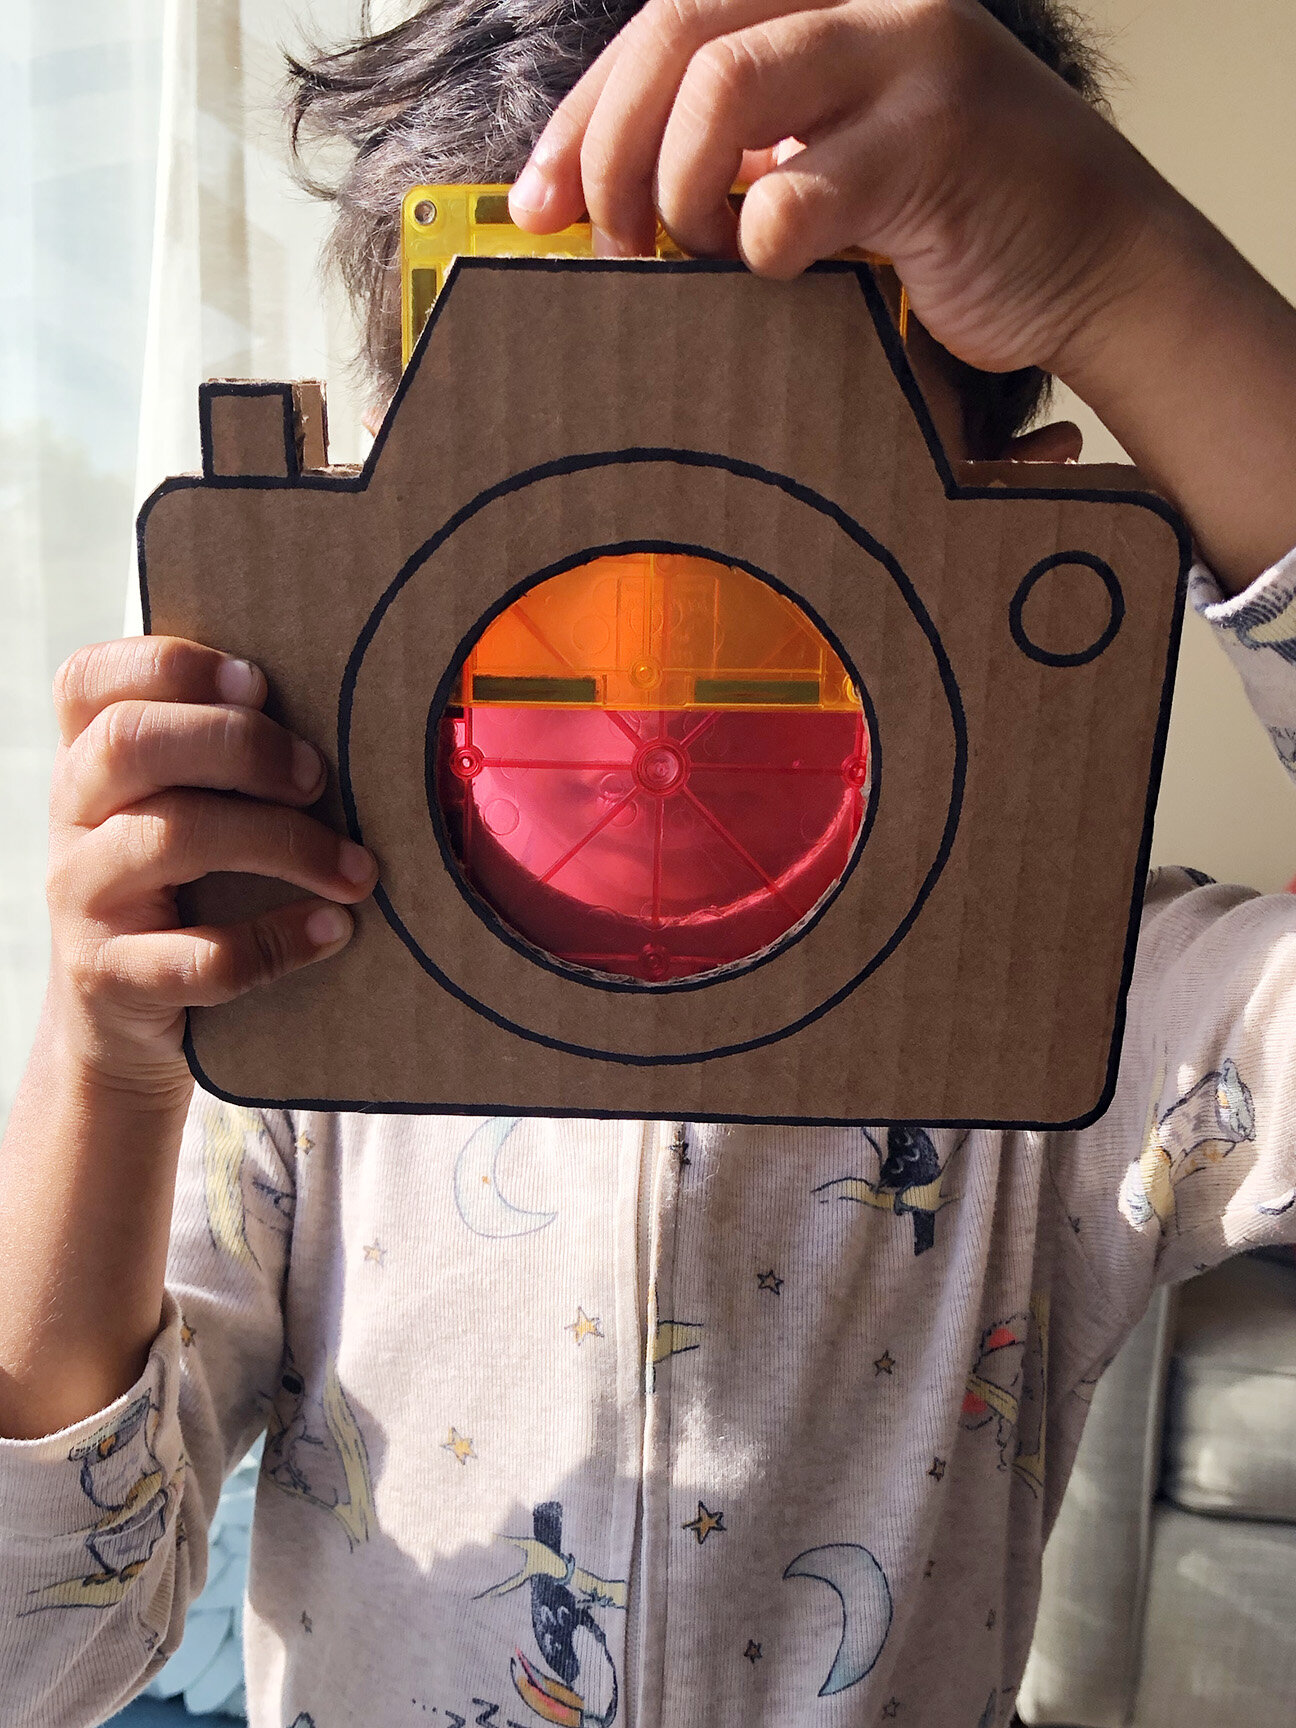
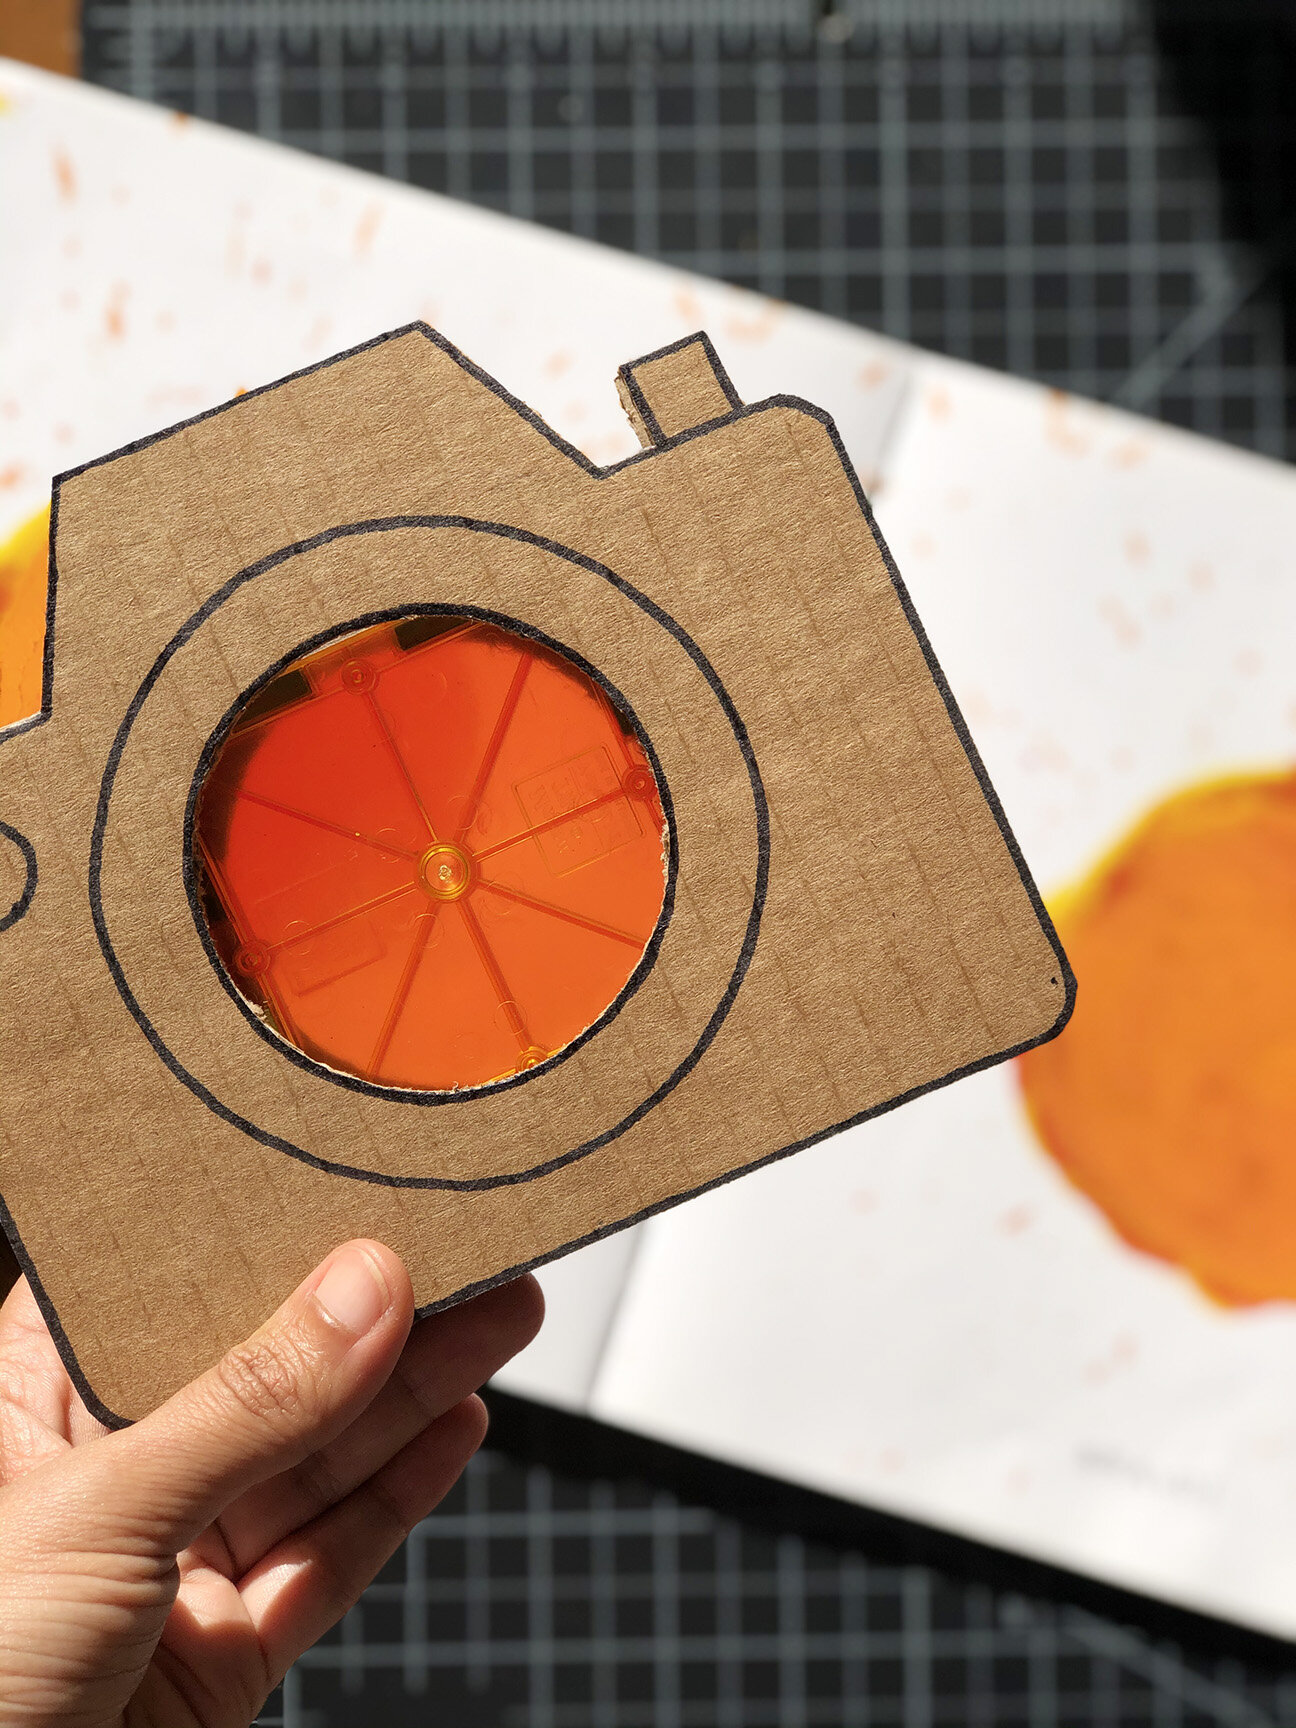
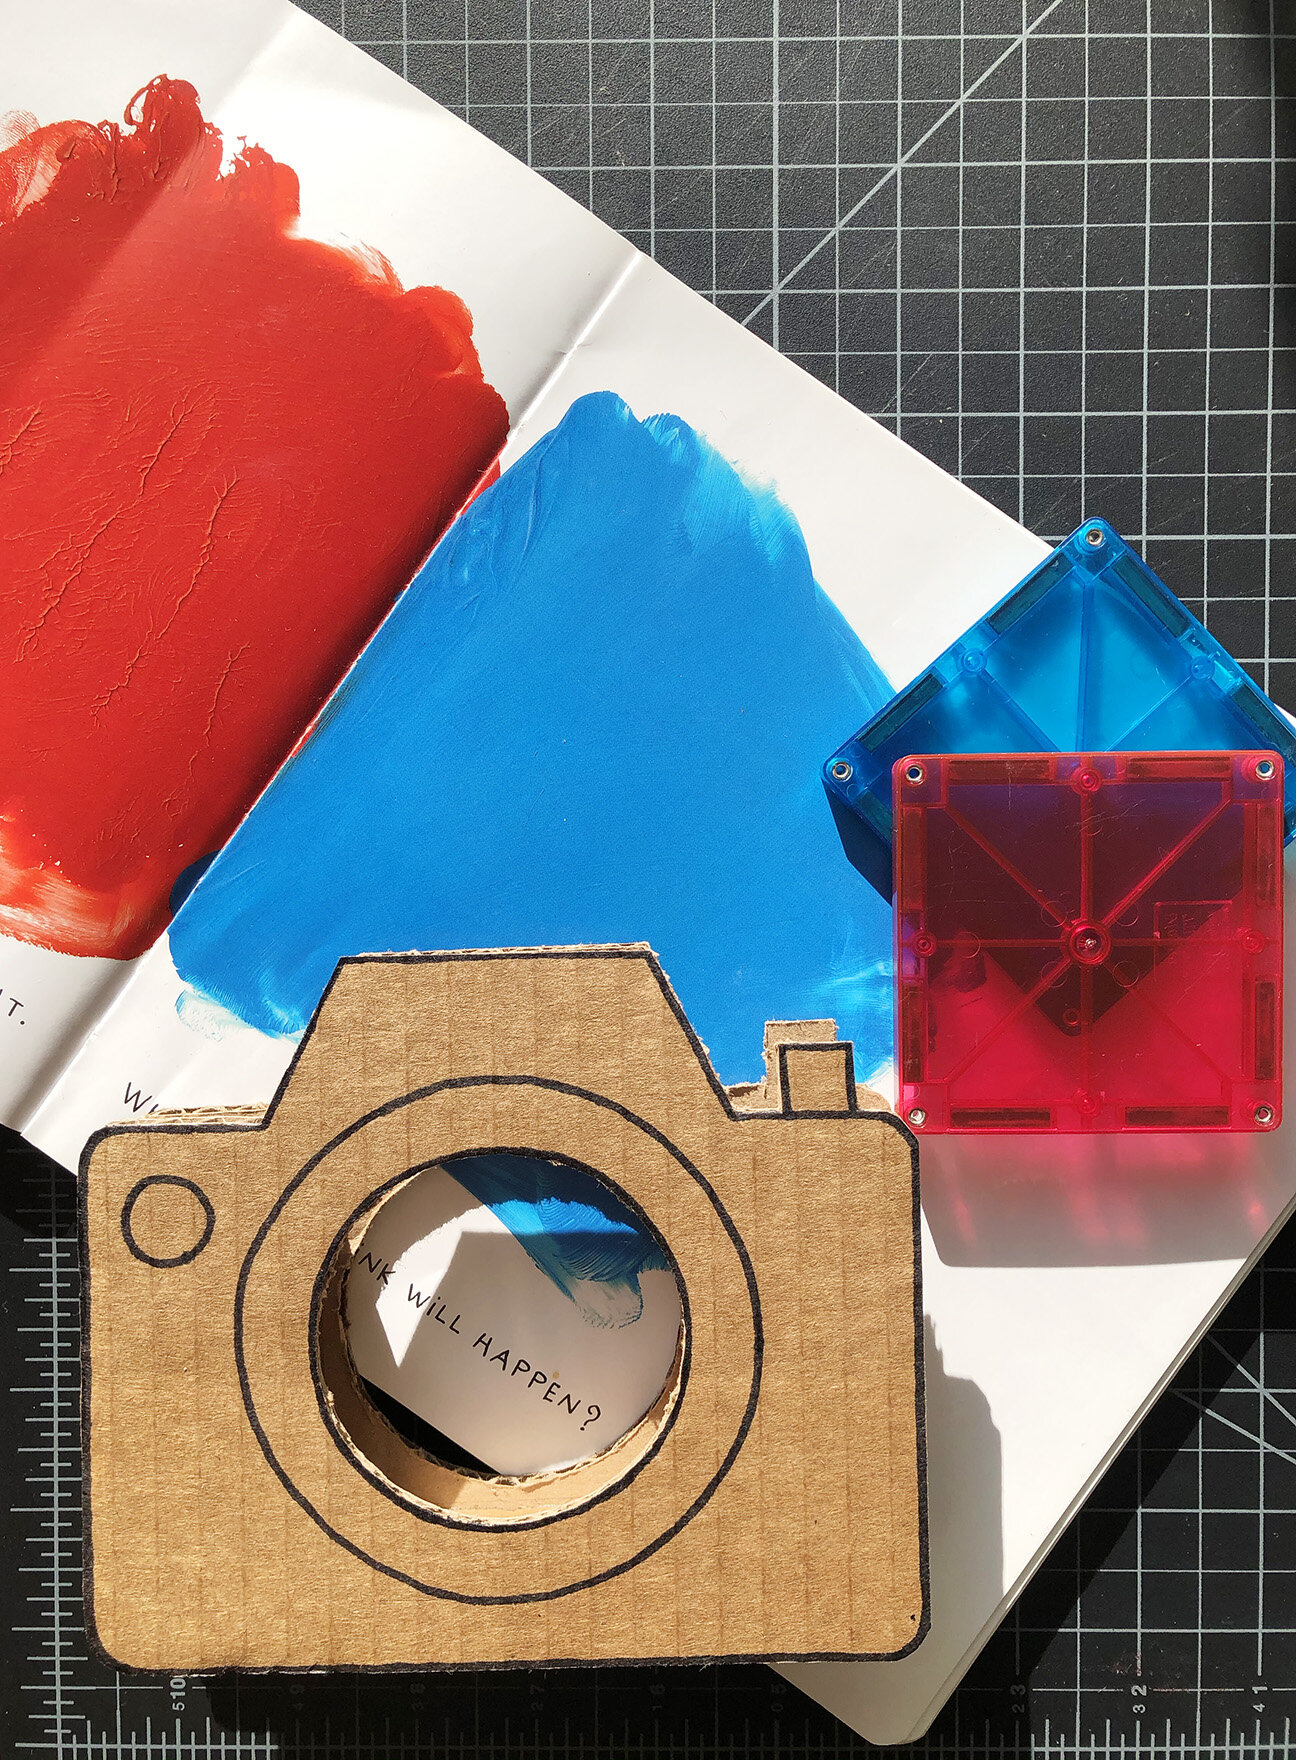
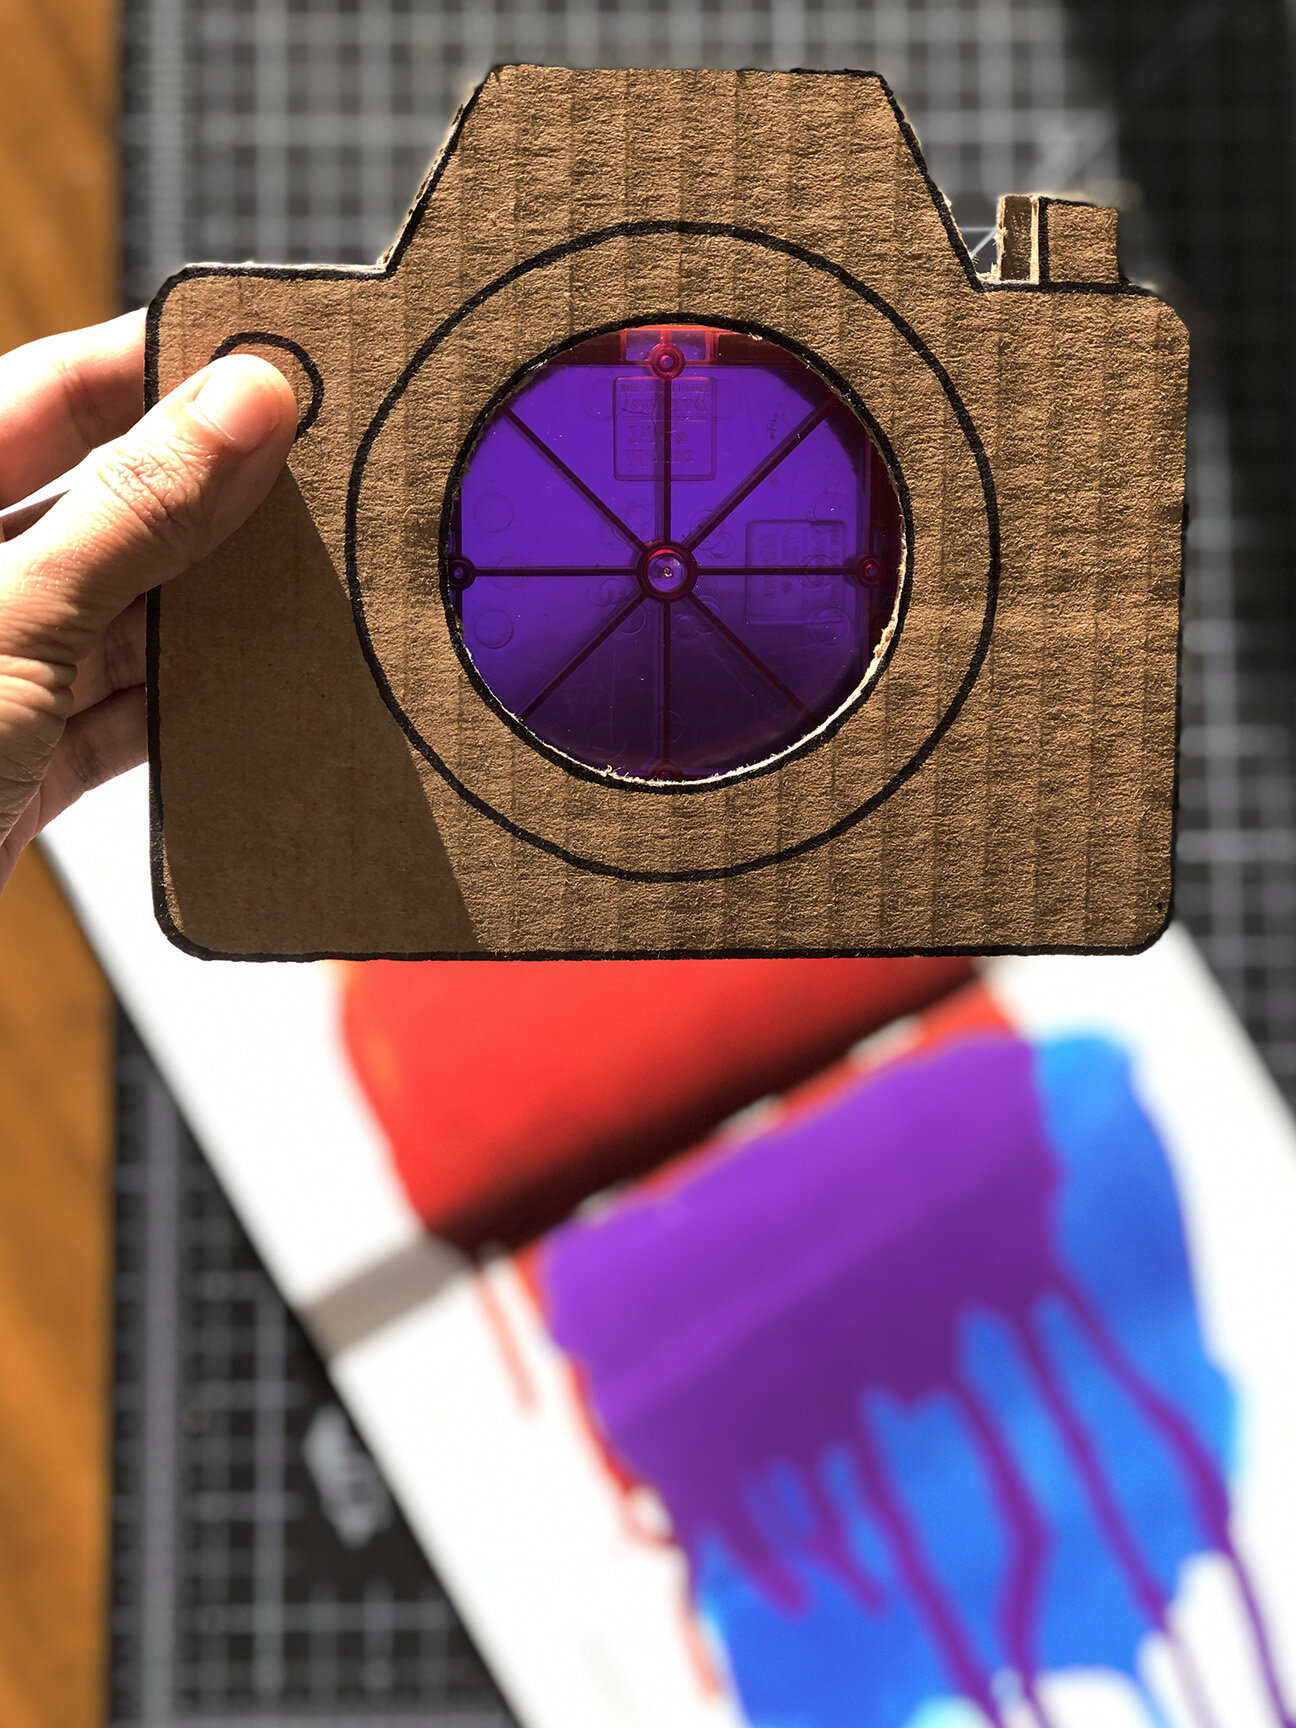
This activity is a great way for kids to keep exploring the colors and color mixing over and over again. A great way to use your magnetic tiles! Kids who own Magnetic Tiles already love holding these up in the sunlight and seeing through it. Why not build something fun, long lasting and self exploratory for them to use with it; a Camera!
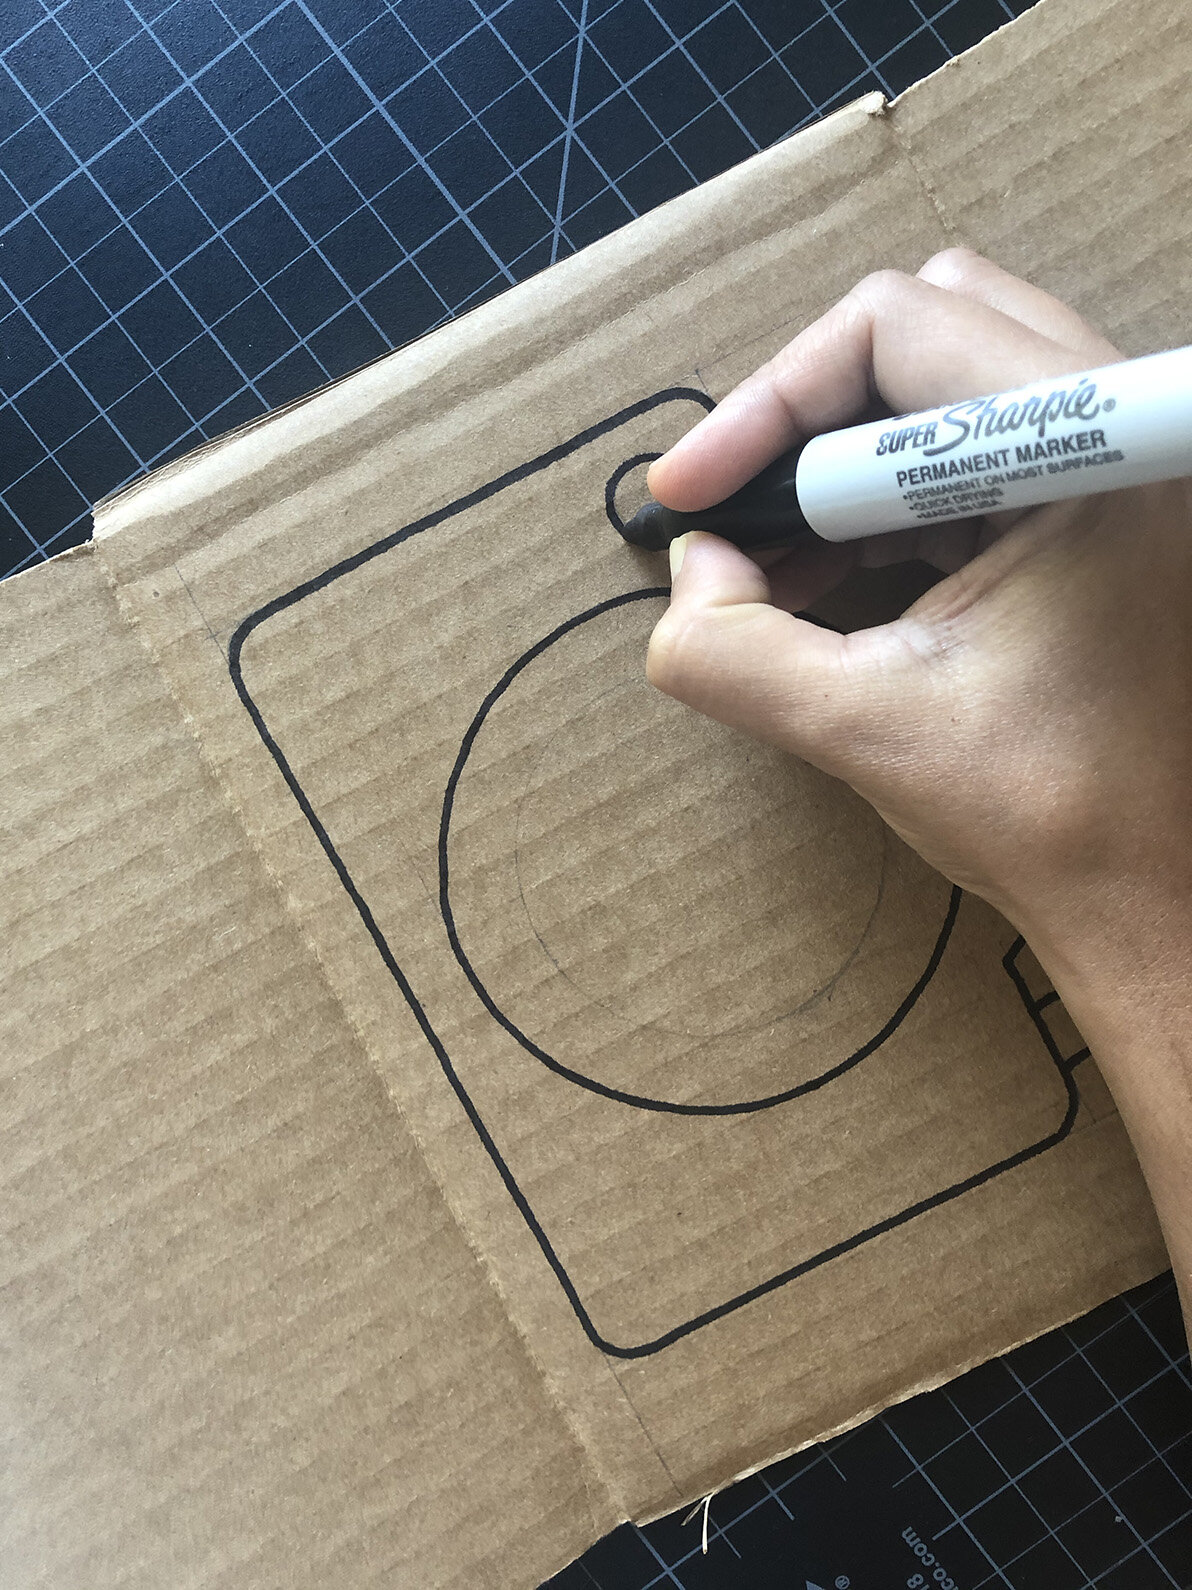
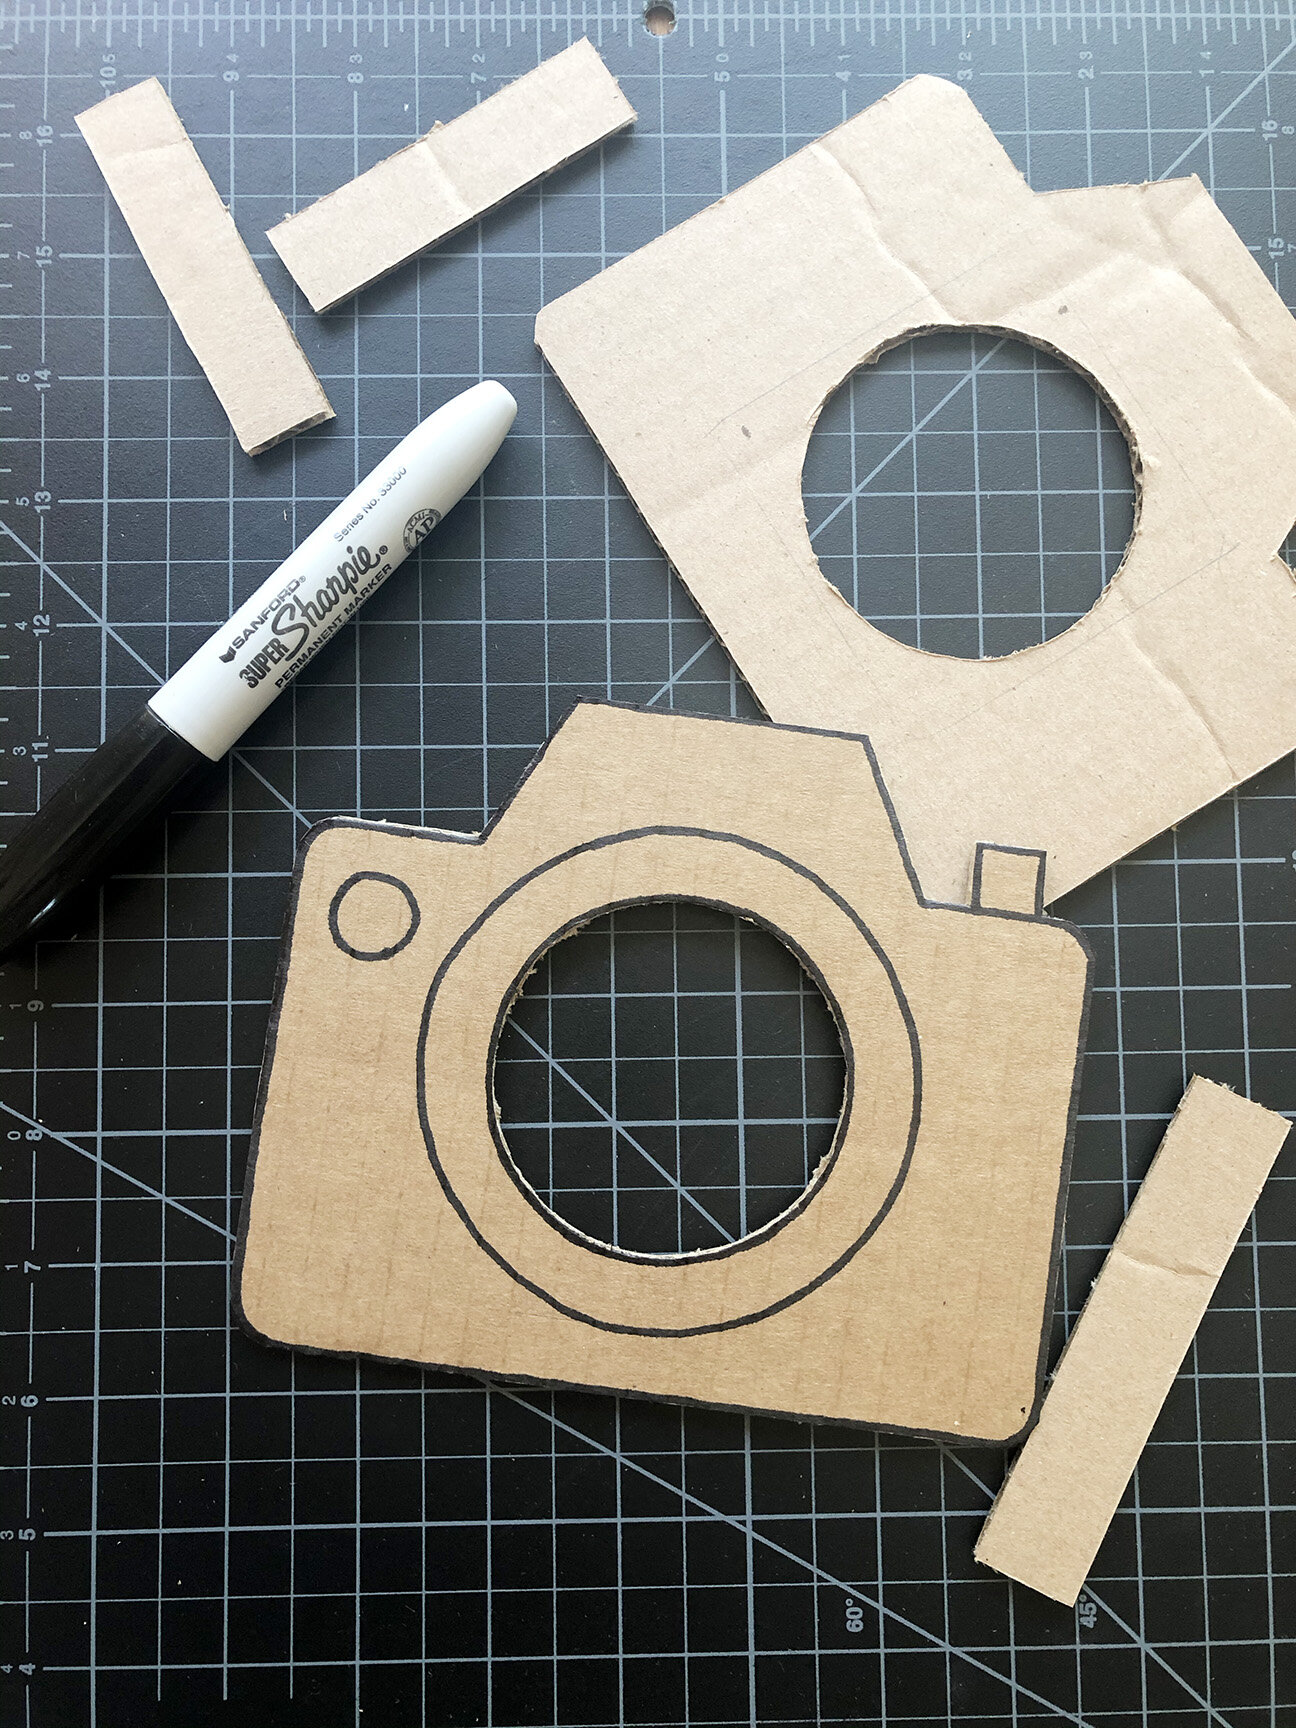
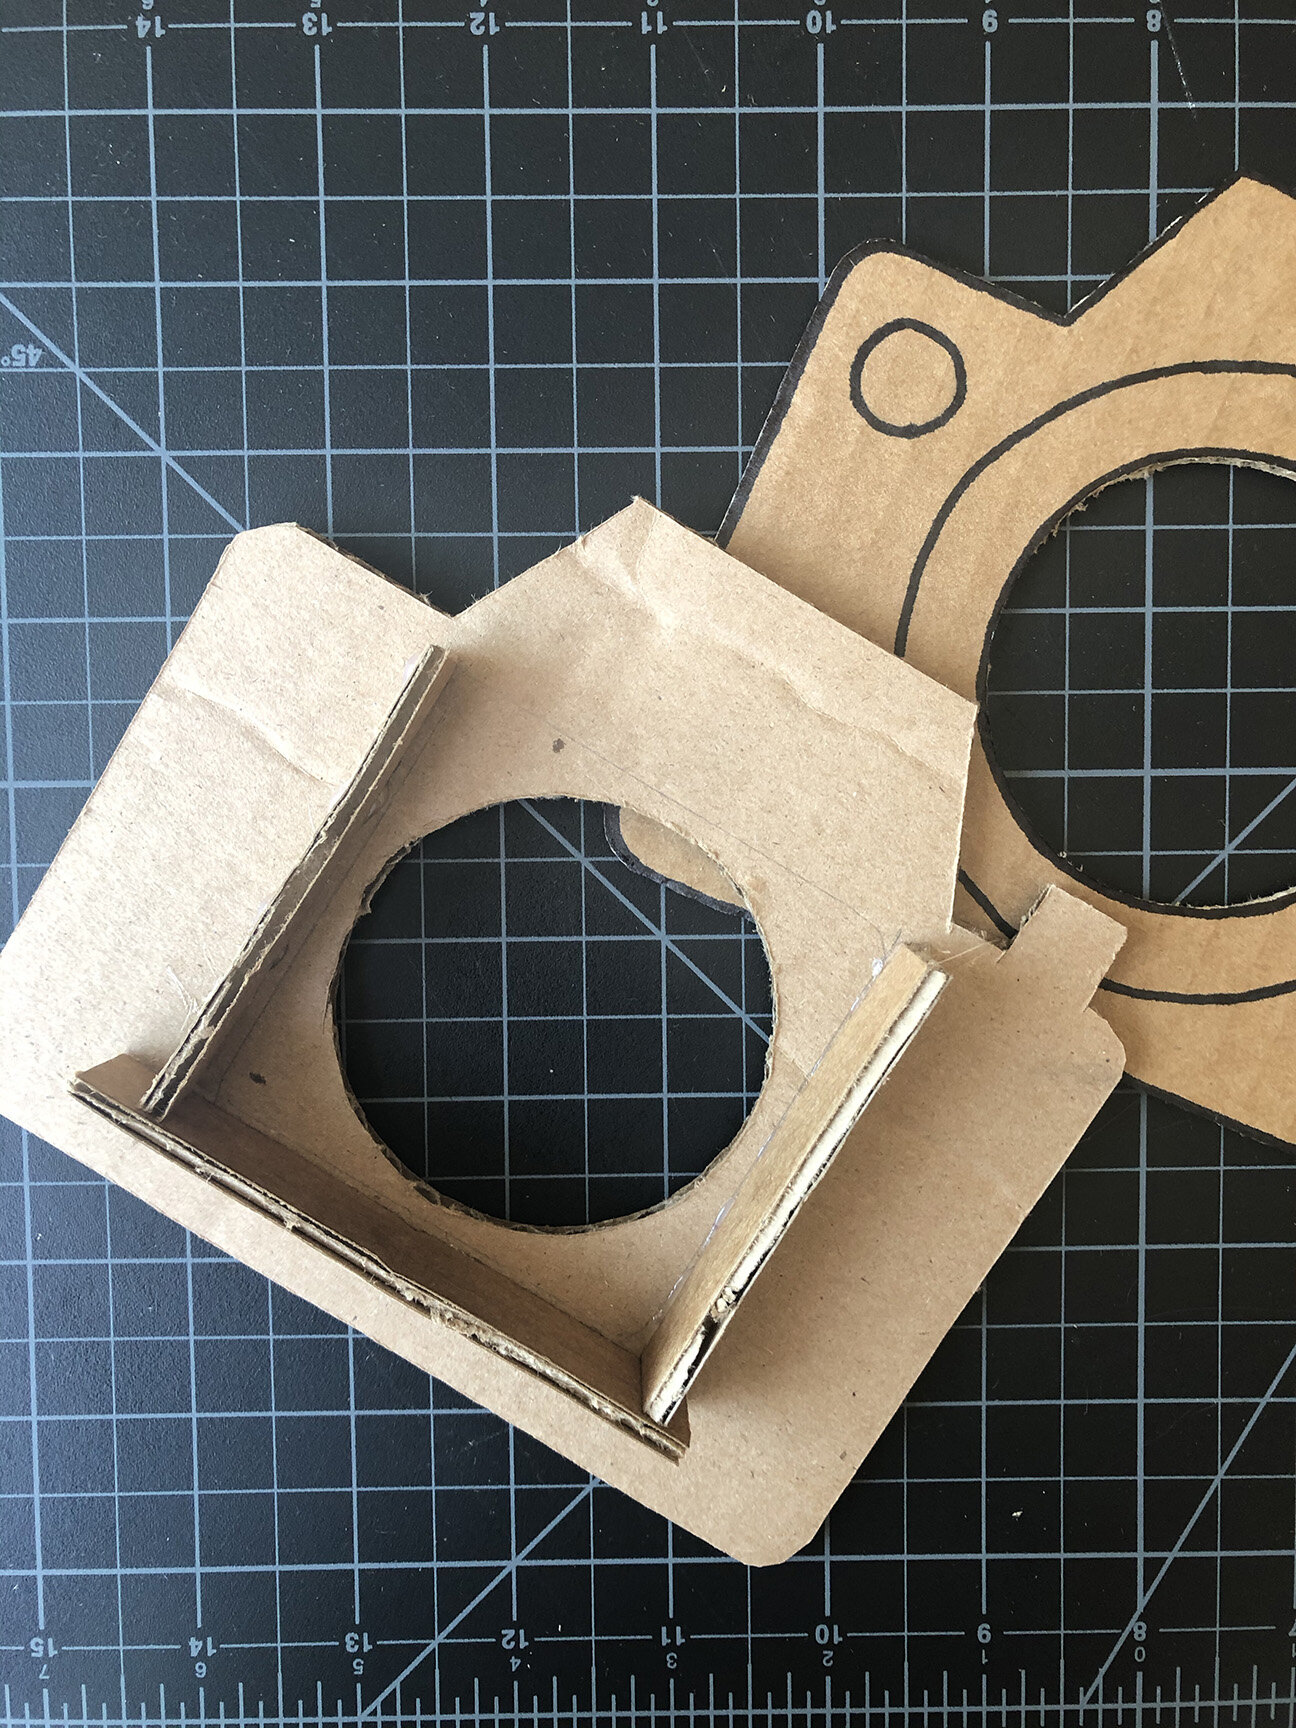
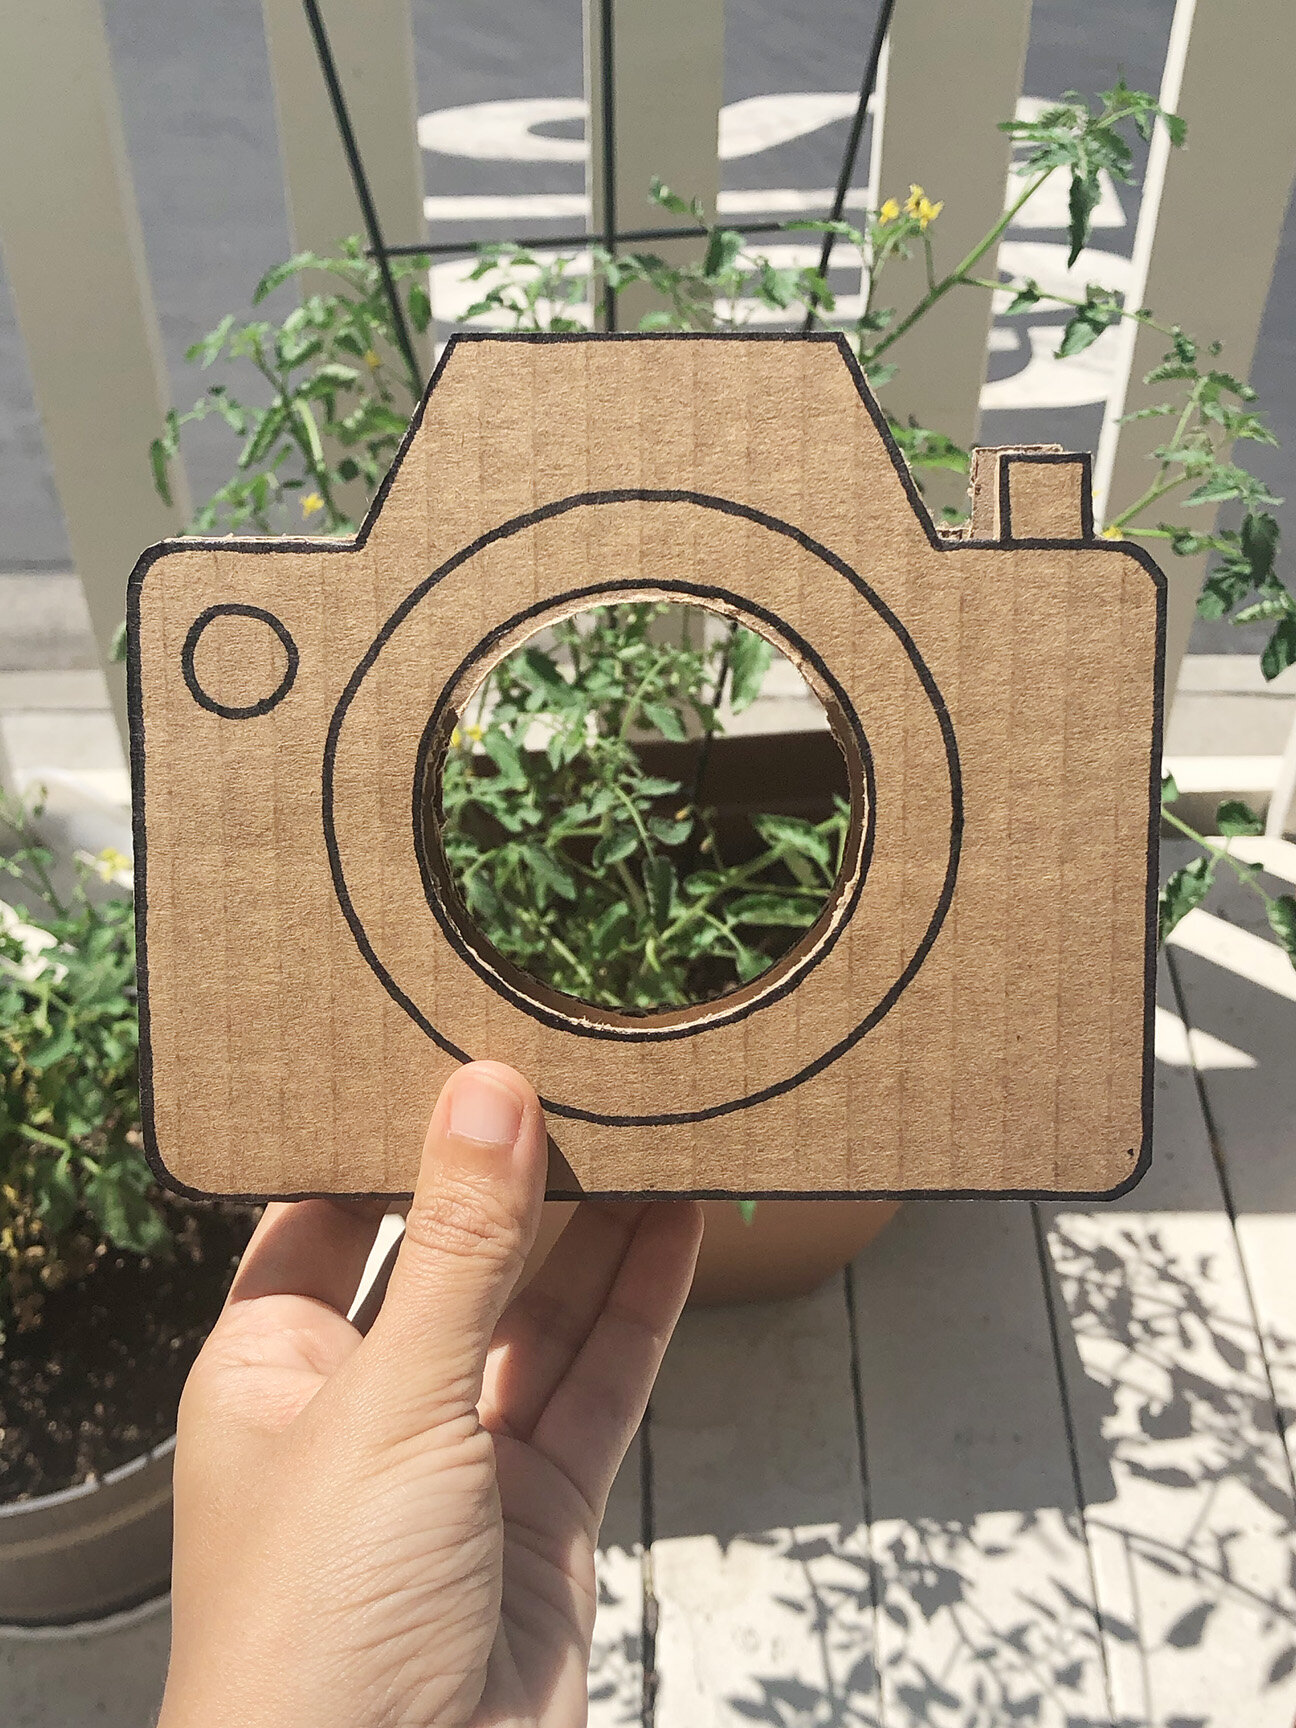
First please download the Camera template at the end of this post. Transfer the drawing onto a cardboard and cut along the outline as well as the inner most circle. You should have two camera cut-outs now. You can use a black marker to draw on the outline of the camera (to help define the shape better). Stick the cardboard brackets on three sides of the outermost circle (on the backside of the camera). Now stick the second camera cut-out on top of the brackets such that the brackets are sandwiched between the two camera cut-outs.
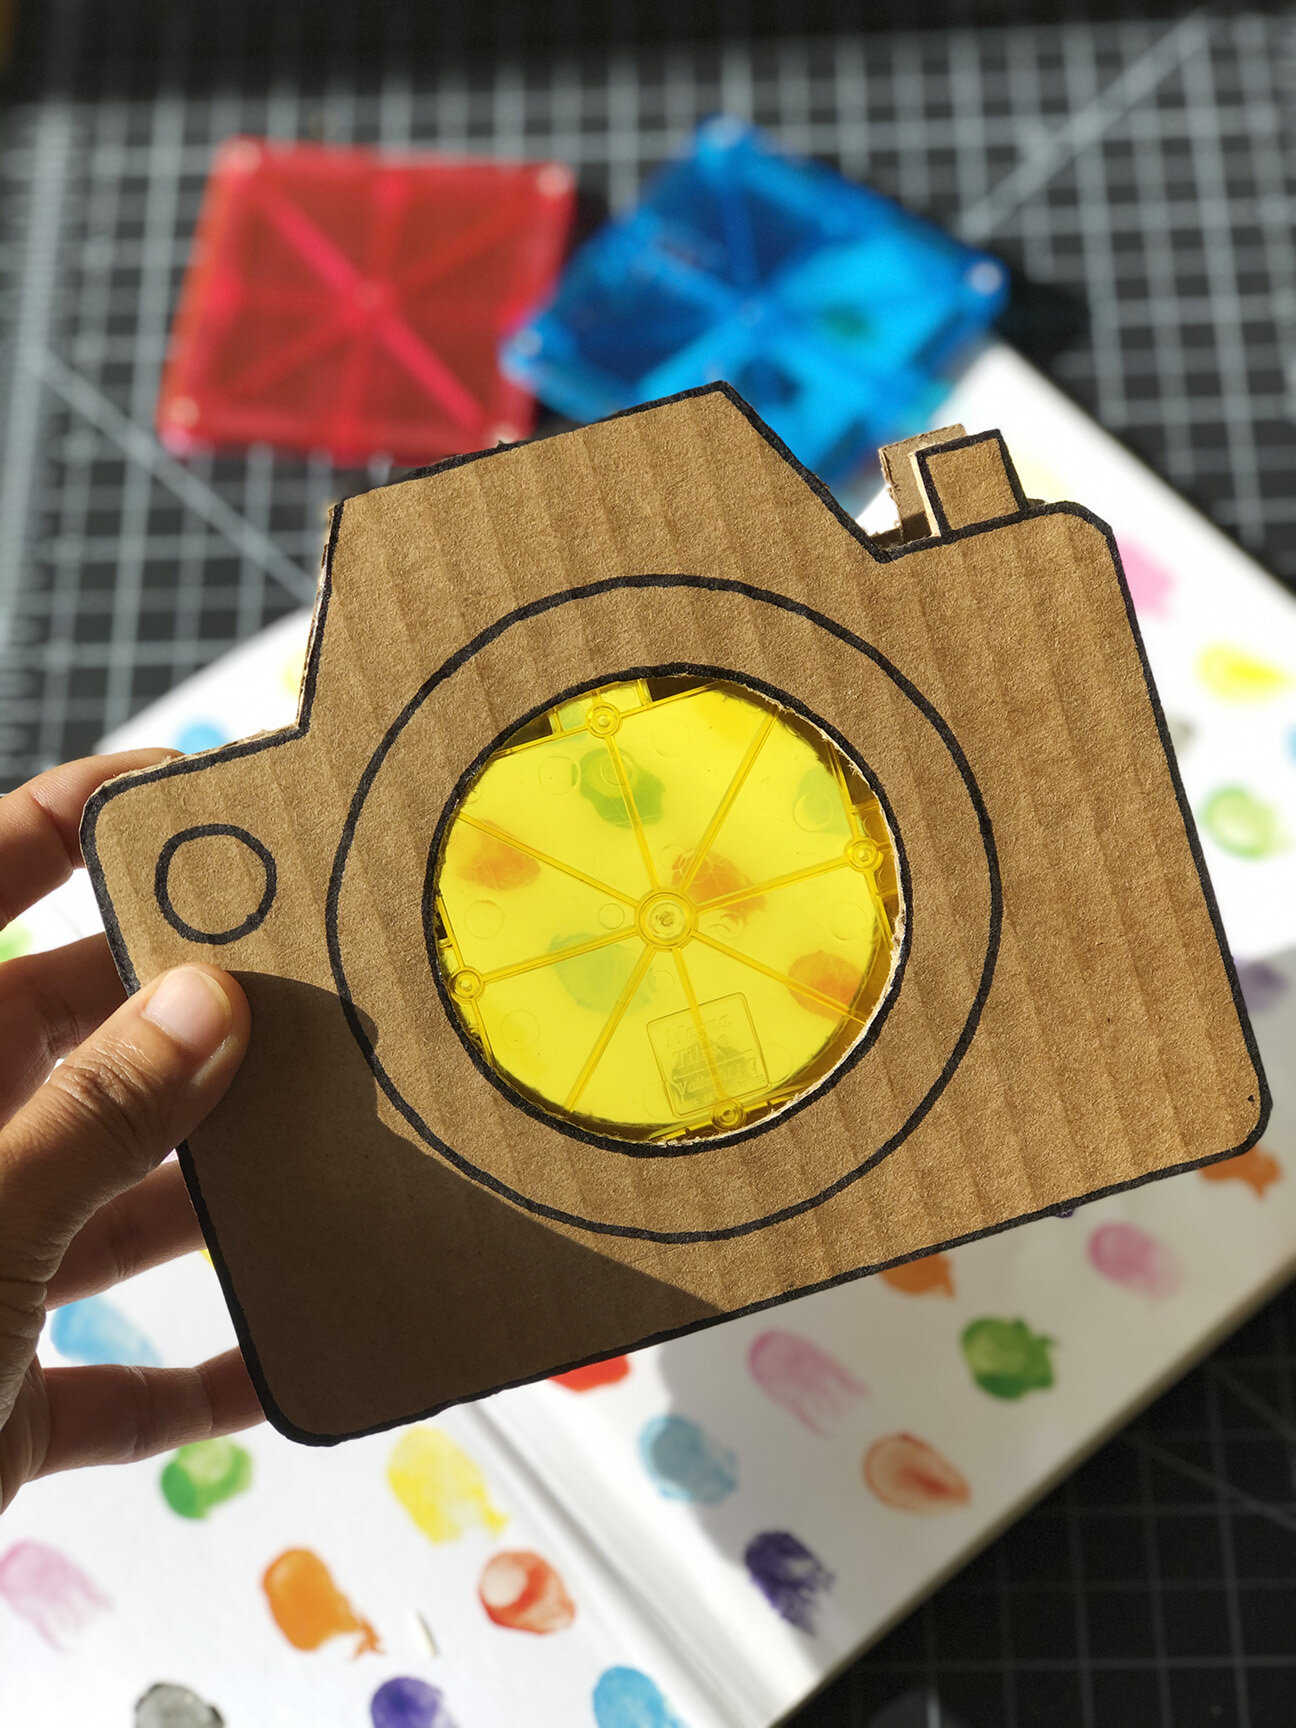
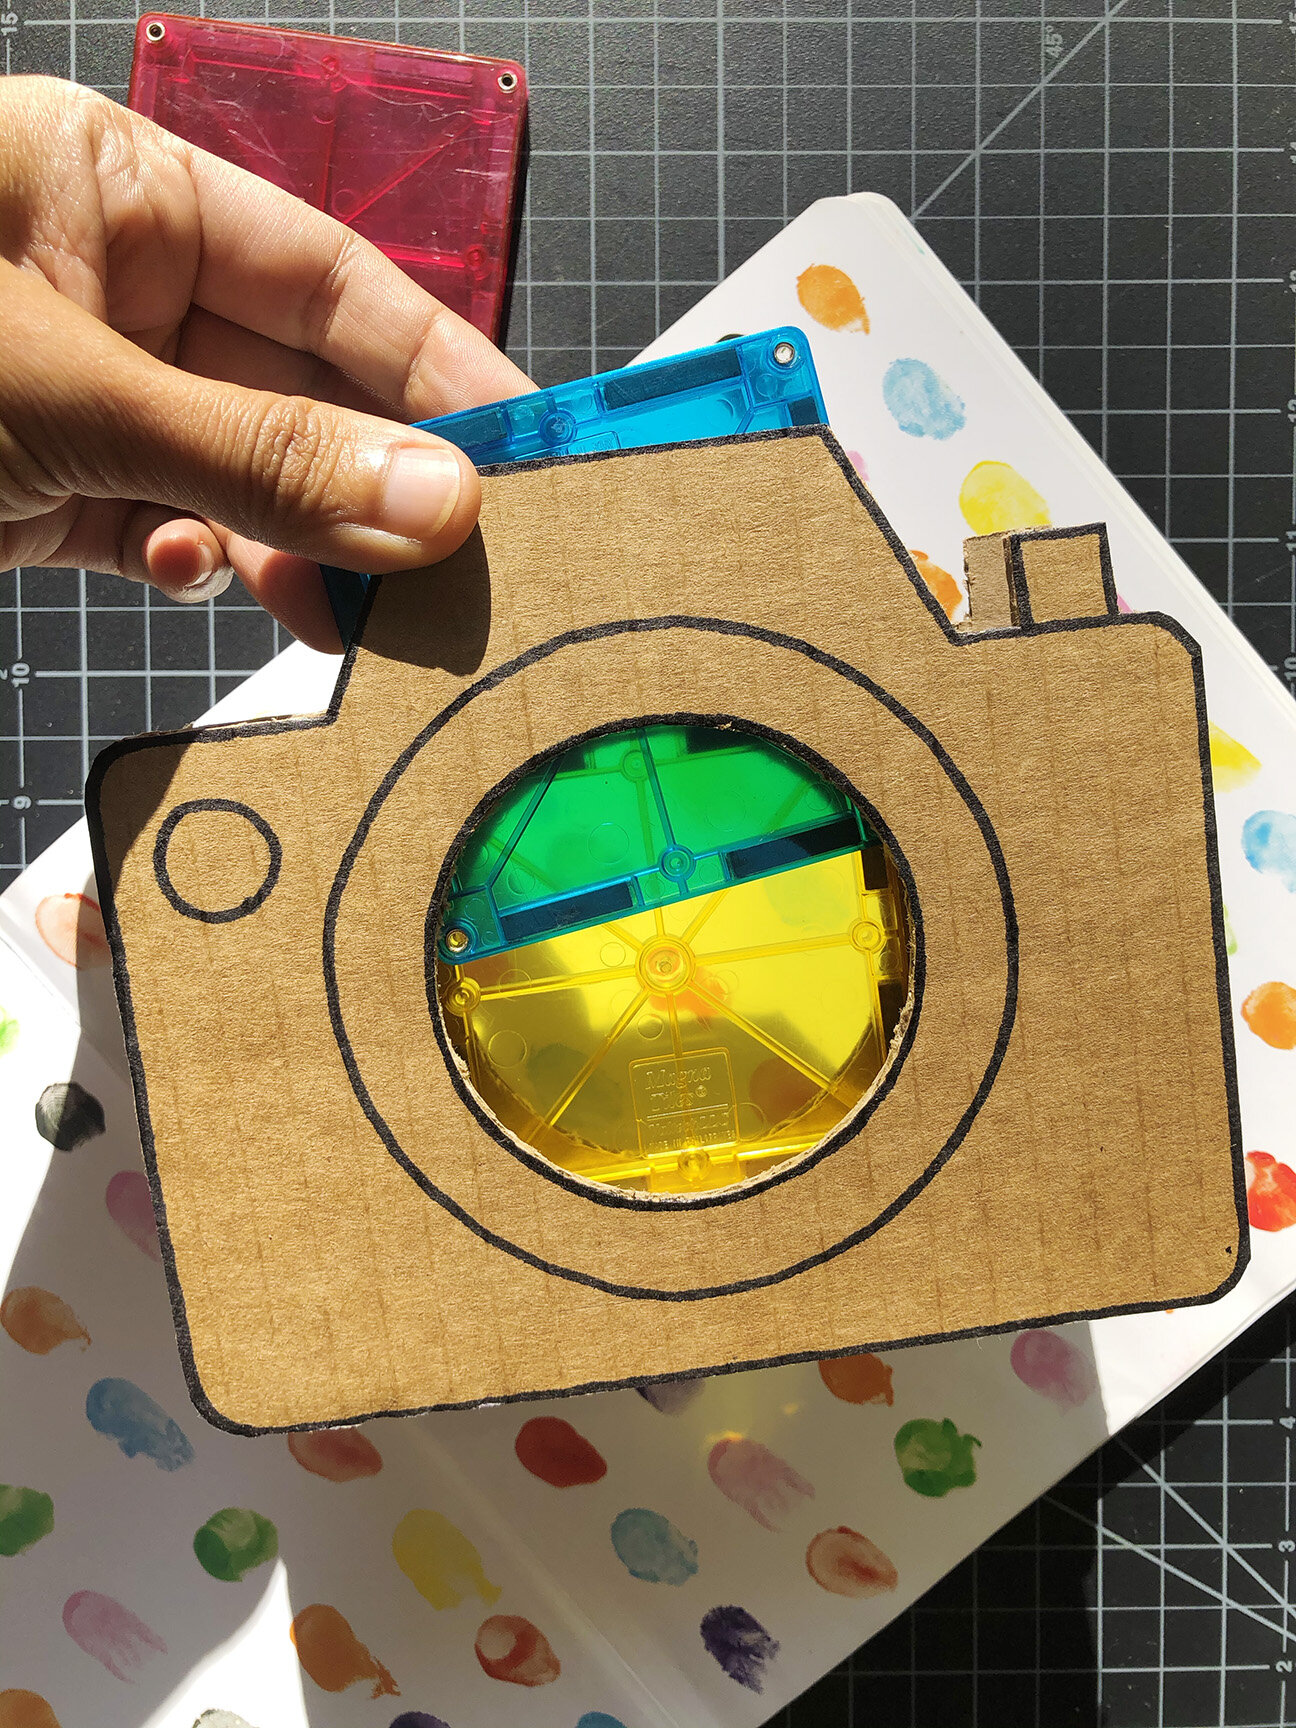
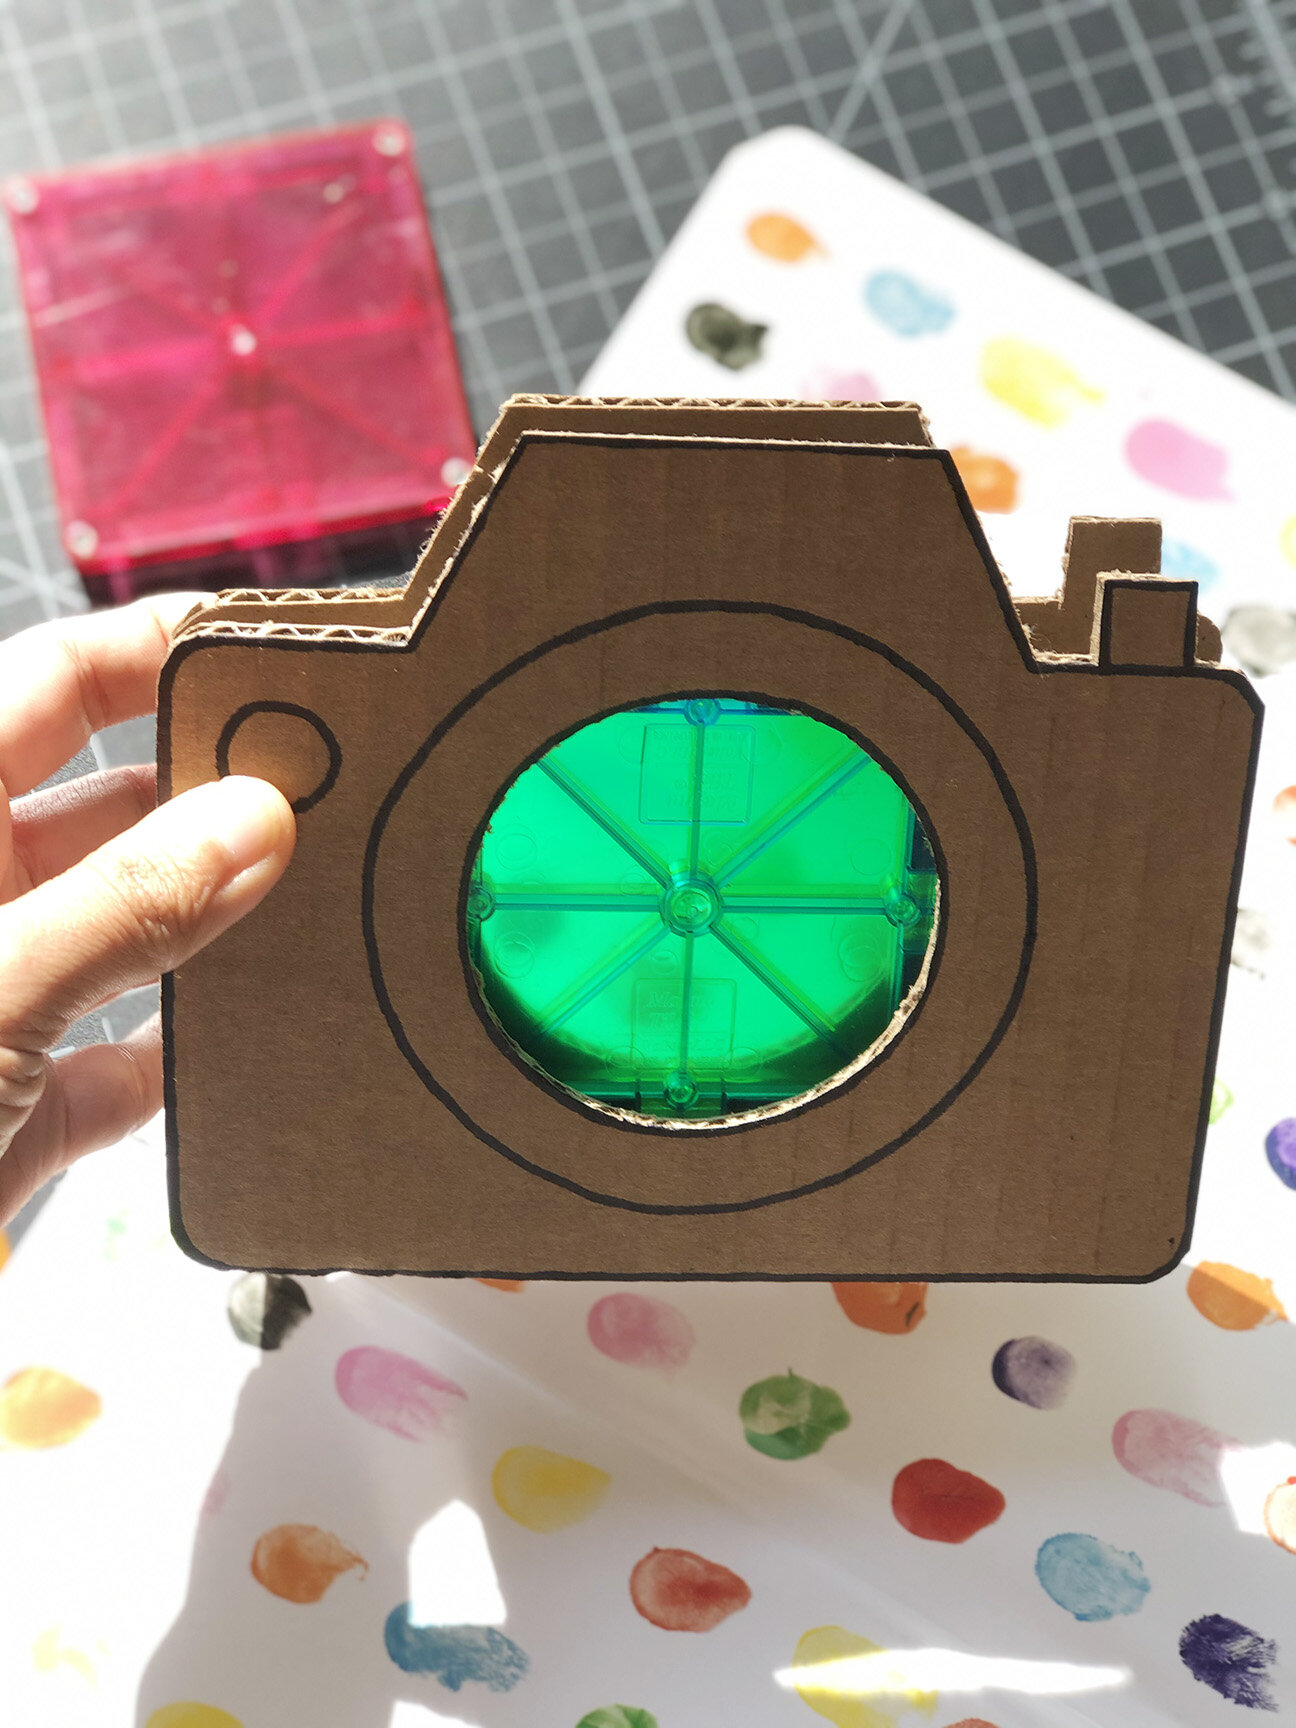
Your Camera is ready for exploration! Slide the magnetic tile/tiles from the top and let the color mixing begin! We did re-read the ‘Mix it Up’ book with this activity. It’s a great way to re-establish the primary and secondary colors in a fun way. I plan to add a strap to the camera (so that it stays suspended on the shoulders), as my son said he would like to take it outdoors and explore with the color filters.
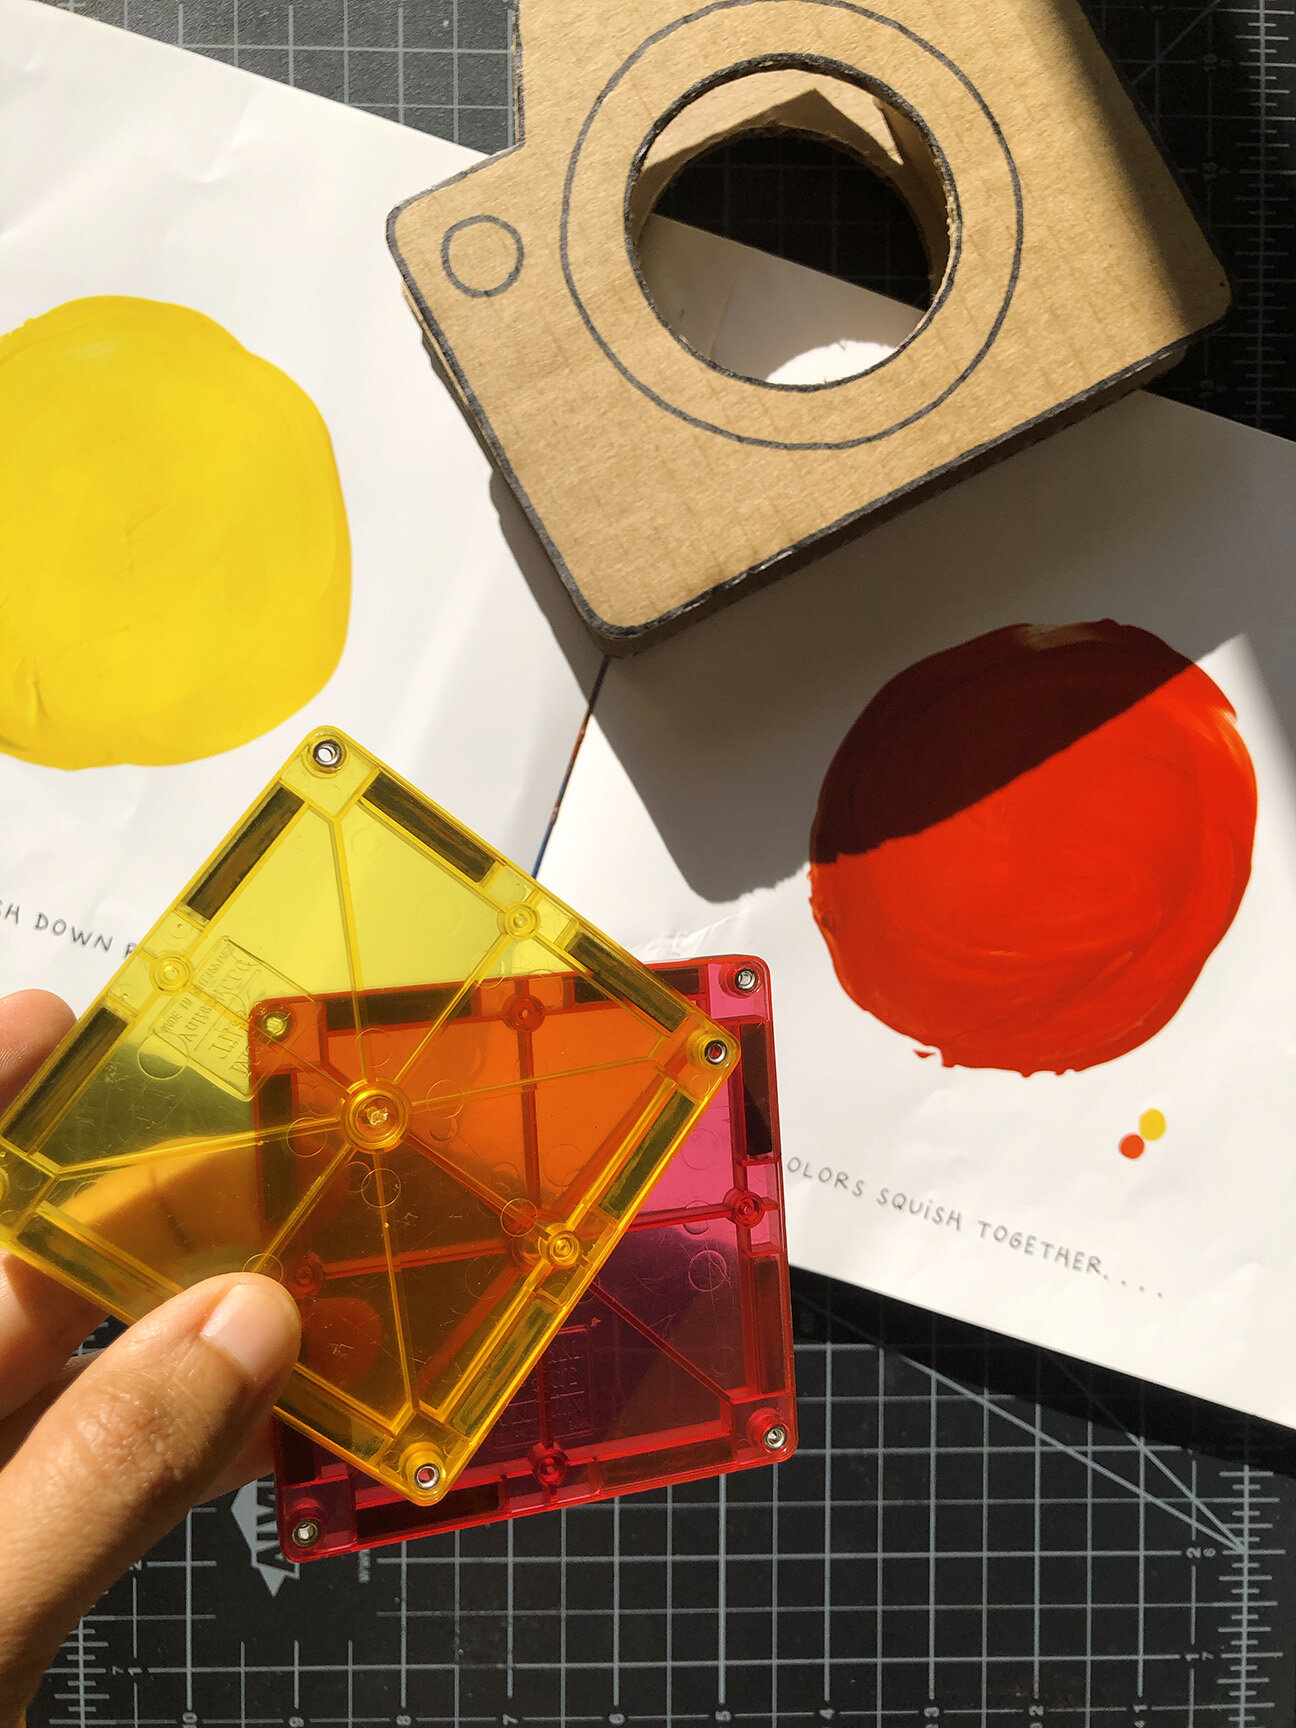
If you don’t have magnetic tiles, you can use colored gelatin paper. Frame them into squares using cardboard, so that it is easy to use and they slide into the slot smoothly.
This post is more of a photo dump (you can see how fun and colorful it is, couldn’t stop documenting it)!
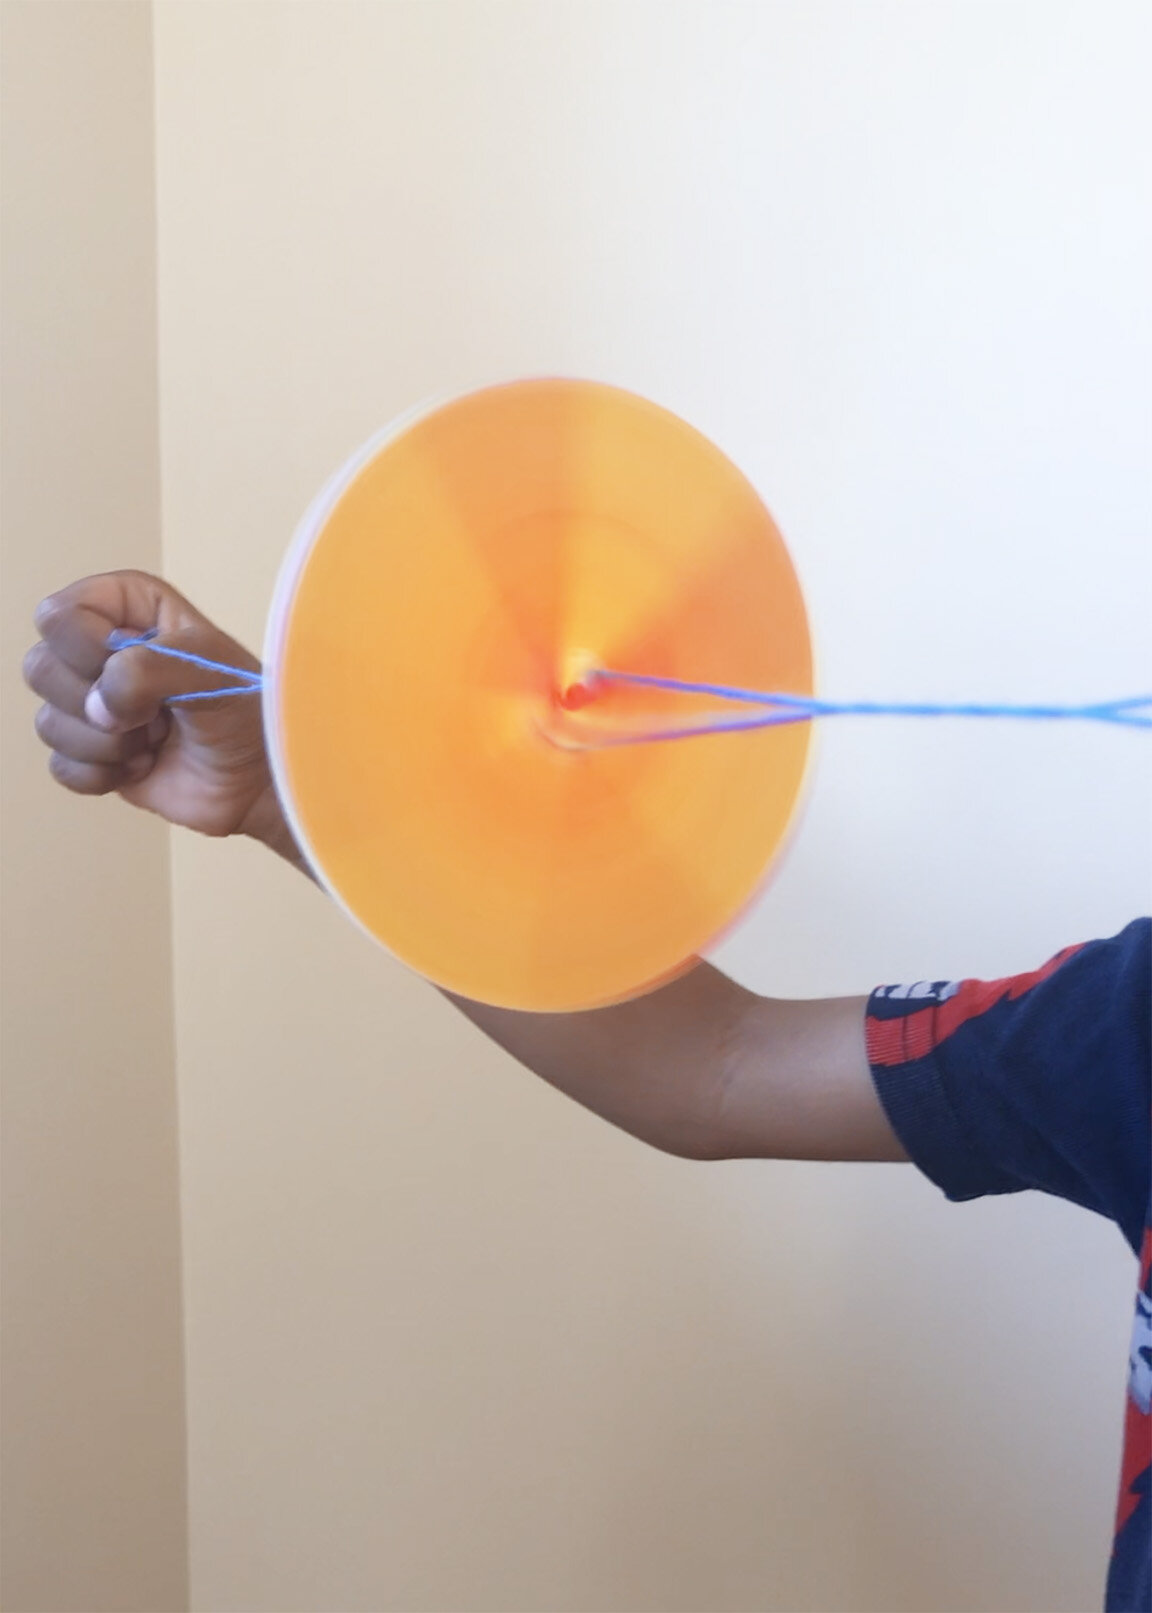
Activity 3: Spin and Mix!
Best for (2 years and up) simple science, color mixing, gross motor skills
Material Needed: Primary Colors (Red, Blue, Yellow), Glass, Cardboard, Paper, Pencil, Scissor Glue and Yarn/String
I remember making a spinner out of bottle caps as a child. This activity is combines scientific principles of physics with the visual science of color mixing. Its visually spectacular and scientifically sound.
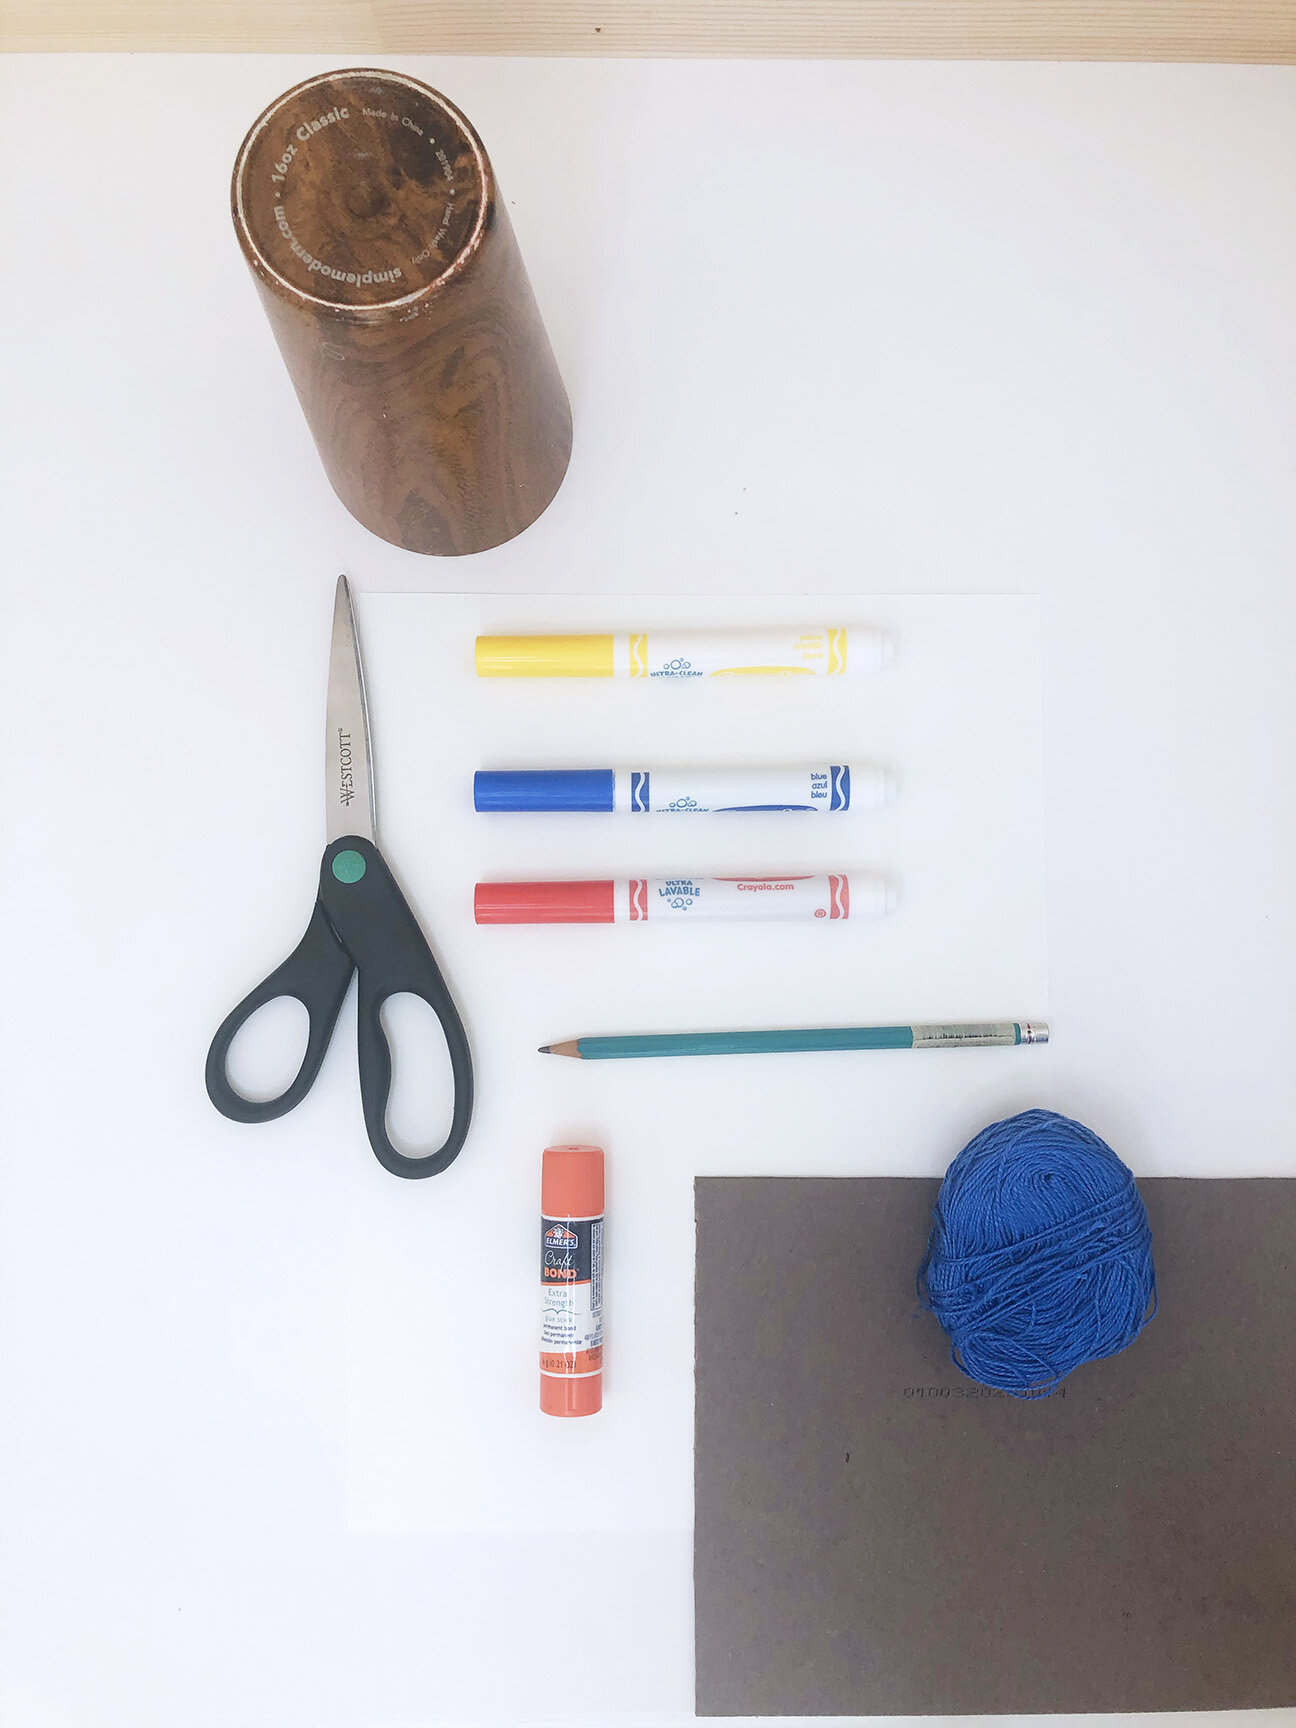
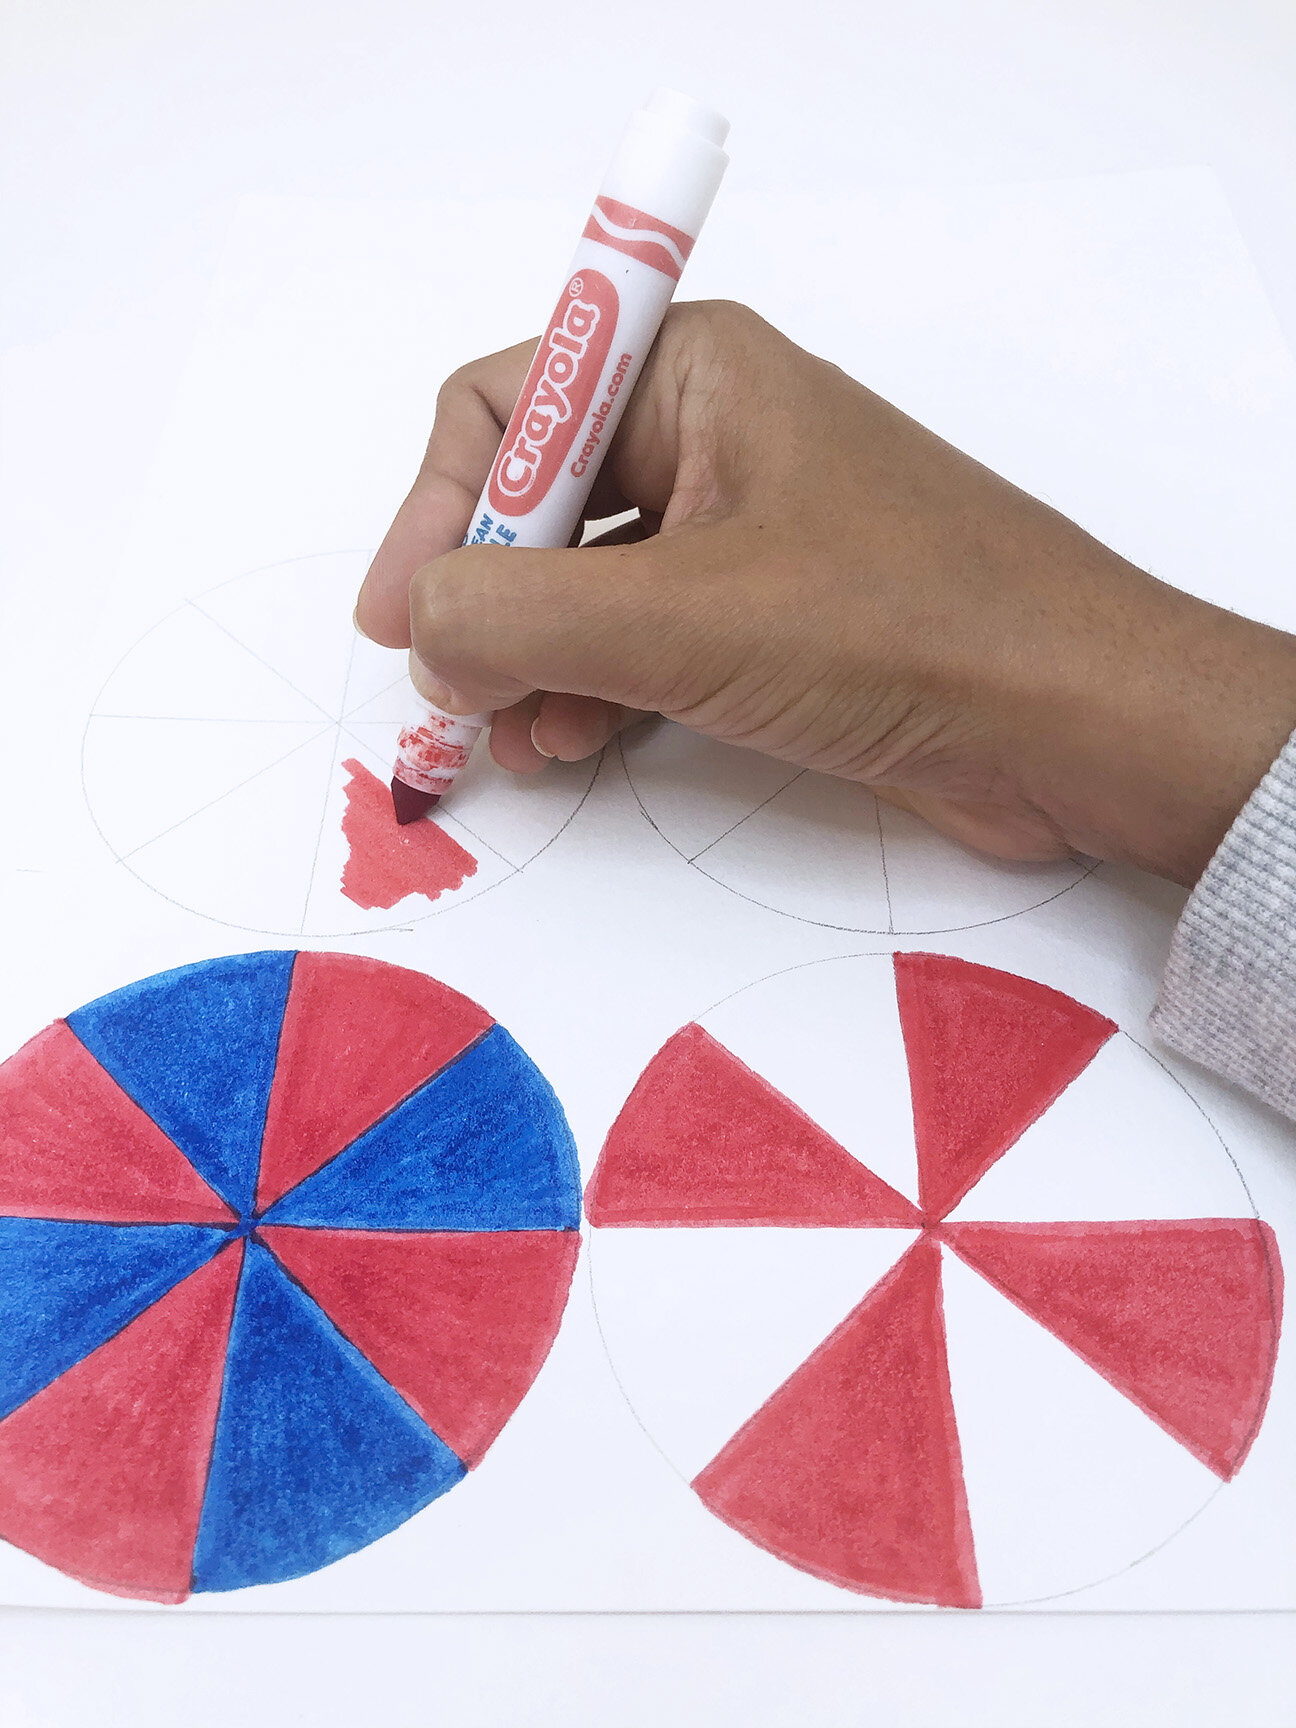
Use a glass to trace 4 circles on paper and 2 circles on Cardboard. Each circle should be 4 to 6 inches in diameter. Divide each paper circle in 8 sections. Color these sections in Primary colors. You can use crayons, paint, etc.
Circle 1: Red and Blue (alternating) gives you Purple
Circle 2: Red and Yellow (alternating) gives you Orange
Circle 3: Blue and Yellow (alternating) gives you Green
Circle 4: Red and White (alternating) gives you Pink
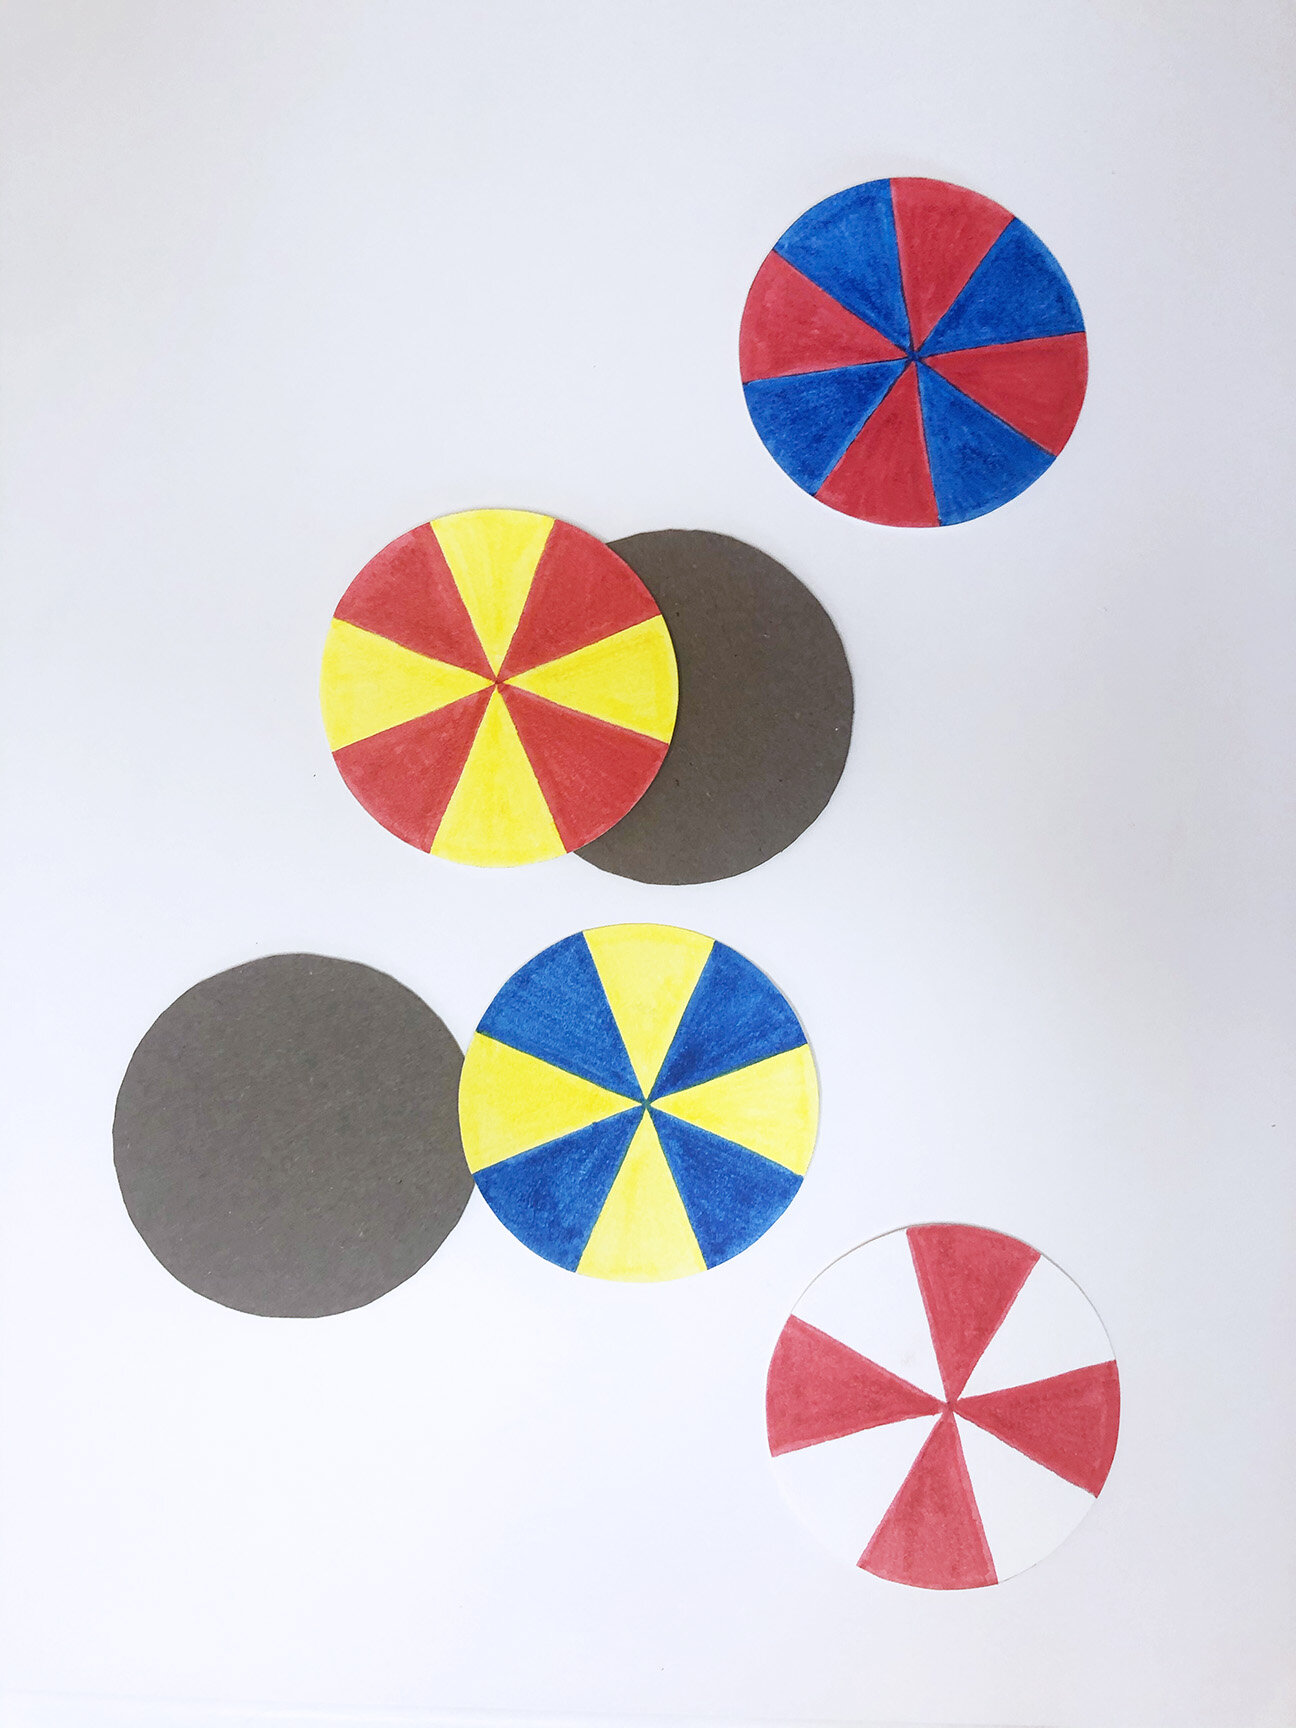

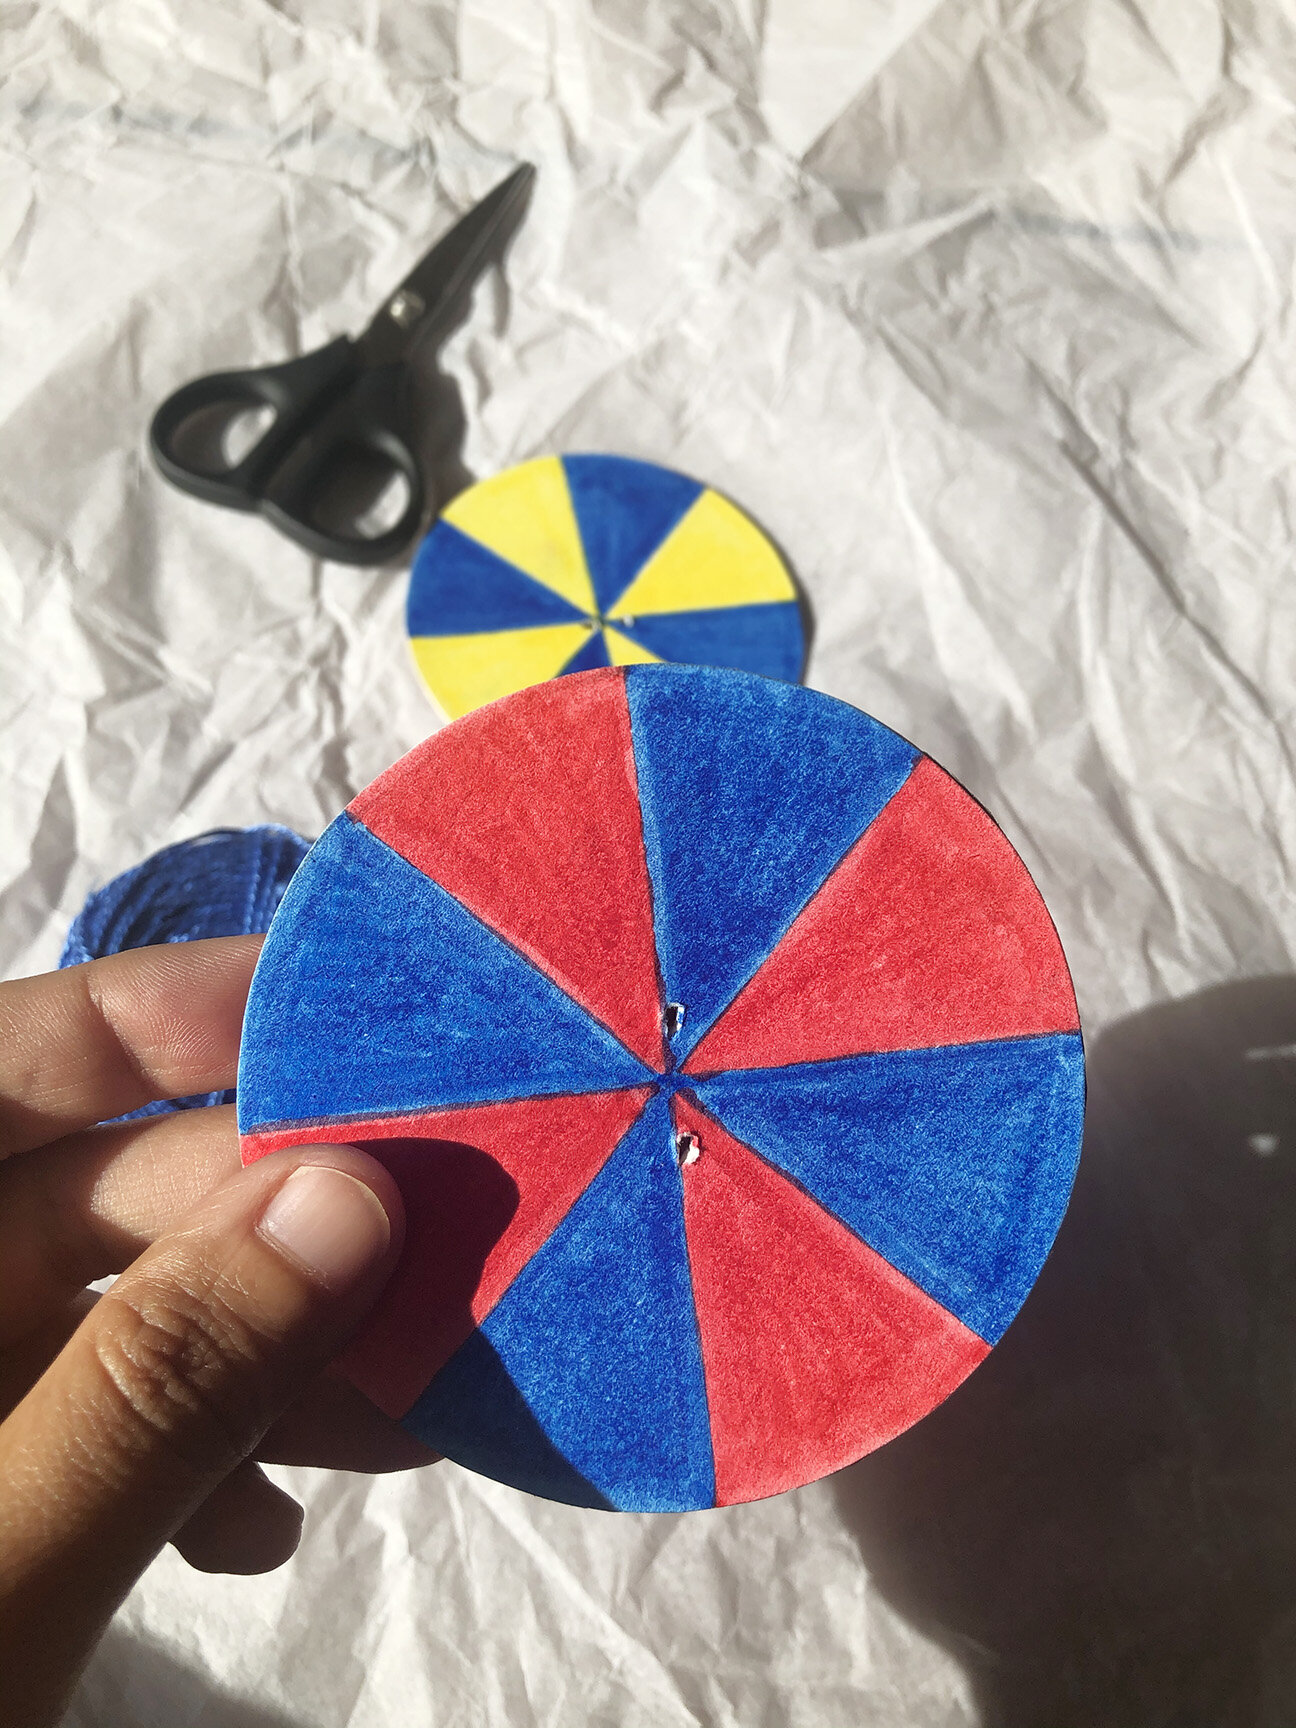
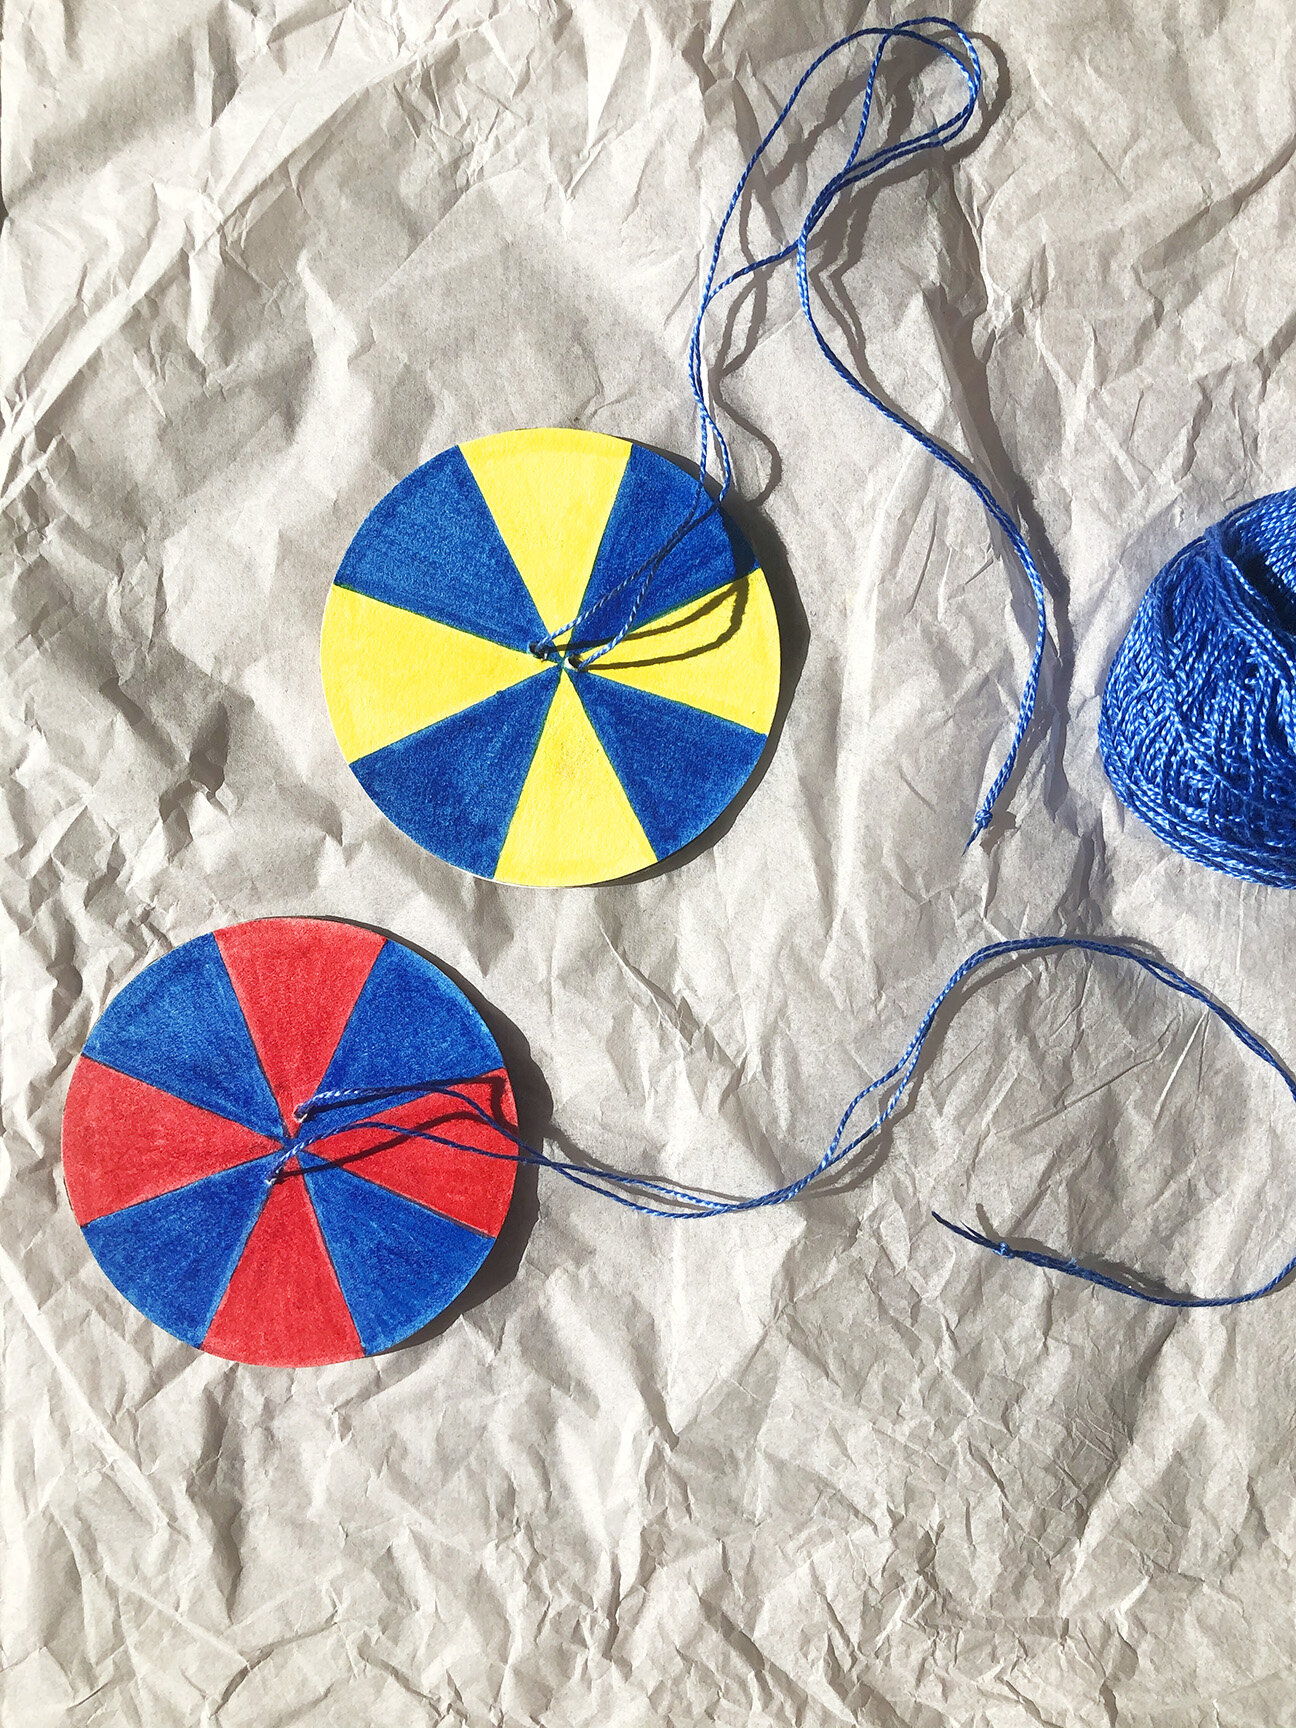
Cut the 4 paper circles and 2 cardboard circles with a scissor. Use glue on the cardboard and stick the paper circles on each side. Poke 2 holes in the center of each spinner approximately 0.5 to 1 cm apart. Thread the string or yarn through the 2 holes and tie a knot at the end. Your 2 spinners are ready for twirling!
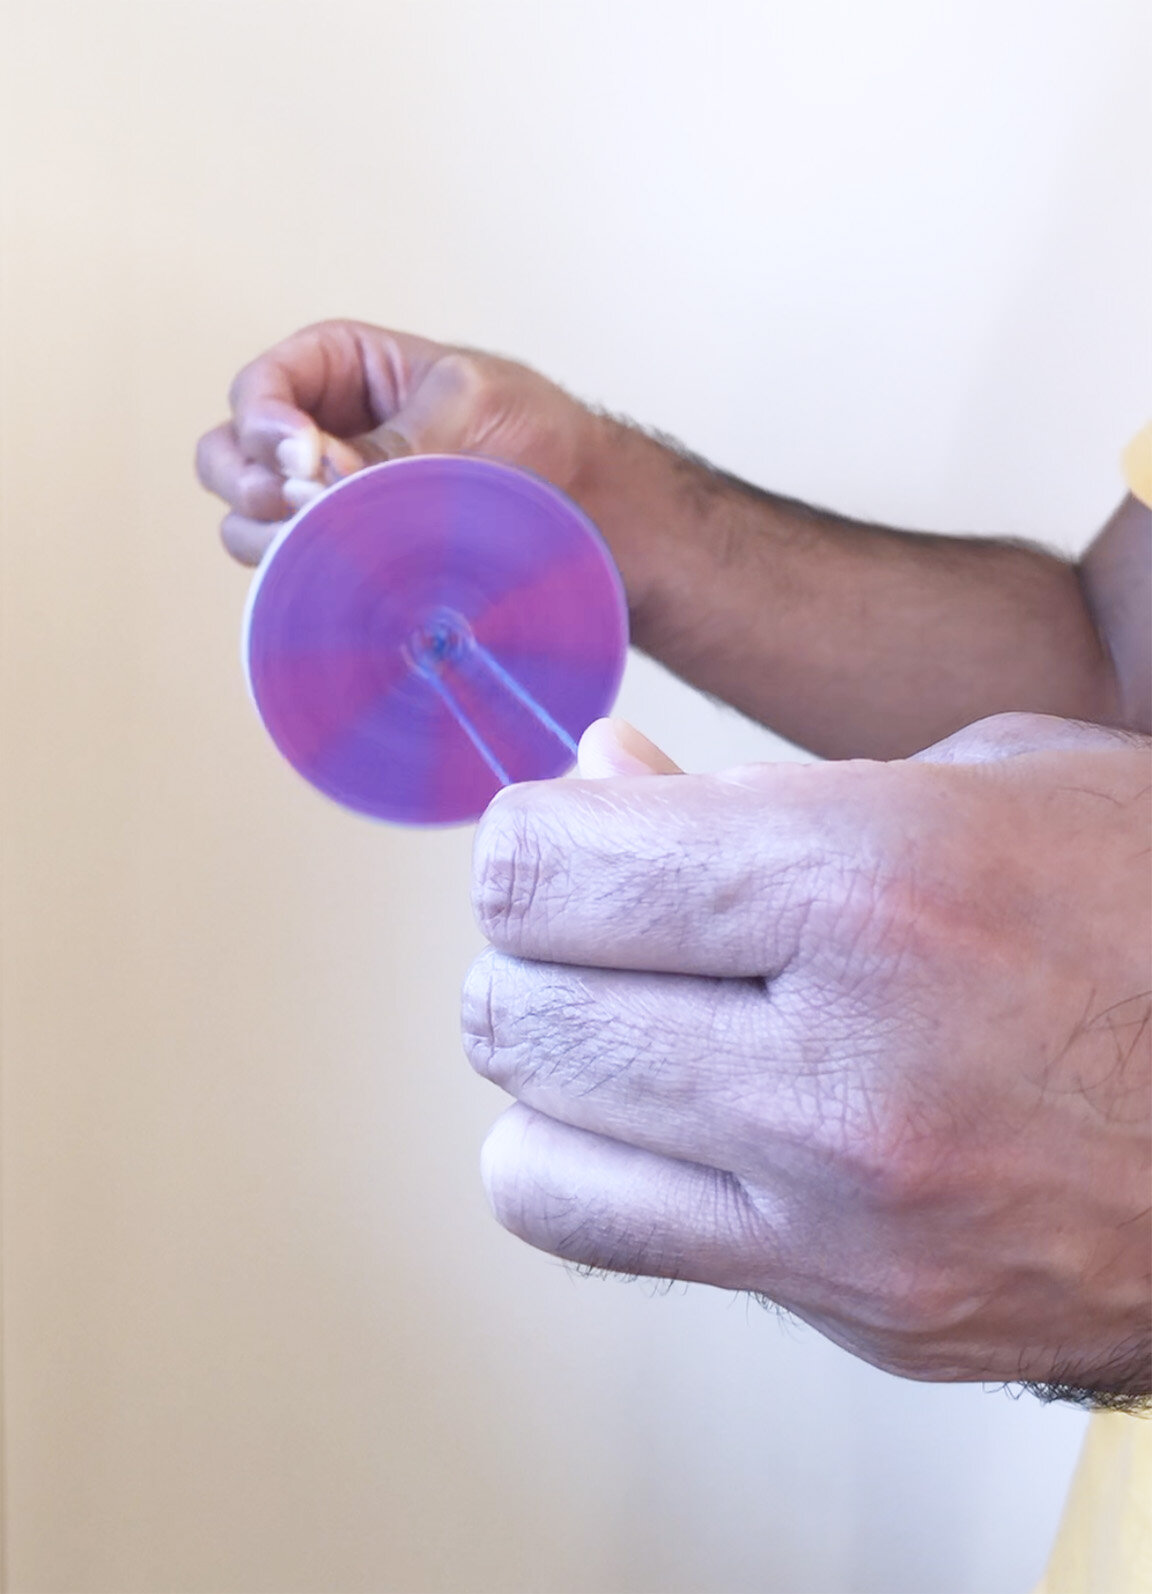
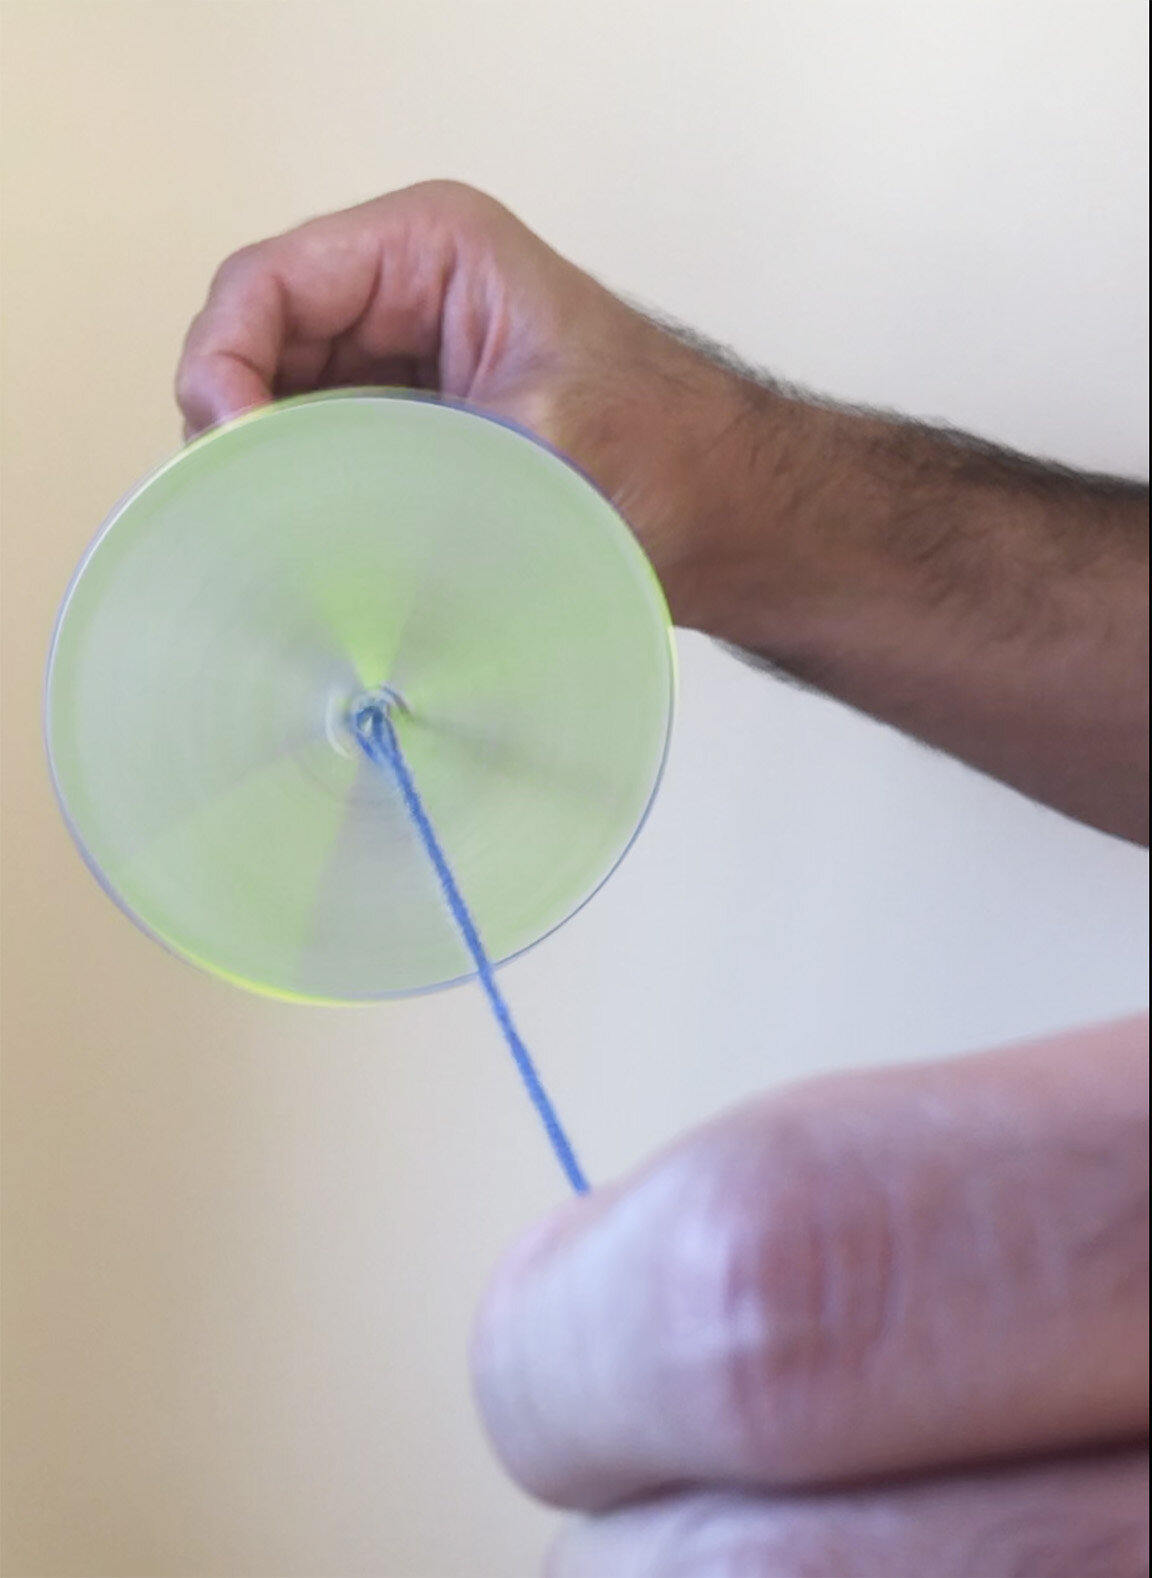
Start by holding the string on both sides of the spinner with your hands. Slide the spinner as close to the center of the string as possible. Spin it like you would turn a jump rope. This is a great way to get the string wound up. Once the string on both sides is twisted, pull the string tight to get the Color Mixing wheel spin.
The colors we used on the Spinners are called Primary Colors (Red, Blue and Yellow), which when mixed give us Secondary Colors (Purple, Orange and Green). Obviously the individual colors on the wheel are not mixing. The color mixing happens due to the speed at which the wheel is spinning. Our brain is unable to process them as individual colors, so it takes a shortcut and creates Secondary Colors.