
As we are heading into mid summer and my son is home for a 2 week break from his Summer Camp, I had to think of a theme that would keep him busy for a longer time. I wish I could just take him to a beach everyday and take my work along. So instead we brought the beach to us!
Sand is so versatile – you can sift it, dig in it, pour it, enjoy the feel of it, build with it, and even make art with it! This versatility means that it appeals to toddlers, preschoolers and even bigger kids who enjoy getting hands-on for some sensory fun.
Kids of all ages love sensory play, and what better sensory fun than playing with sand? If you are looking for easy set-up ideas; make an indoor sand pit, practice writing or drawing or use Kinetic Sand to build.
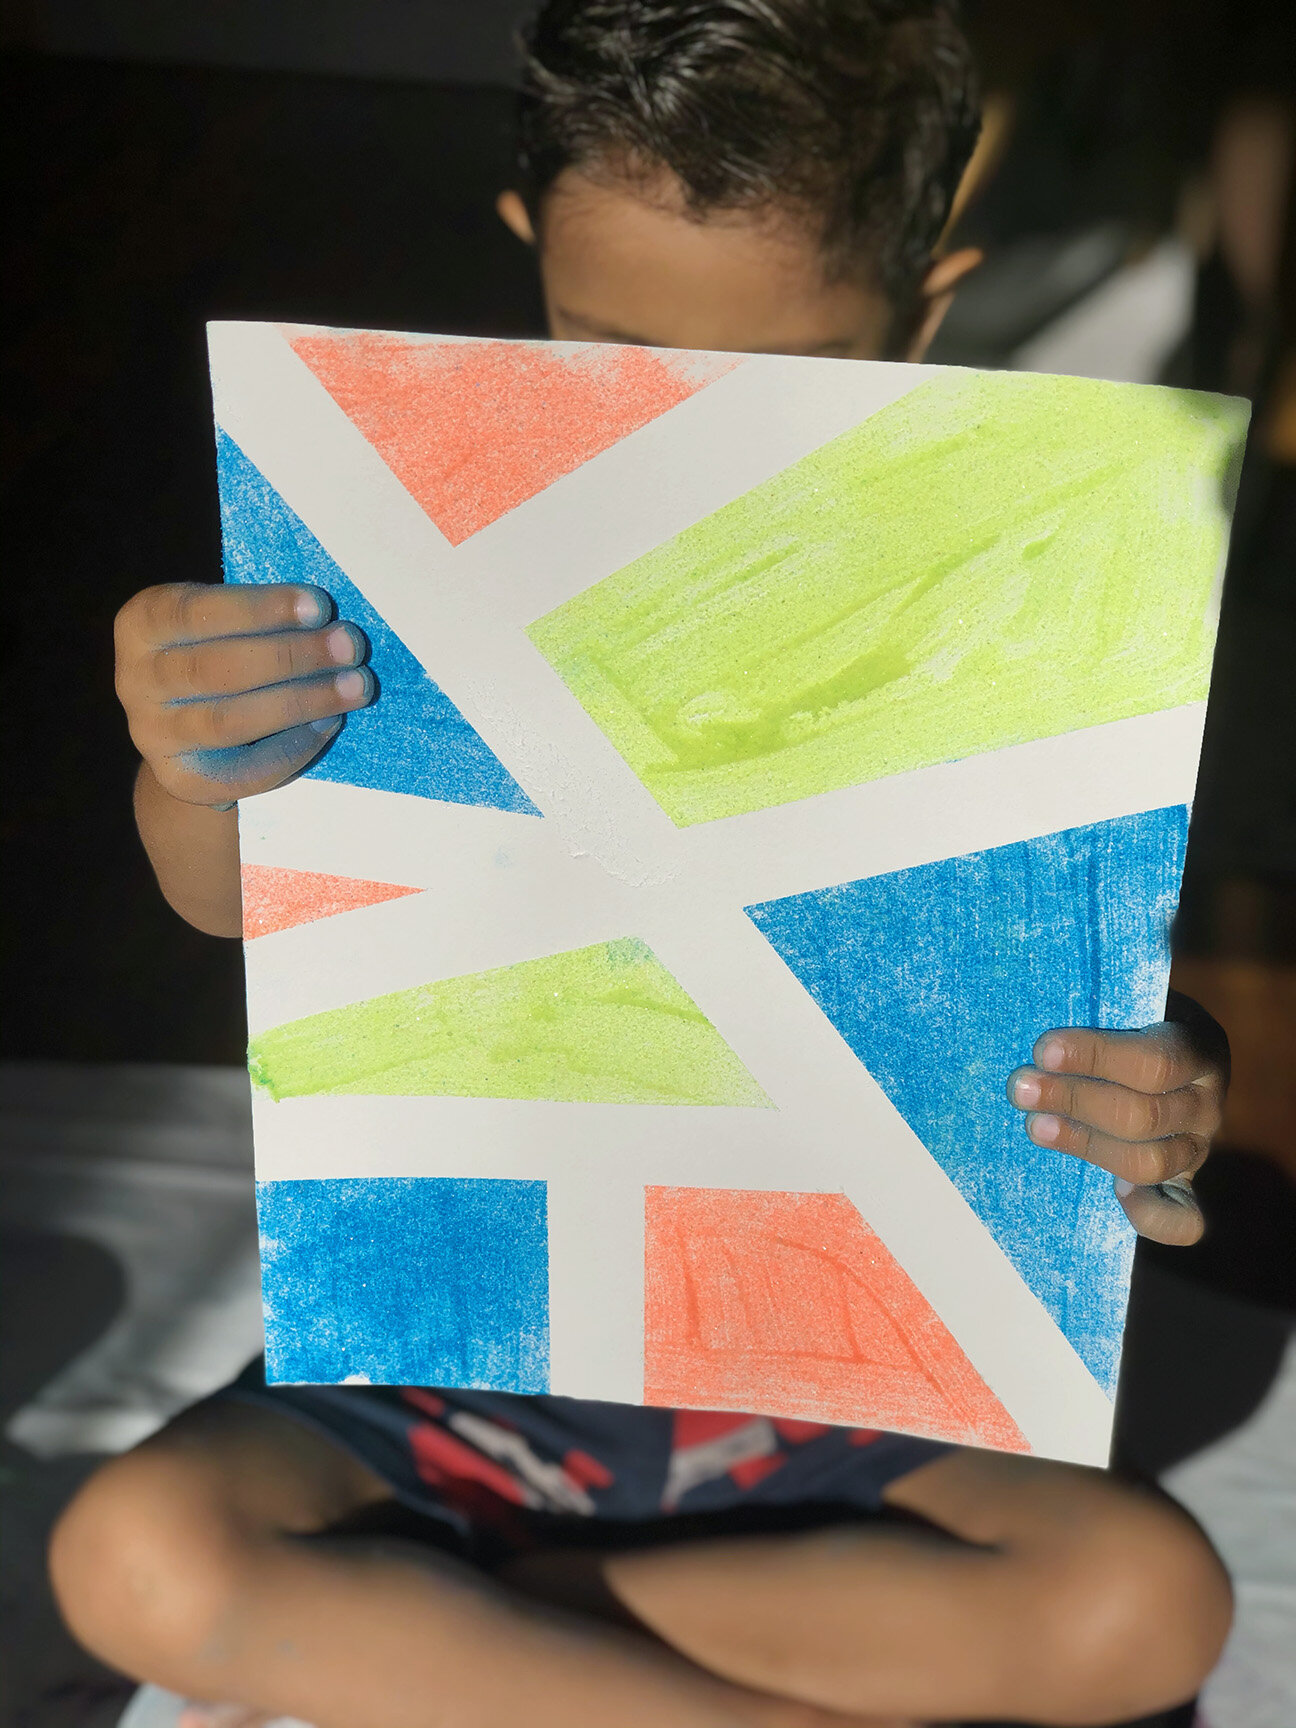
Activity 1: Frame Worthy Sand Art!
Best for (2 years and up) color recognition, fine motor skills, art, creativity

Material Needed: Colored Sand, Washi Tape or Painters Tape, Watered Glue or Mod Podge, Thick Paper and Paint Brush (for glue).
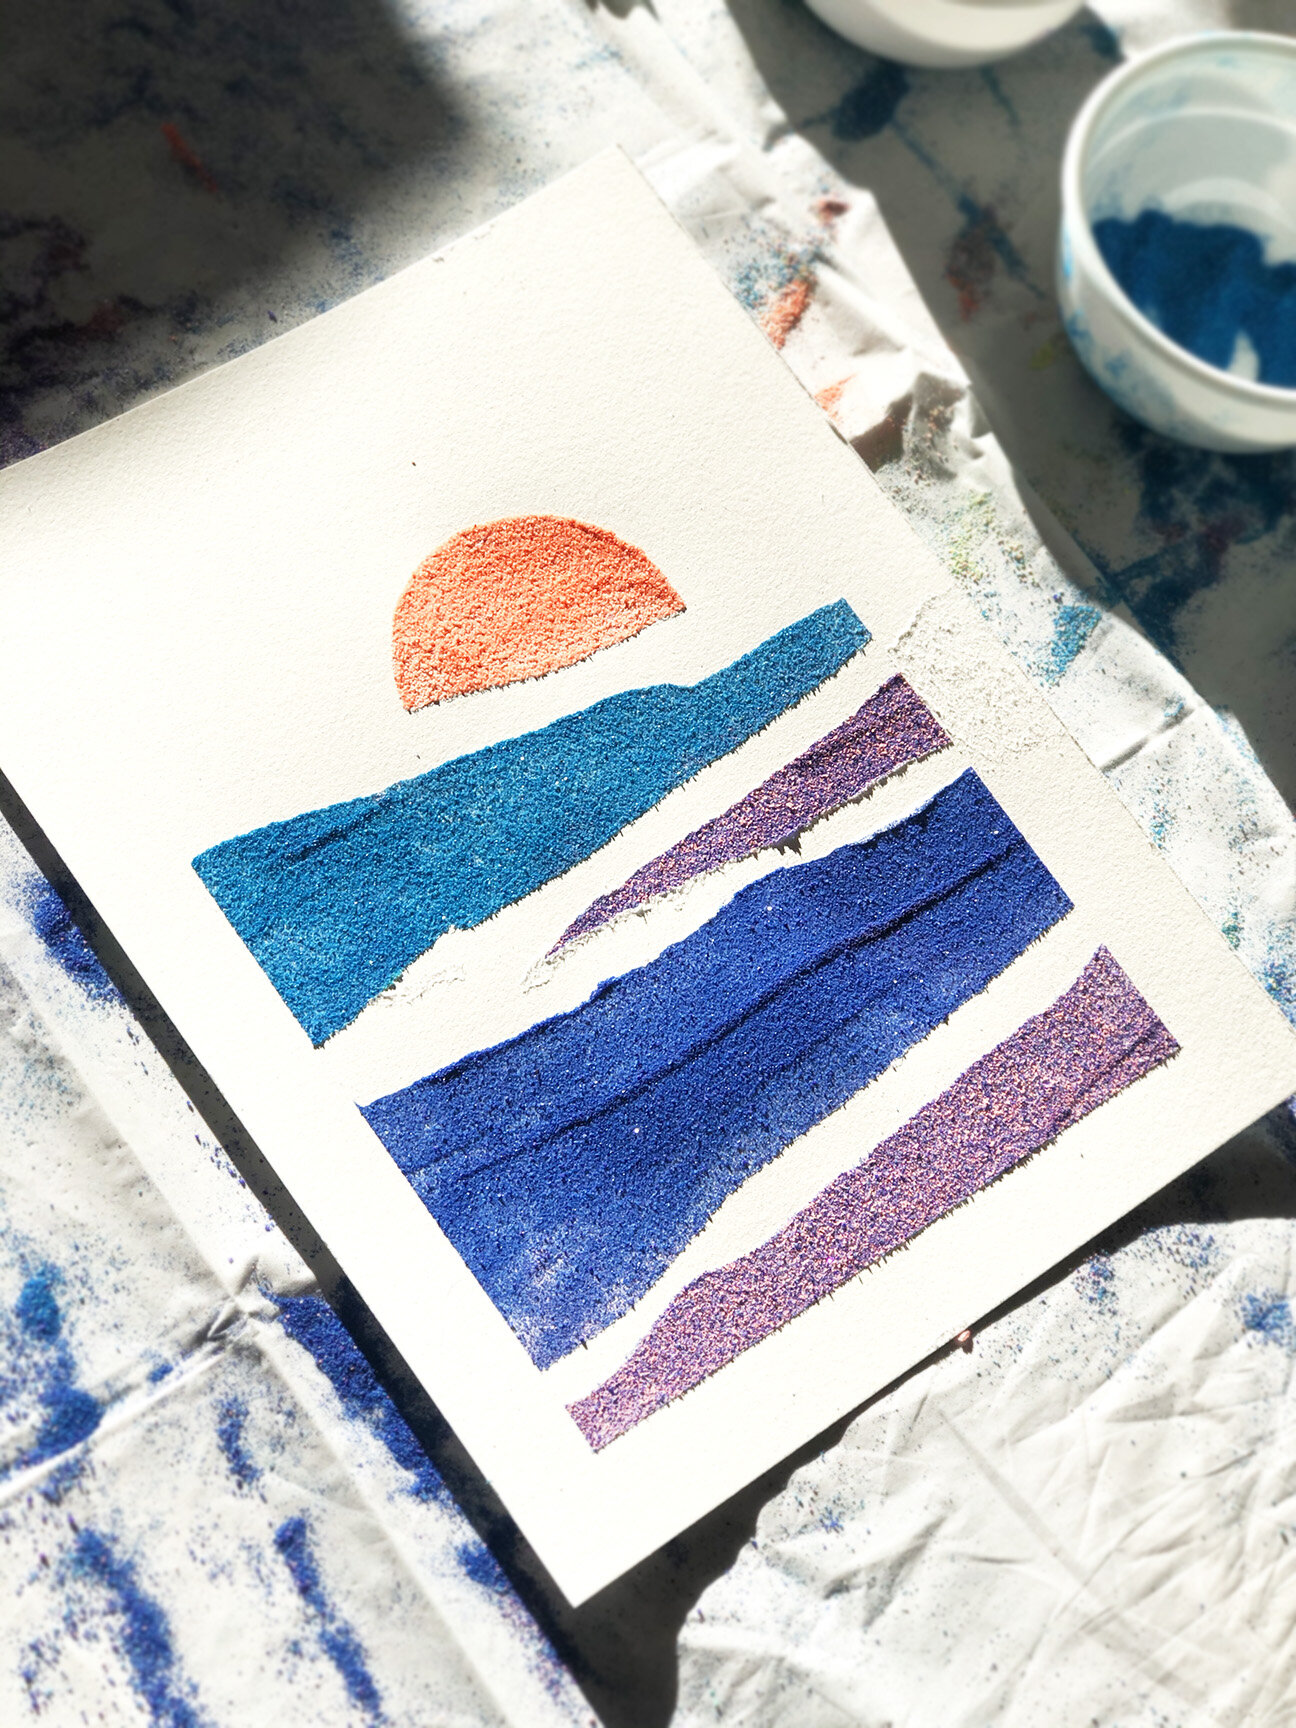
We love messy art and this activity is so worth it! Plus the end result here is not messy at all. You will mostly have clean lines and a colorful and fun art to hang up on your wall. We did two different designs for Sand Art. For the first one we went for a geometric design and the second was more of a scenery.
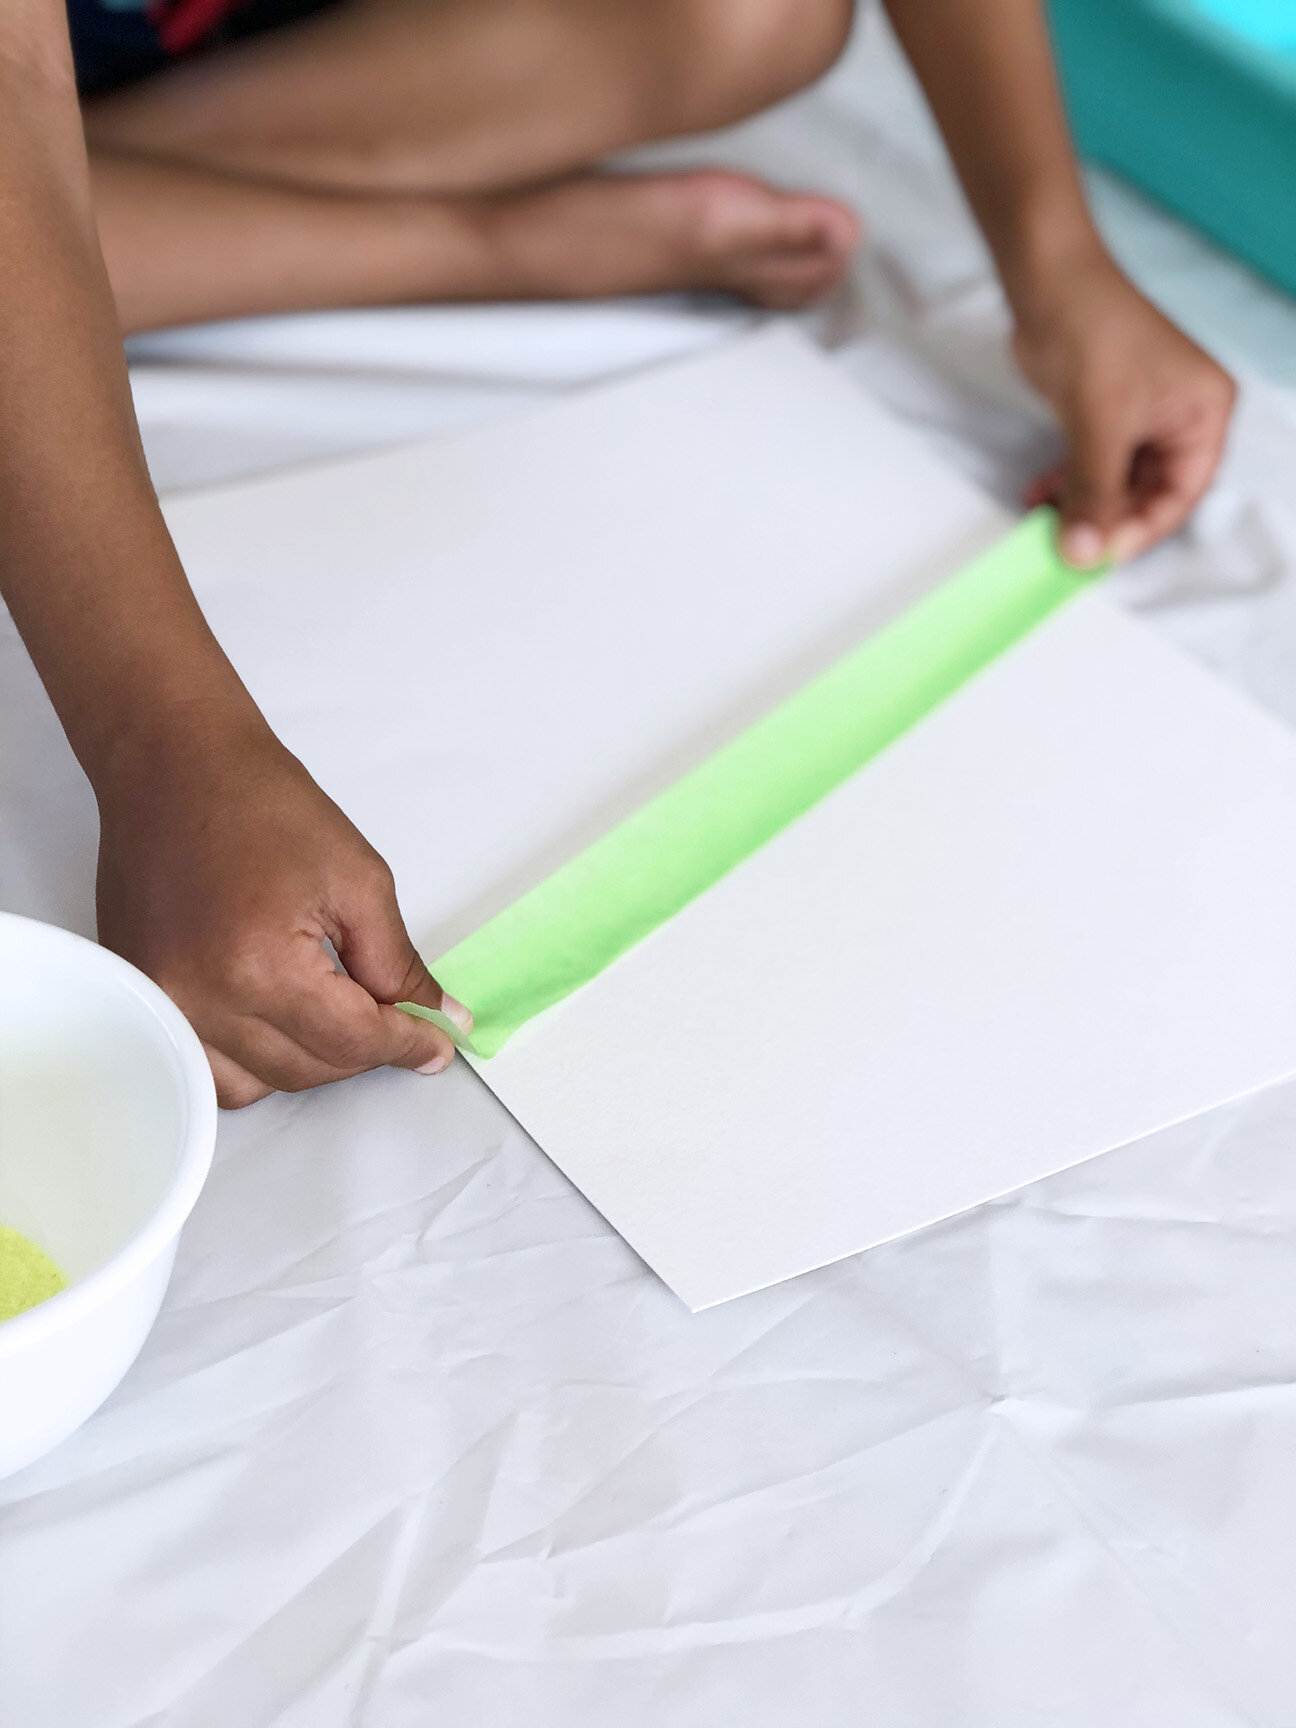
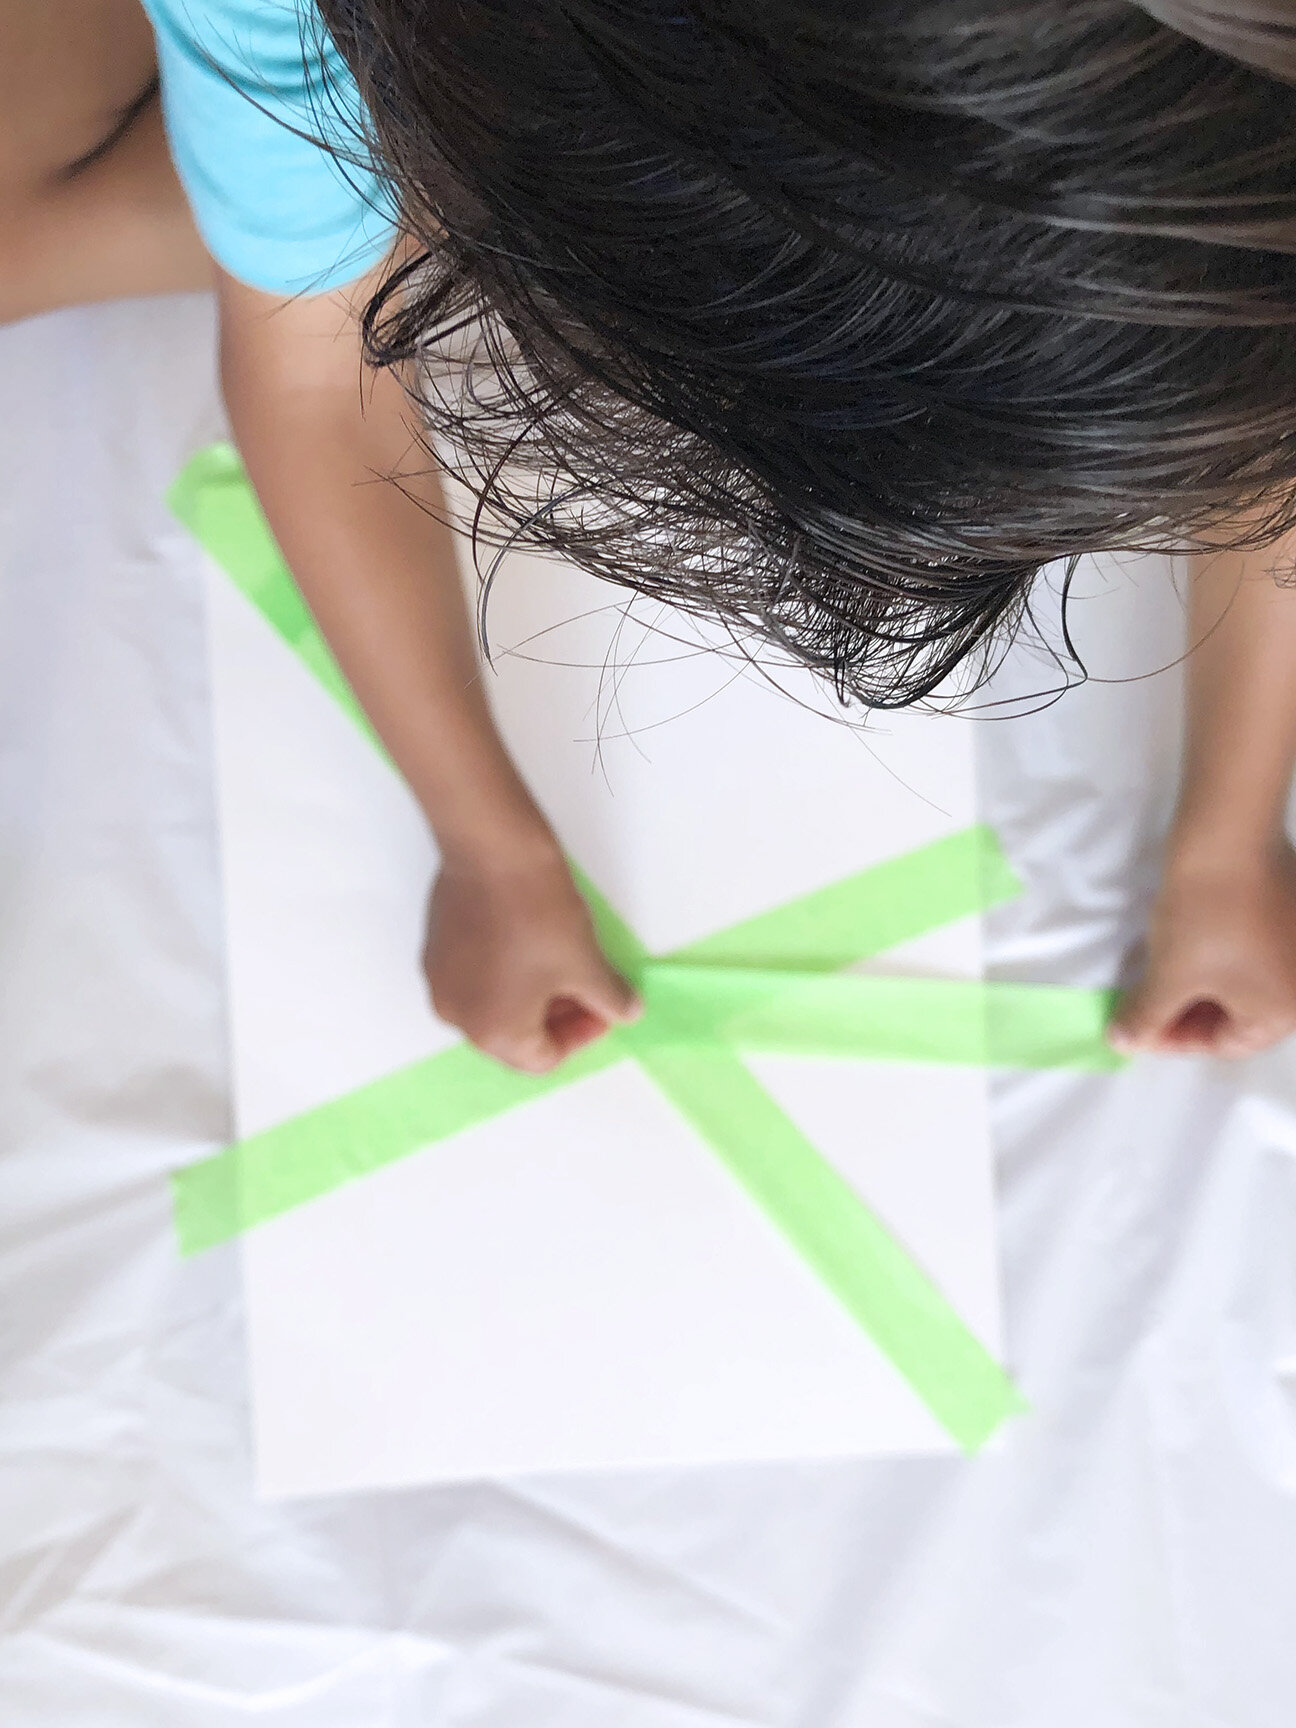
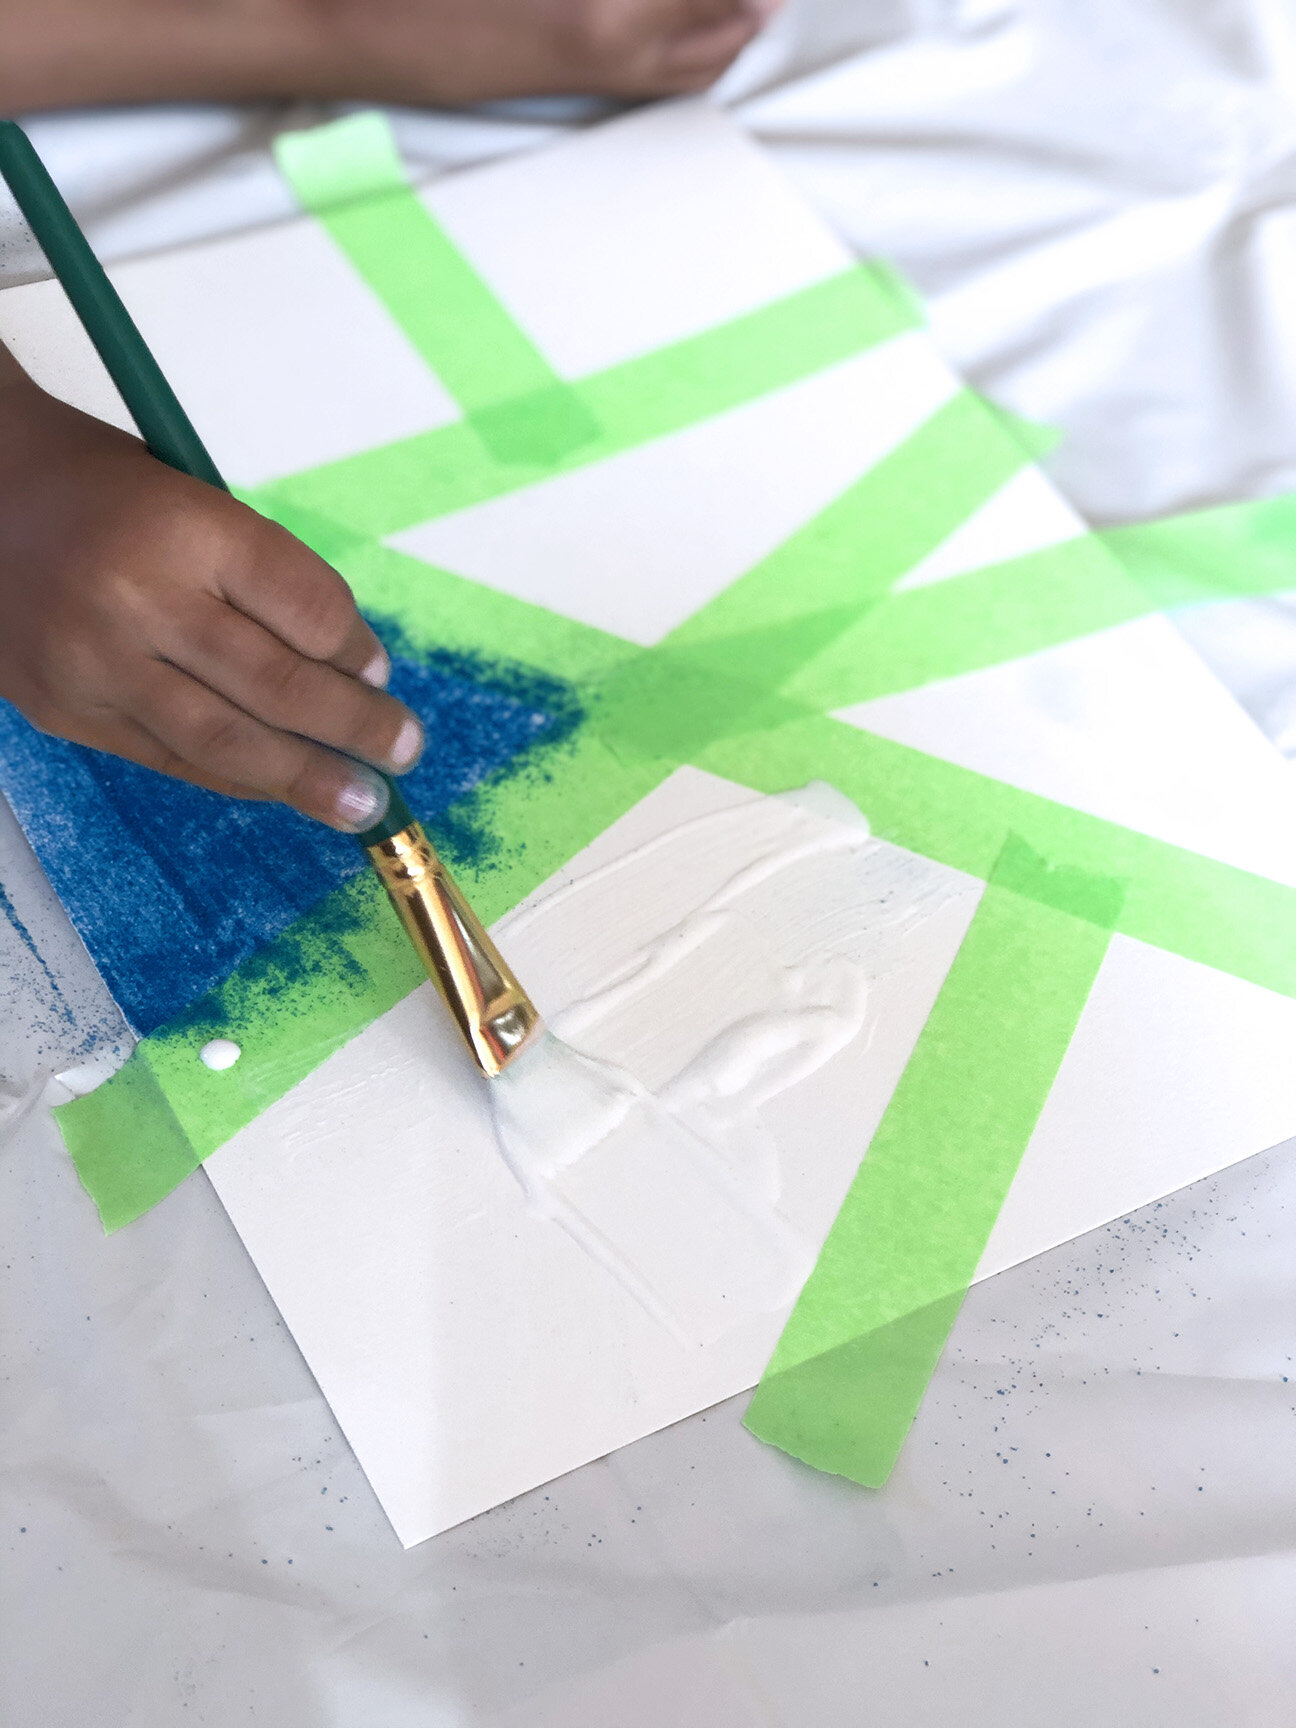

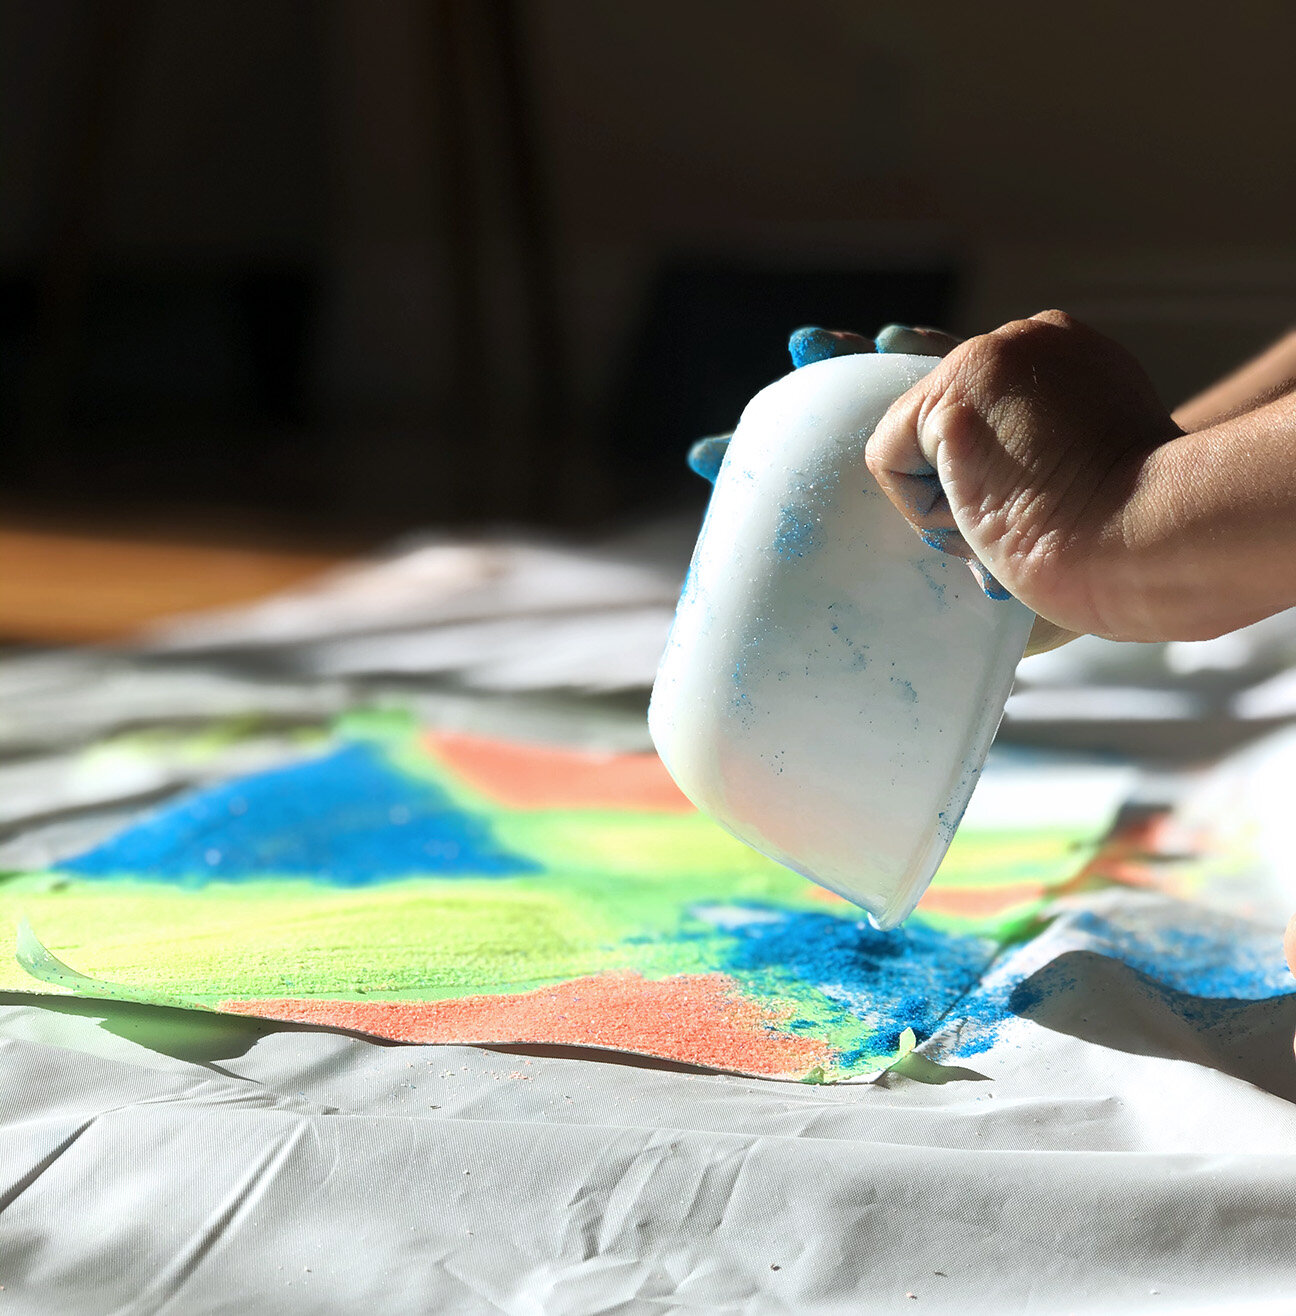
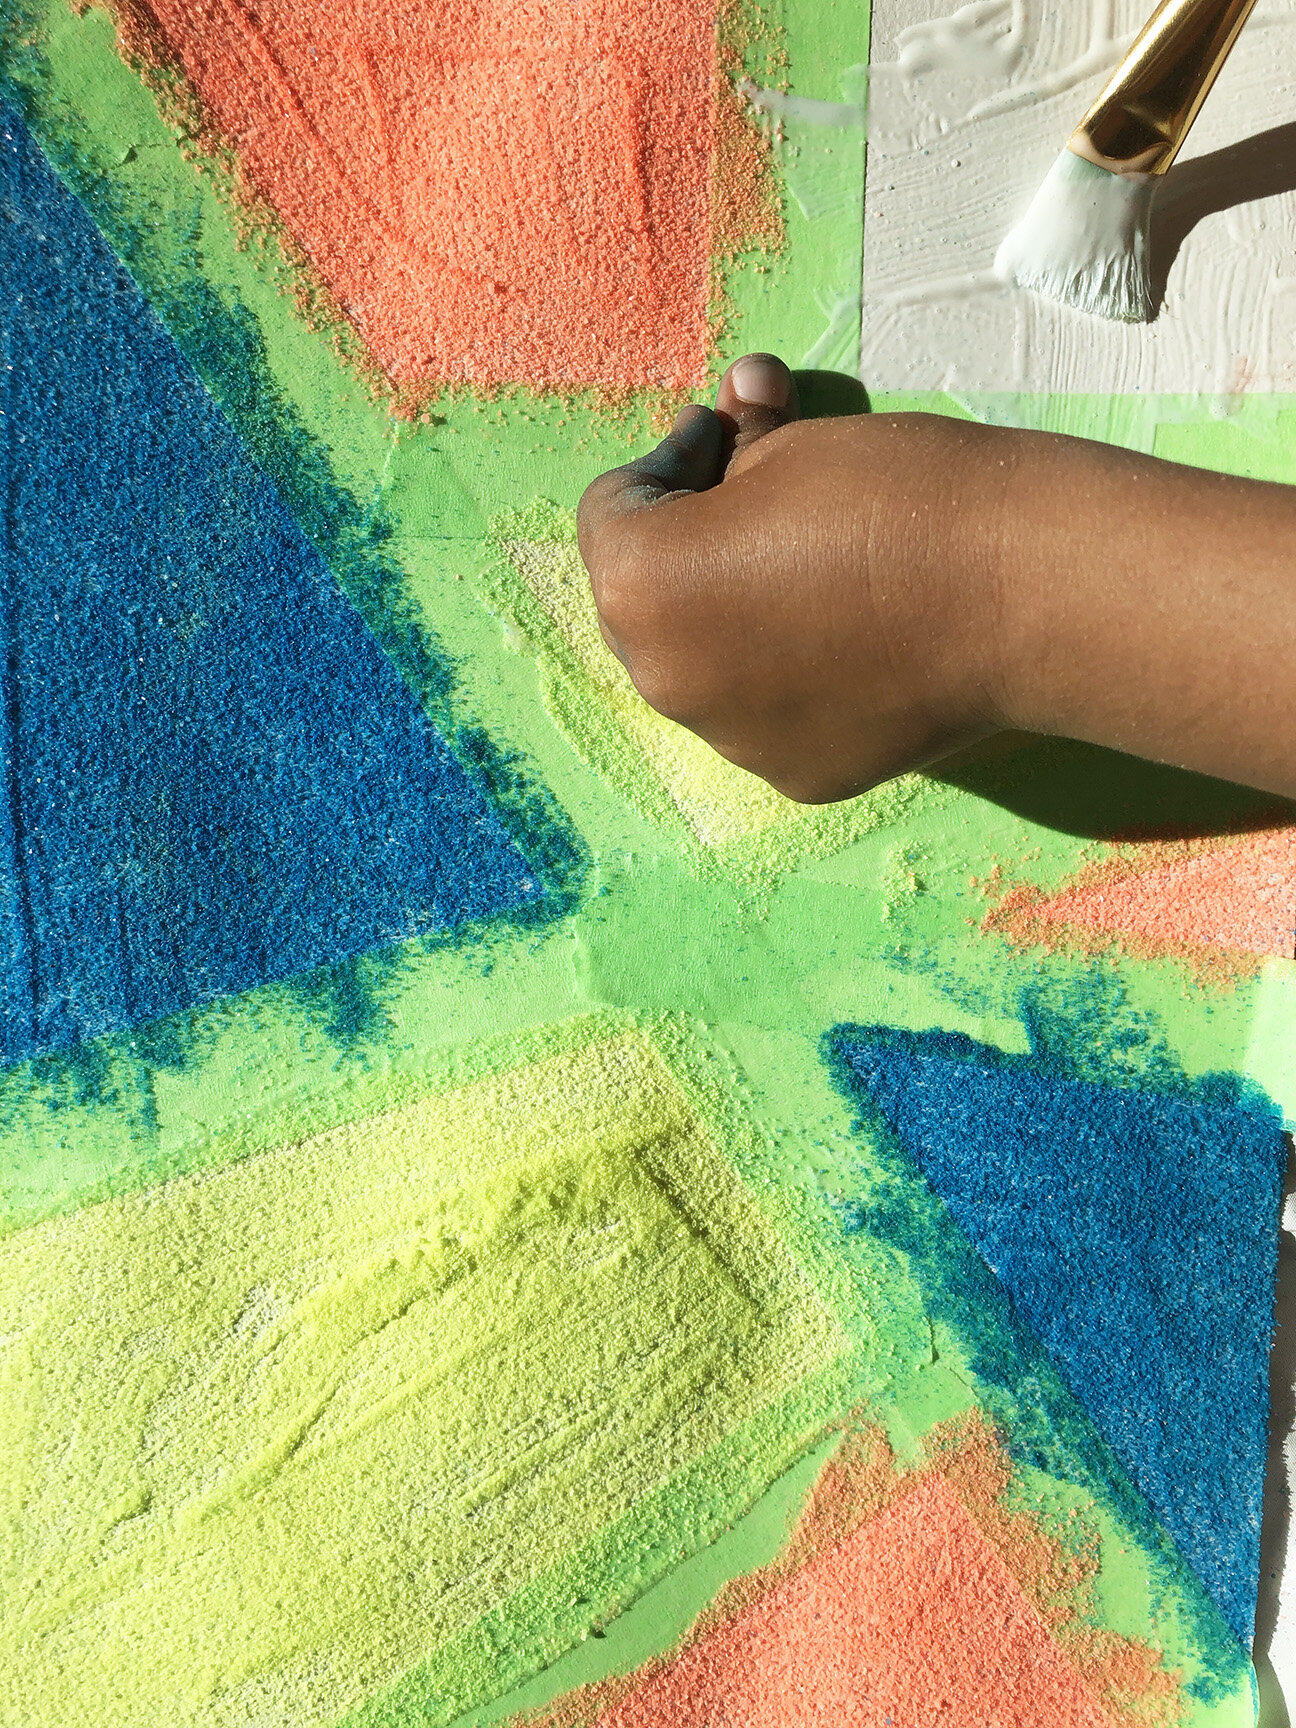
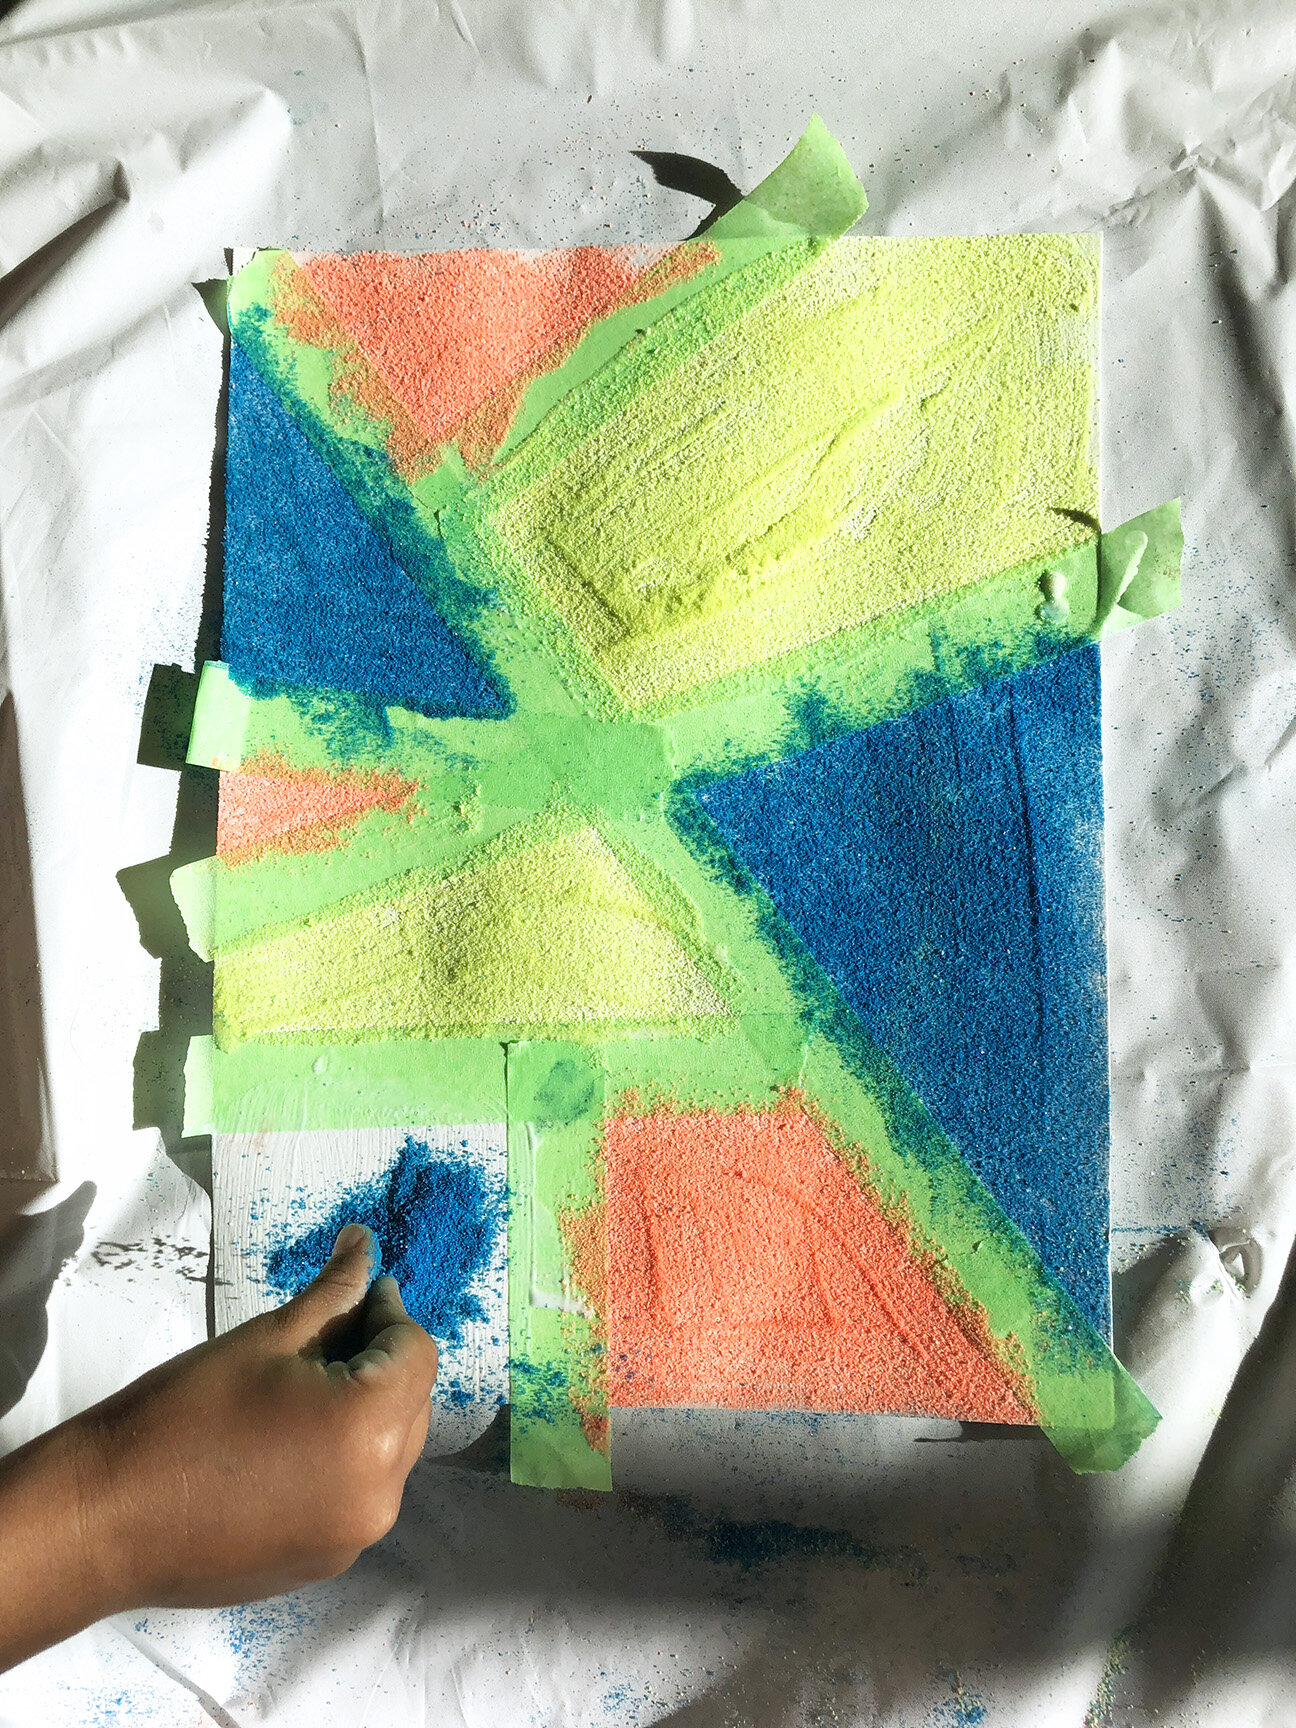
Take a thick paper or canvas. Then use washi tape or painters tape to make interesting lines/shapes. This type of tape is removable without tearing the paper. Once you are happy with your design, use paint brush to apply glue to one area at a time and sprinkle colored sand on it. Don’t worry if your child is not able to evenly spread the sand; it’s a great exercise for those little fingers. As we finished each section we just turned the paper upside down in a tray and collected the extra sand that did not stick. Repeat the same for each section. Once you are done, remove the tape one at a time slowly. Leave the paper out to dry for a couple hours.
My son loved this activity. Soon he realized he can dump the sand on paper and the extra sand will come right off and we can collect it again and use it. It’s a great sensory activity plus the satisfaction you get when your kid pulls the tape off slowly (better than watching those soap cutting videos!).
Beach is my sons favorite place to be, so we did one sunset over water scenery as well. These turned out beautiful and we have one more nostalgic piece of art to frame!
If you want more details or have questions, just post them in the comments below. Happy to help! Hope you try this with your kid soon.
Activity 2: A Pouring Sand Timer
Best for (2 years and up) DIY, upcycle, simple science, kids teeth brushing timer

Material Needed: Sand (or Semolina Flour/ Salt), 2 Empty Sanitizer Bottles, Glue, Scissor, Tape, Food Color (fun but optional).
This activity was my husbands idea (He does come up with some great ideas every now and then thankfully). But since he left me in charge with the execution, I am totally going to take credit for it (haha).
We all have been using Sanitizers since the pandemic. Instead of recycling the bottles this time, save them to make this very easy but useful sand glass timer. It is handy for teaching gravity, playing games, time keeping, etc. We use ours to teach our son about brushing his teeth for a whole of two minutes. This DIY sand timer makes it easy and fun for your kids to practice proper dental hygiene.

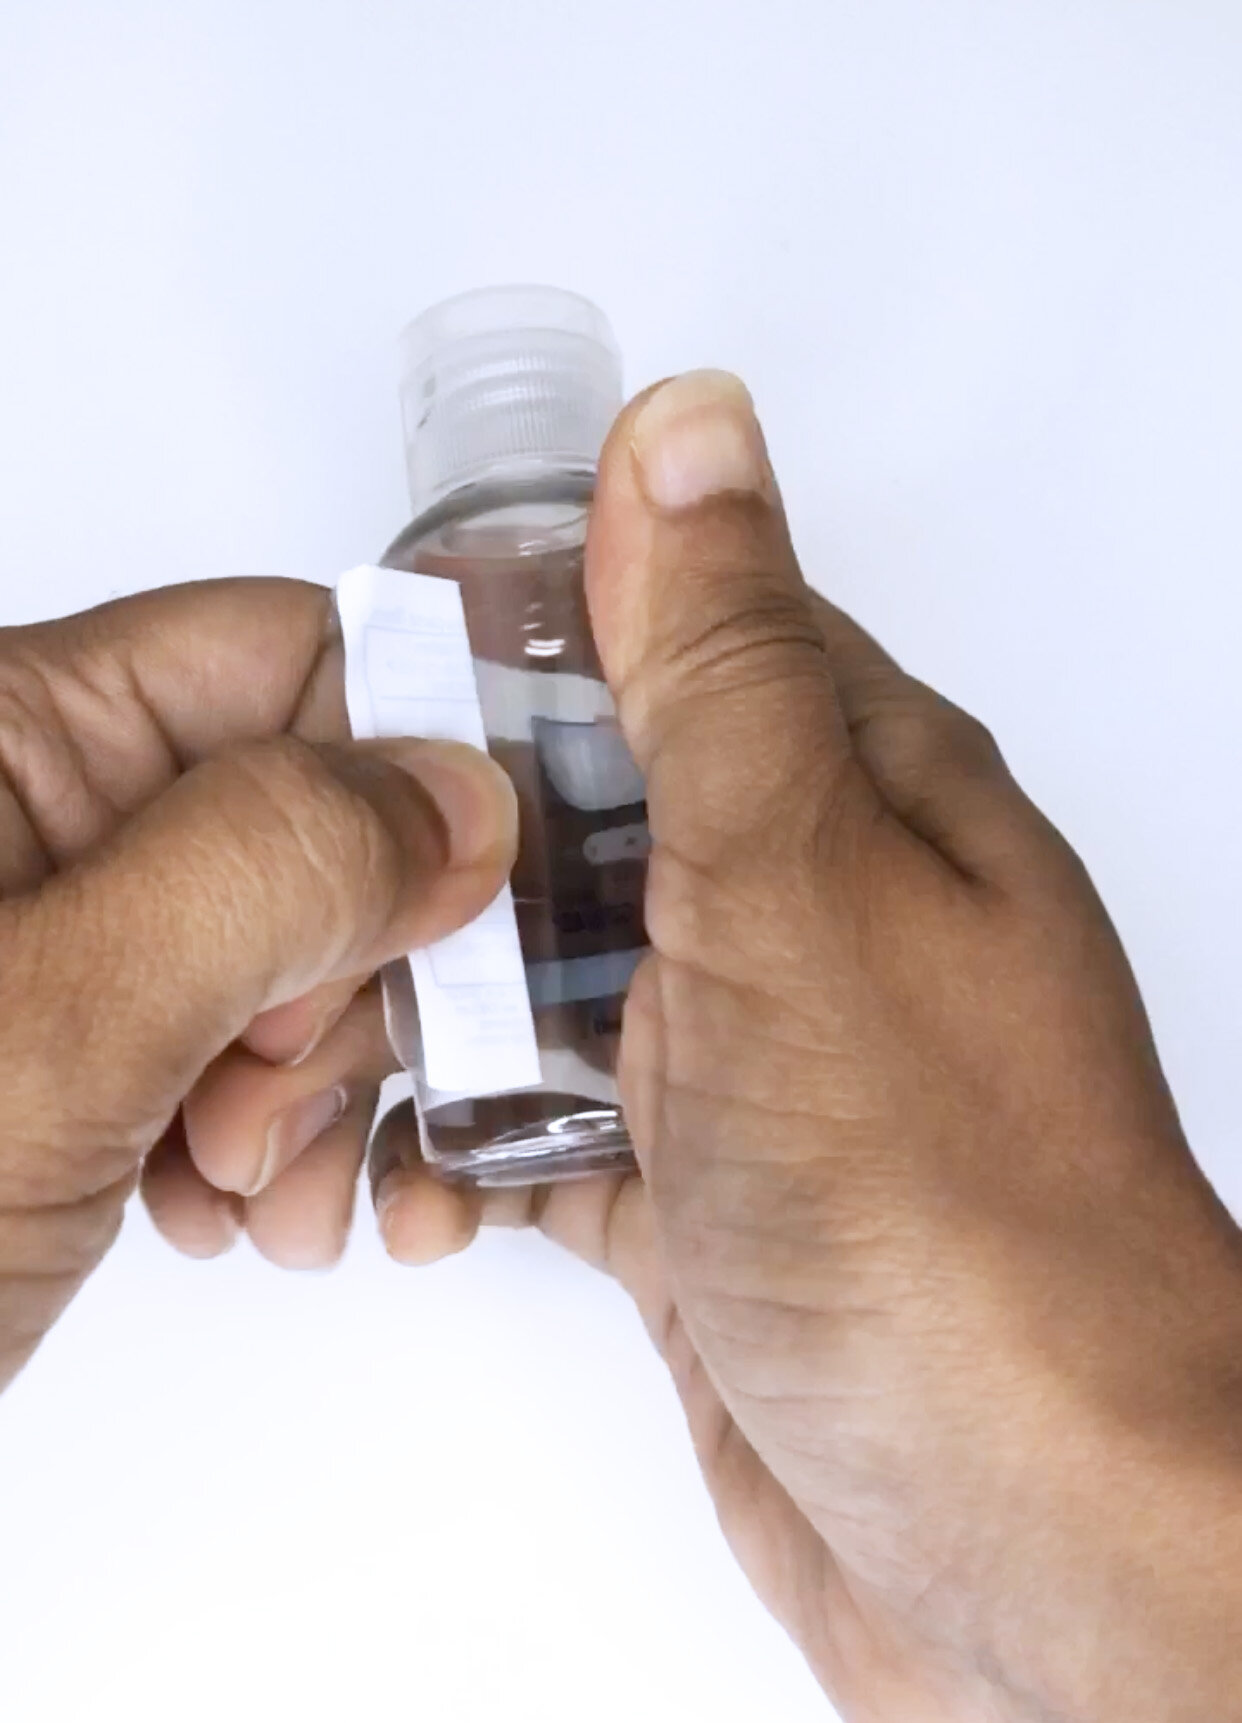
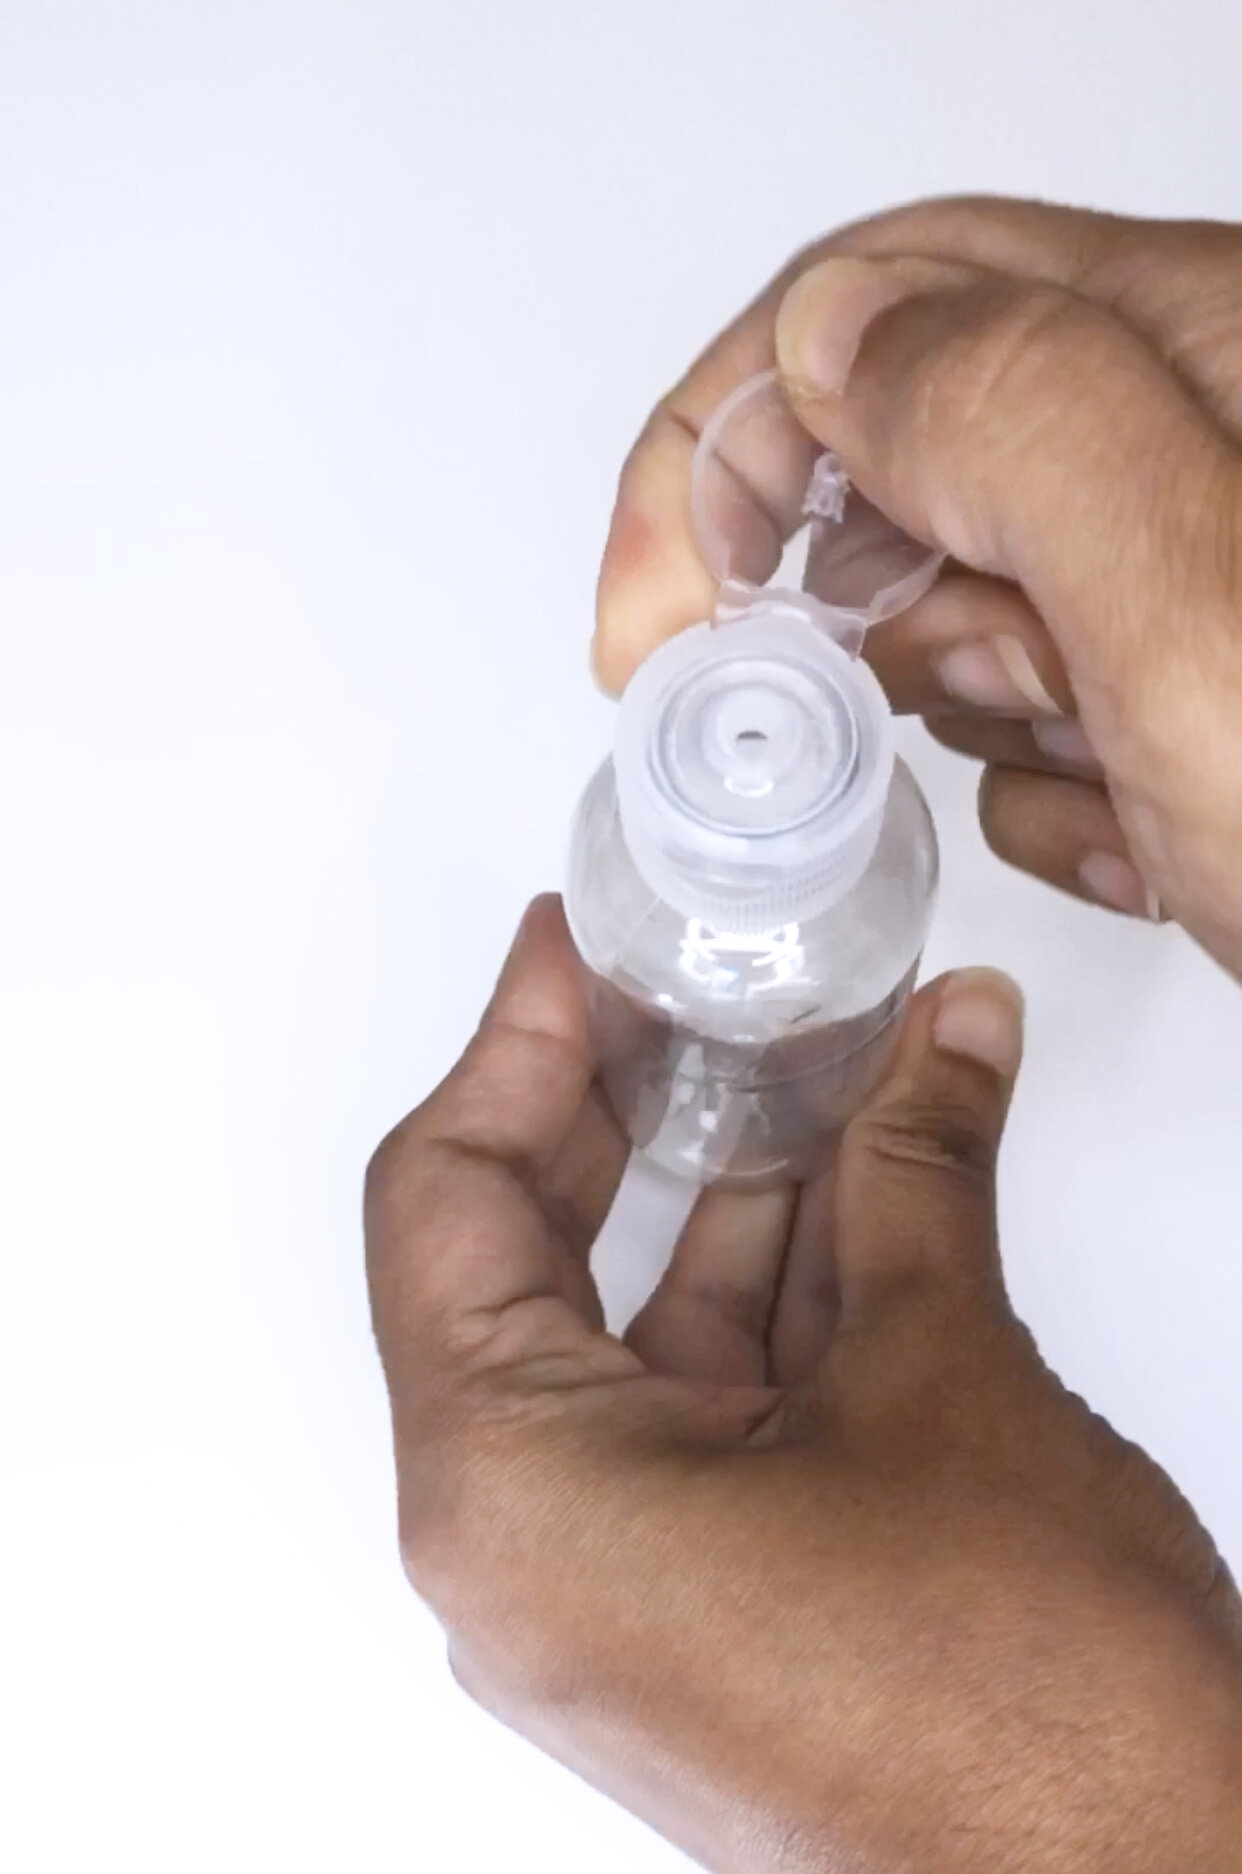

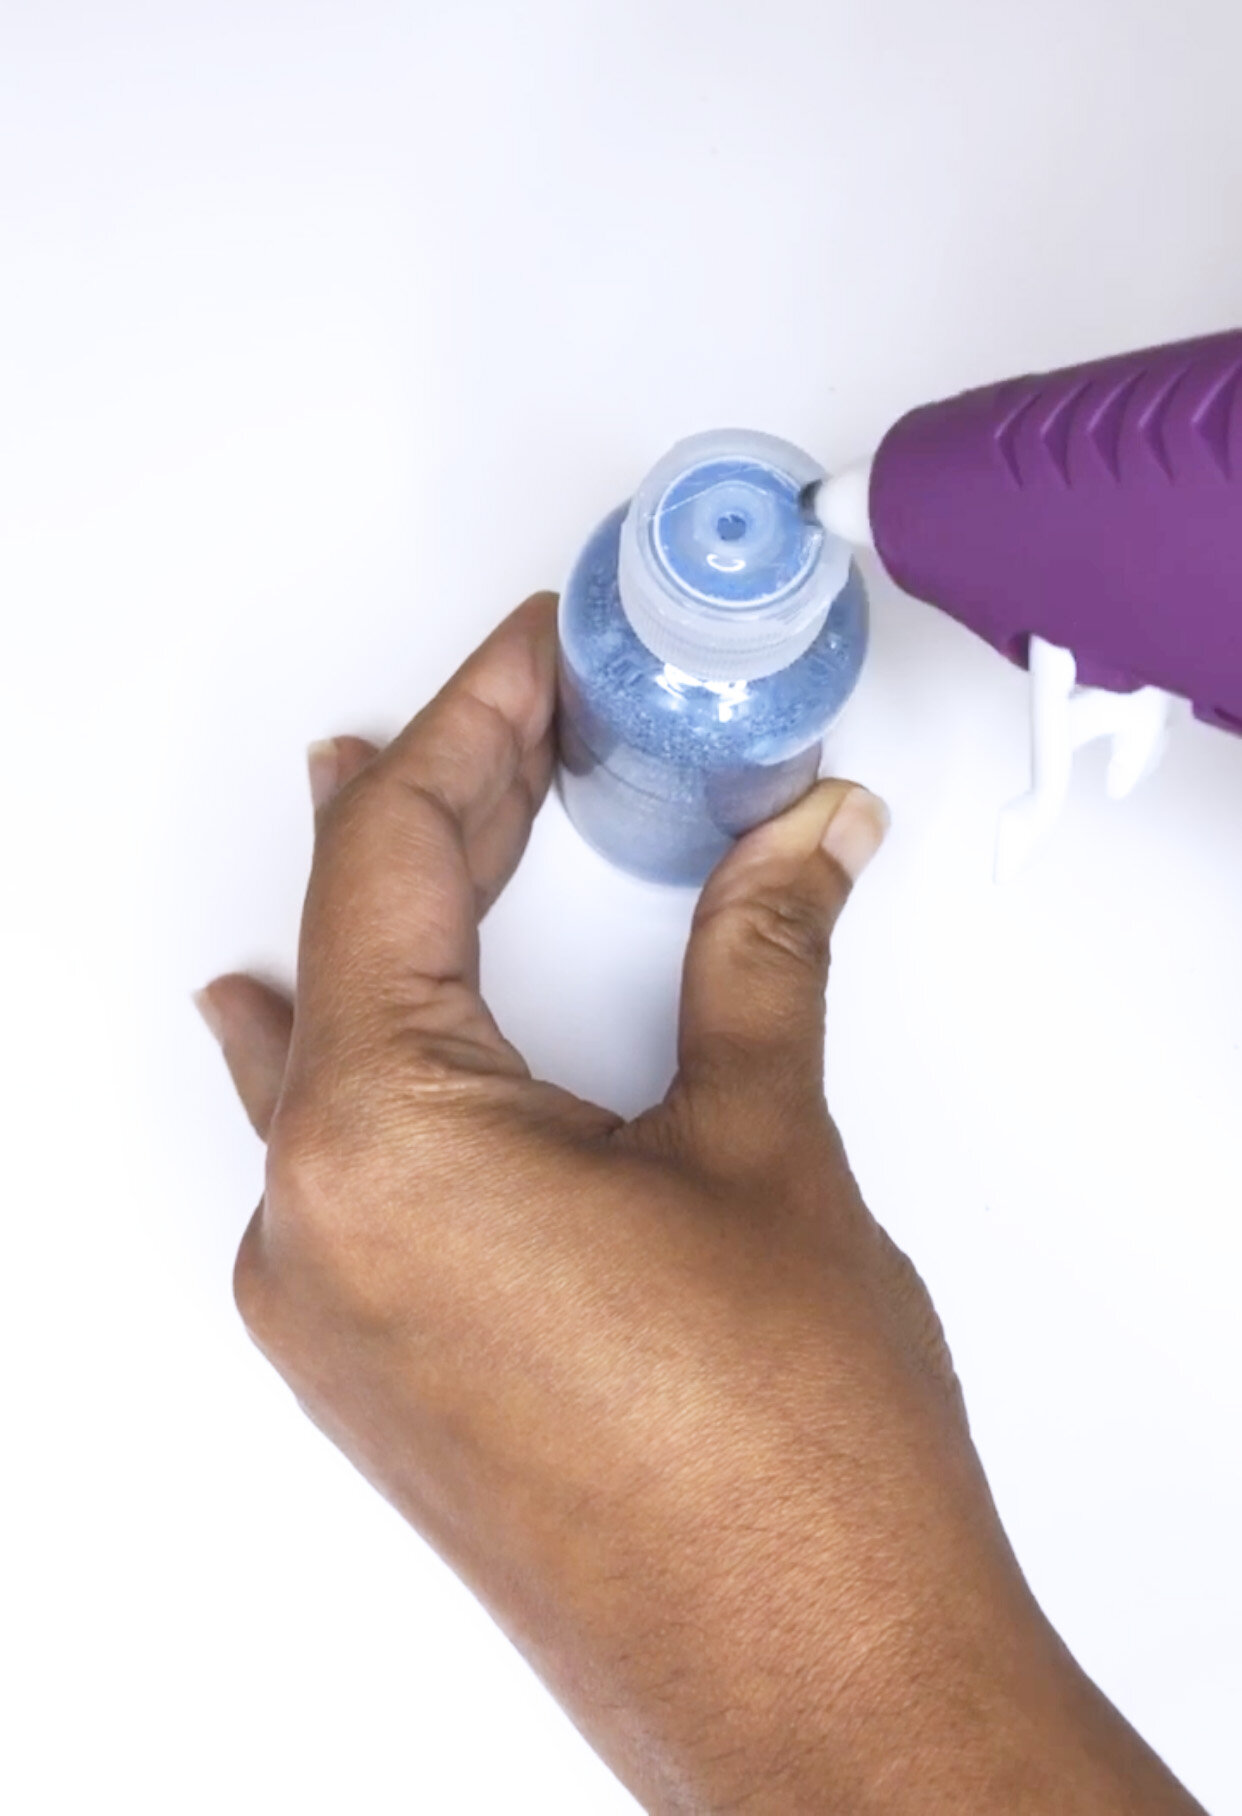
Find two, clear plastic Sanitizer bottles that are the same size and shape. The shorter the bottles are, the more stable your timer will be. Make sure to remove the labels and clean the bottles from inside and outside. Use soap and warm water to clean off any residue. Wipe the bottles clean with rubbing alcohol afterwards. We cut off the top layer of the lid to make things simpler for us. Now make a hole with a scissor or screw driver on both the caps of the bottles (the cap on our bottles had a hole already). Make sure you align them and mark the center before making a hole.
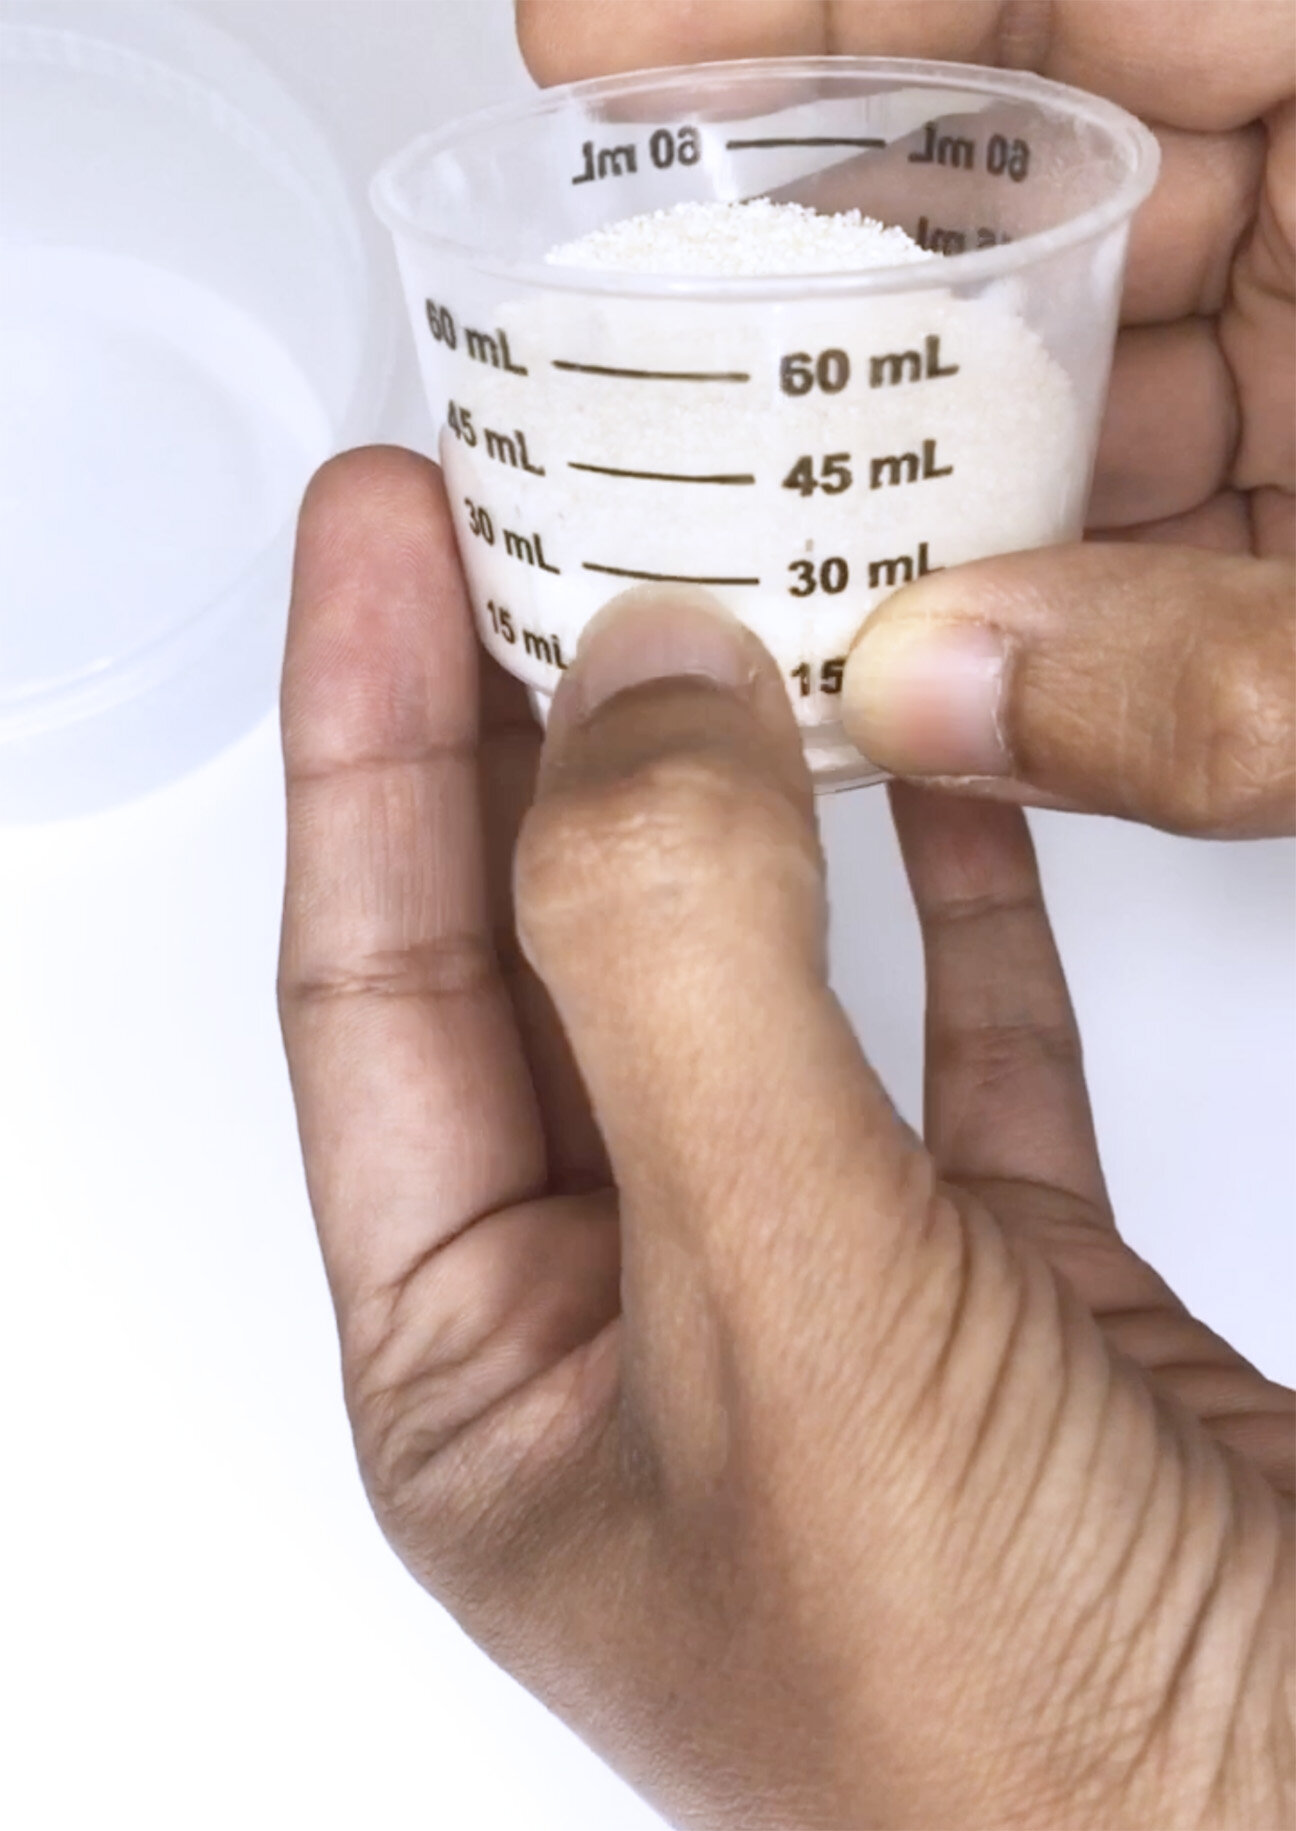
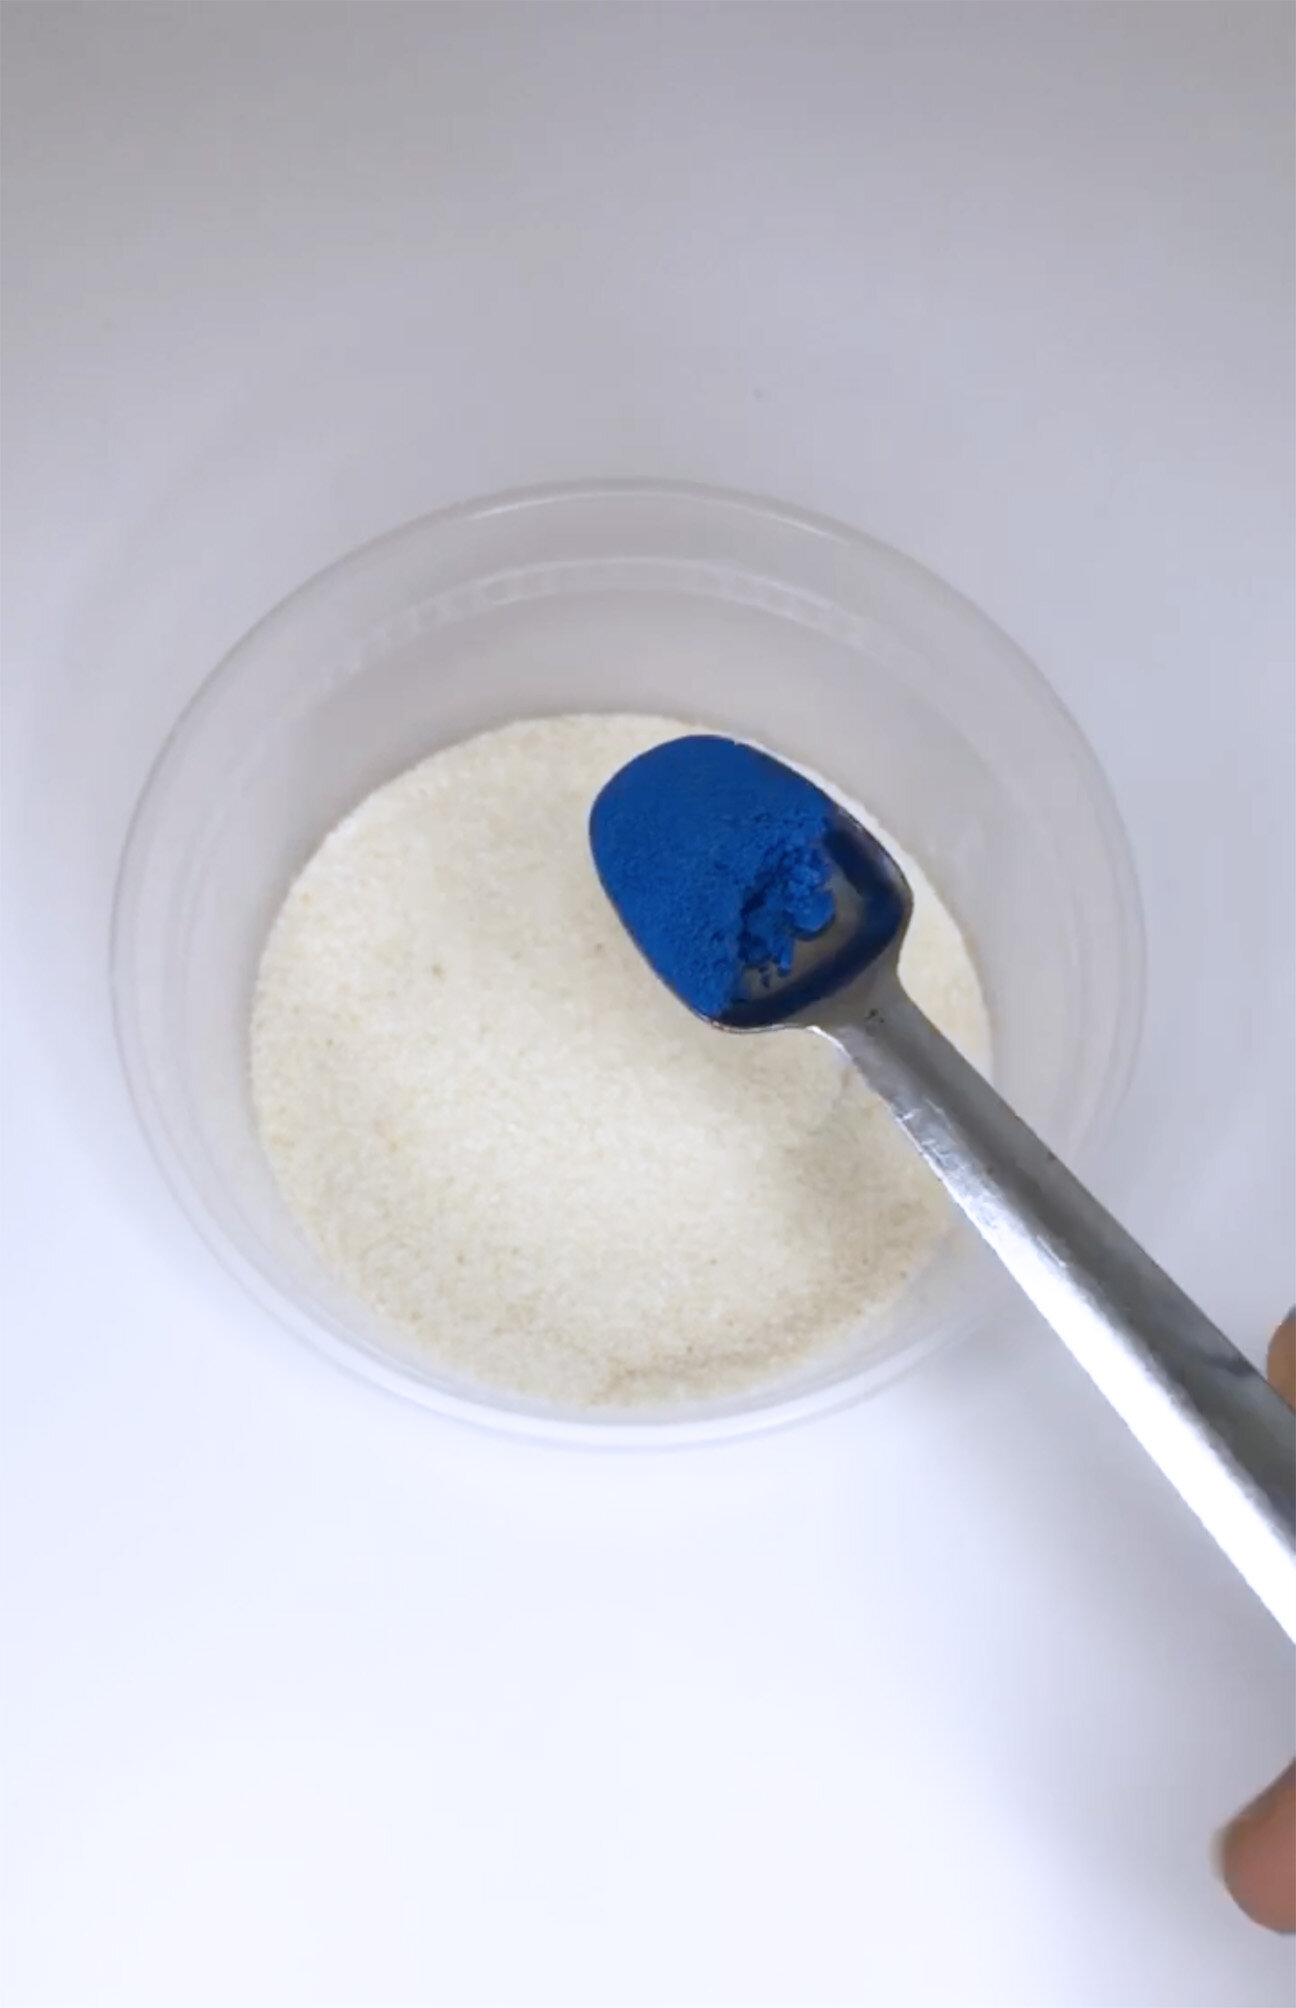
Draw a ring of glue around the top of the first cap. Be careful not to get any glue in the middle, or you won't be able to see the hole. Place the second cap on top of the glue. Make sure that the tops of both caps are touching. You should only see the underside/inside of each cap. Set this aside for drying. In the meanwhile, color the sand (in our case semolina flour since we were out of sand). We used powdered food color to mix in with the semolina flour (I will be switching this out when I get my hands on colored sand).
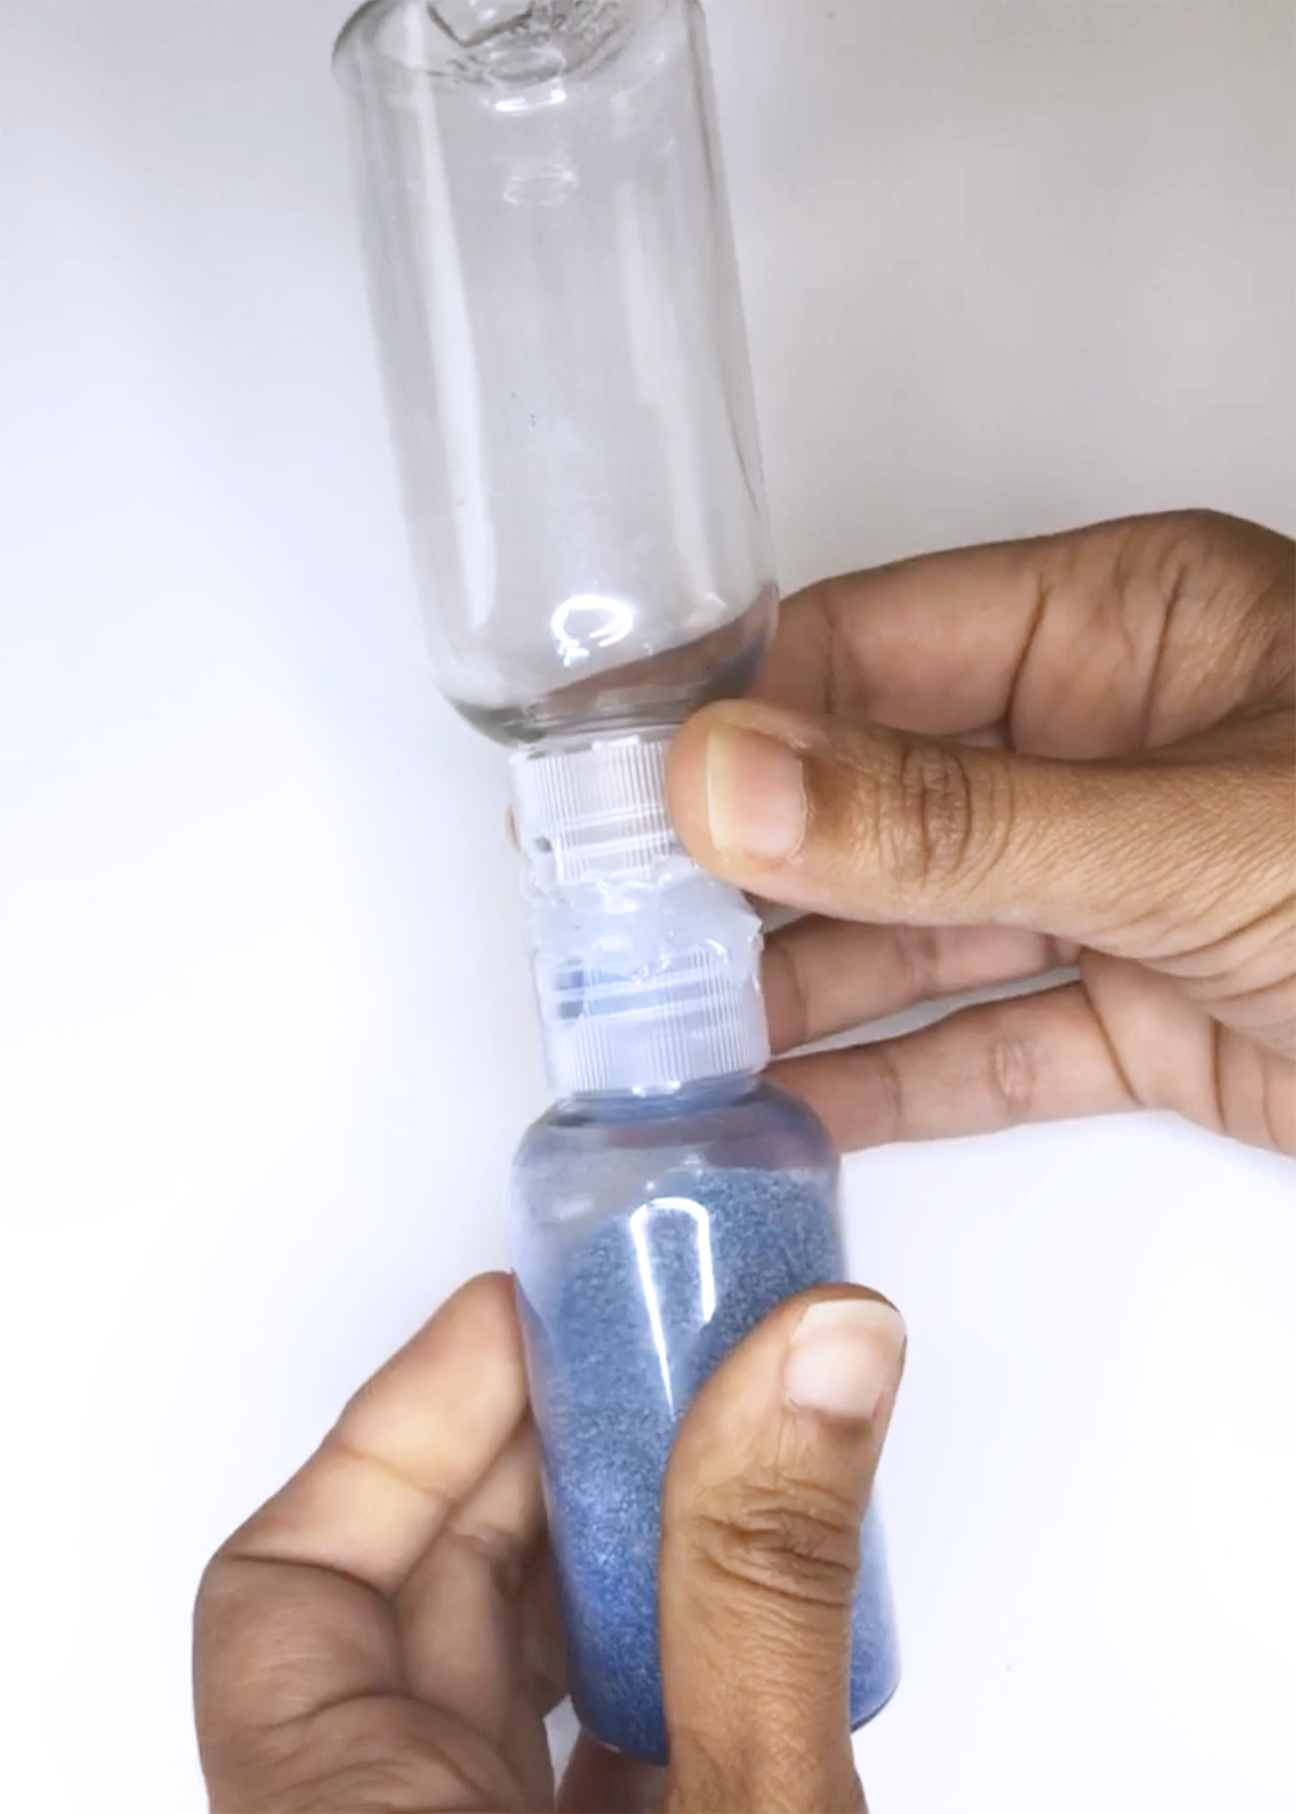
Fill one bottle with this colored sand. Once the caps are dry, attach the bottles back to each cap. If you want your sand timer to run for a specific amount of time, then time yourself filling the bottle using a stopwatch. We filled ours for a minute (1 minute to brush the exterior surface of your teeth and then flip the timer for another minute to brush the chewing and interior area of the teeth). To secure the bottles further we used tape around the caps. Make sure to not tape the bottles as you can twist the bottles out and switch the sand thats currently inside for fresh sand or a different colored sand in the future (My son used it for a day and already wants to switch it for a pink colored sand!).
Activity 3: Kids will Dig it!
Best for (2.5 years and up) pretend play, fine motor skills, sensory play, imagination and creativity
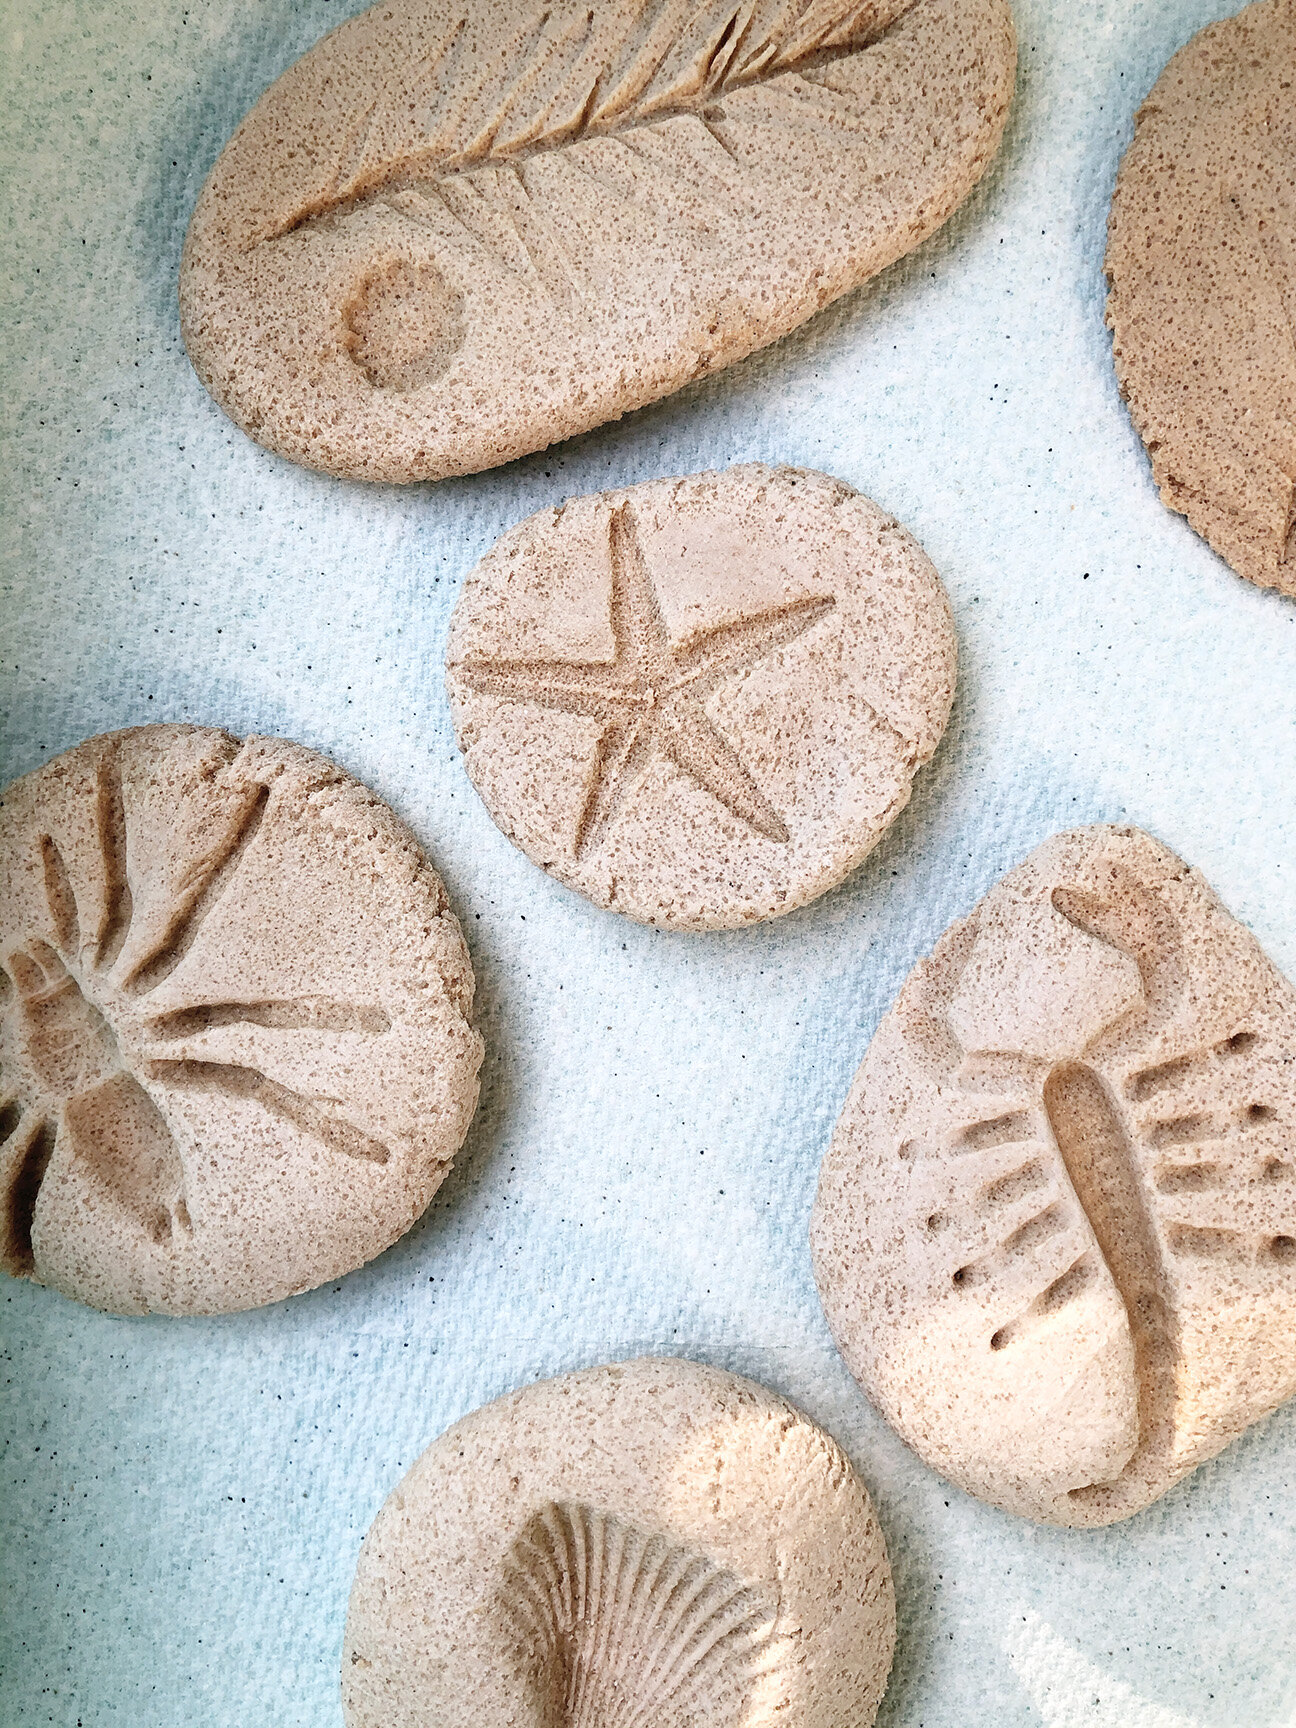
Material Needed: Sand (see the link here to buying safe sand and my notes below to sand alternatives), Salt, Baking Tray, Dinosaurs or other toys (we used Plastic Spider and Scorpio, Leaves, Shells, Star Fish), Deep Tray or Box, Paint Brush, Toothbrush, Magnifying Glass (ours was a pretend one).
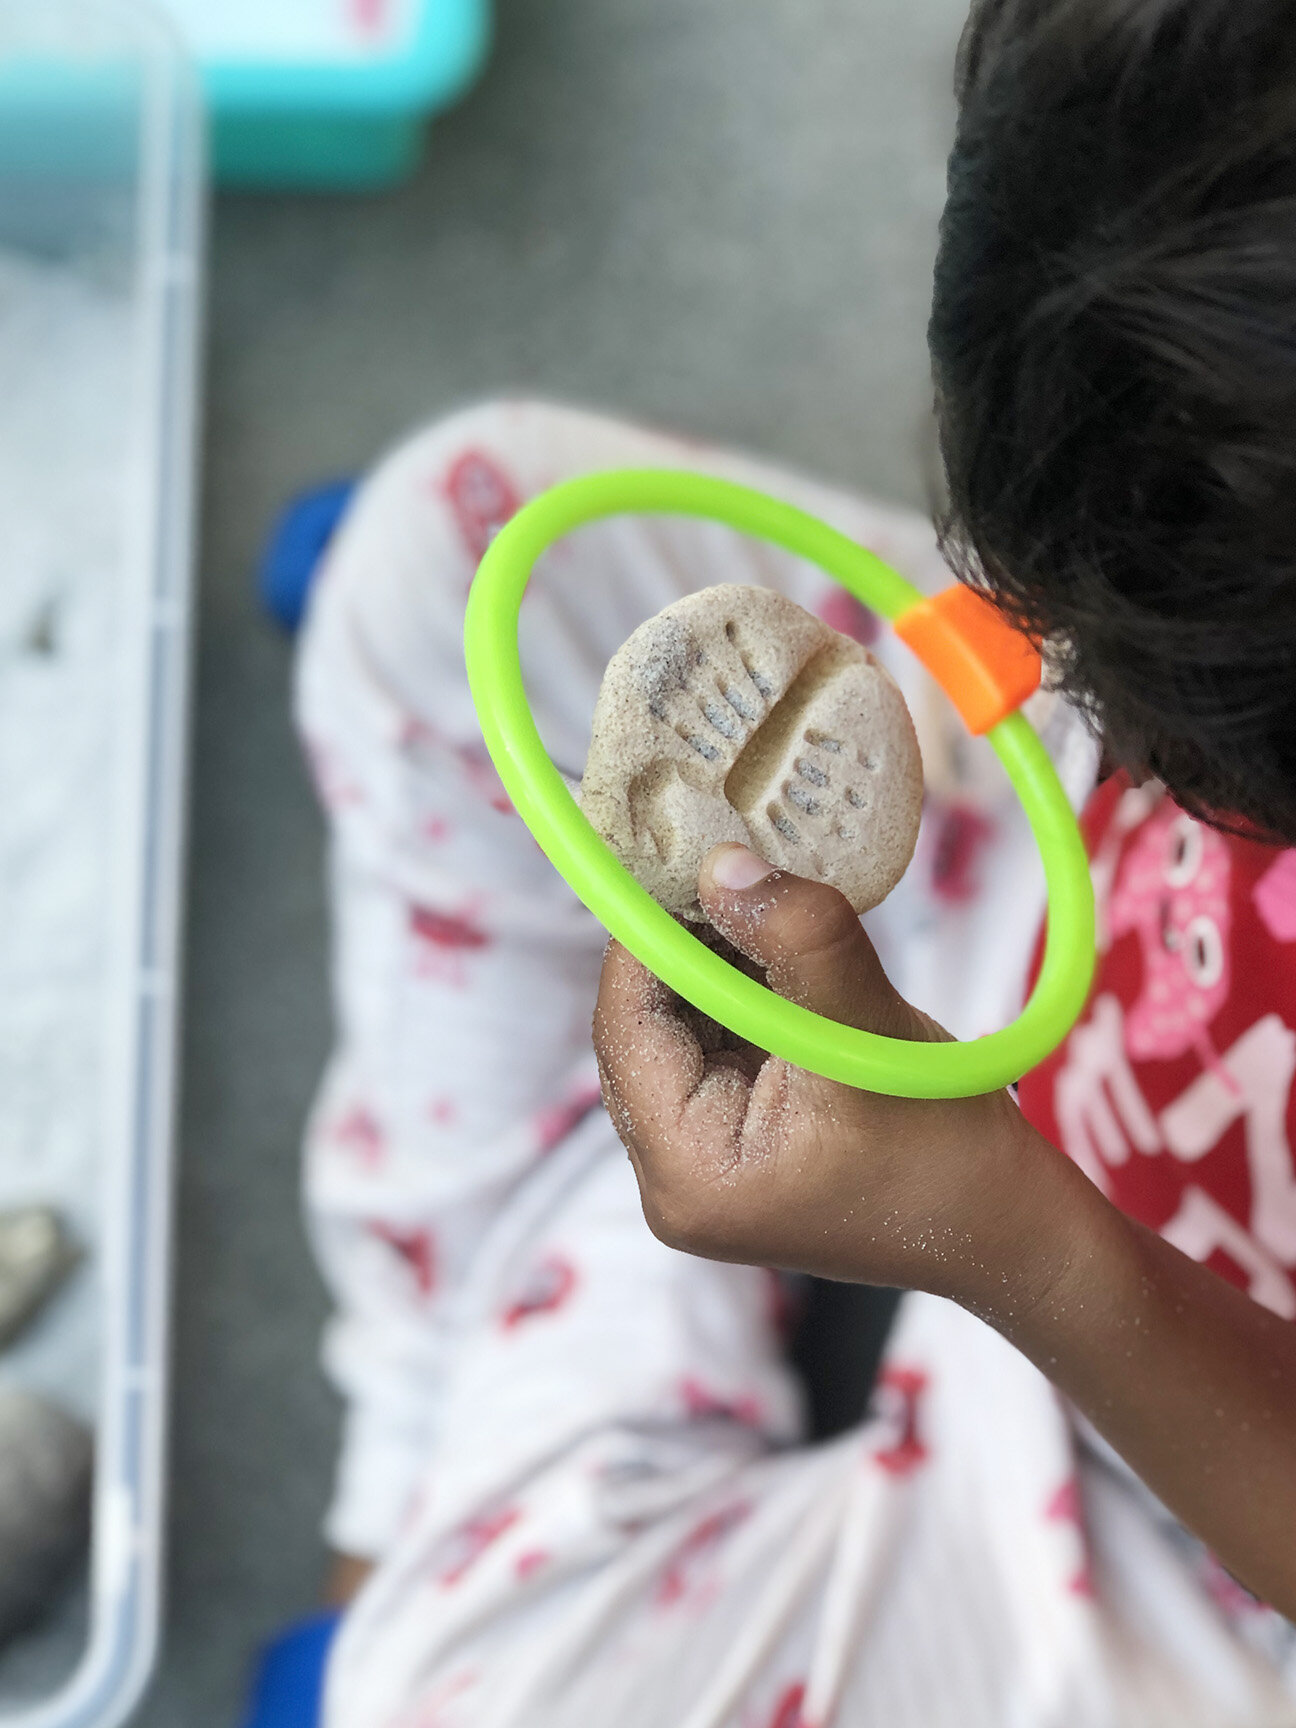
Calling all Archaeologists! This is a DIY fossil dig activity. I would have honestly loved to have a Dinosaur Dig, but my son is not into Dinosaurs yet. But why should that change anything! We can dig up fossils of fishes, leaves, insects or anything your kid wants (yes even Legos!). Lets encourage some imagination and creativity here!
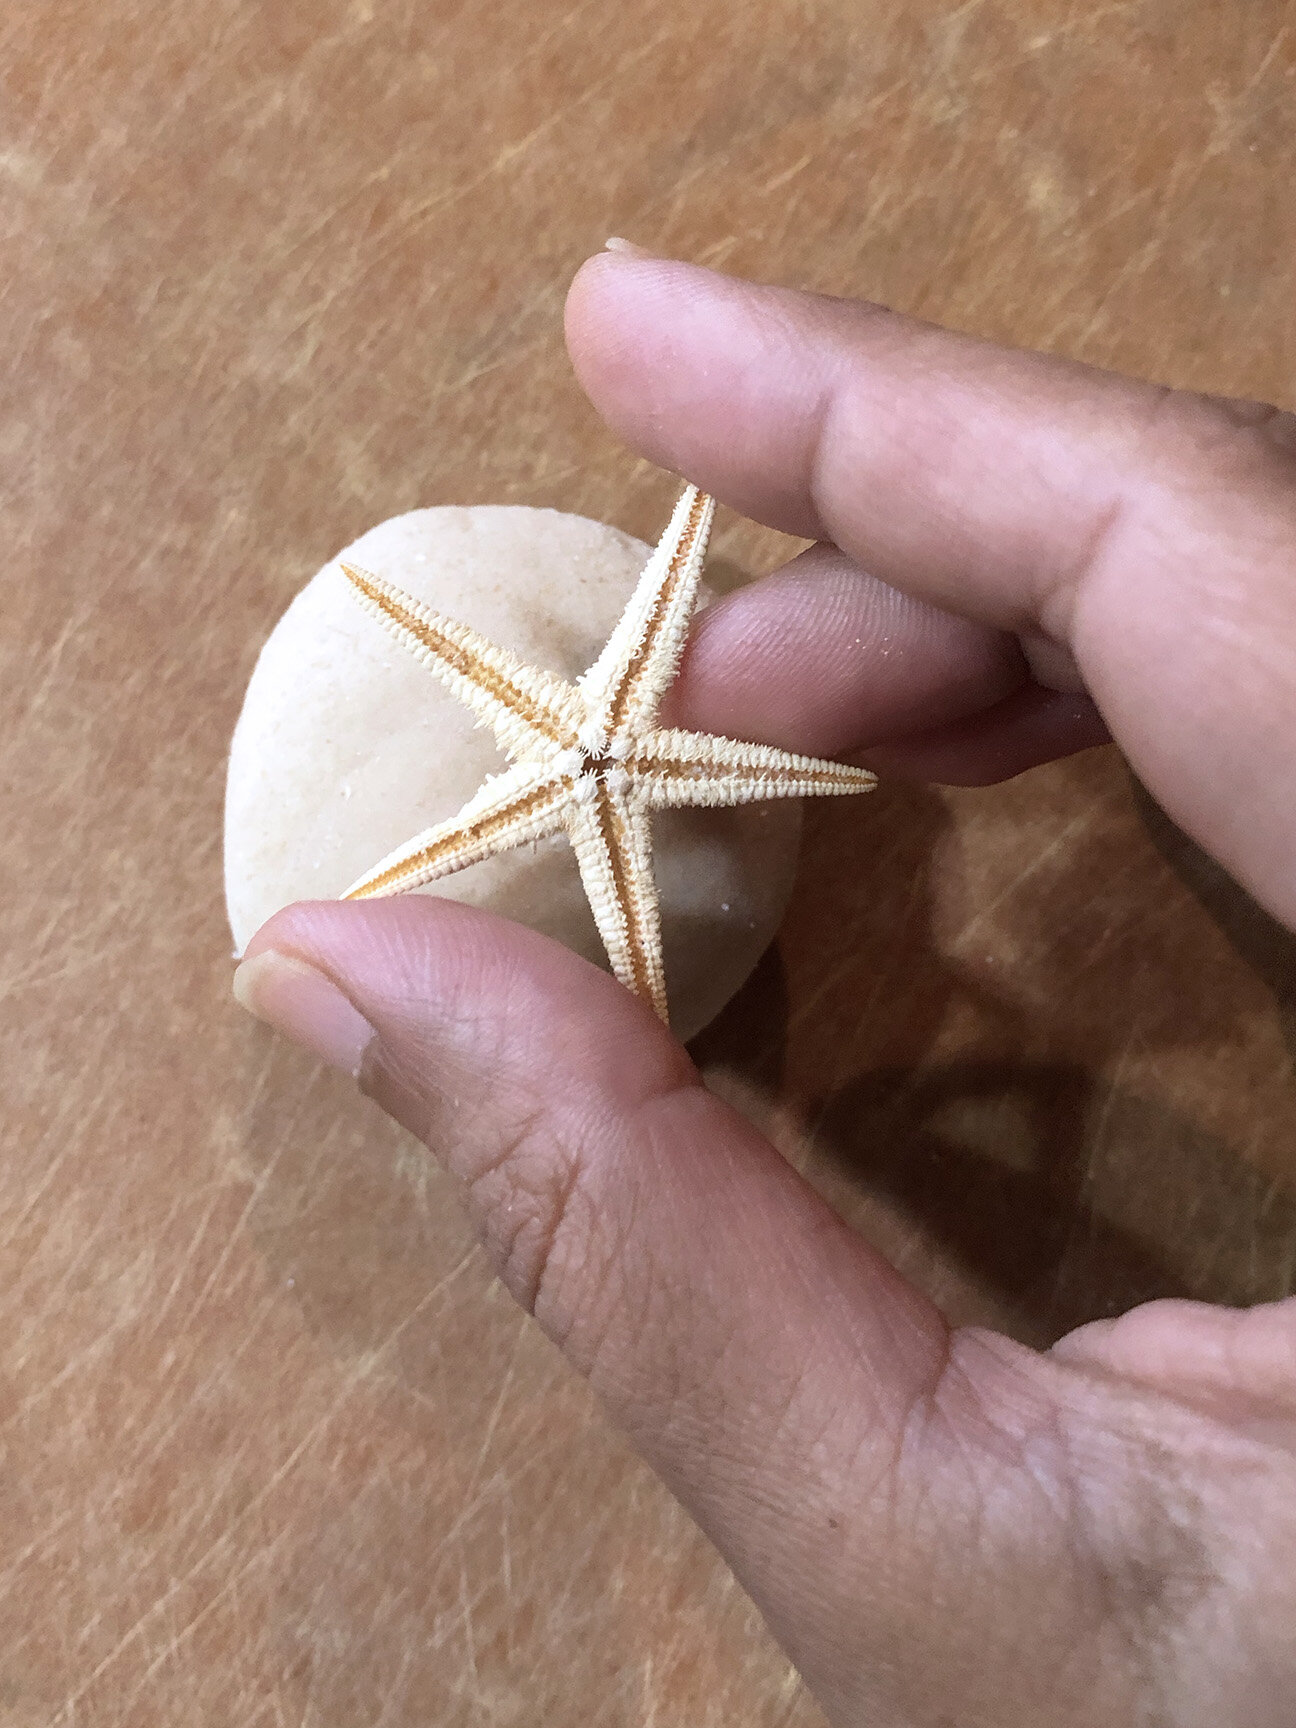
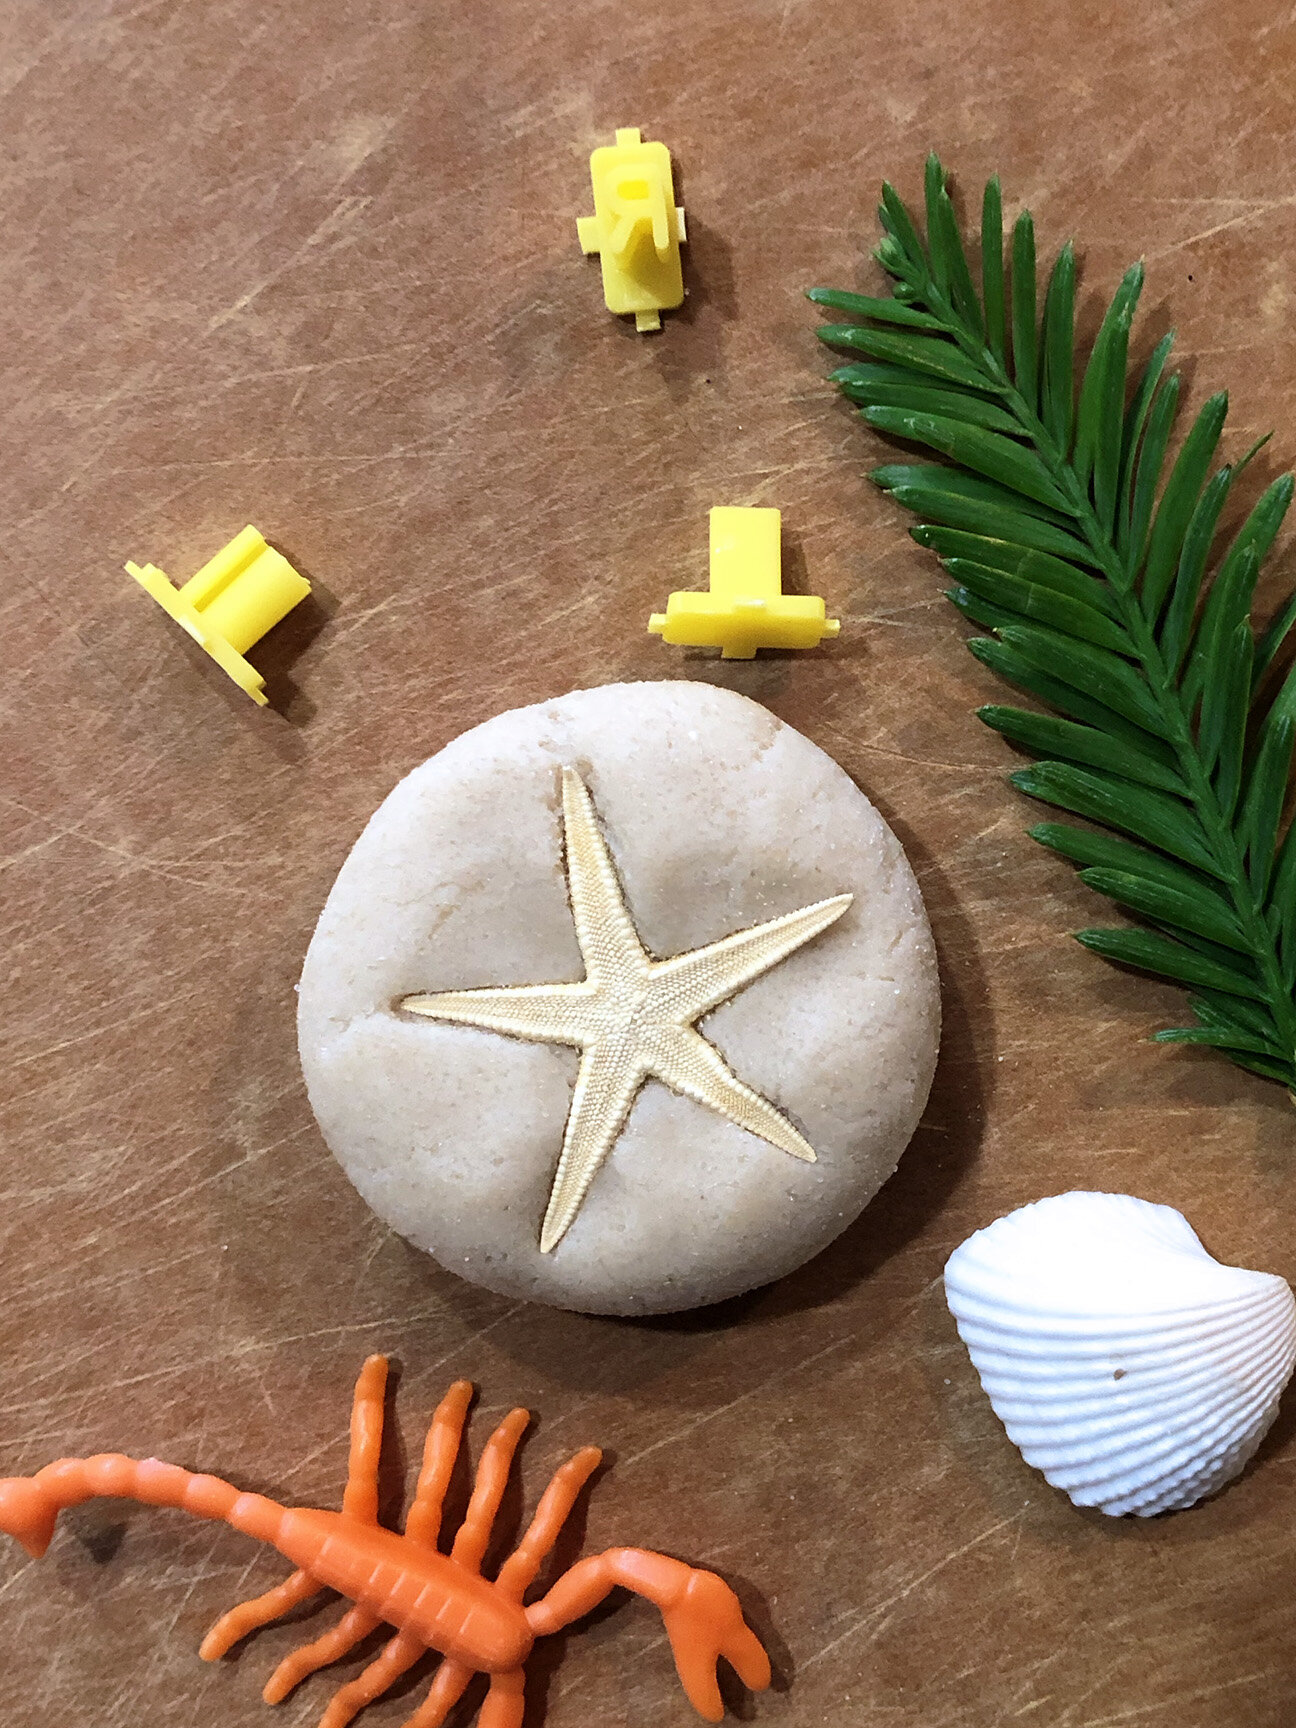
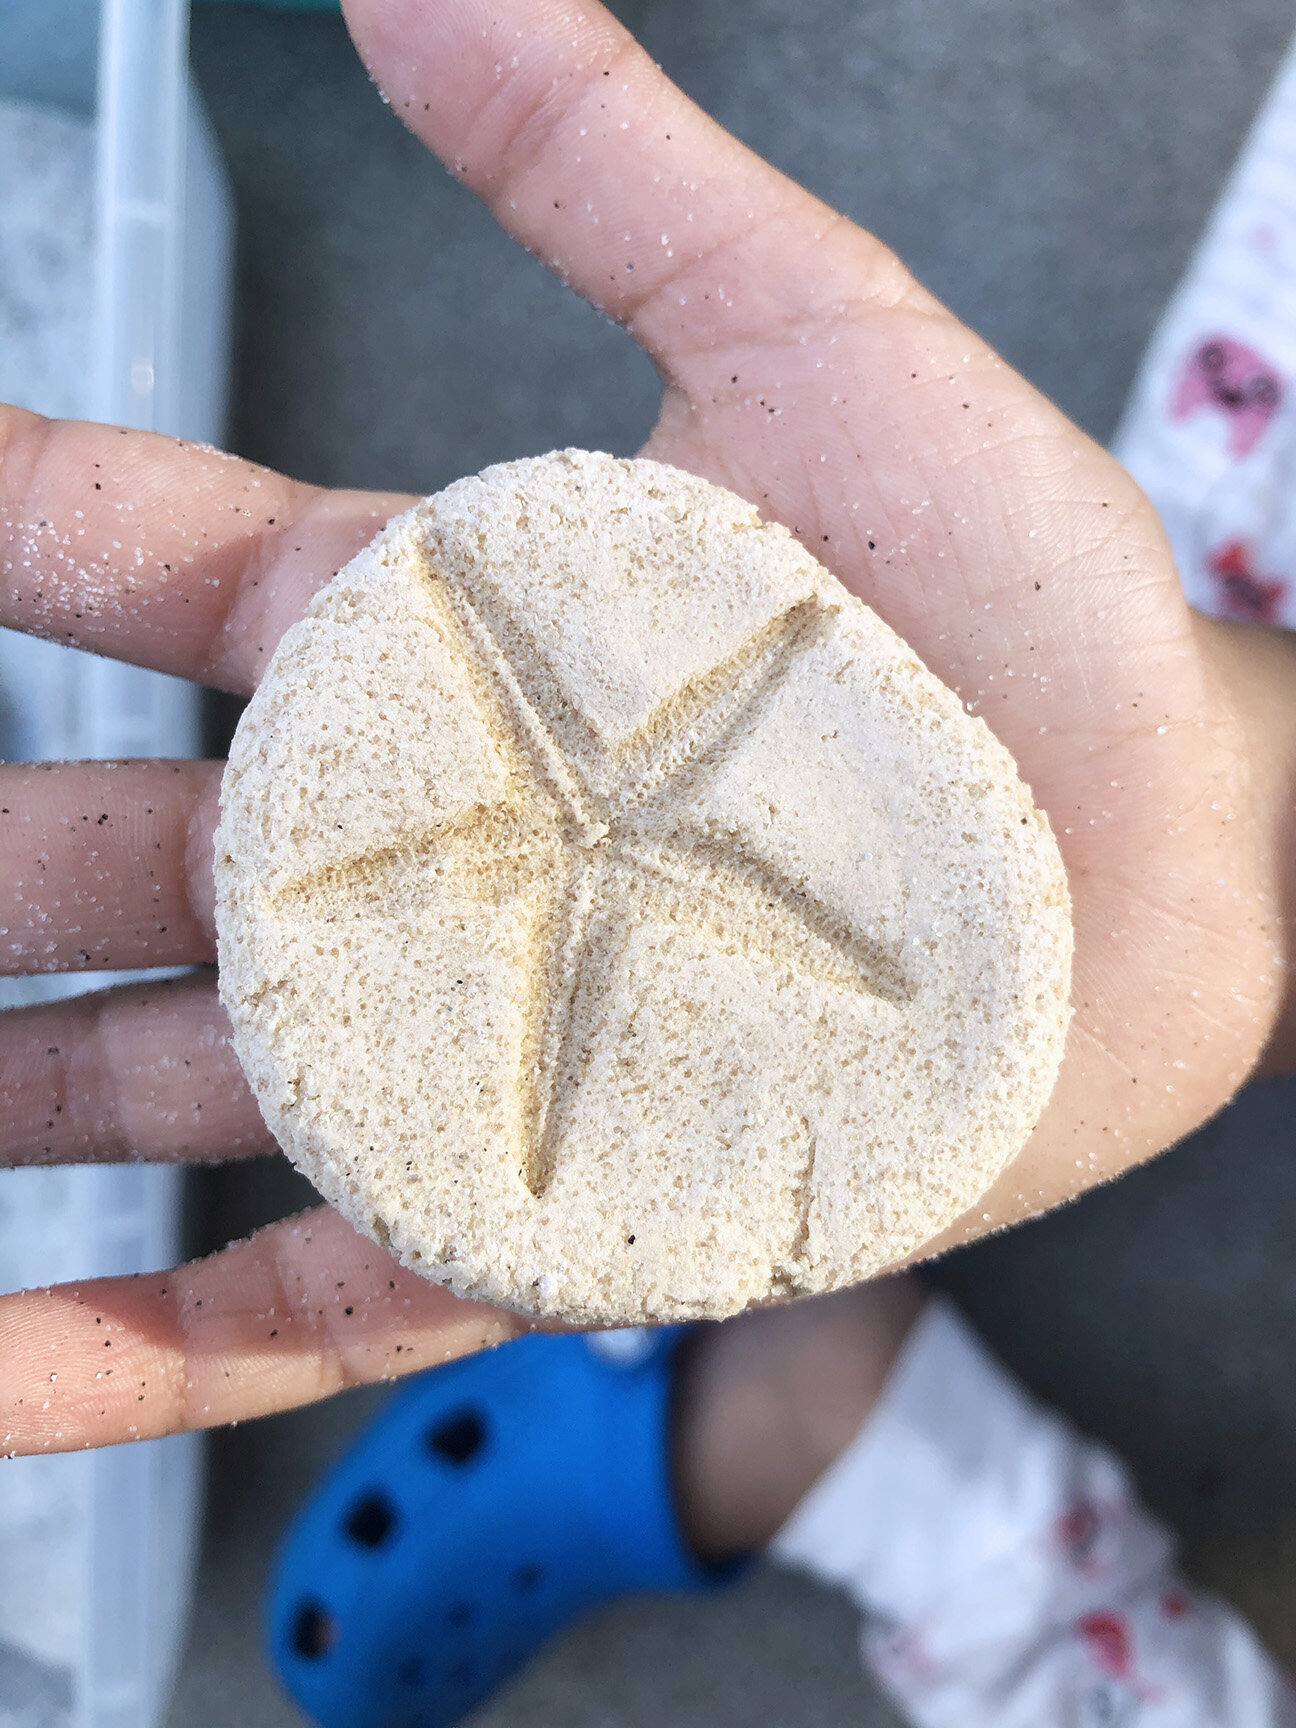
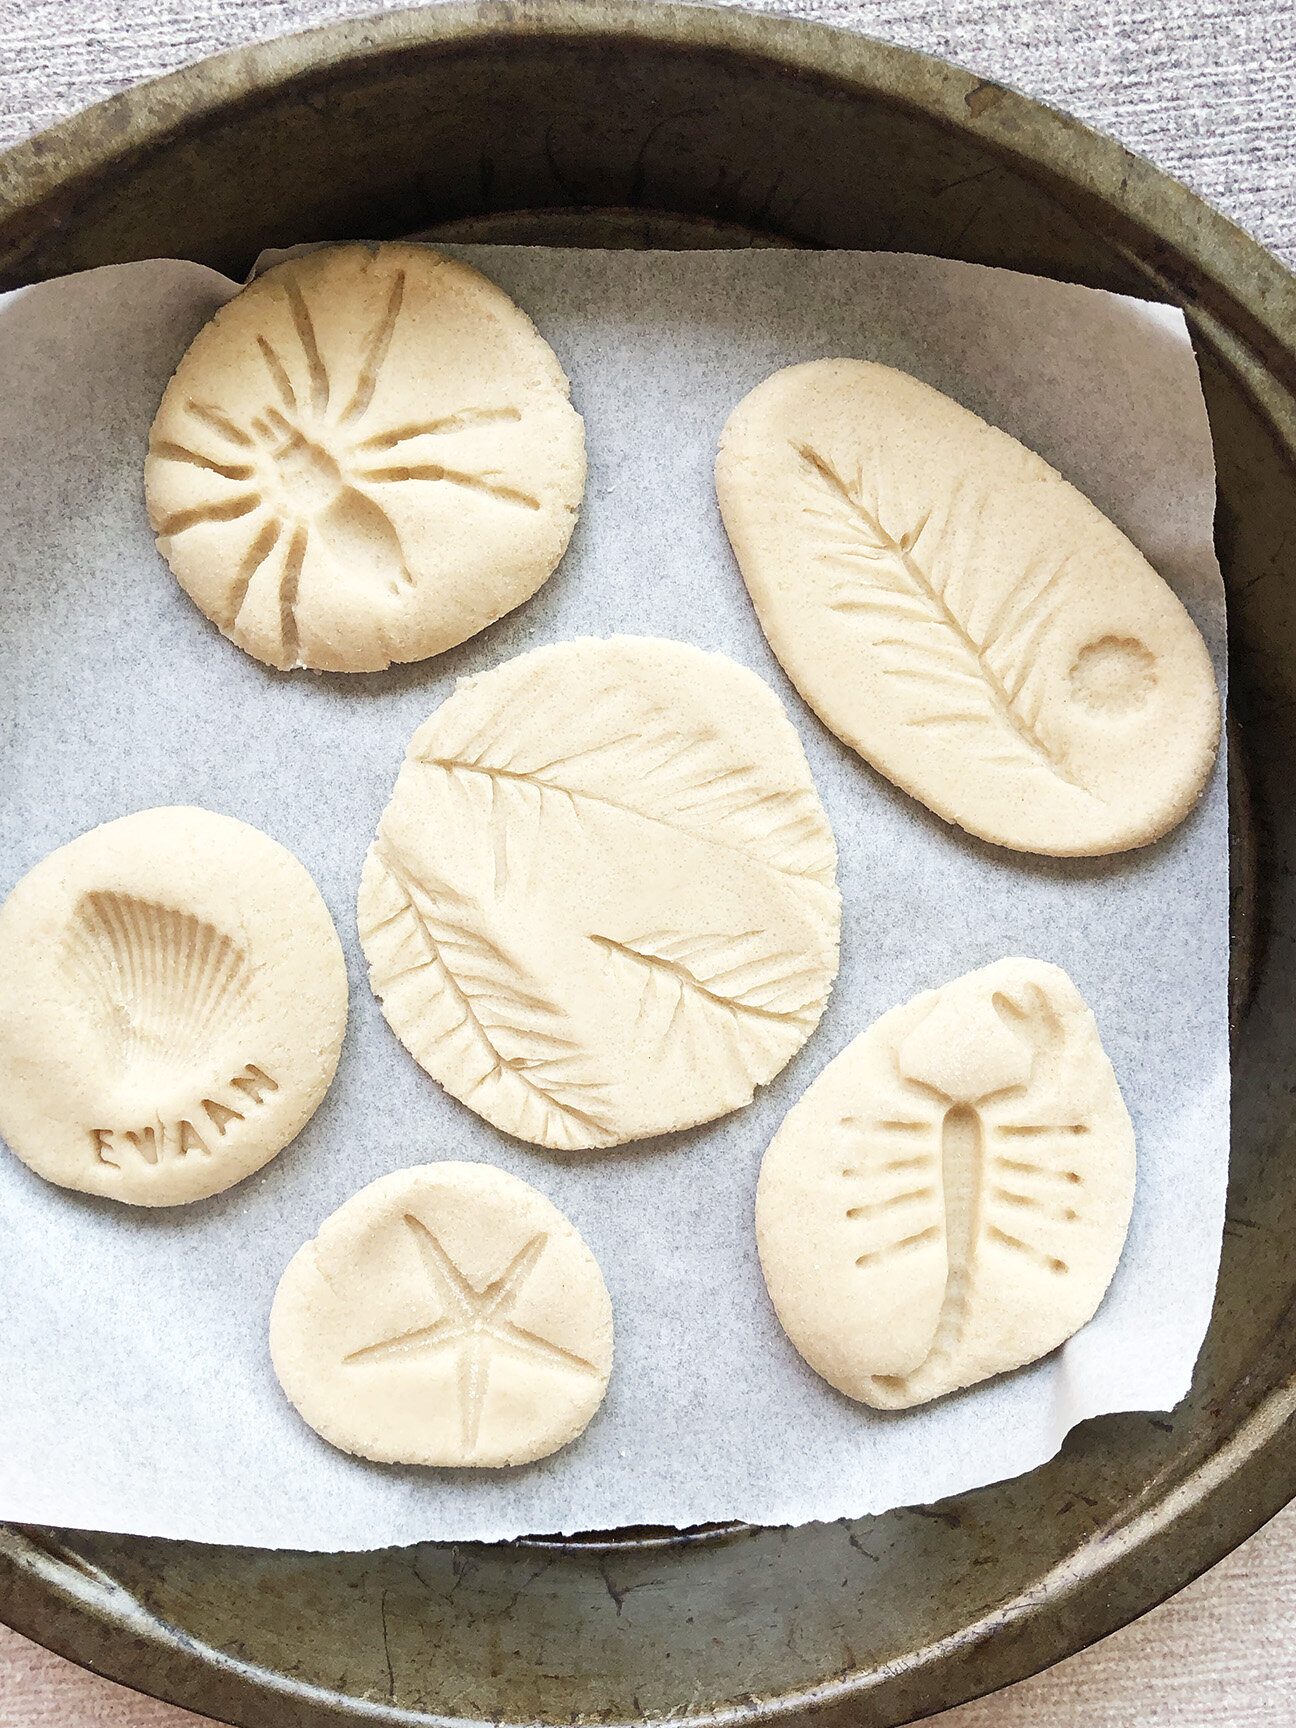
Check the above link on where to buy safe sand products or simply use alternatives like Semolina Flour, Salt, Wheat Flour, anything thats safe and free flowing. Now let’s get to the part of making the fossils first. You can make a Salt Dough fossil or an Air Dry Clay fossil (we tried Salt Dough). Mix 1 cup wheat flour, 1/2 cup salt and a little less than 1/2 cup warm water in a bowl. Once you have a dough, make small round balls and press in the objects that you would like to turn into fossils. Once you have all the impressions on the dough, place these on a baking tray (best to use baking sheet too). Put the tray in the oven for 1 hour on 350°F. Once baked these should be hard as a rock.
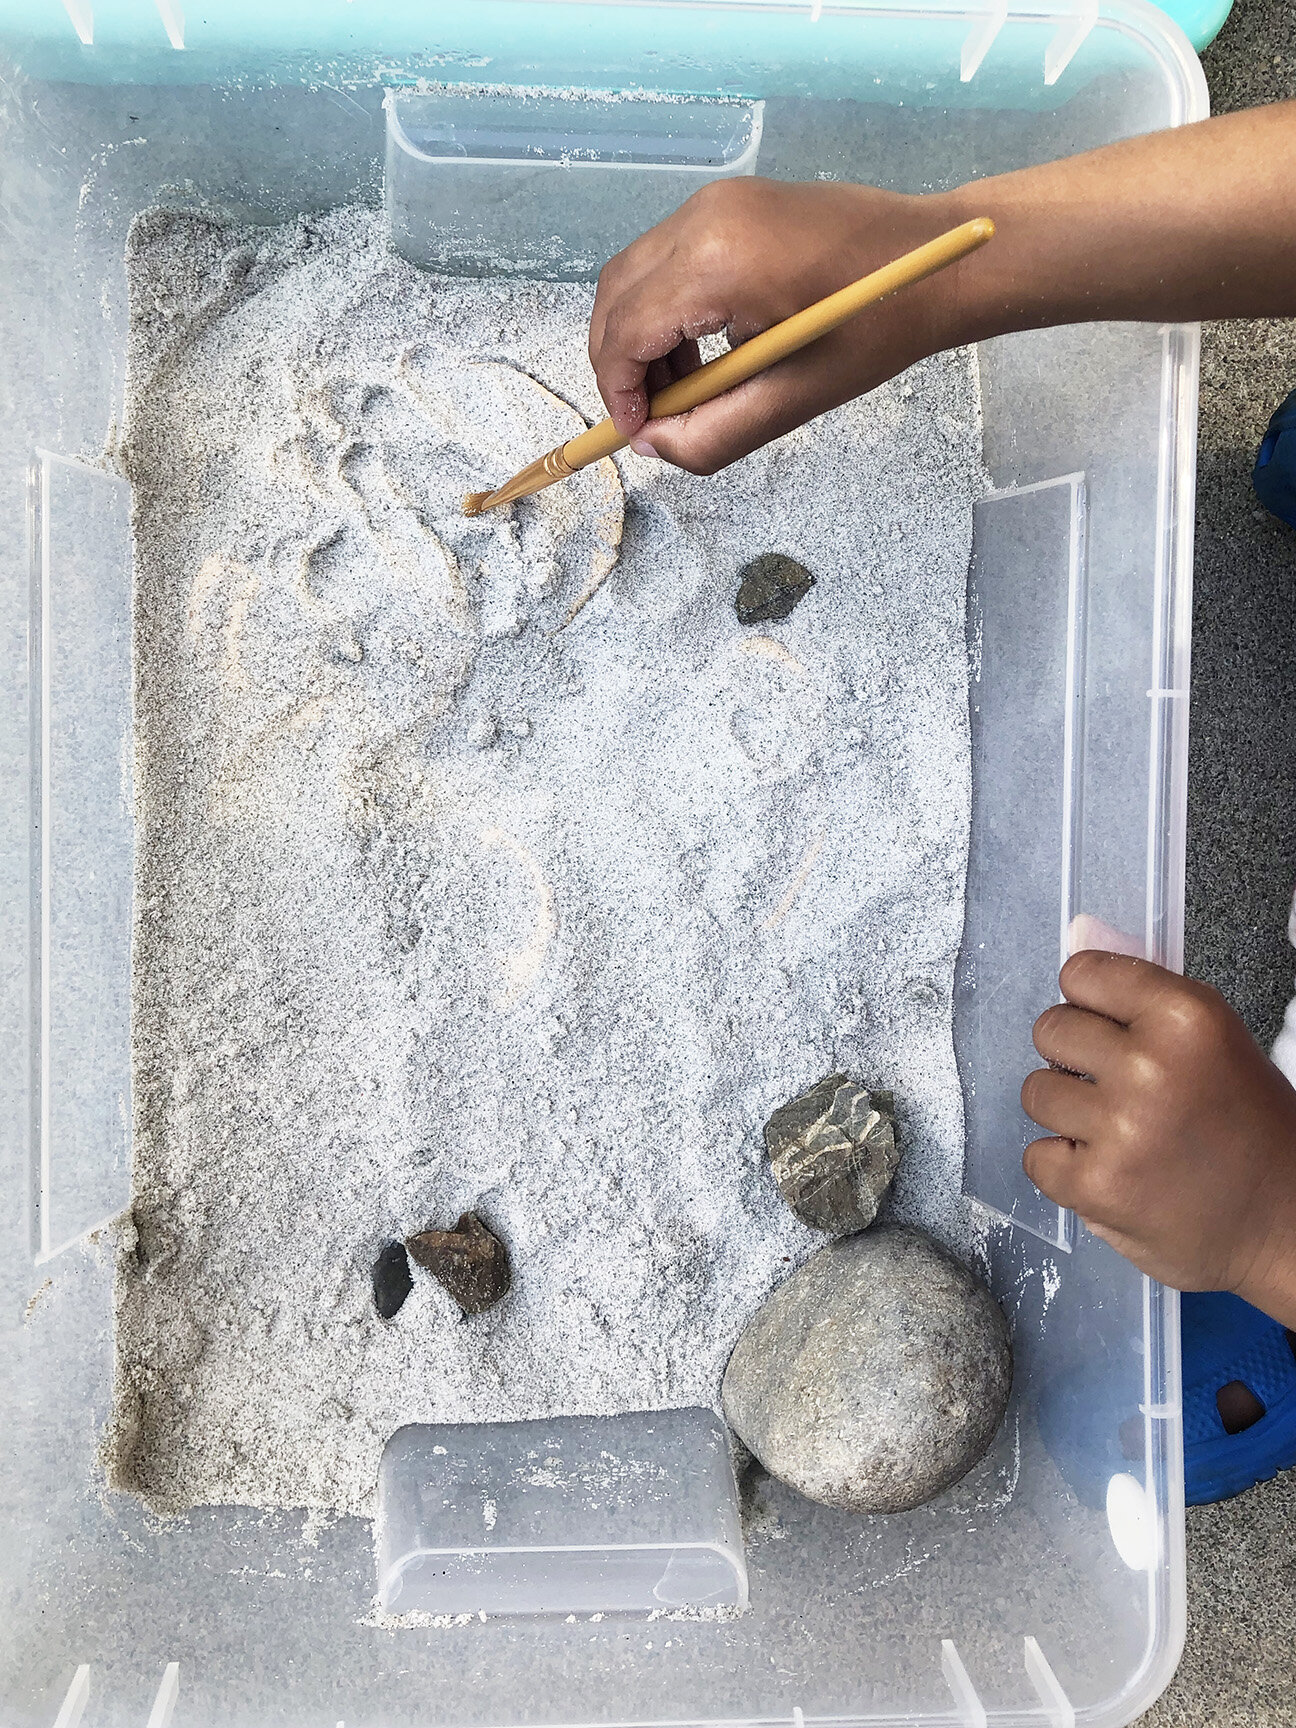
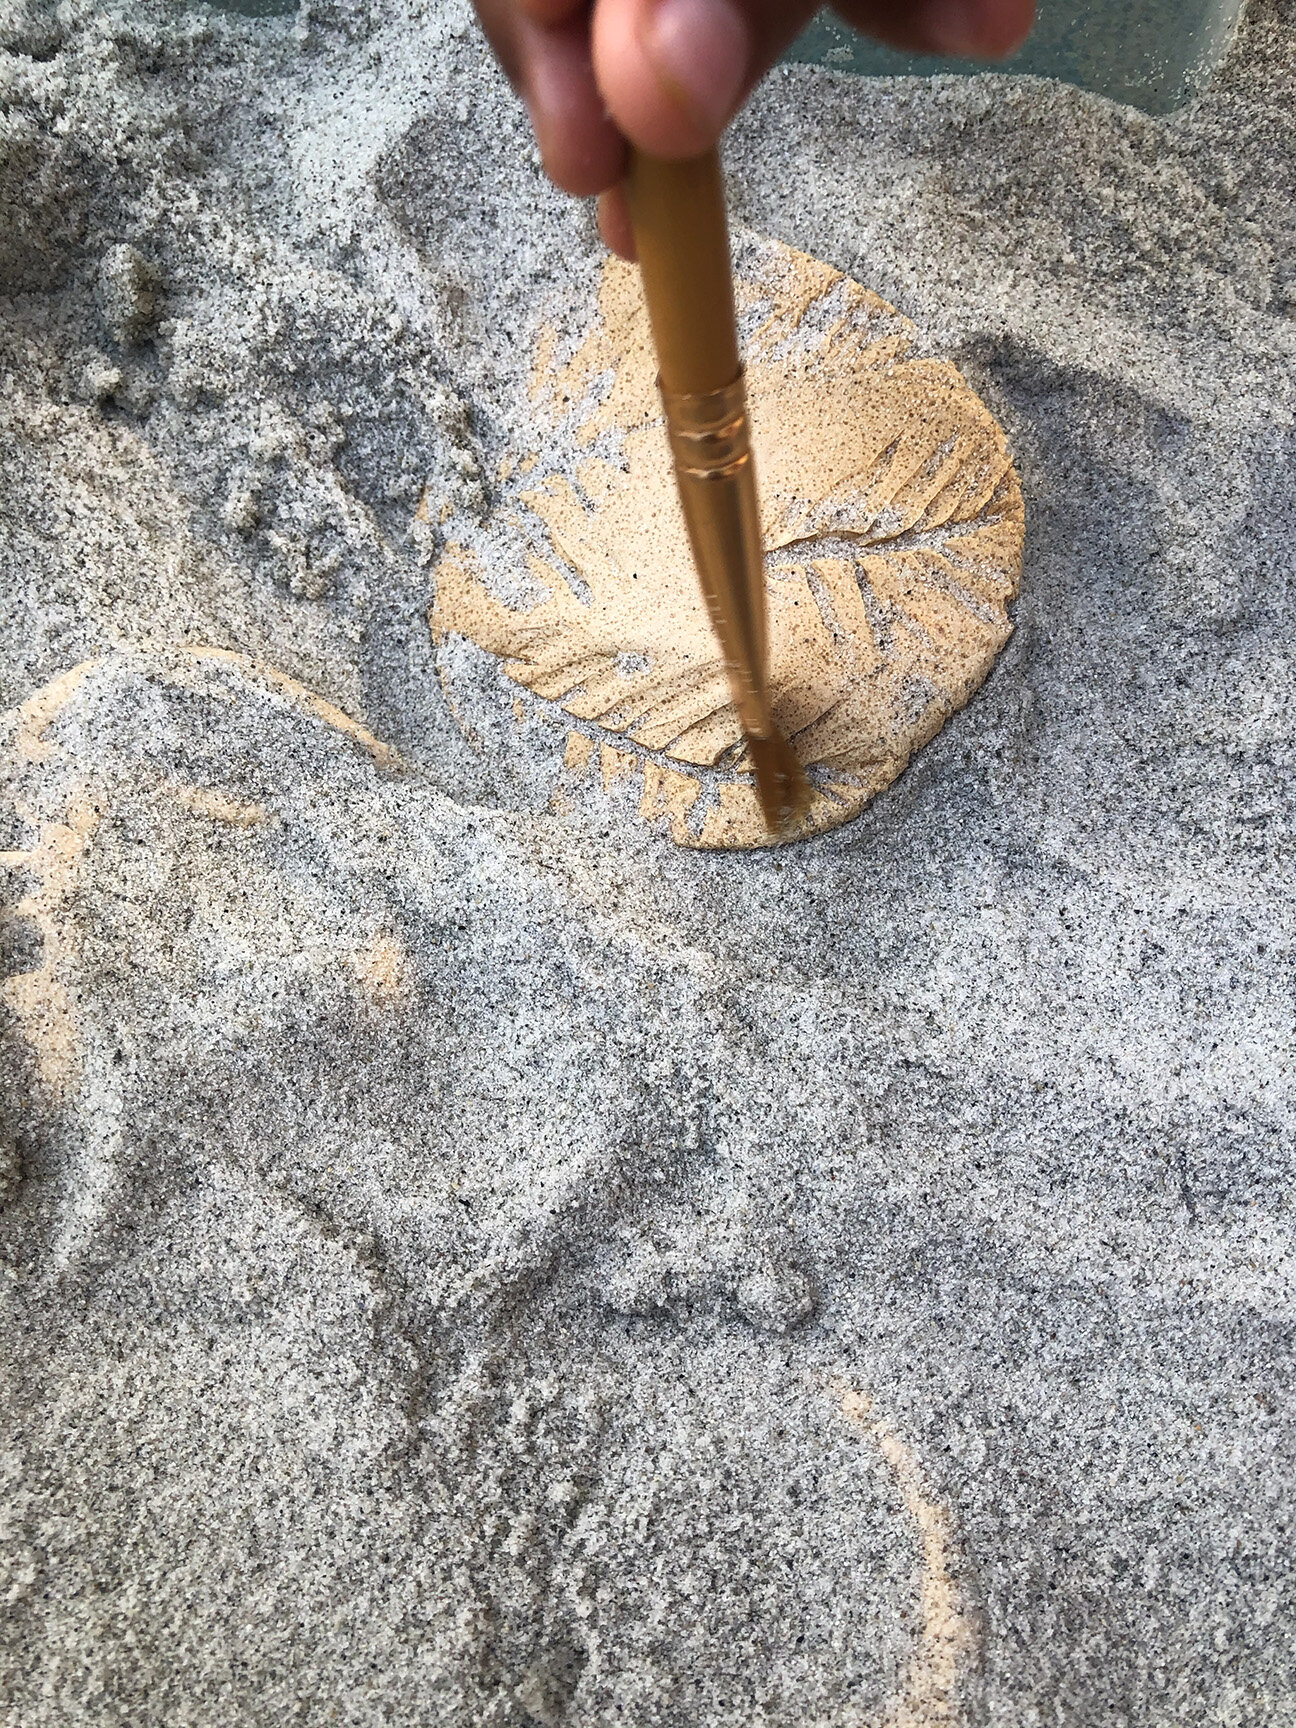
Now set up the Sand Box/Tray for the dig. Bury the fossils in the sand. If desired, pack the sand tightly around the fossils. Invite your child to carefully excavate the fossils with a toothbrush or paintbrush. We even used a pretend magnifying glass to see the fossils in detail. After we excavated the fossils from the sand we carefully cleaned them with a toothbrush and identified the objects.

Speak to your kids about fossils and how they are formed. Older kids can even document the fossils after excavation by drawing them. This is a pretend play activity and imagination is highly encouraged.