We have been doing a lot of outdoor Water activities like every Summer. Water Table is always our favorite for easy water play. But this week we are going to explore some simple science activities with water (but with a fun twist).
Activity 1: Sink Or Float
Best For (2.5 years and up) fine motor skills, simple science, language development, scientific thinking
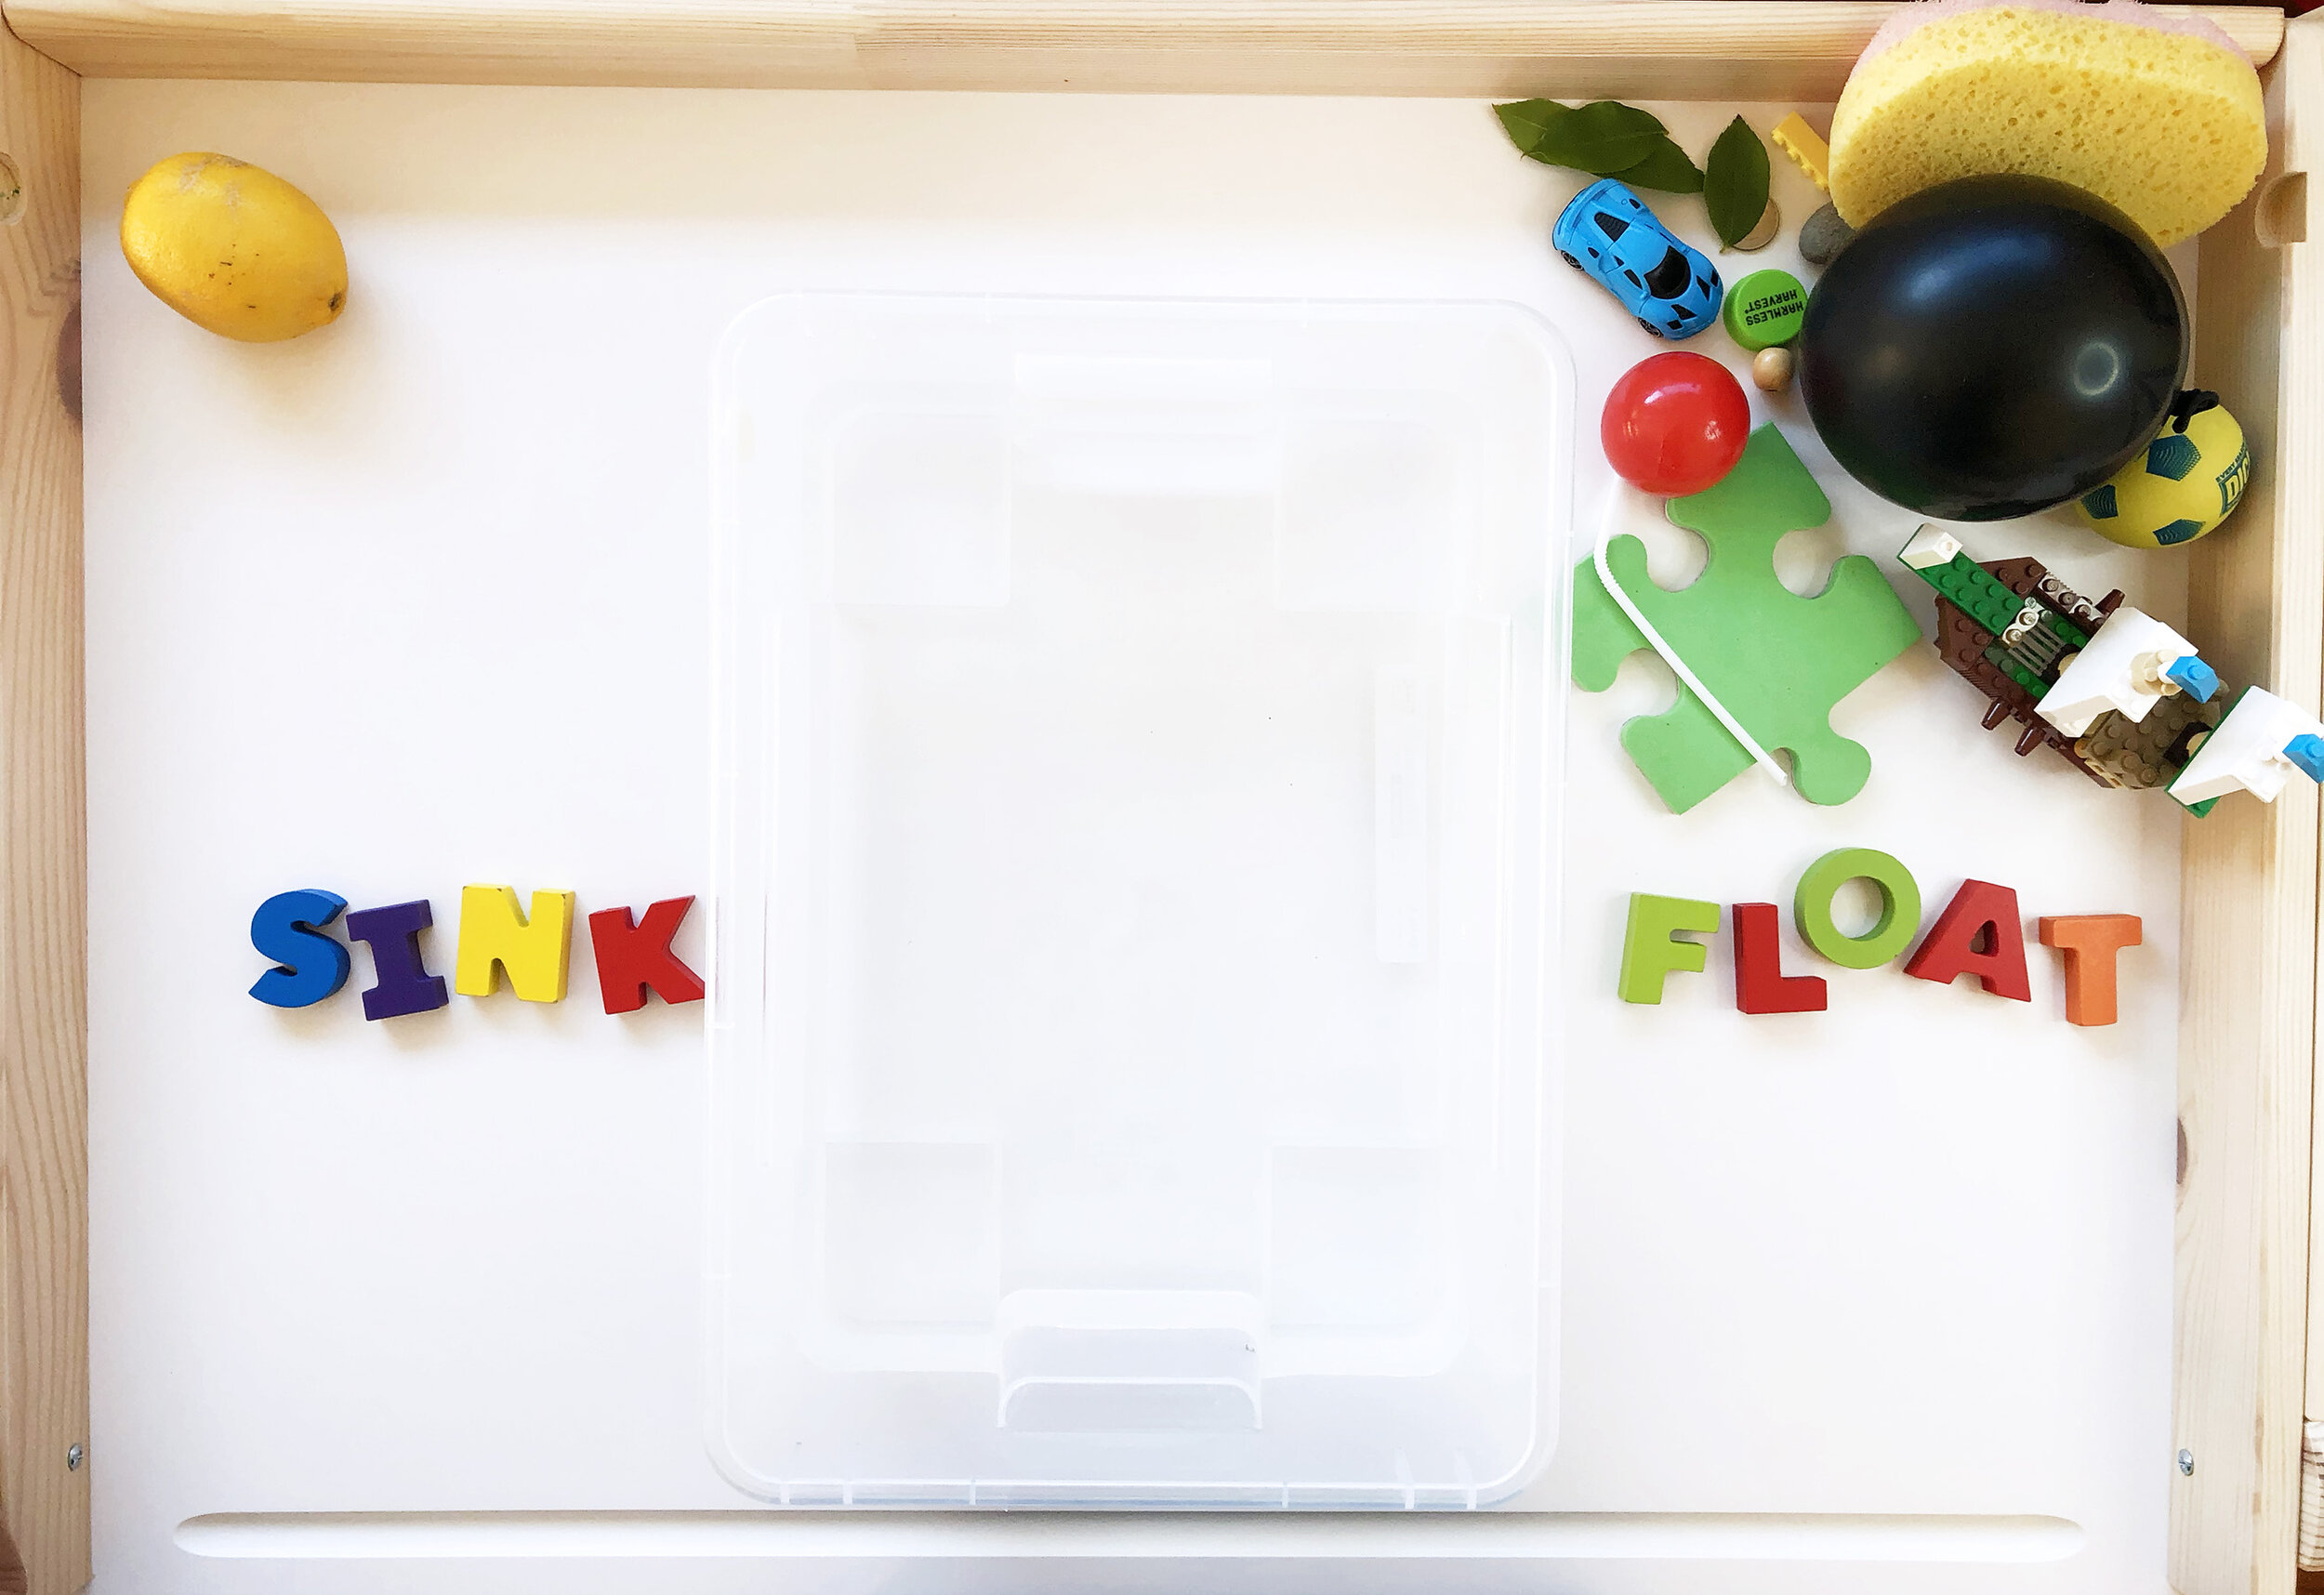
Material Needed: Large container filled with water, Everyday Objects, Sink/Float Label, Foam Sheet and Building Toys/Material.
Floating and sinking is a fun science concept for children to explore. Setting up a Floating and Sinking Learning Tray will invite them to play, experiment and explore how and why different objects float and sink when placed into water. Kids love the instant gratification of testing an item to “sink or float” and I love how this activity stays with them: forever they will question whether an object sinks or floats – harking back to this activity. It’s an oldie but a goodie for a reason.
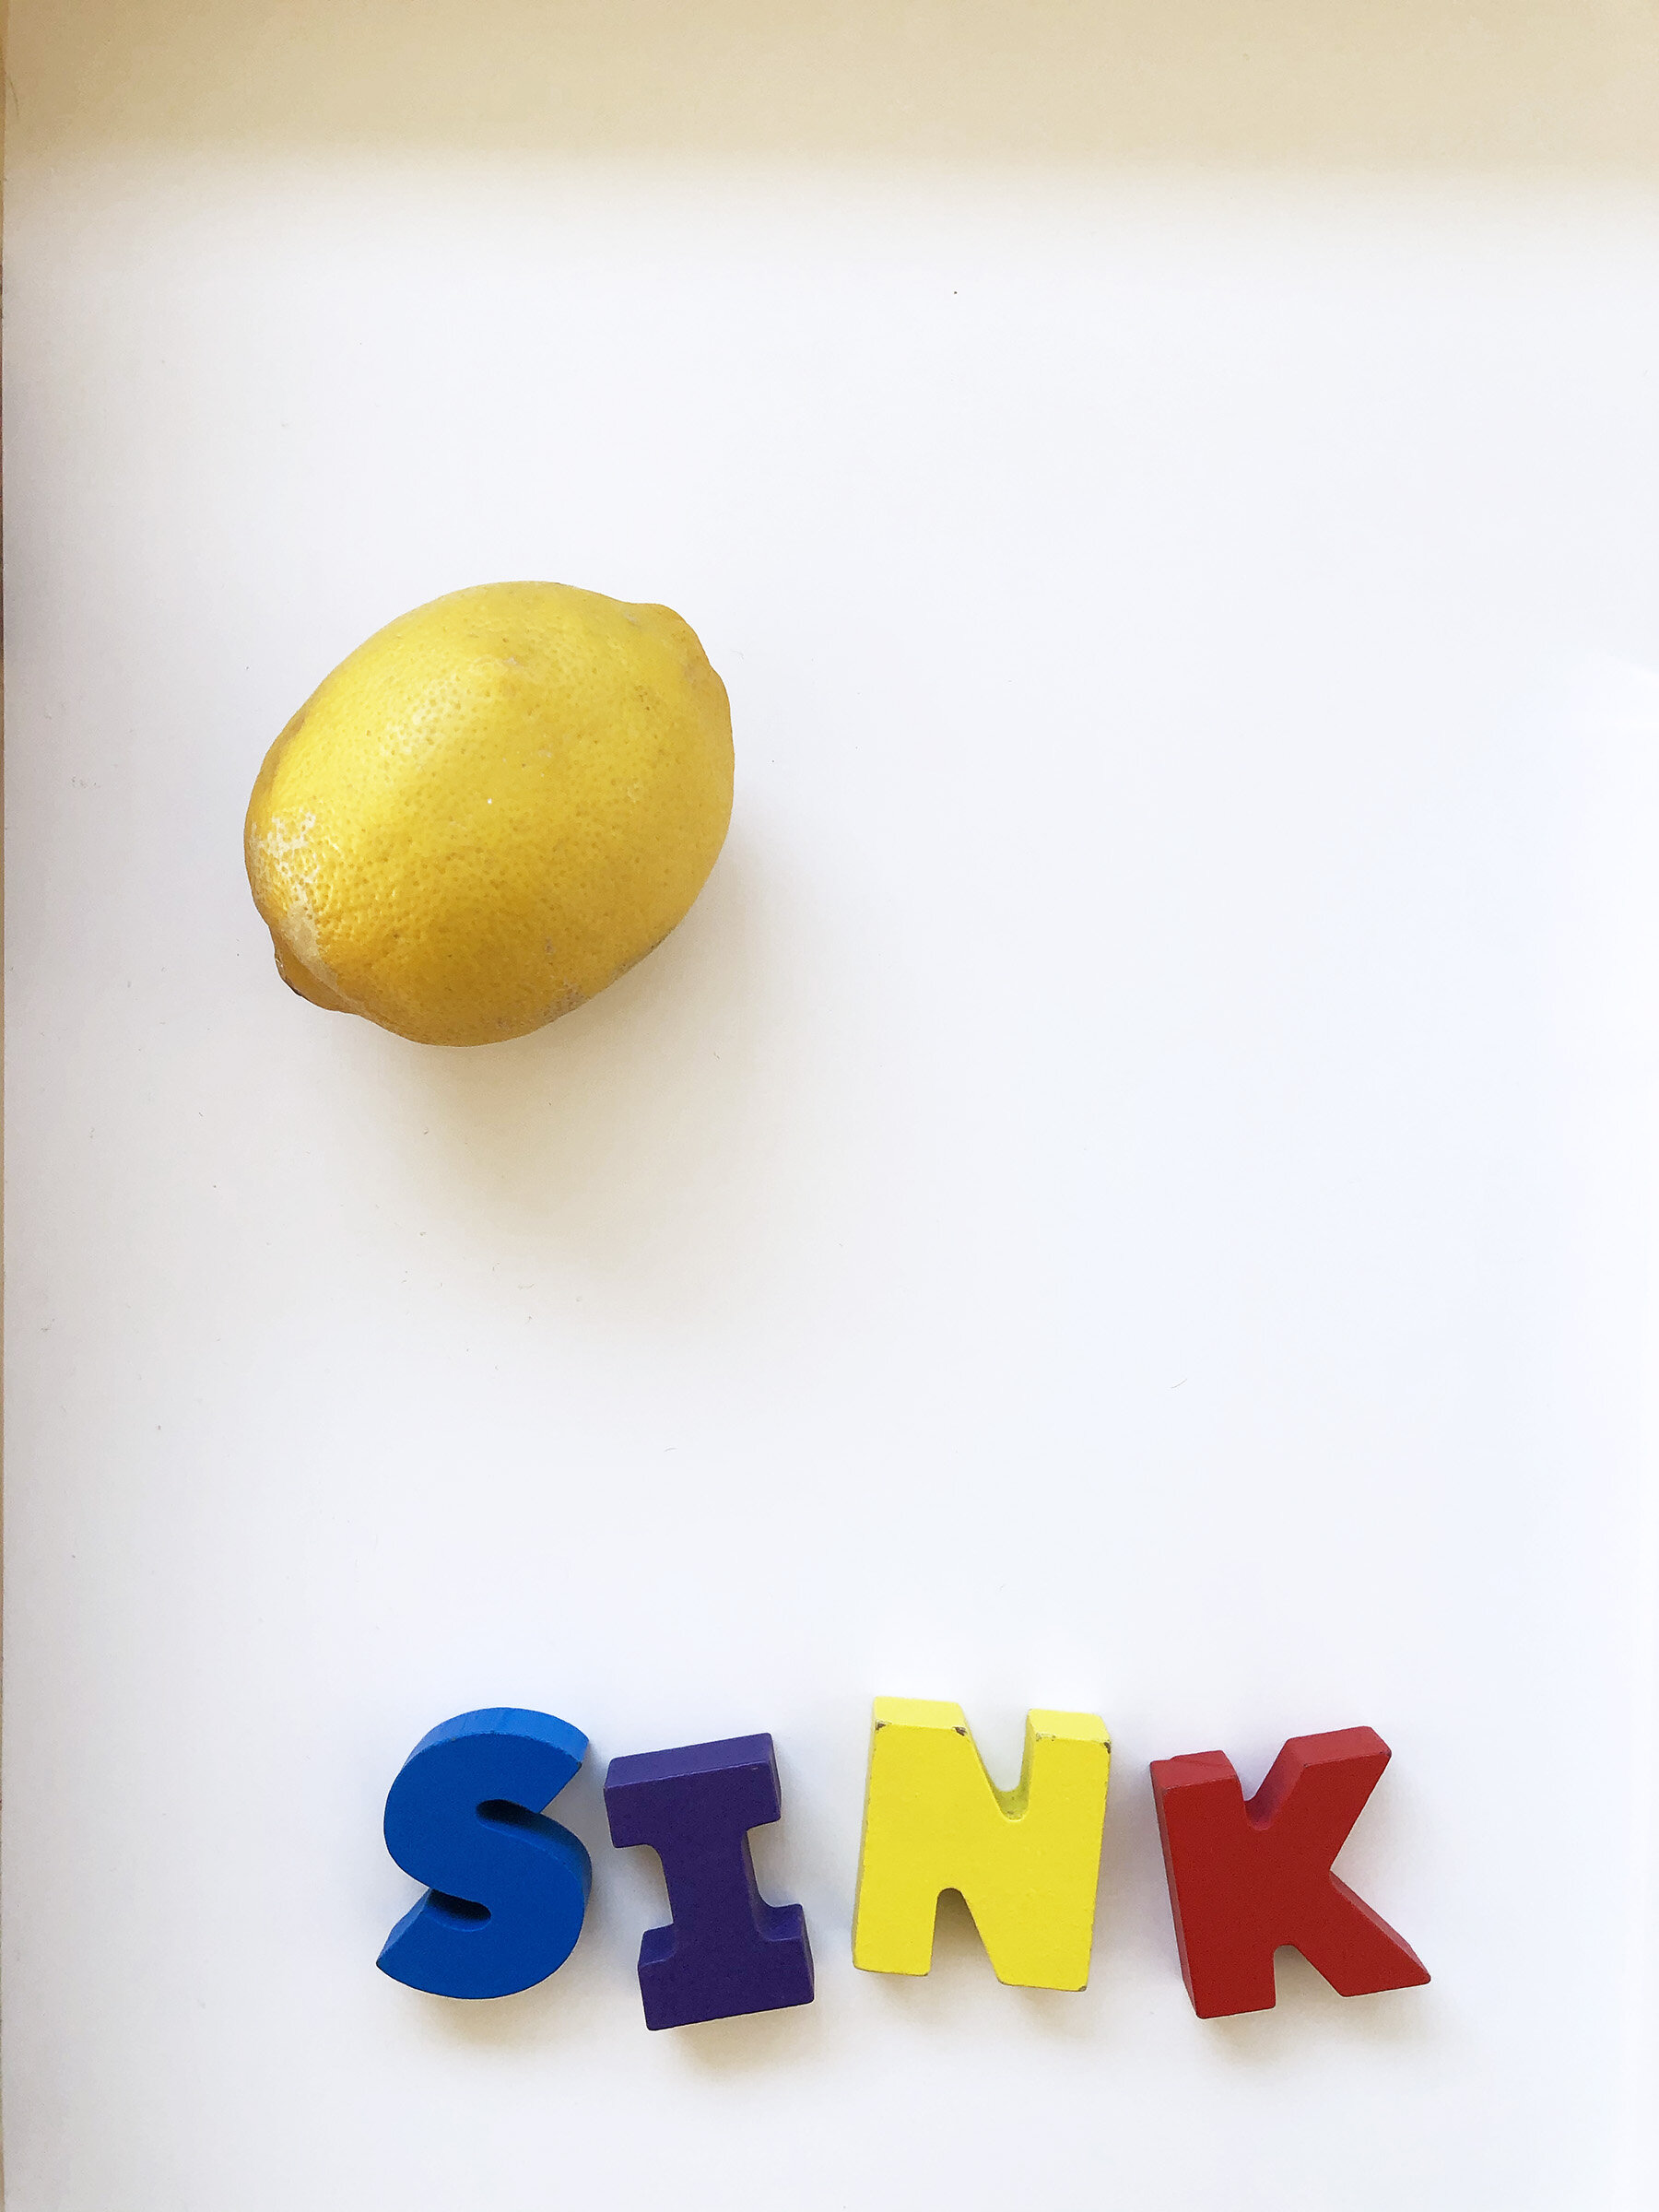
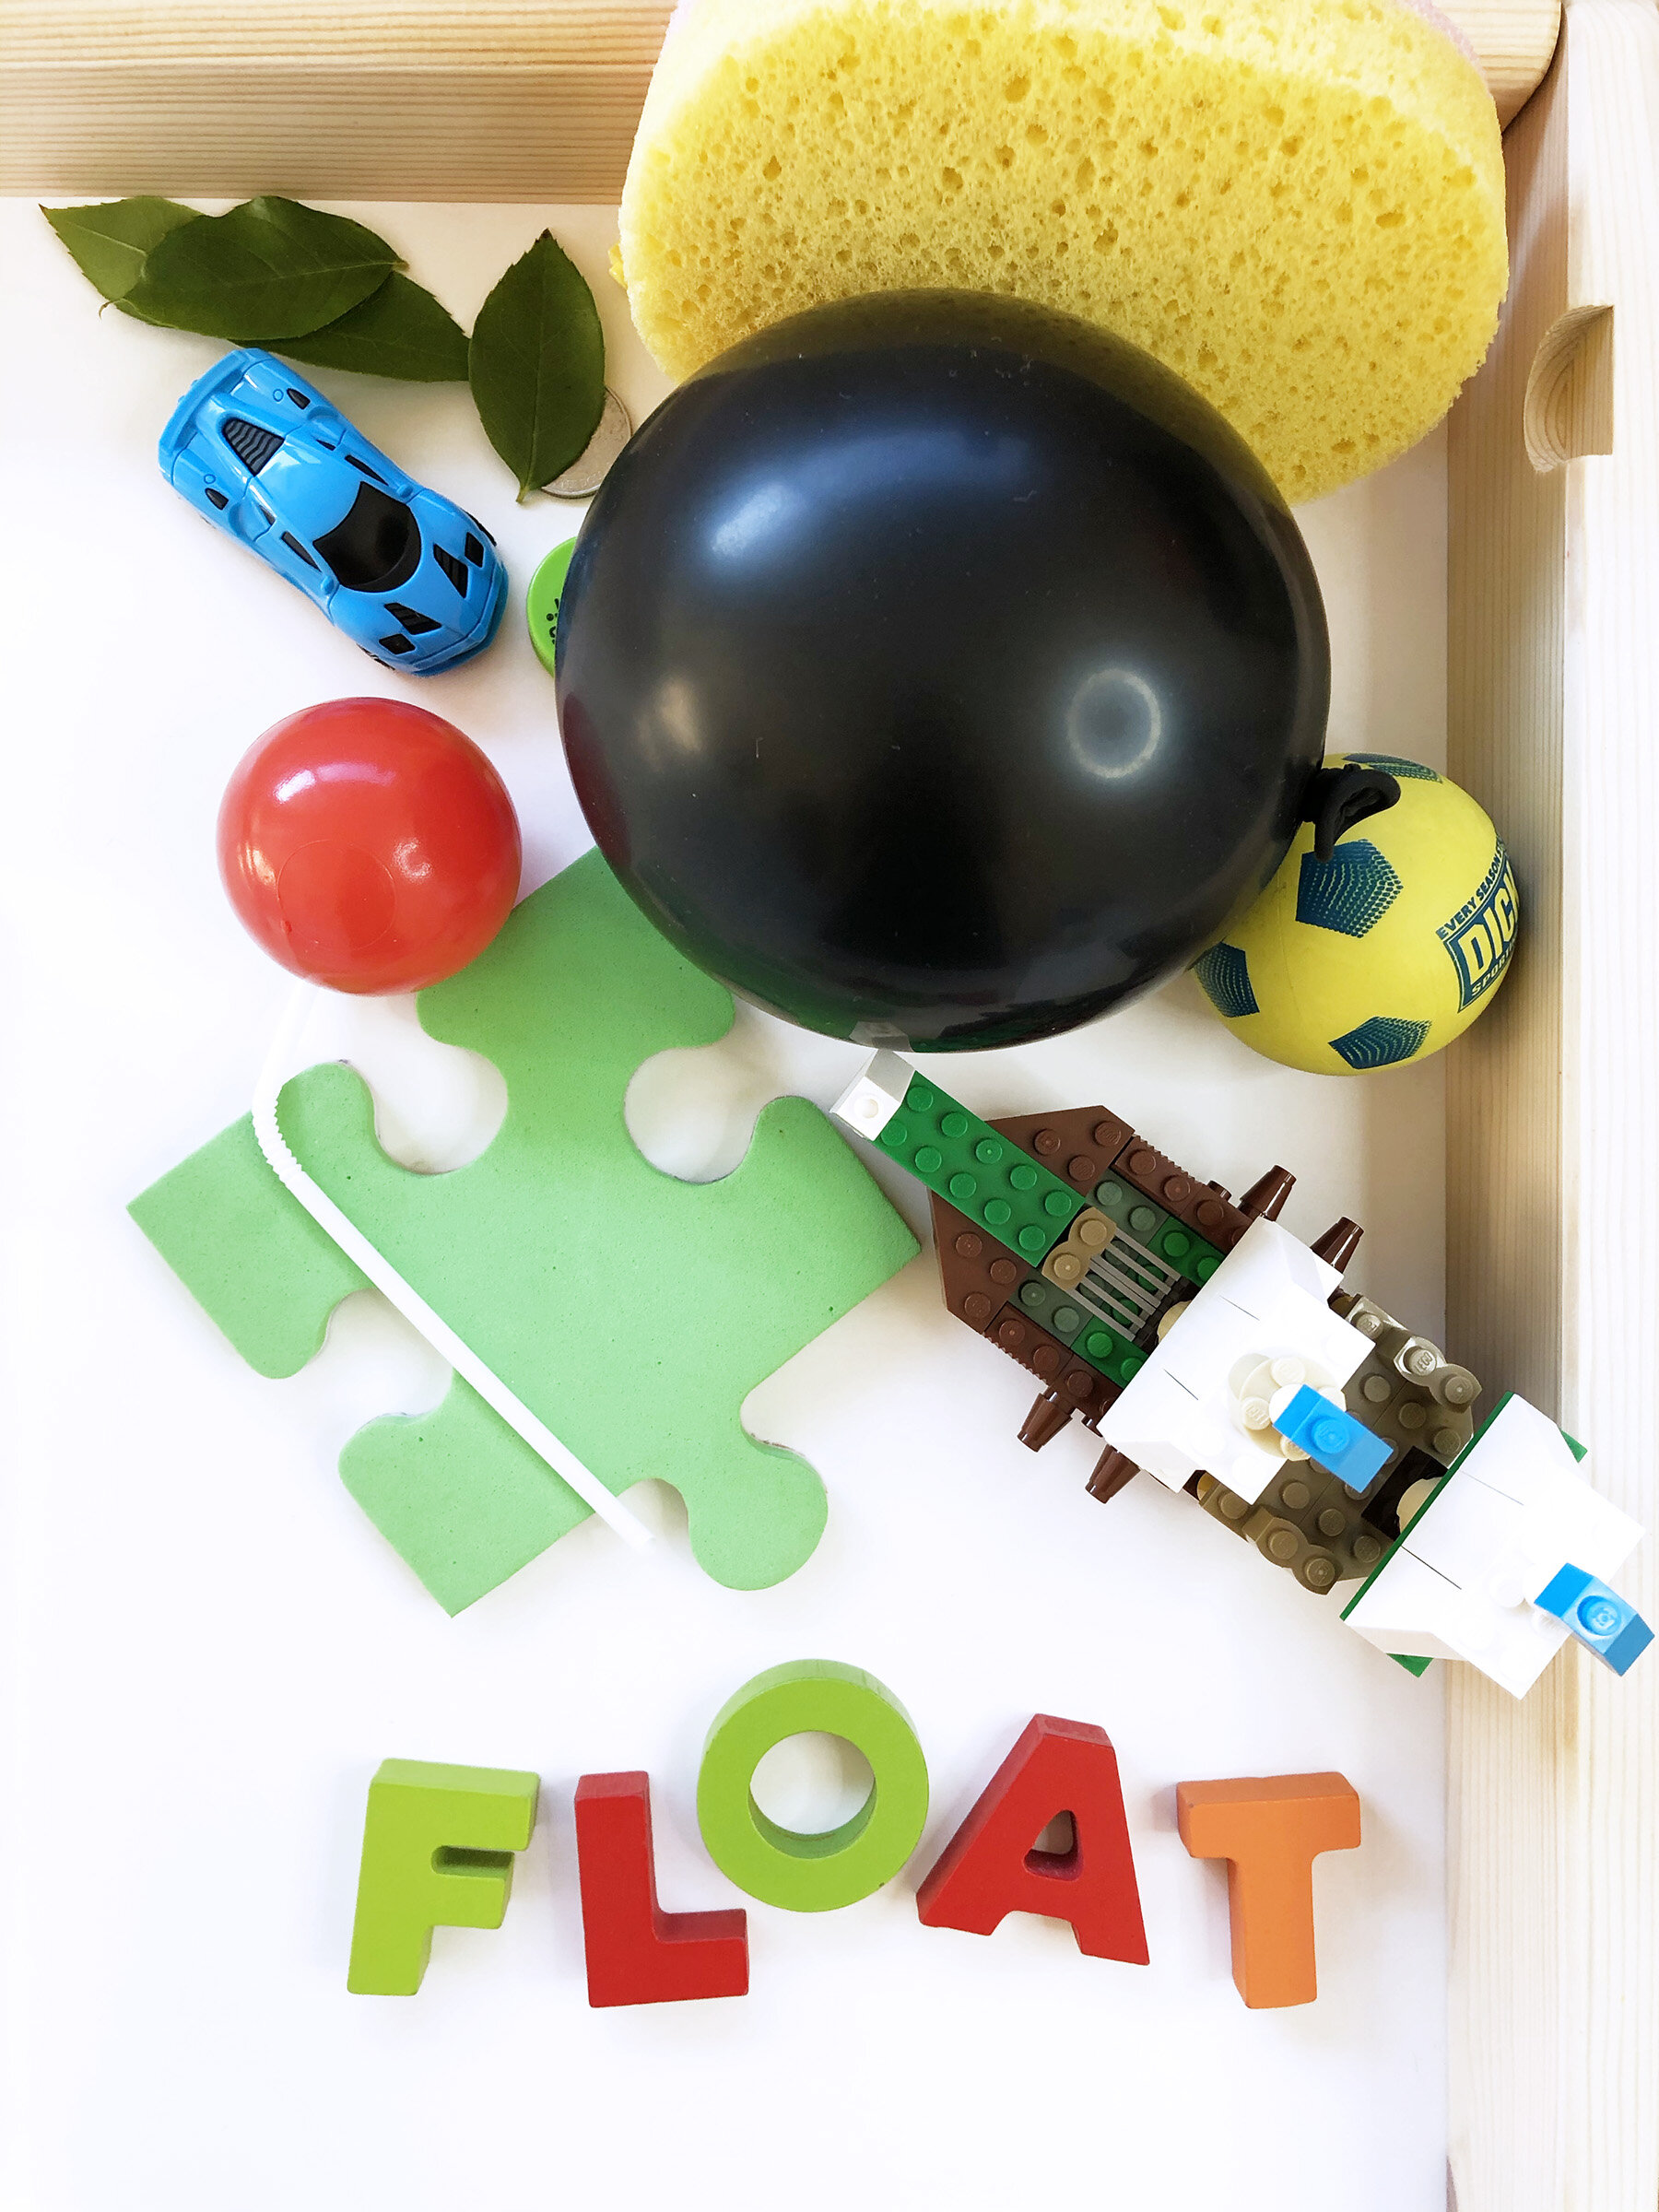
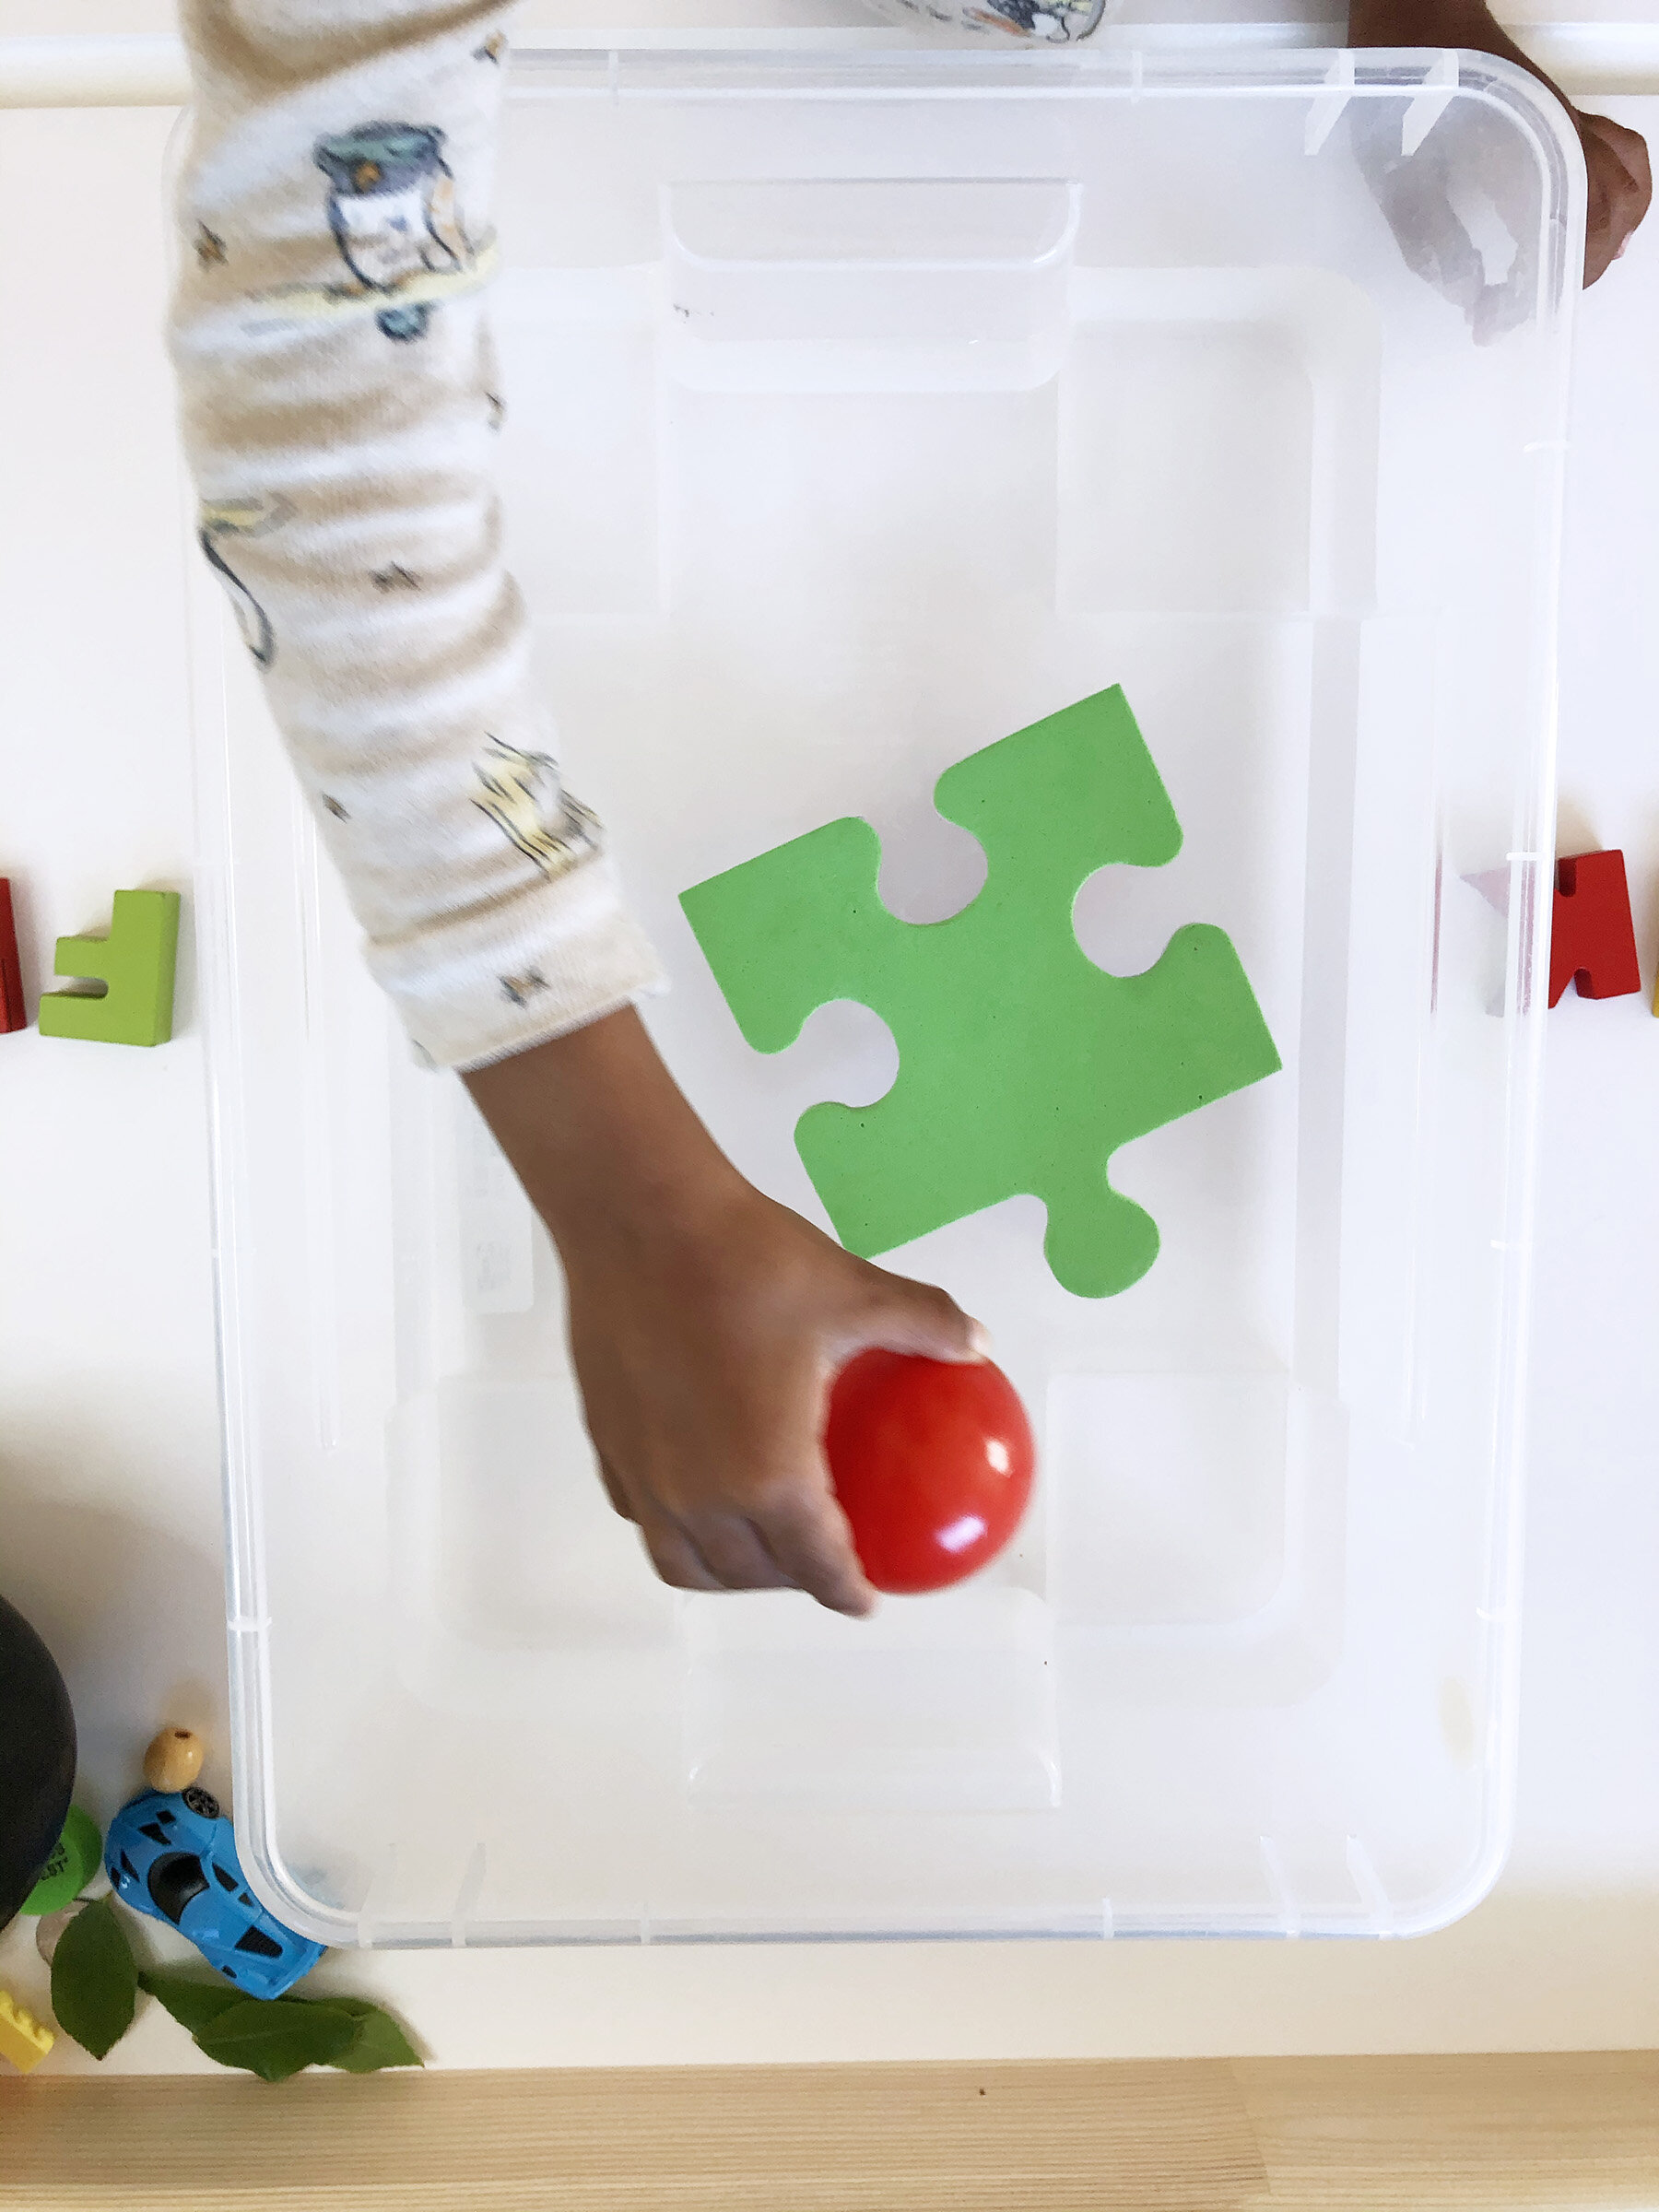
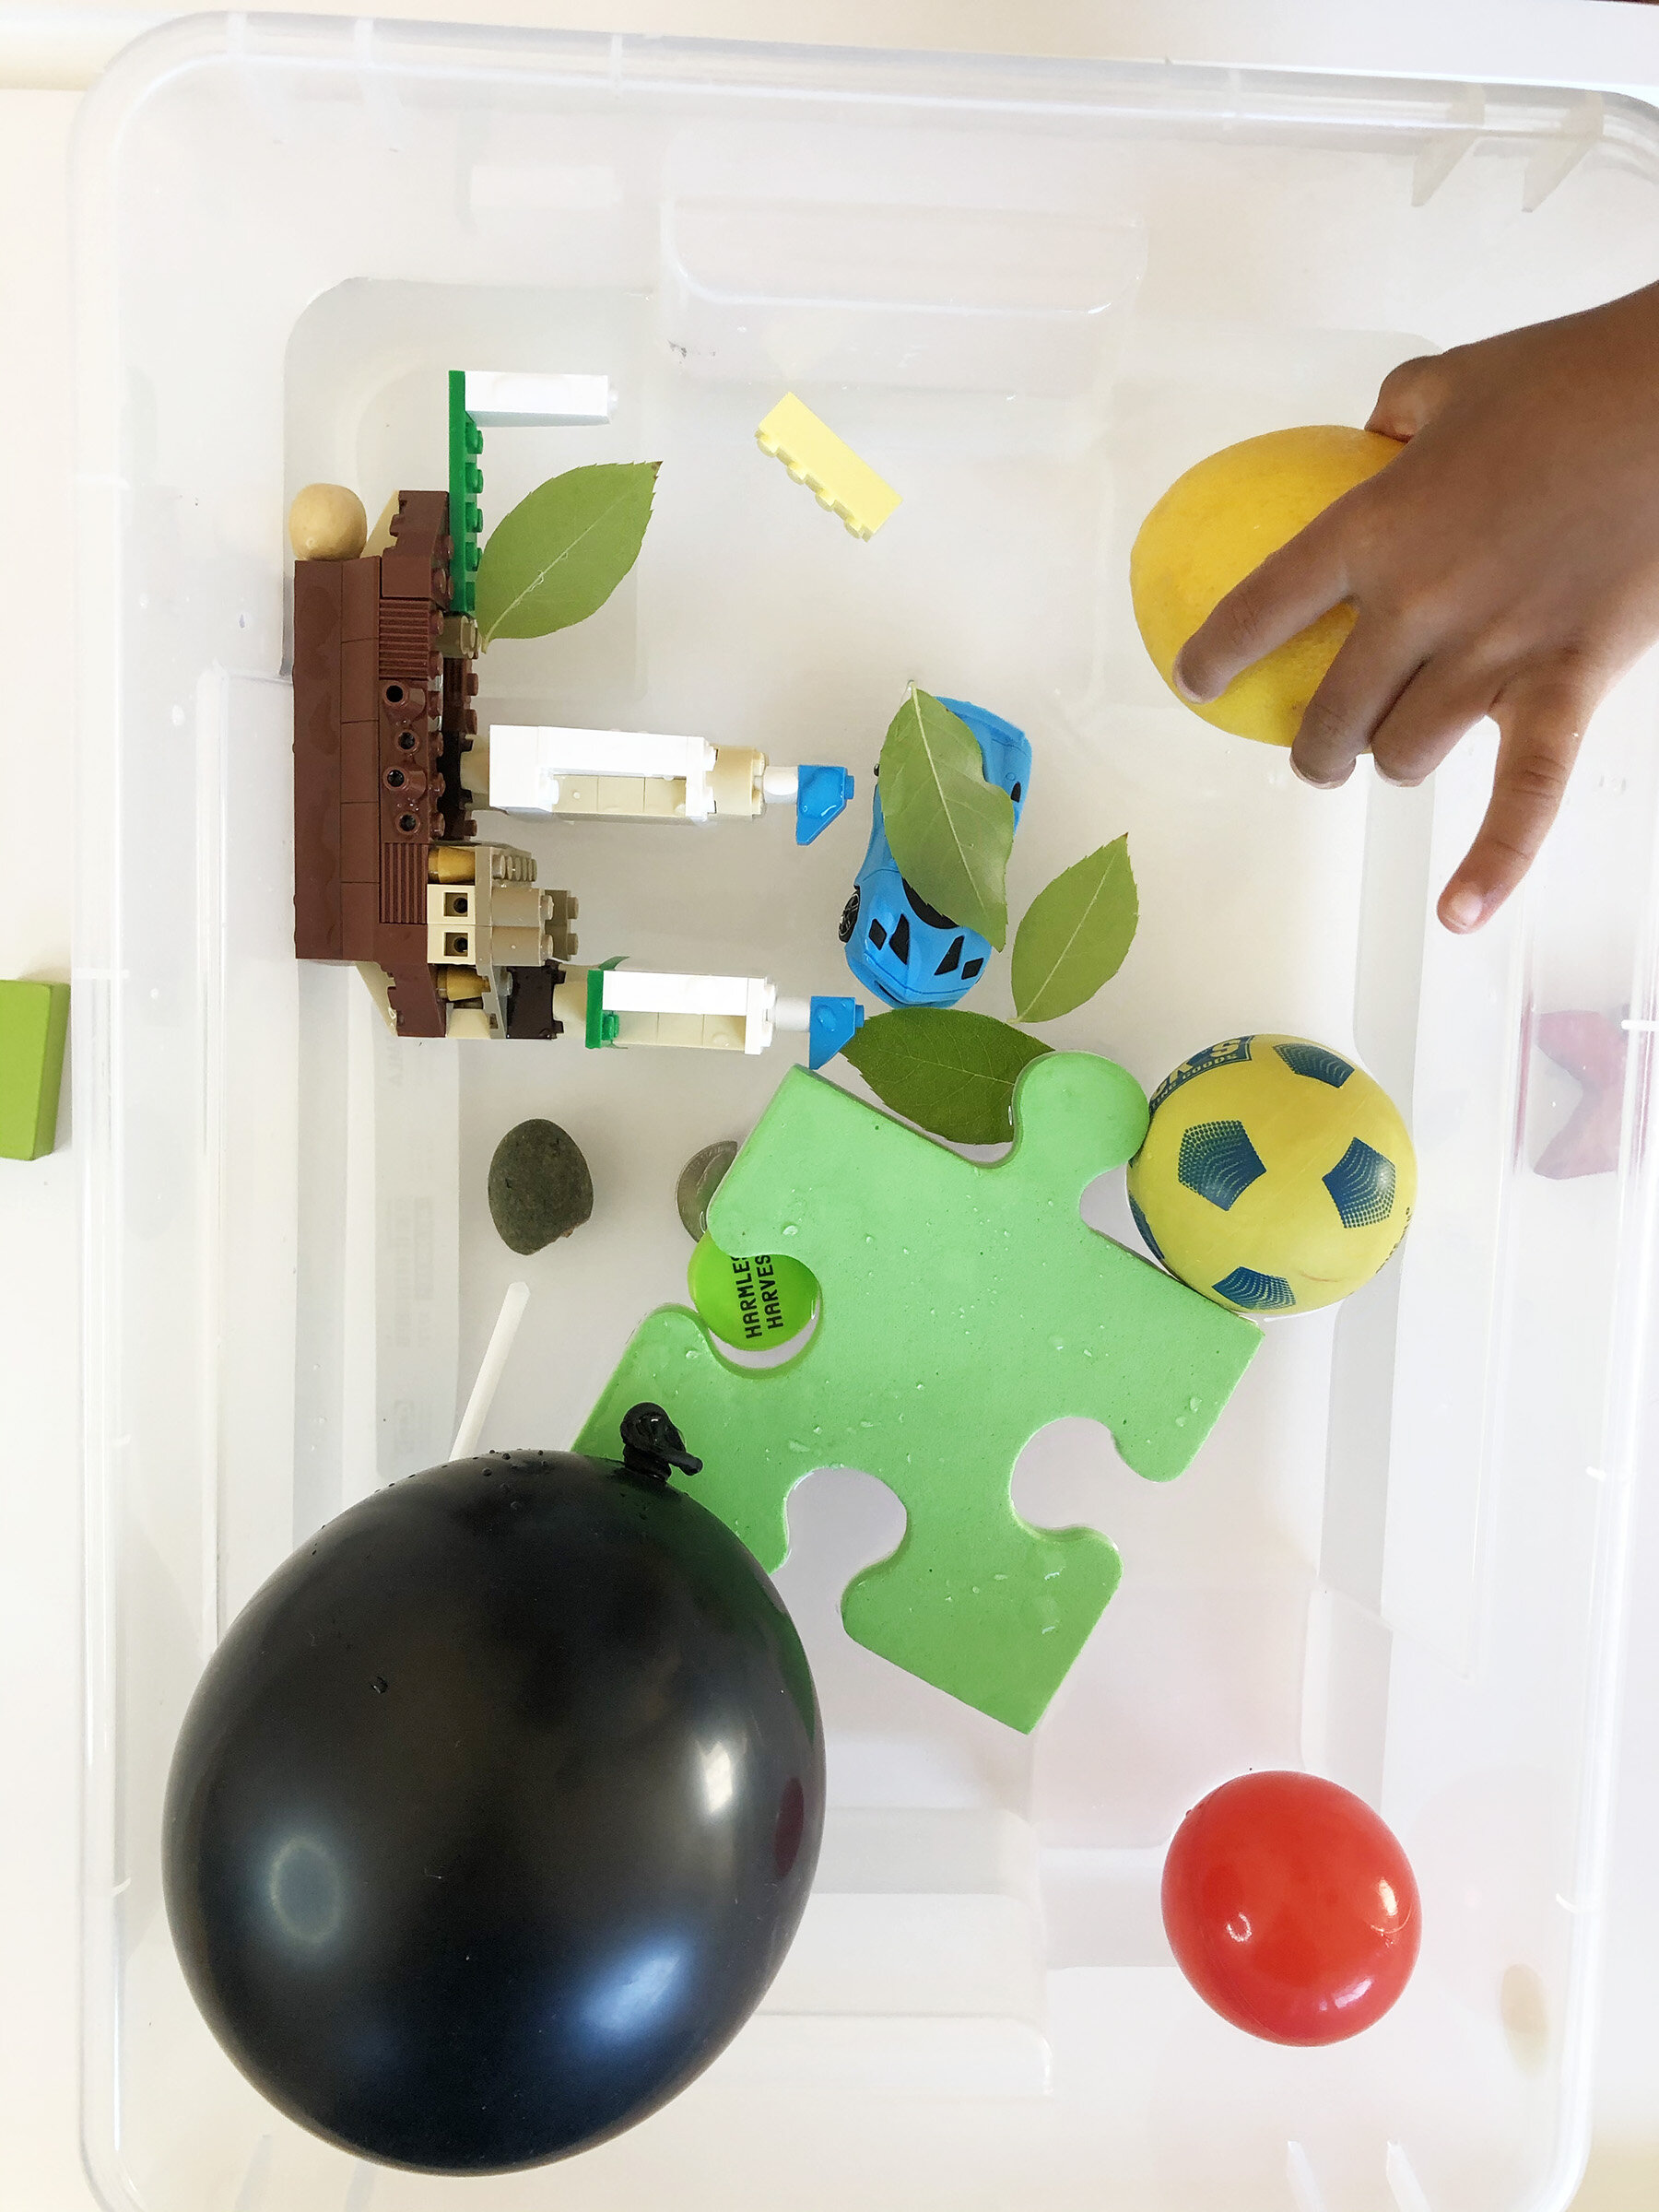
The set up for this activity is super easy. Fill up a large container with water. Now gather some objects from around the house (we tested car, bottle cap, leaves, sponge, bead, lego piece, balloon, straw, foam, lemon, rock and ball) to test for this activity. Set up two stations; one for Float and the other for Sink. You can label it or use letters like me. Start this activity by asking your kid the question “Will it Sink or Float?” We made a hypothesis (don’t be scared to use such big words with your toddler, just don’t expect them to say it) for each object and placed them under either Sink or Float section.
It’s time to do the experiment and test the hypothesis. As they test each object in the water, analyze the result as you go. Some objects like cars floated initially, but sank after sometime as the car slowly filled up with water. Once all objects are analyzed, remove them from water and categorize them again this time under the right section. Talk about why some objects floated, while some did not.
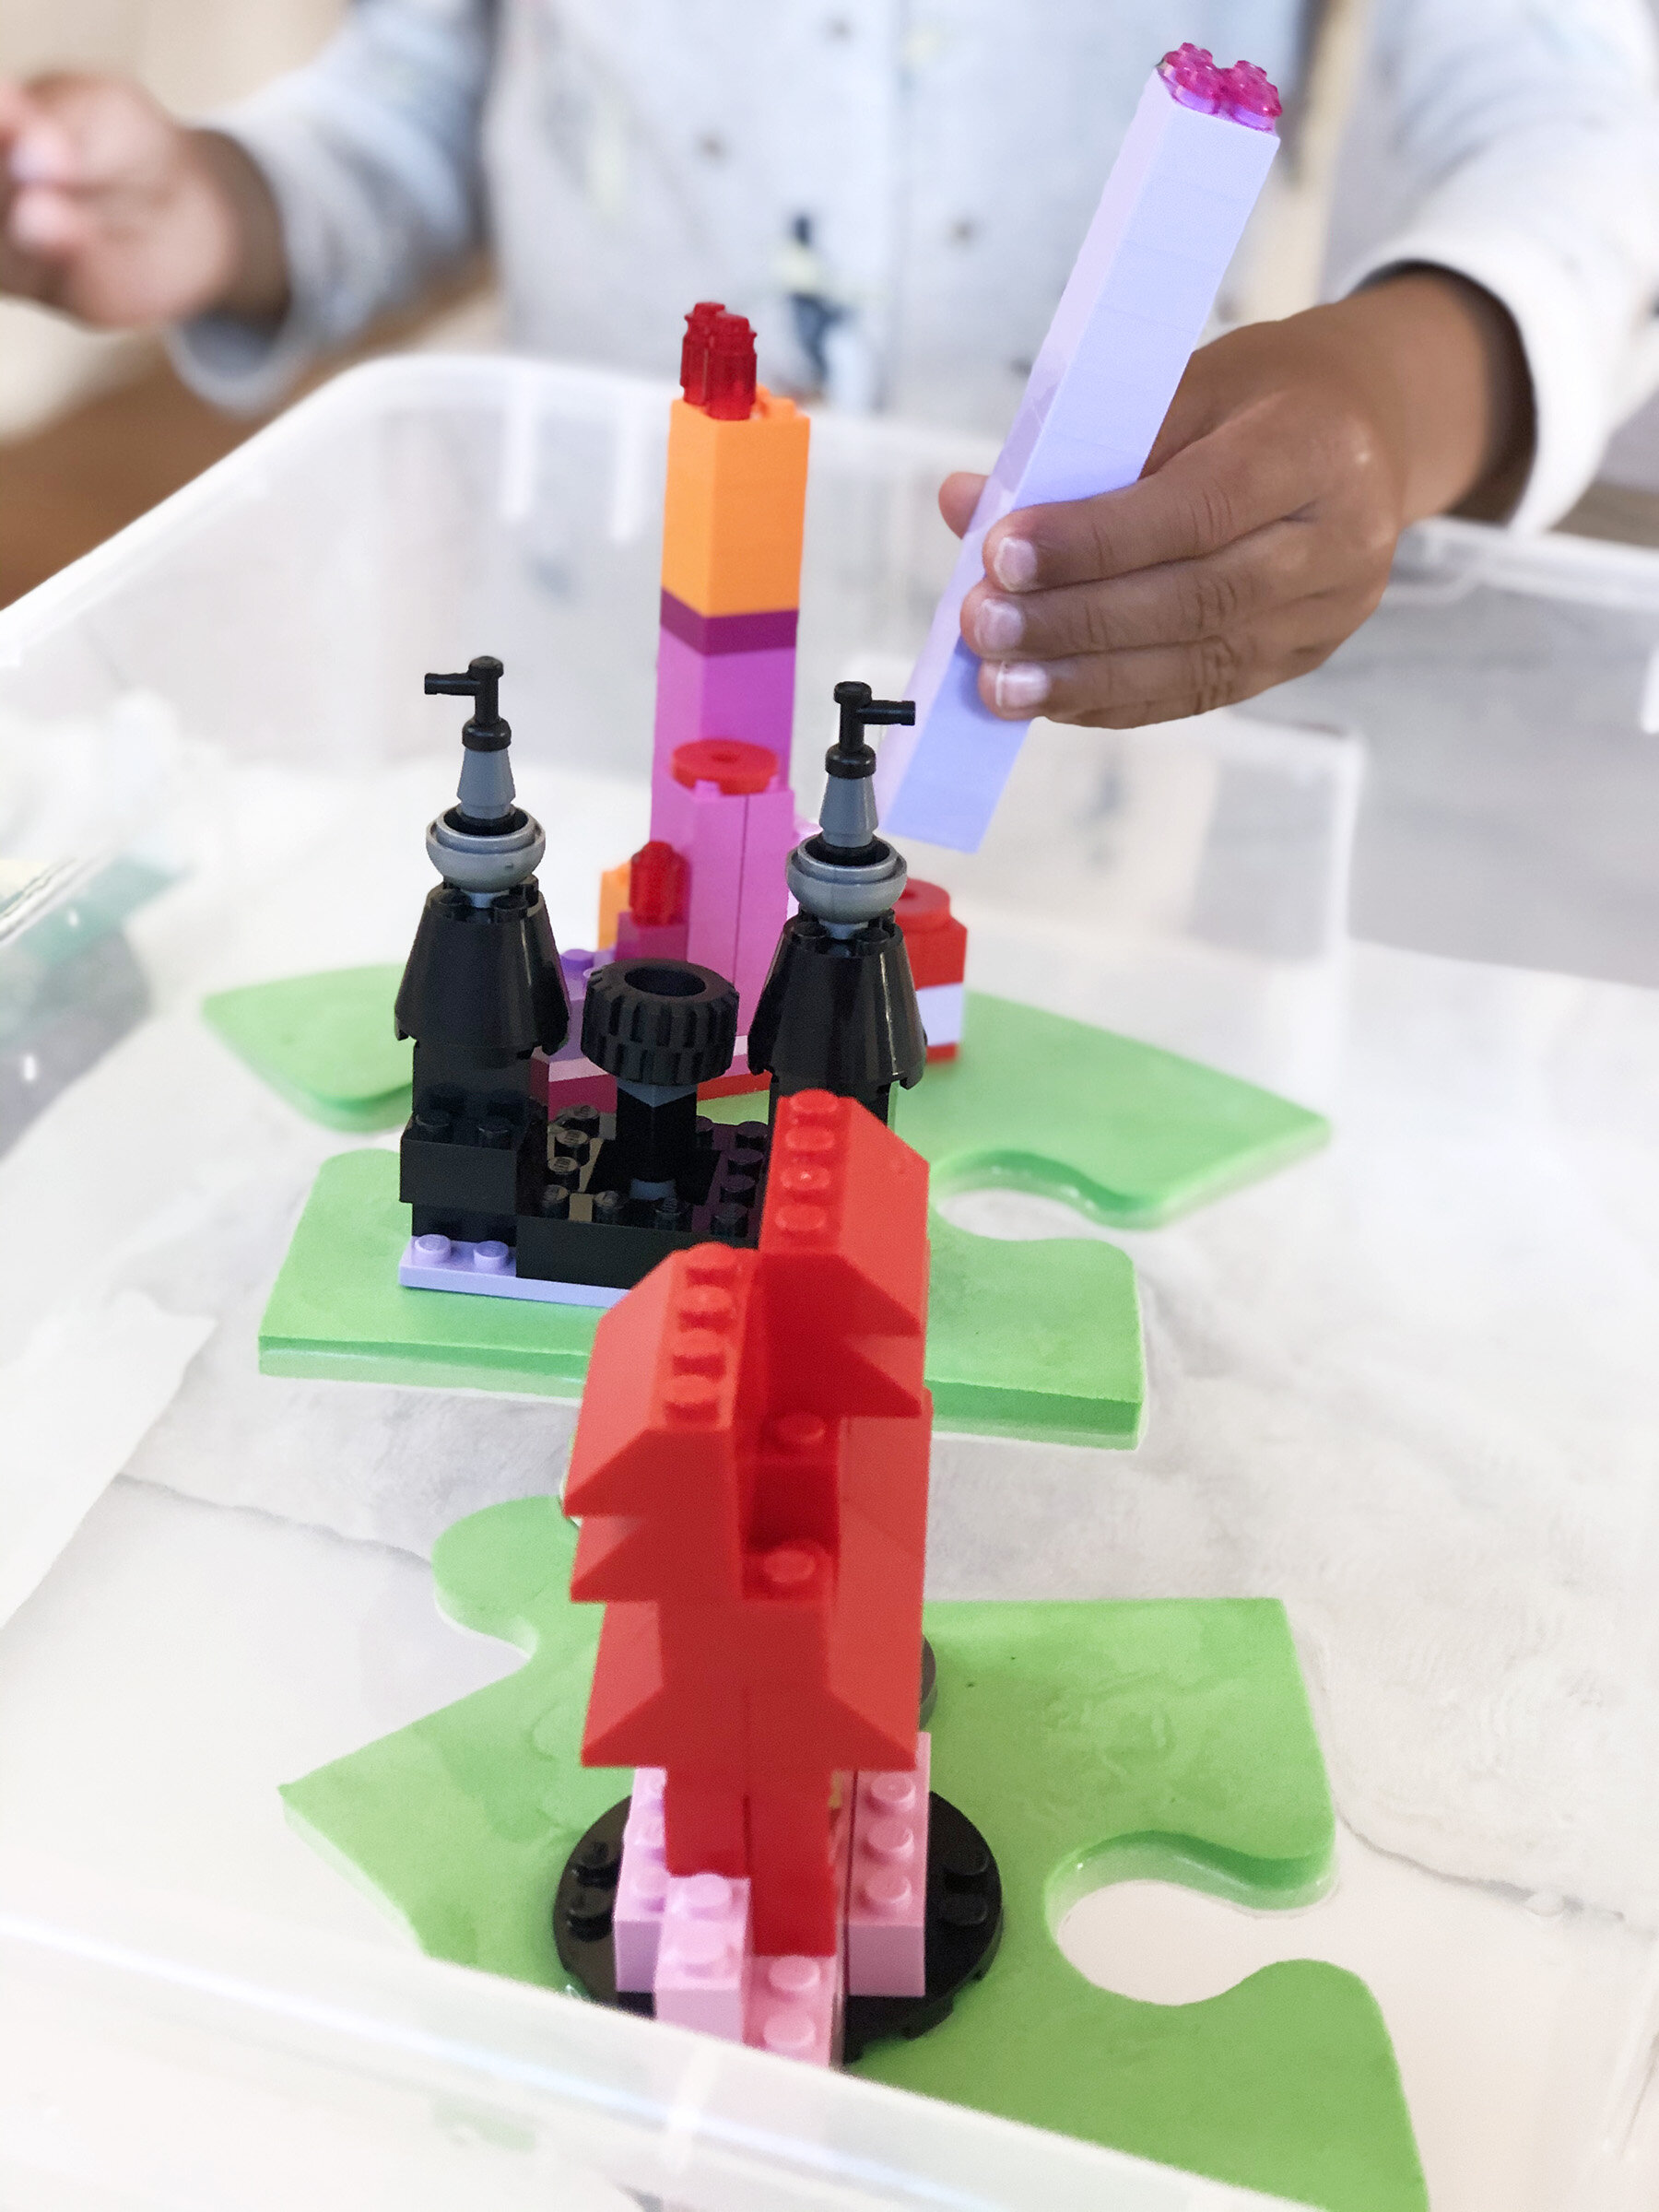
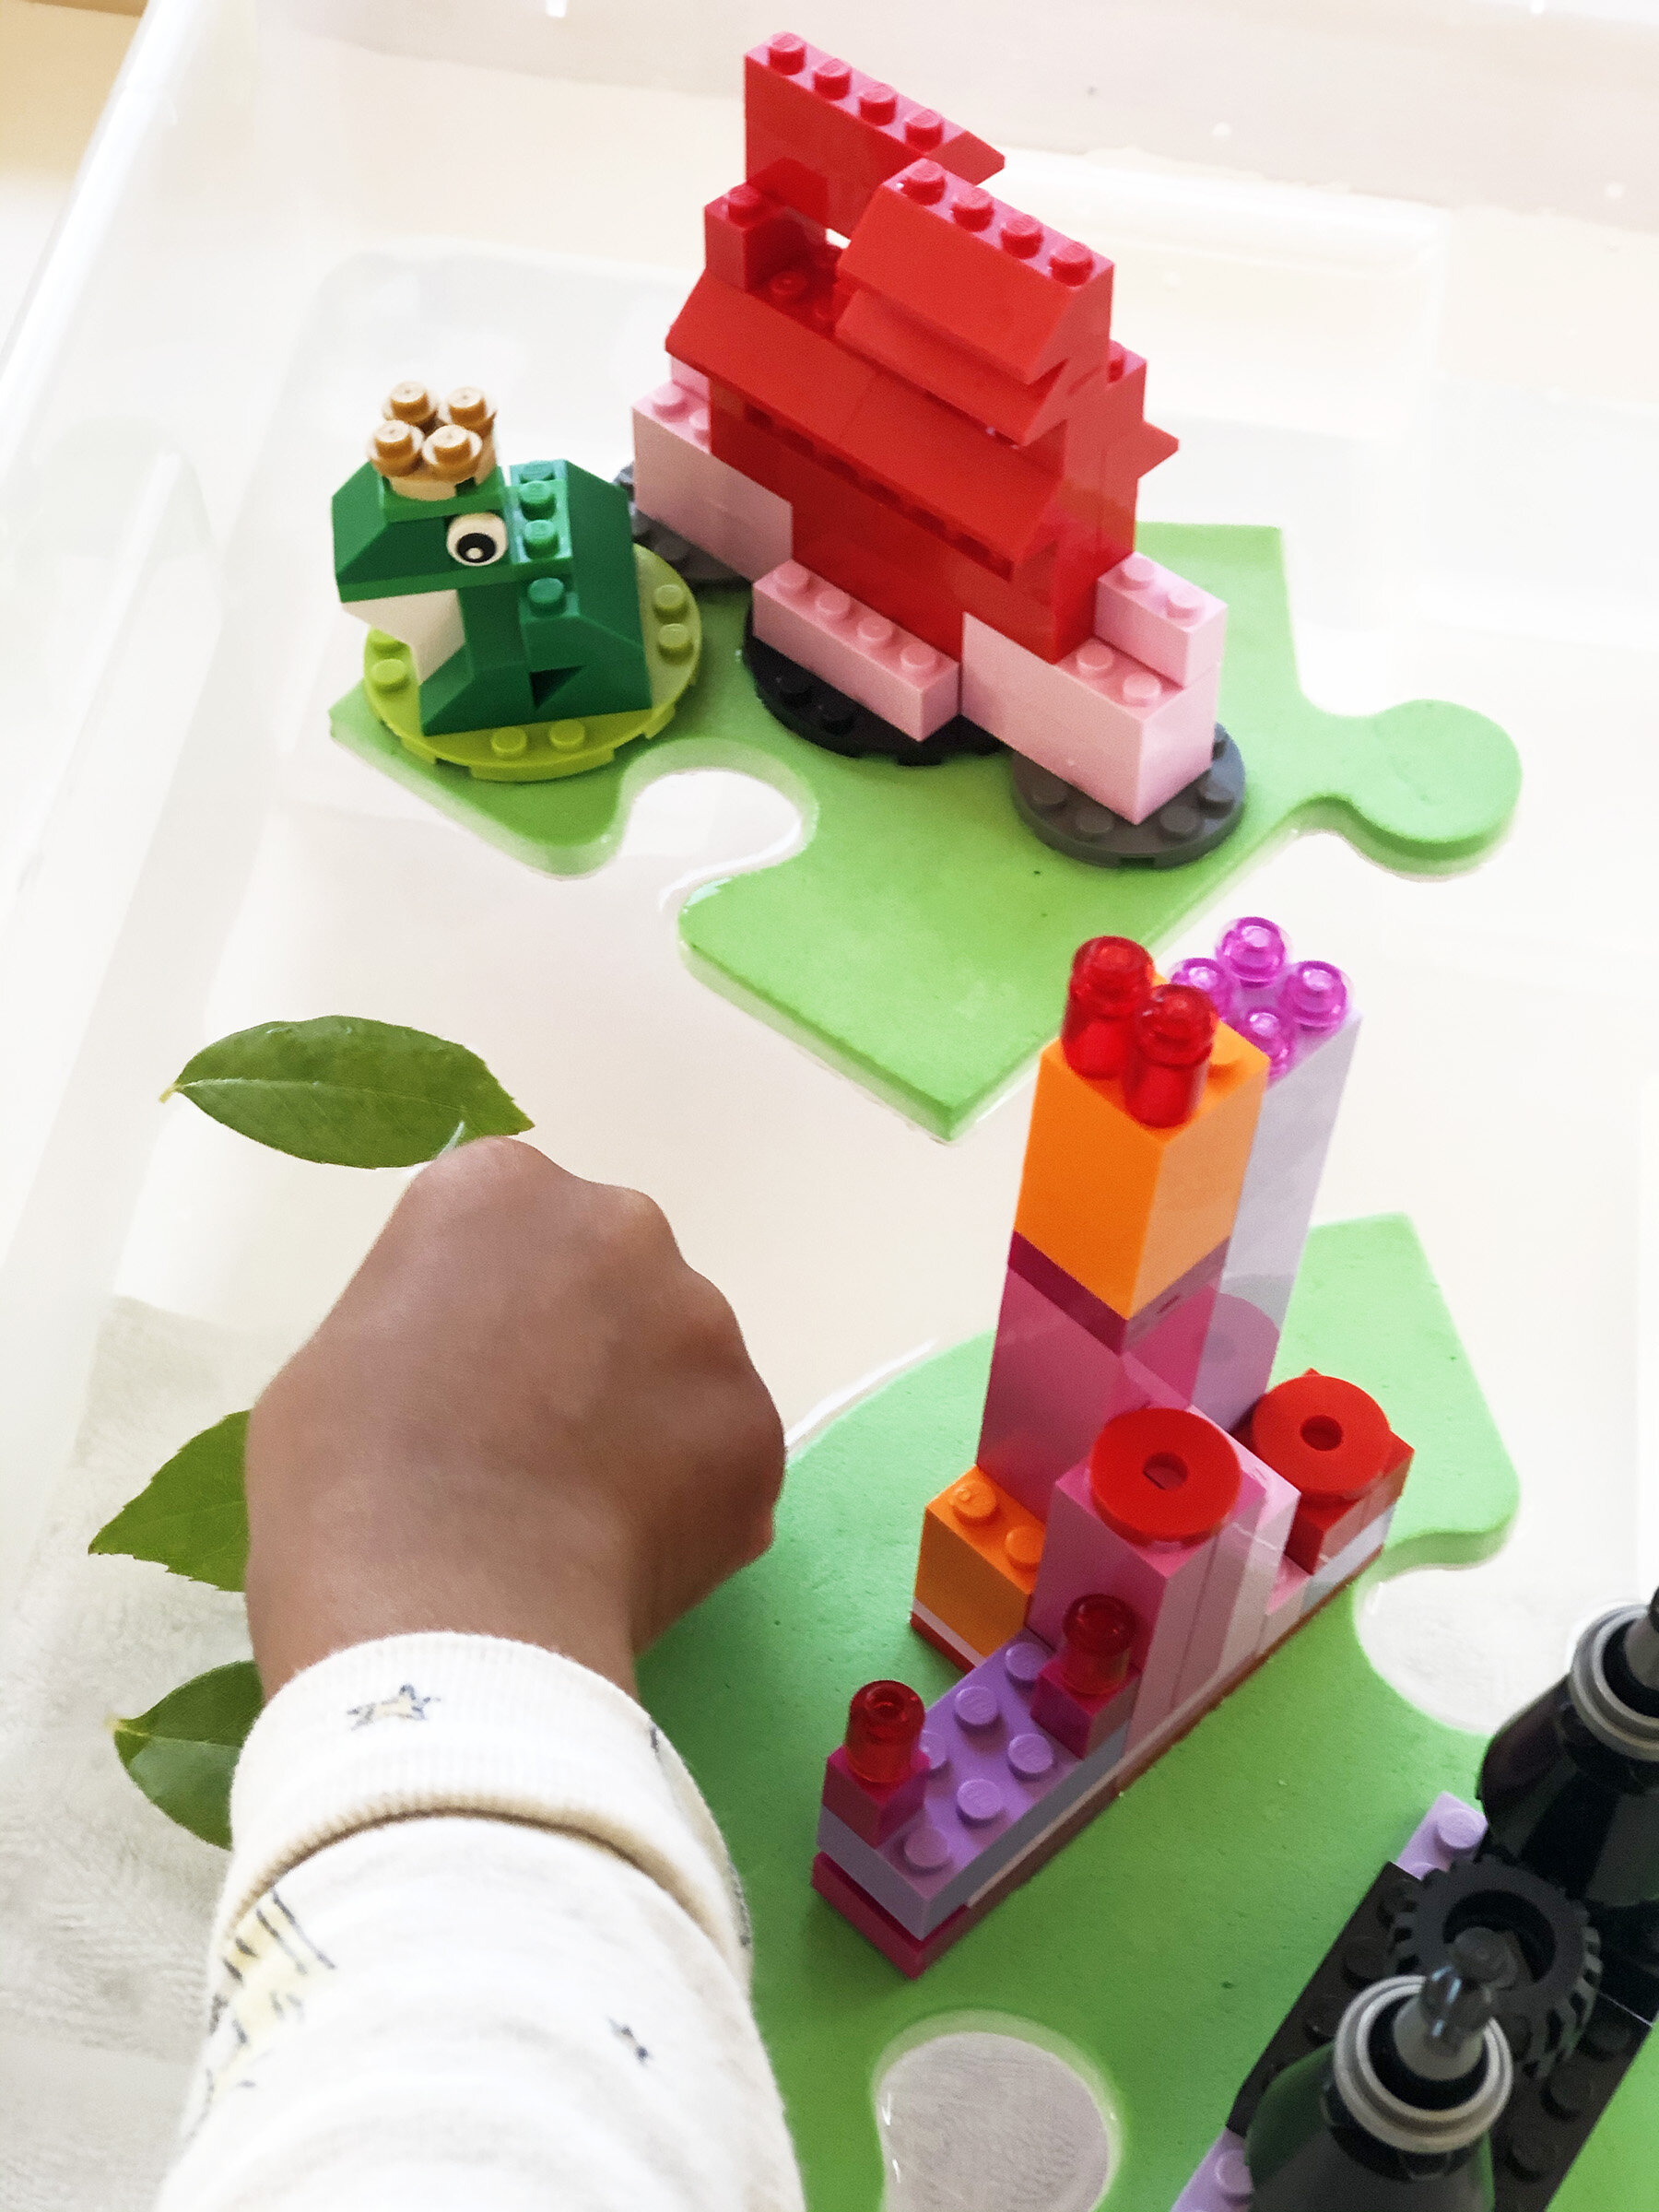
Take this activity one step further and join your kid in making a floating city. Use pieces of foam as your base, as these will float on water (we used pieces from a foam puzzle). You can use legos (regular or duplo), foam blocks, etc (anything that you have on hand) to build your buildings/city. Explore, experiment and have fun. There is no right or wrong as long as it floats. This will teach them important aspects of building like balance, spatial reasoning, cognitive flexibility, language skills, a capacity for creative, divergent thinking and engineering skills.
Activity 2: Water+Soap (Simple Science+Art)
Best For (2 years and up) fine motor skills, simple science, art and print making
Material Needed: Dish Soap, Water, Paint or Food Color, Glass or Container, Straw, Thick Paper and Tray.
Messy Activity Alert!
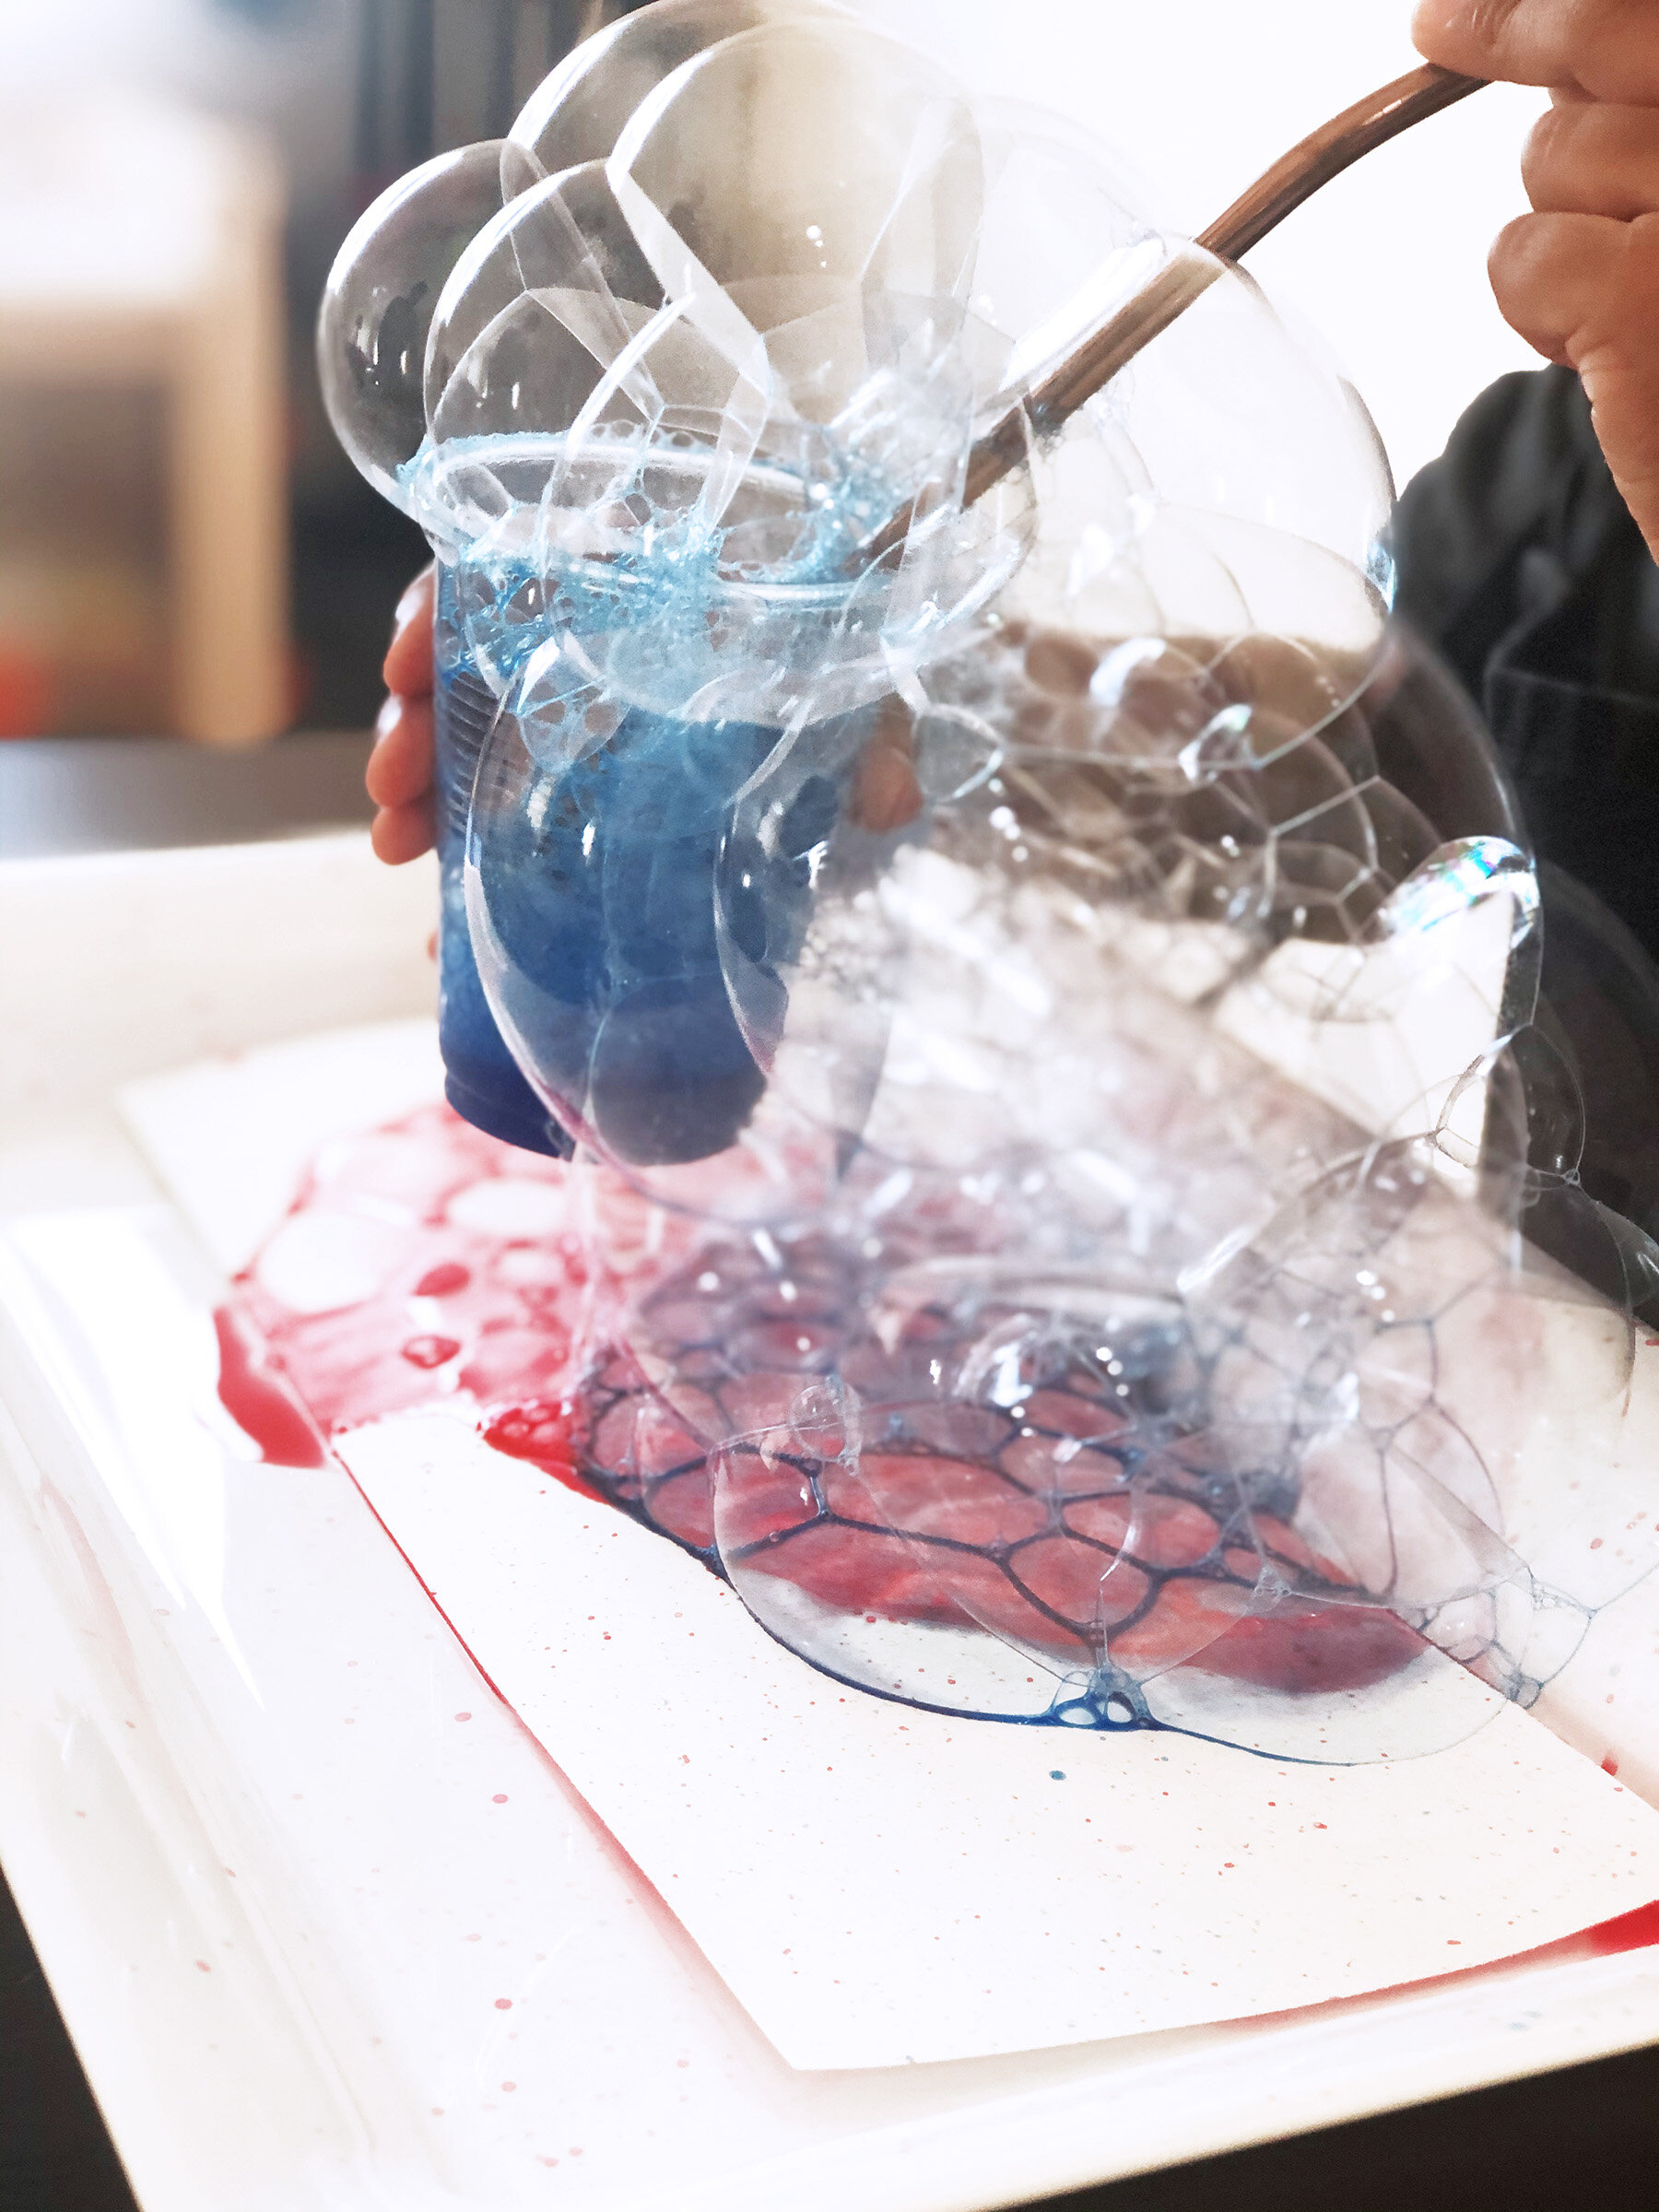
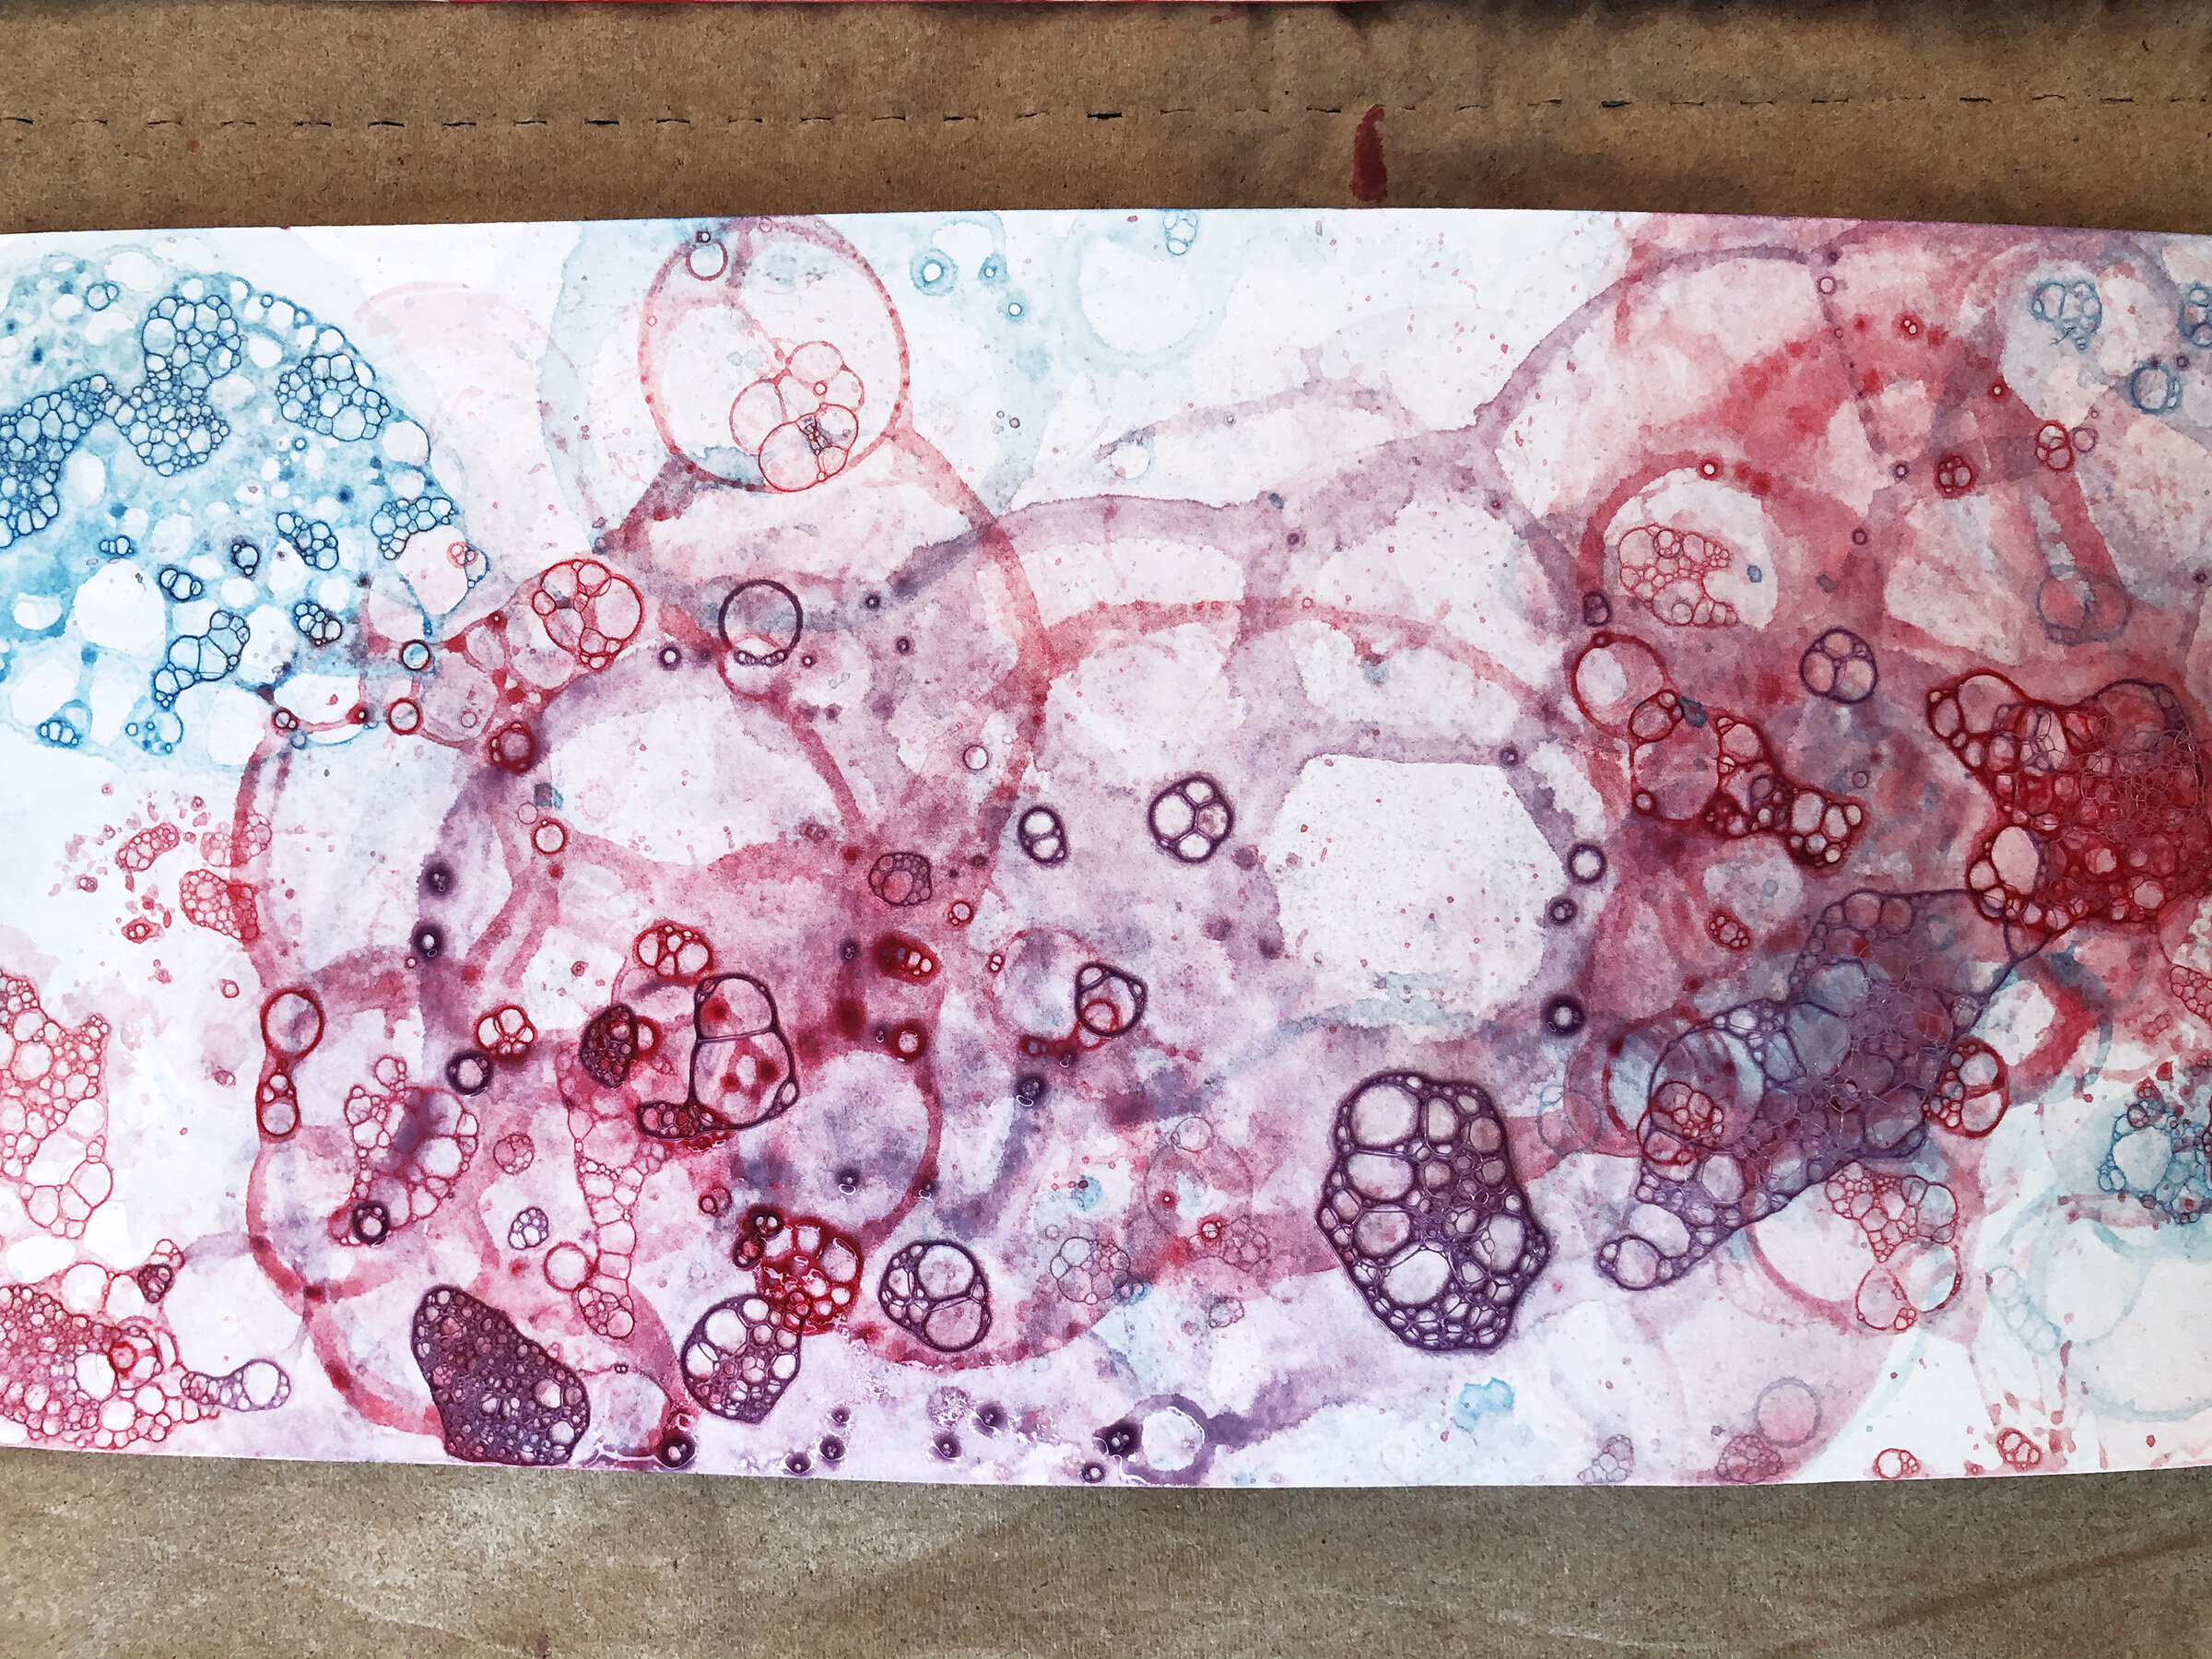
This is an activity that is guaranteed to earn you brownie points from your kid. Continuing our water theme this week, we experimented with water+soap. Kids love bubbles and popping them (I know a lot of adults who do too; no judgement here)! This is a Simple Science activity and we always love it when we can explore it further with Art.
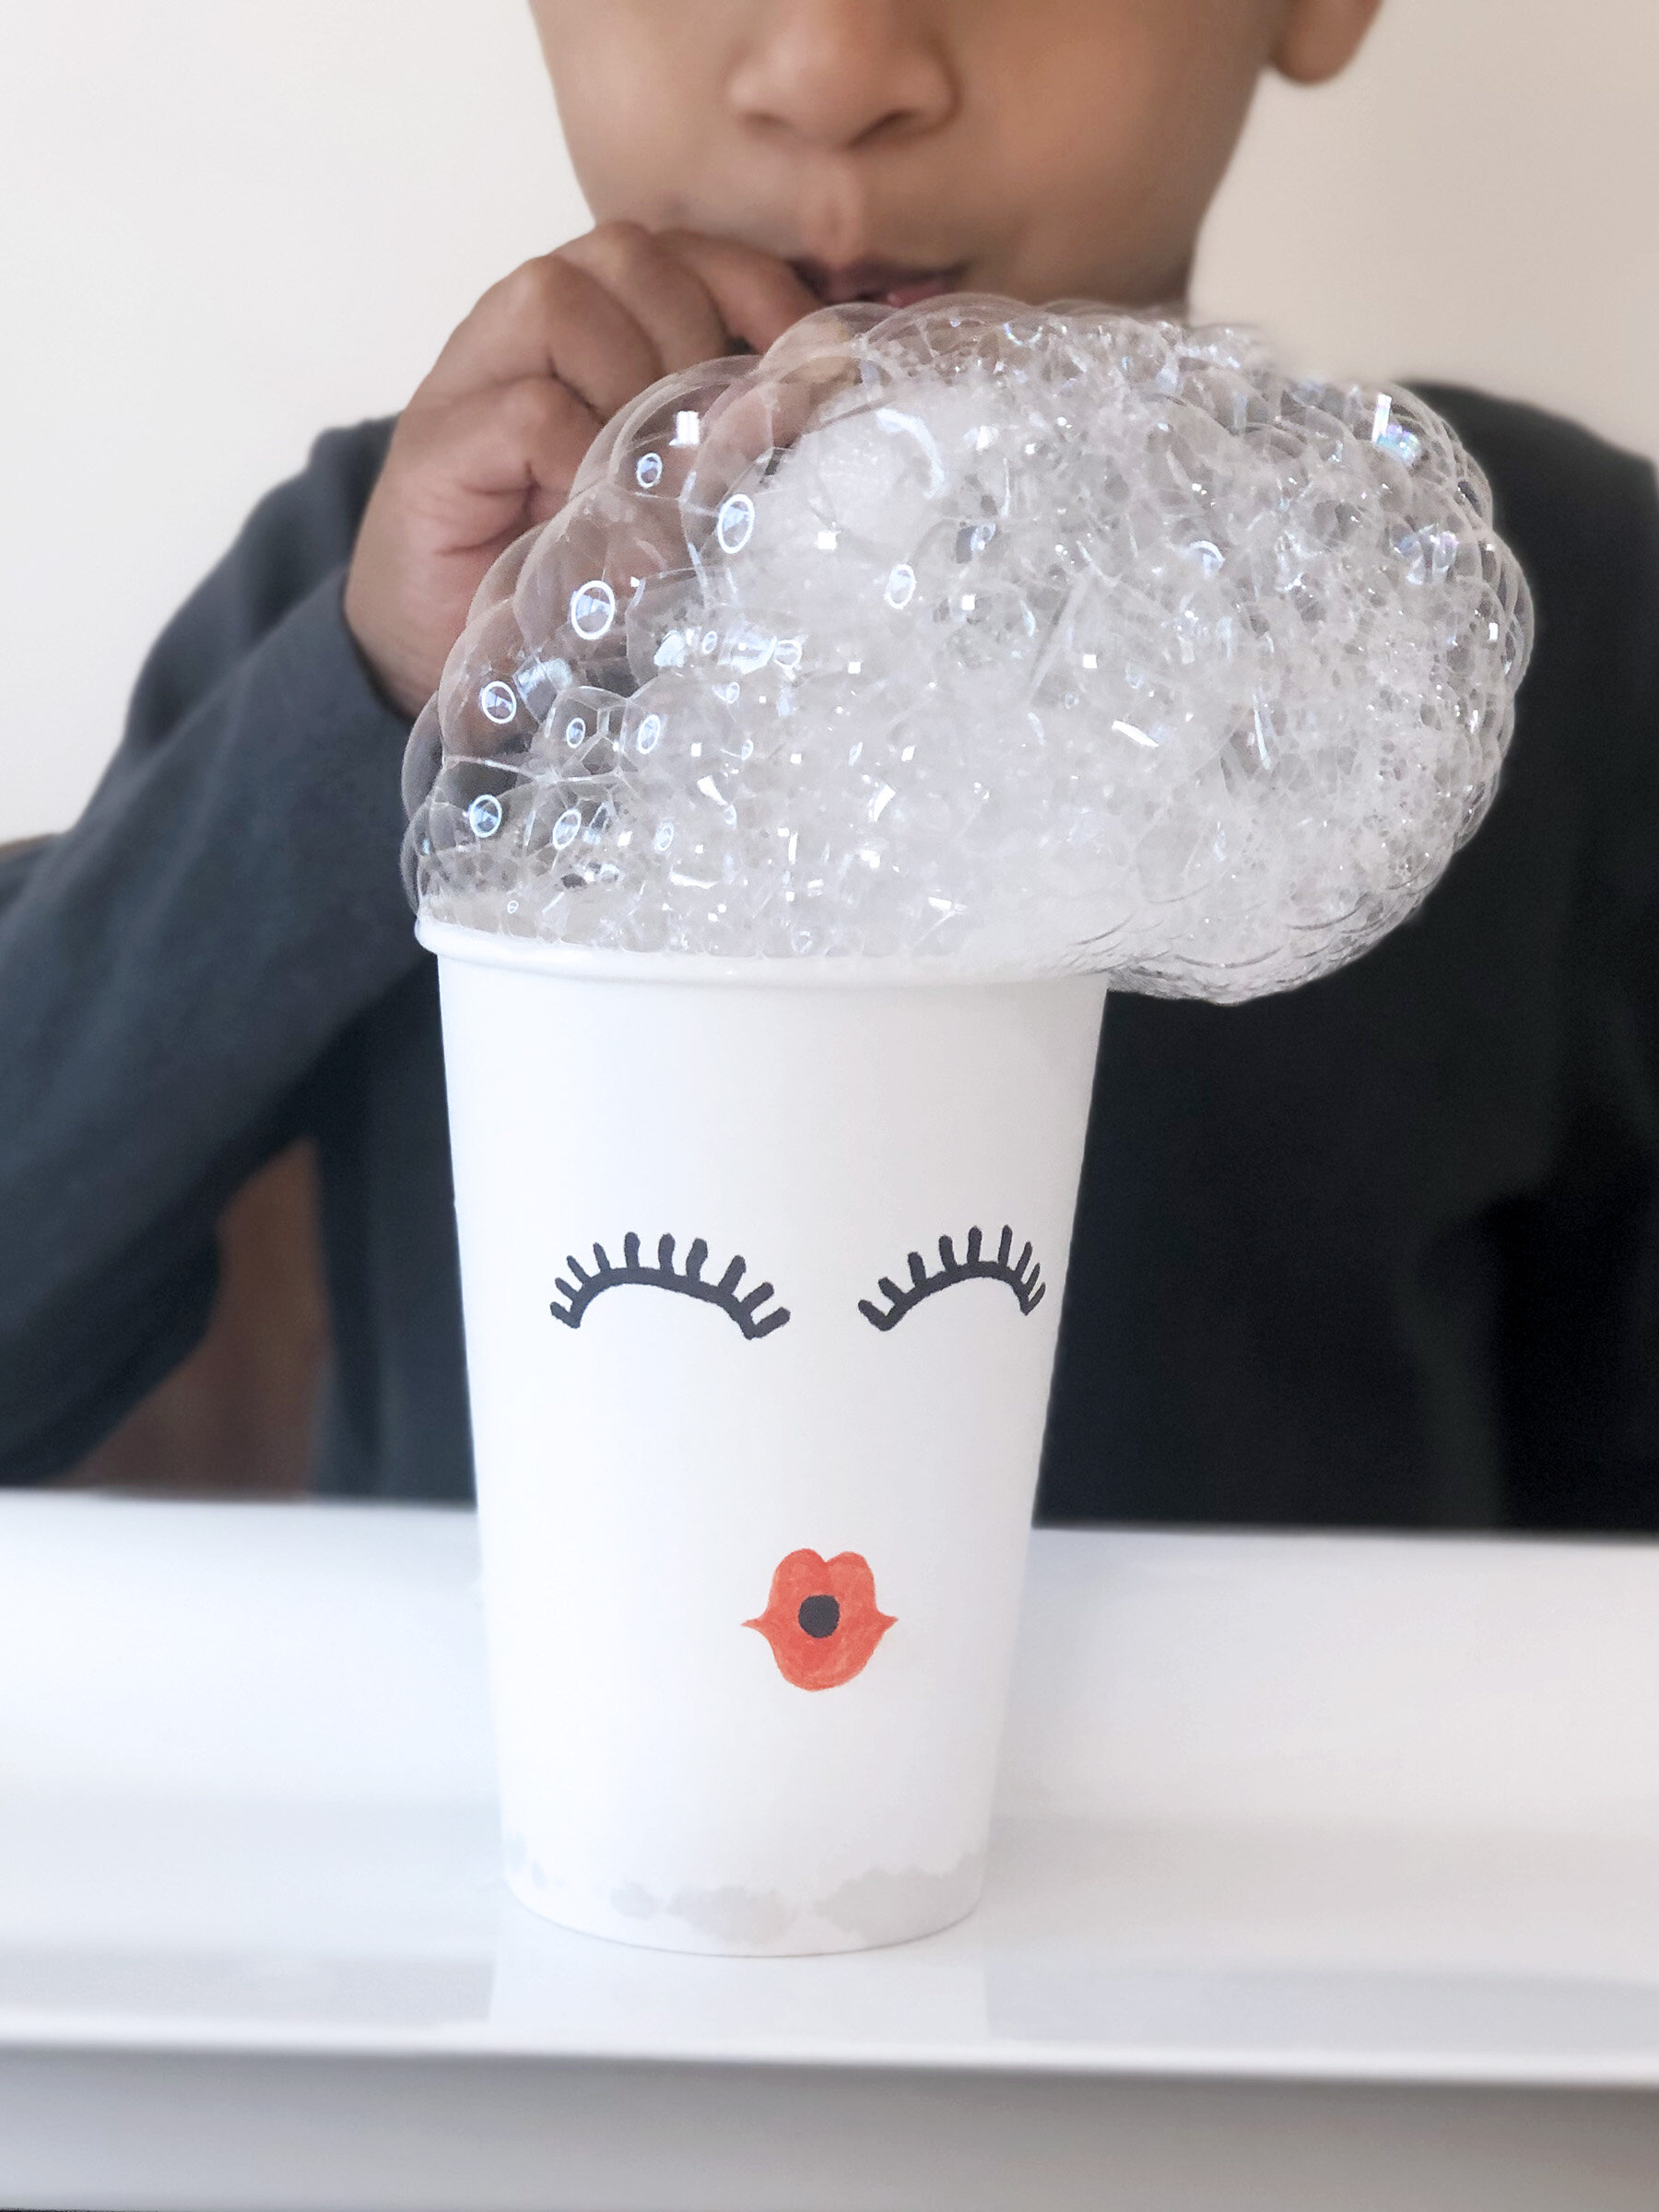
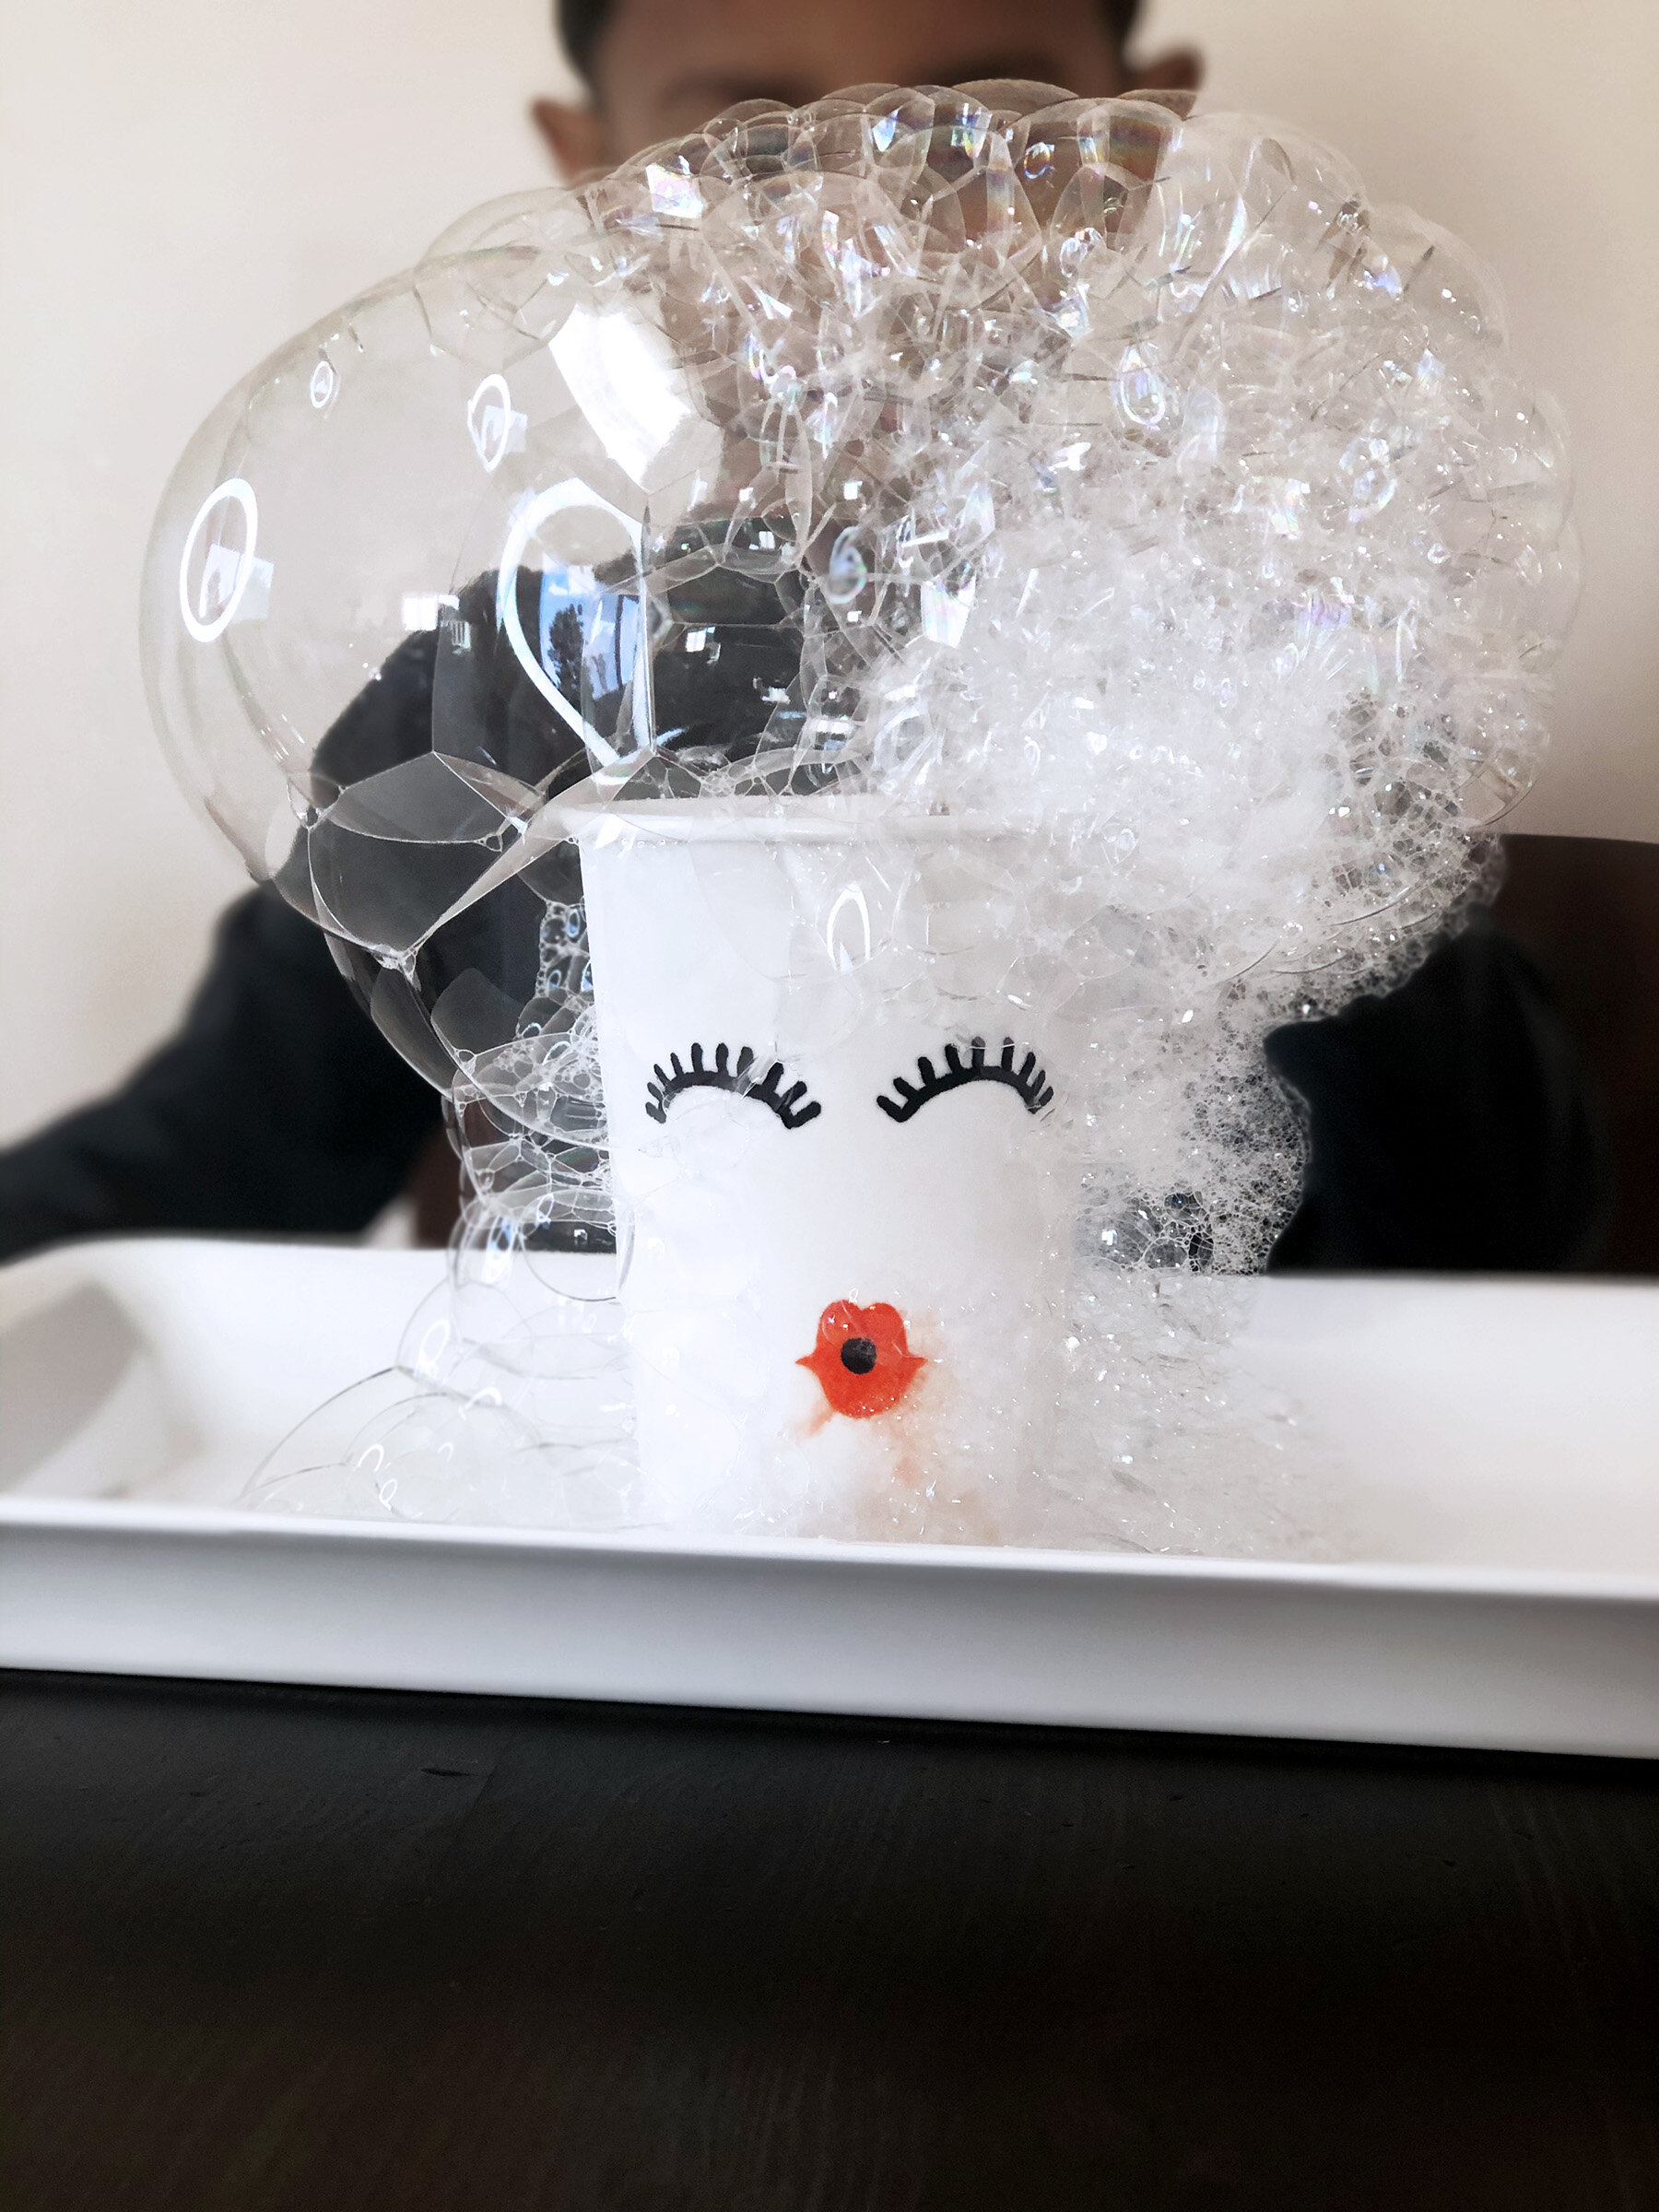
Take a glass (paper or plastic), add a little dish soap and mix it with water. We drew a face on our paper glass, just for fun. Keep the glass in a tray and keep tissues handy (you will need them). Now hand a straw to your kid and ask them to blow in the glass to make bubbles. When I gave my son the straw and asked him if he wanted to make bubbles, he looked confused. He was a little hesitant and asked me if I was sure (my son loves to make bubbles whenever he is drinking anything and obviously I always tell him a no). Once he started making bubbles, there was no stopping him. We tried different hairdos with bubbles for the face on the glass. This was a lot of fun and kept him occupied for a long time.
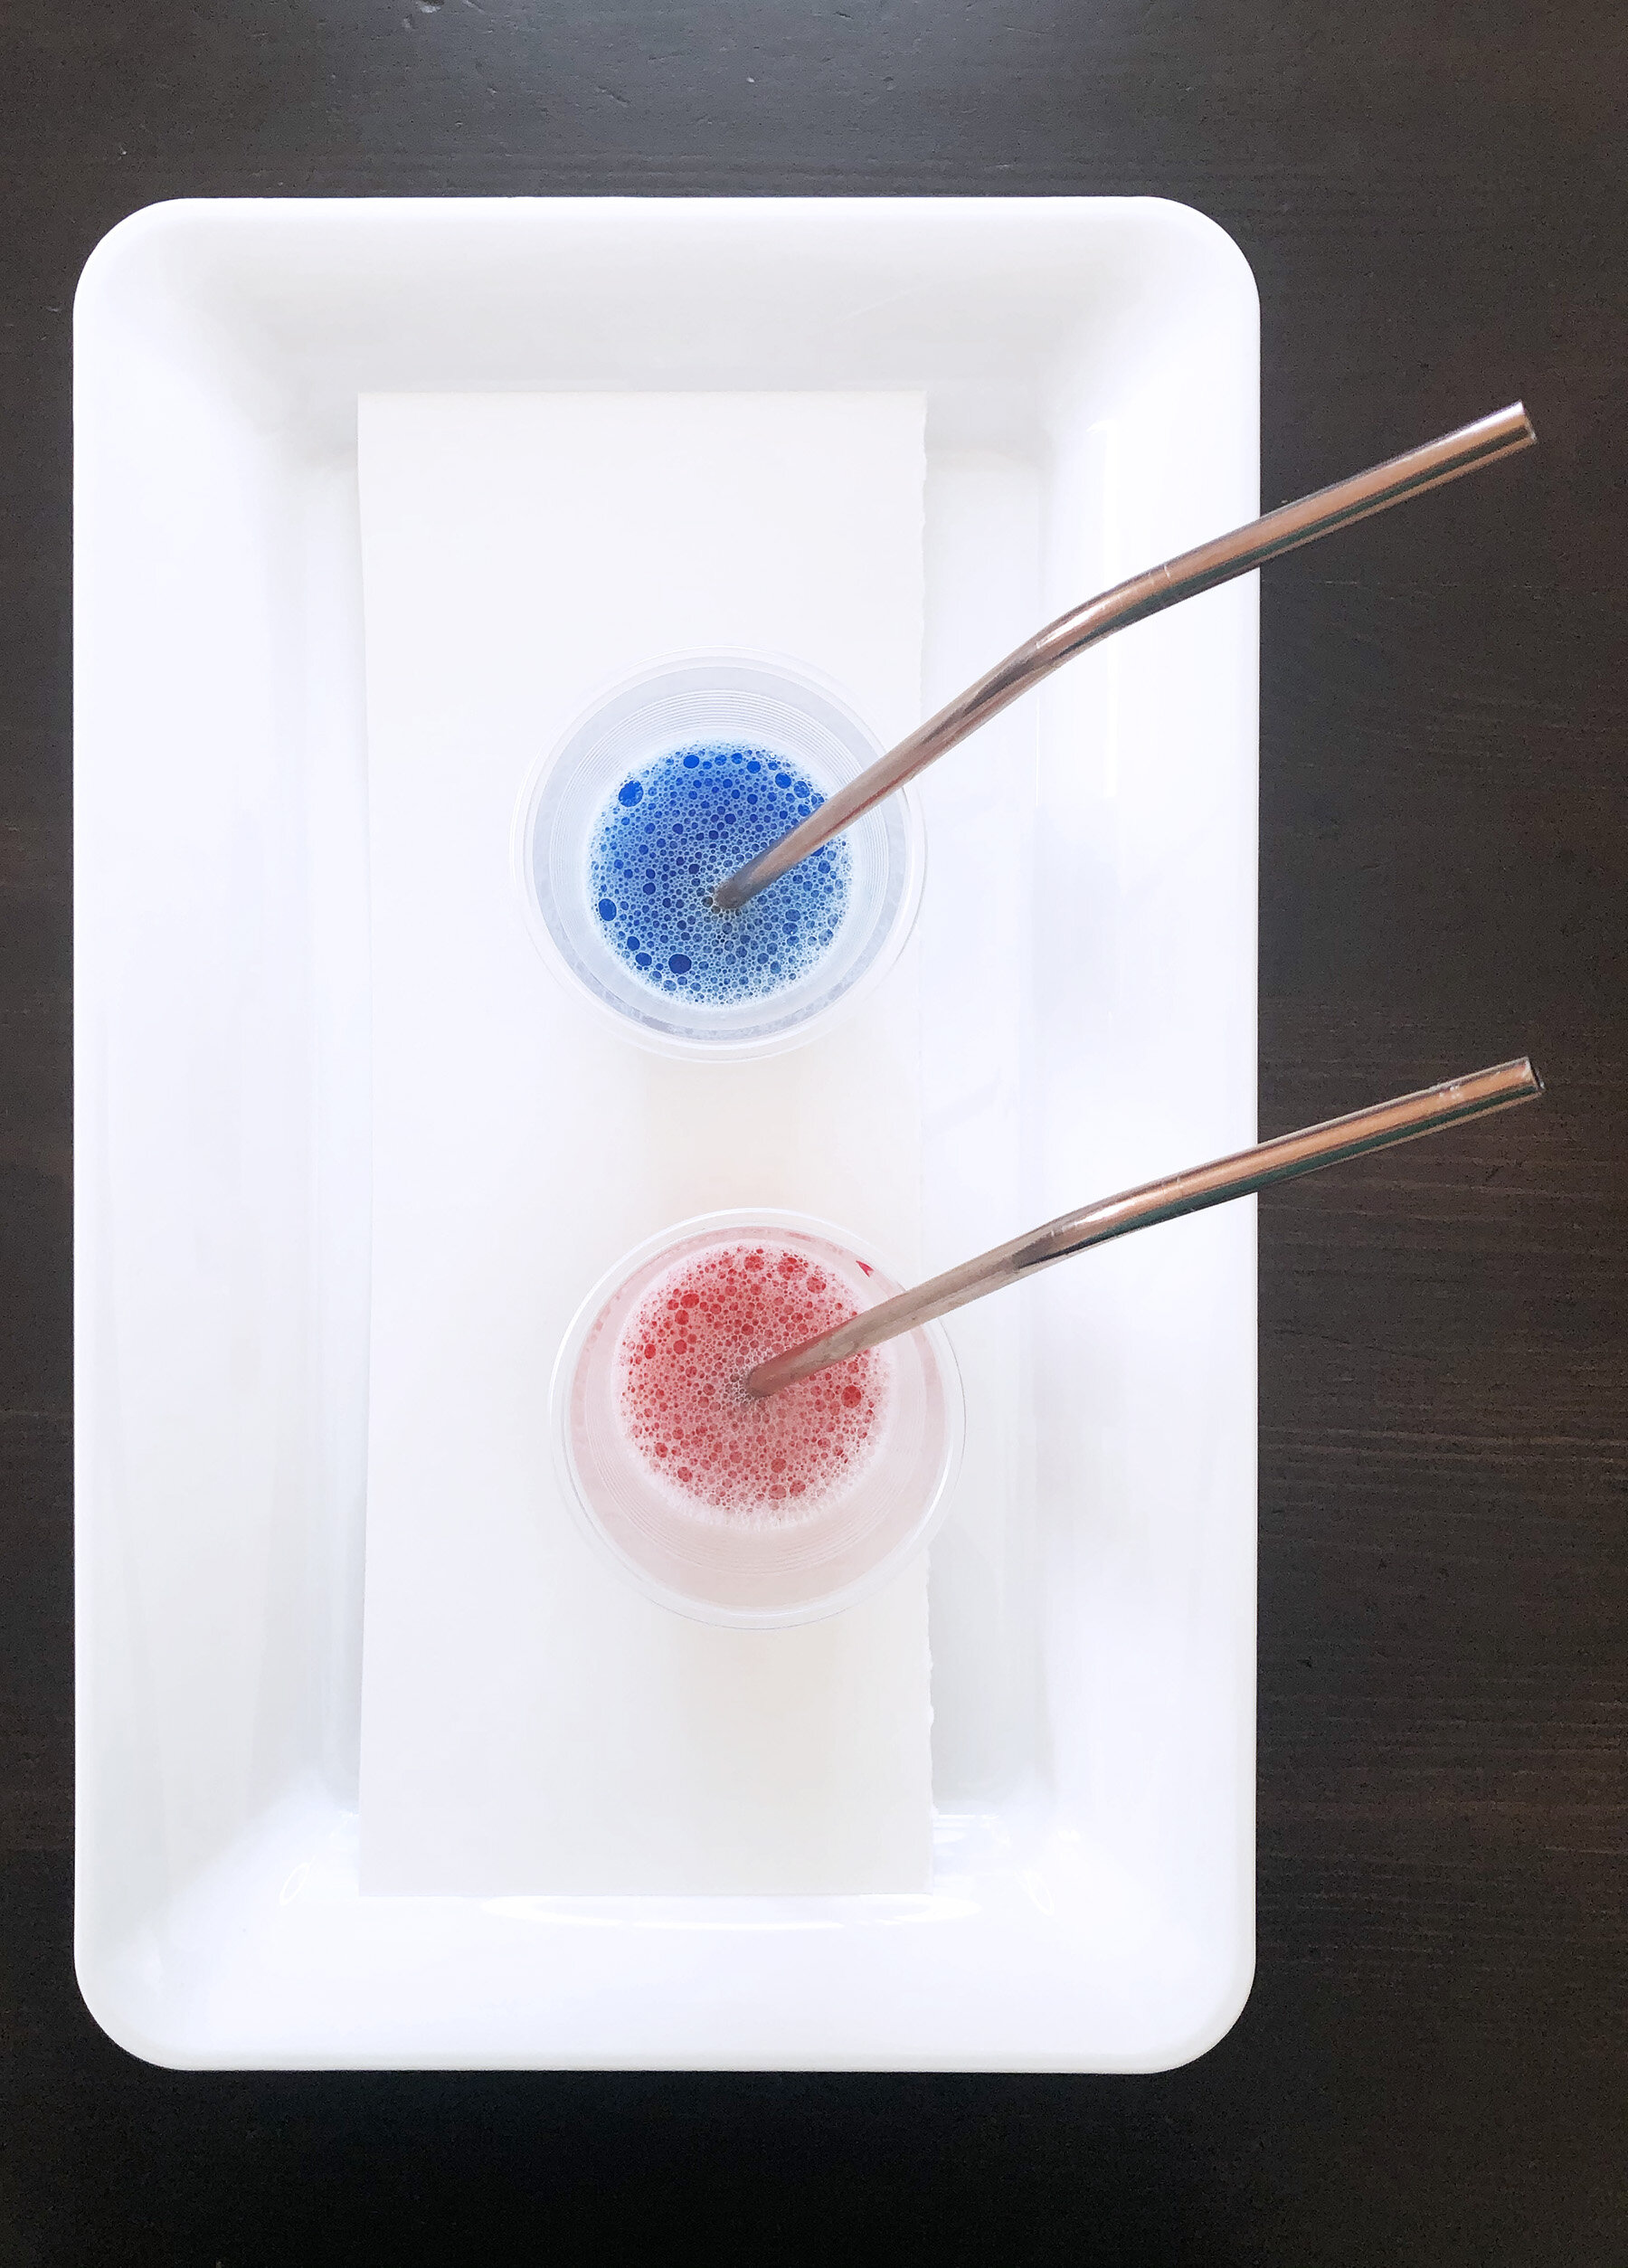
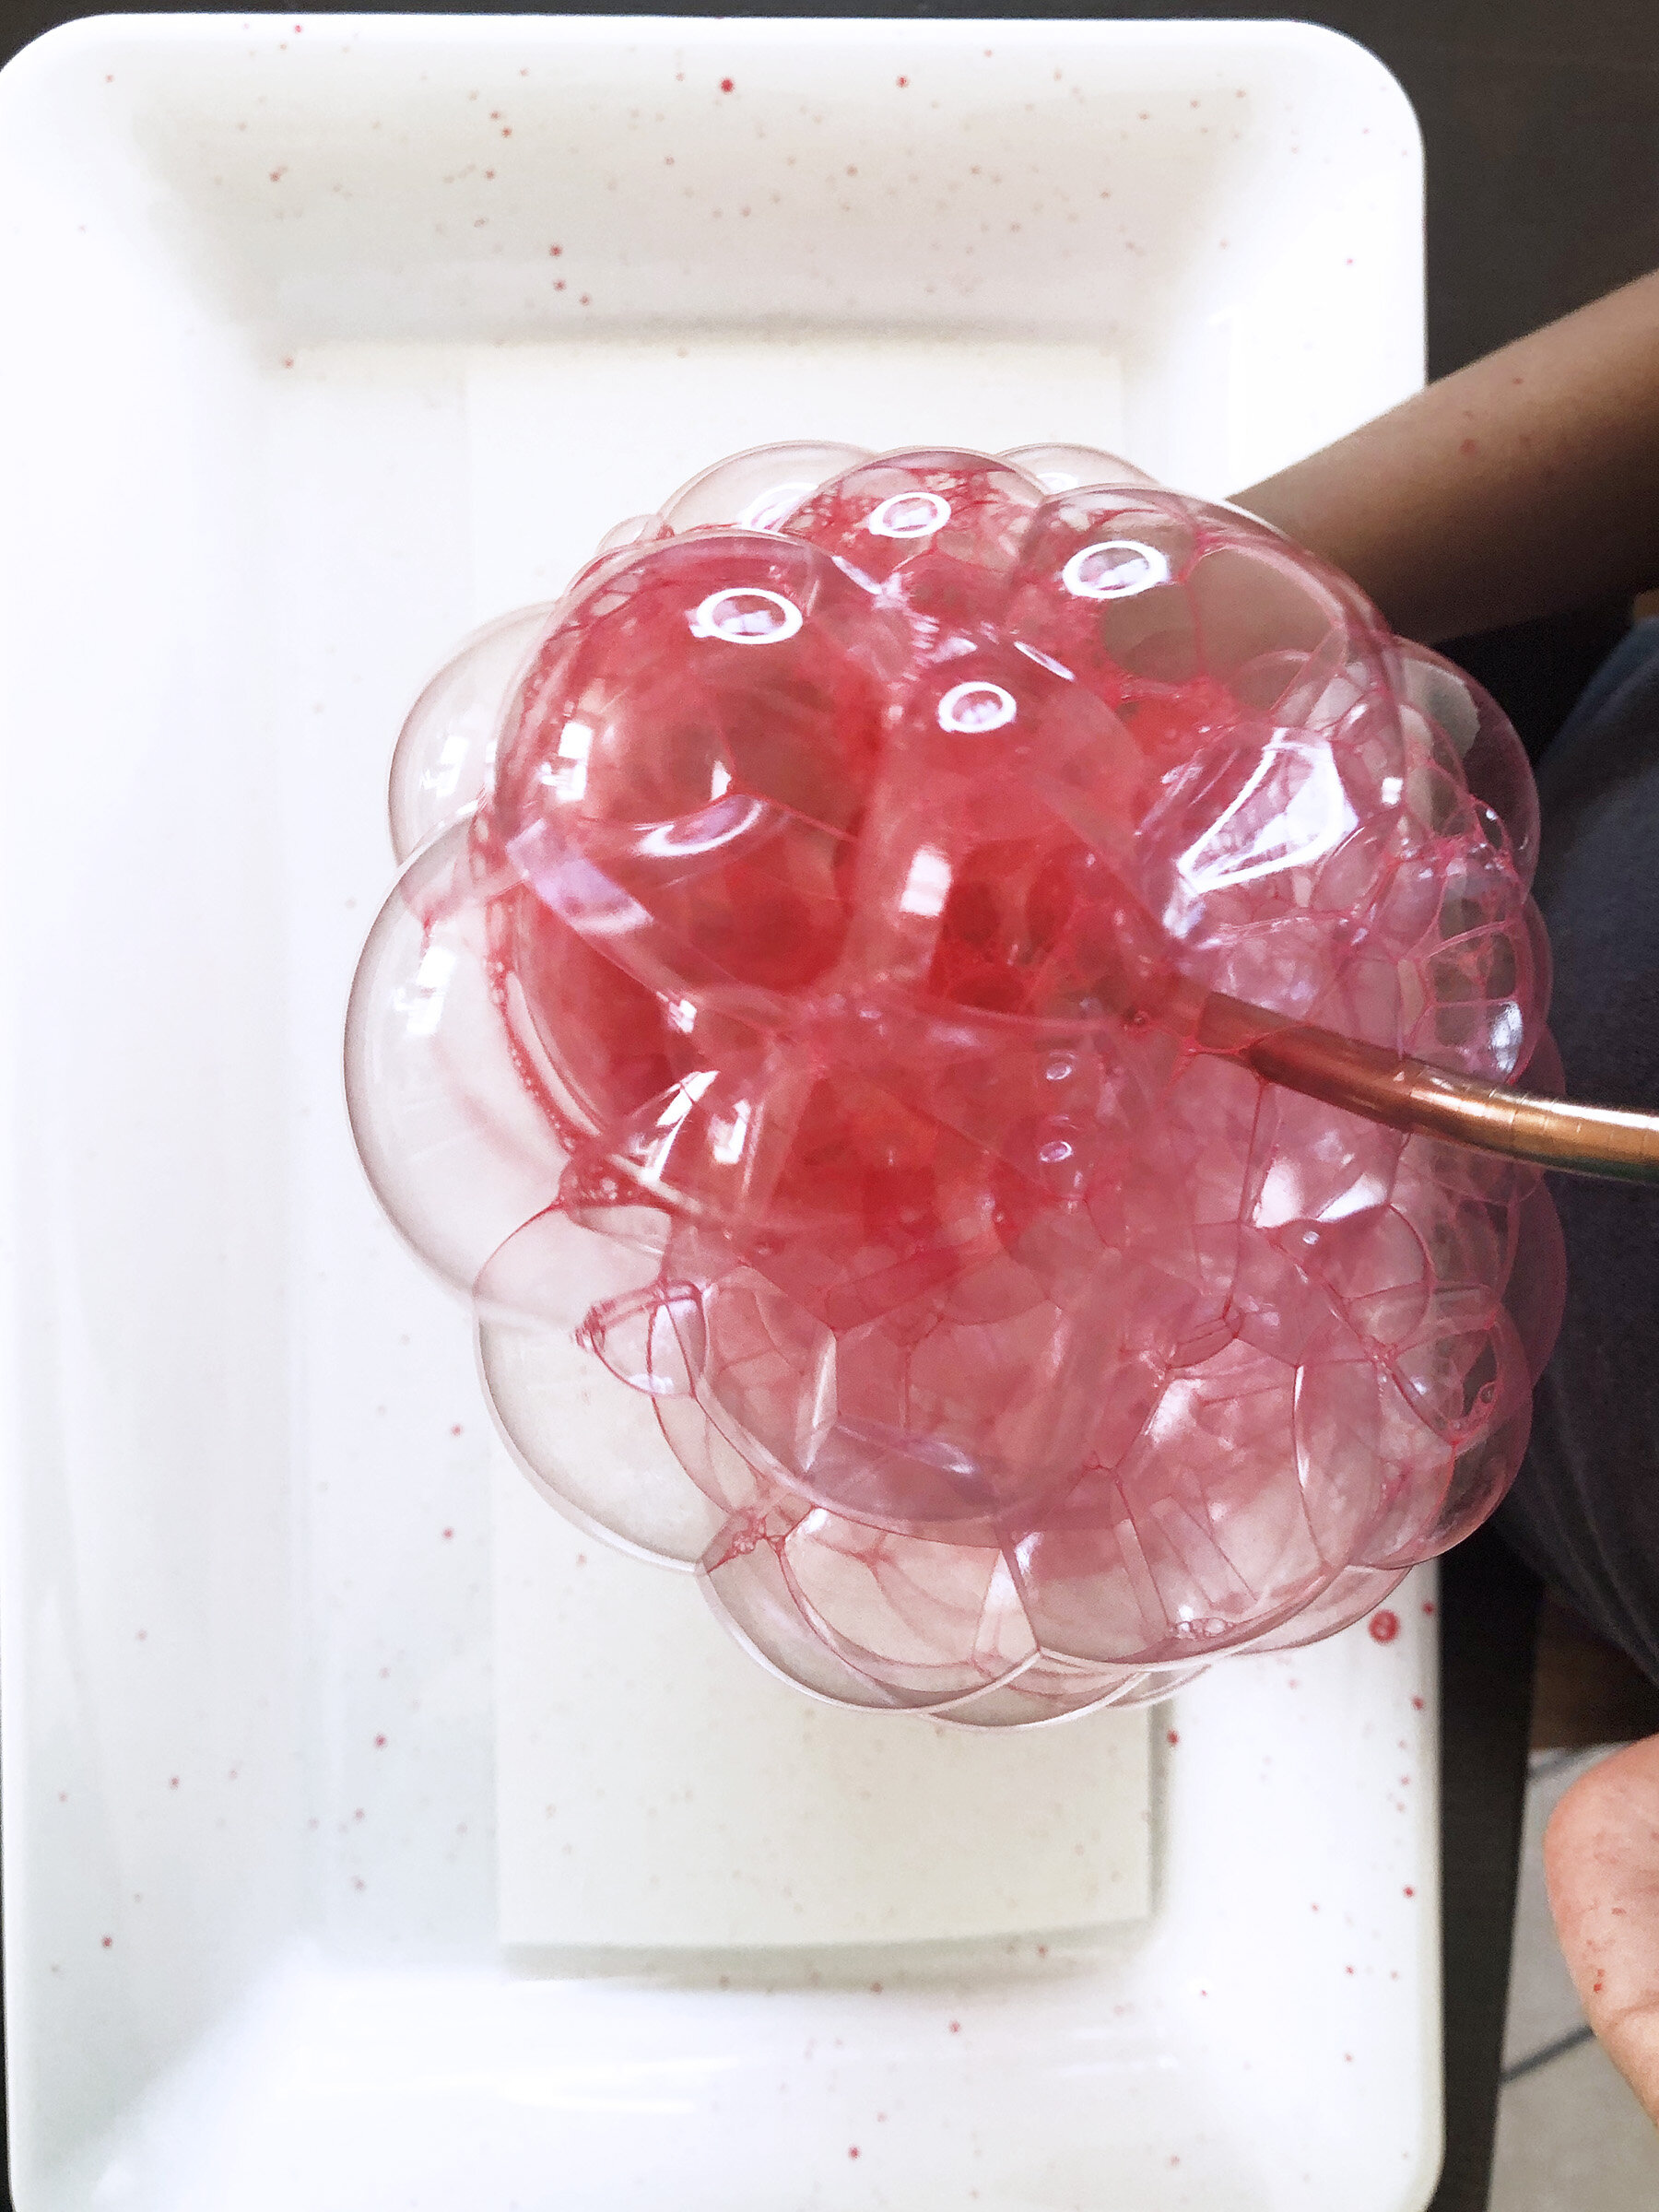
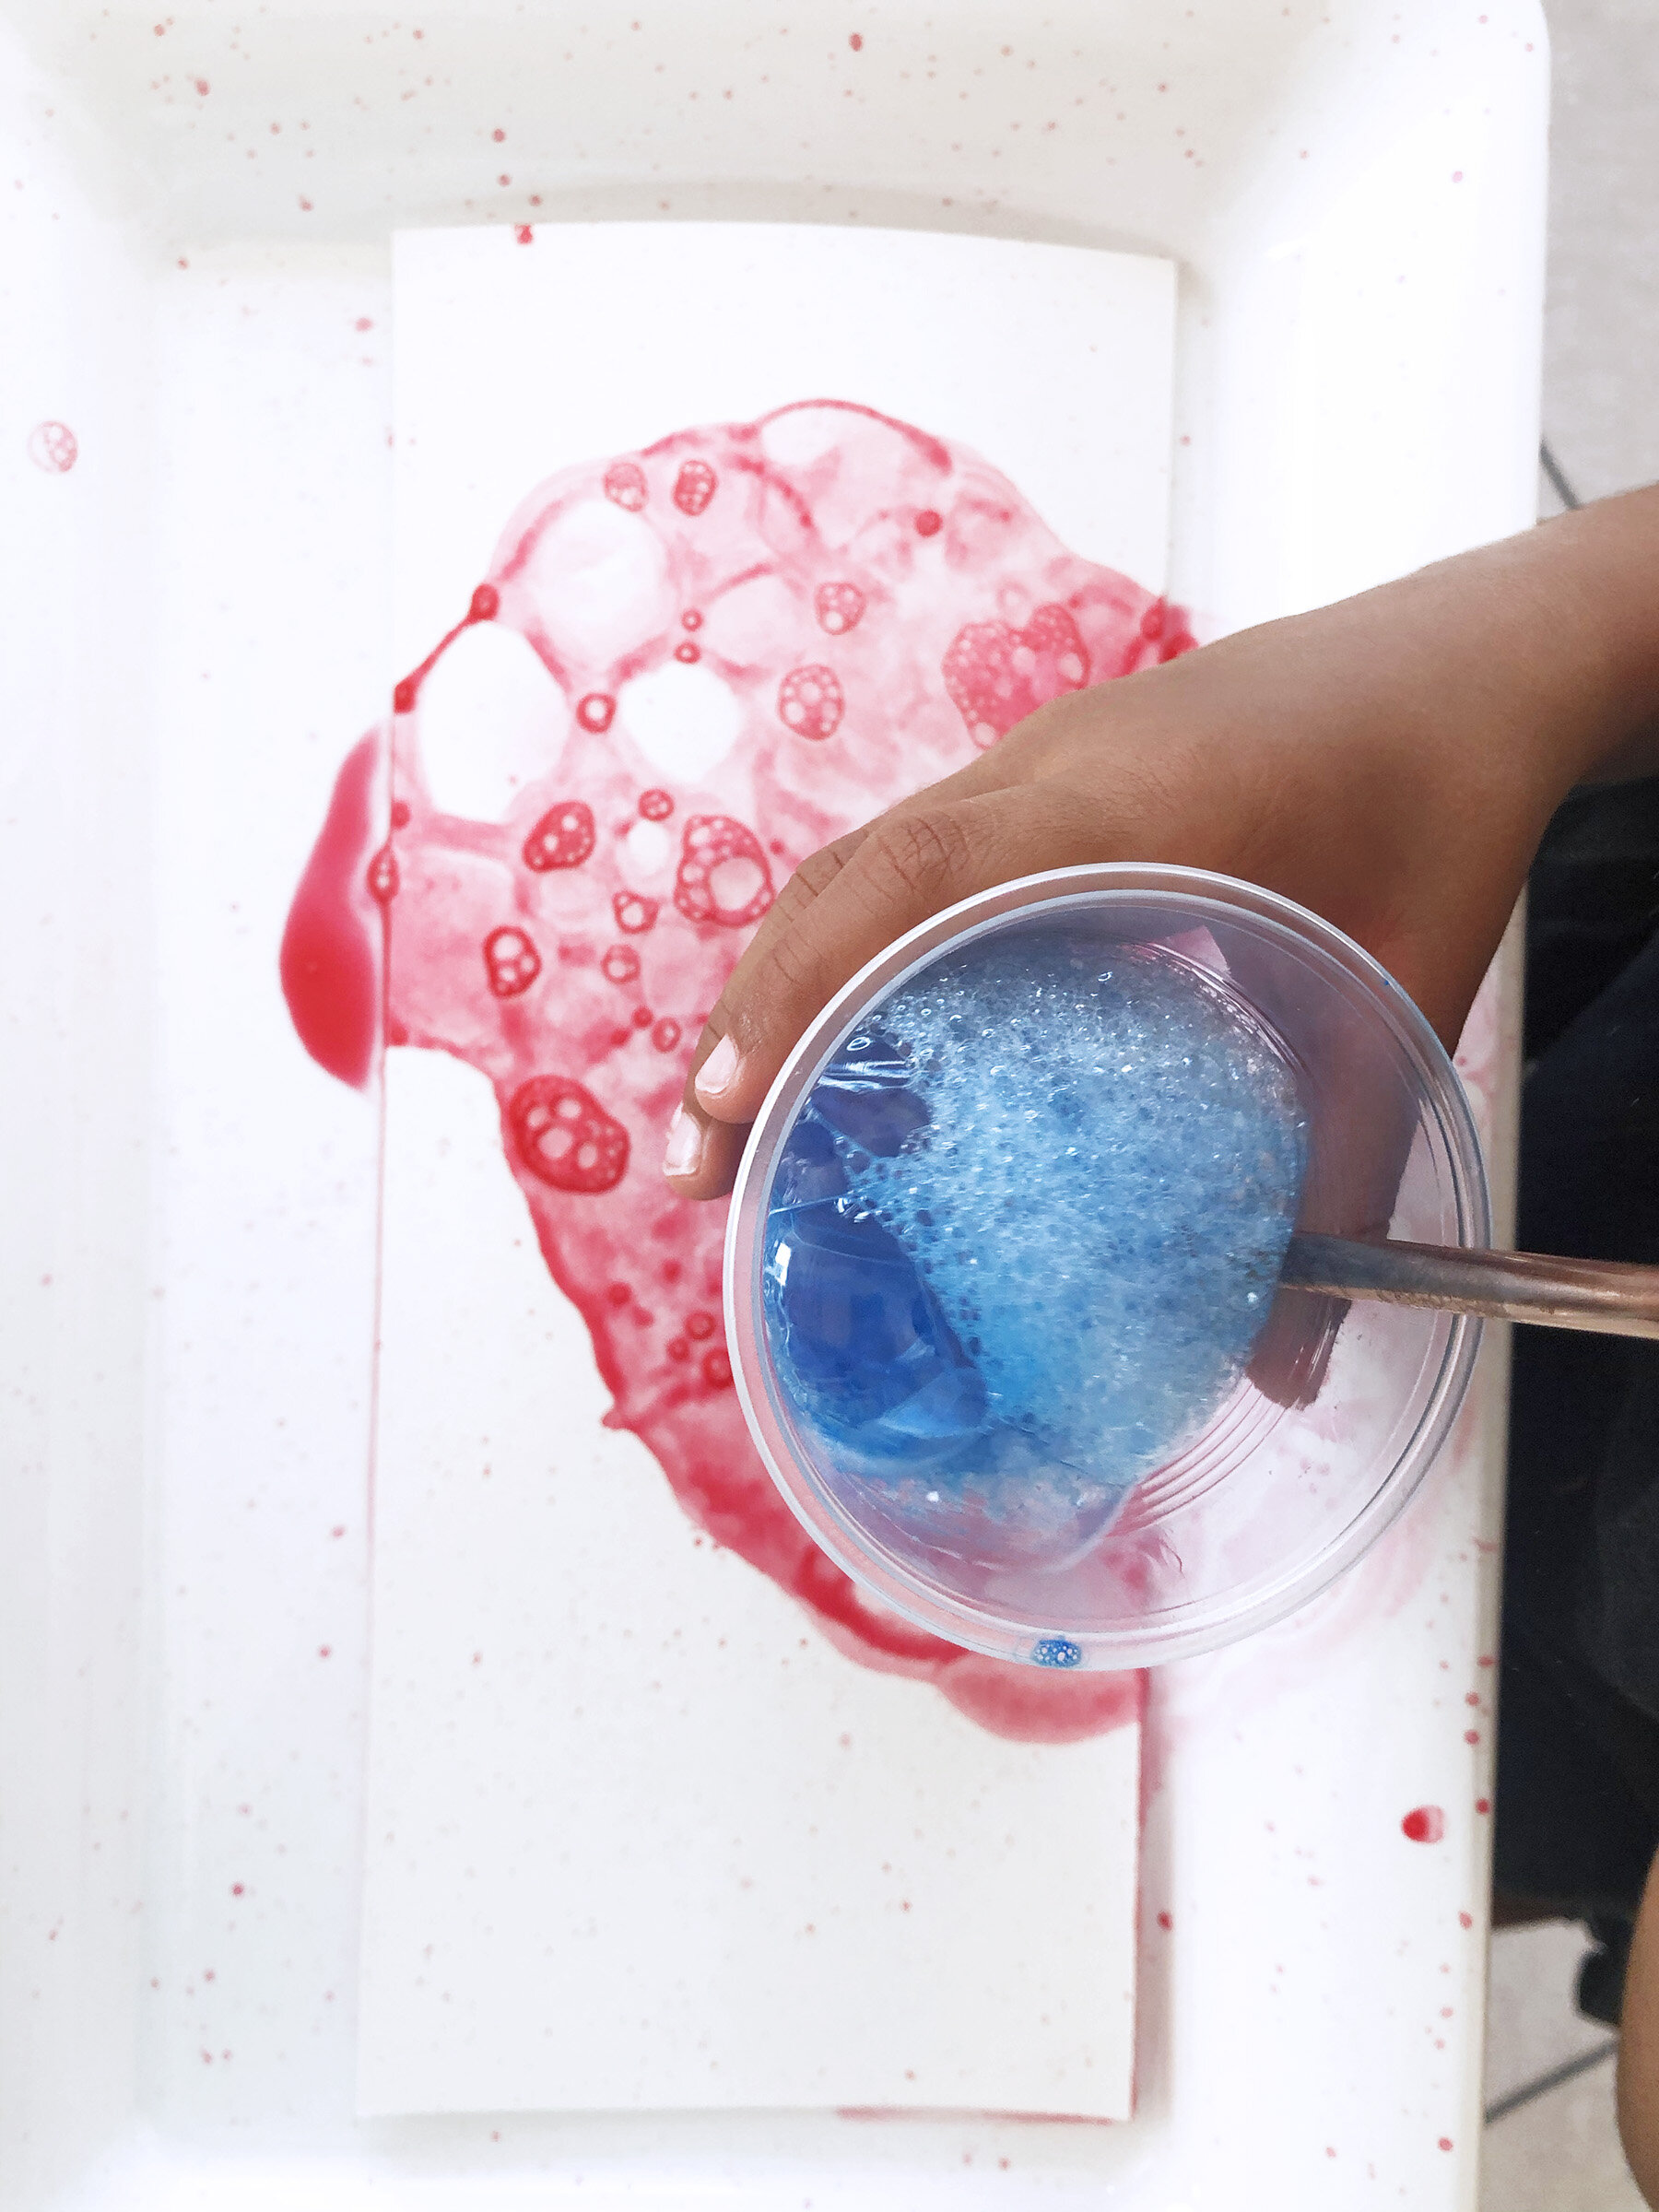

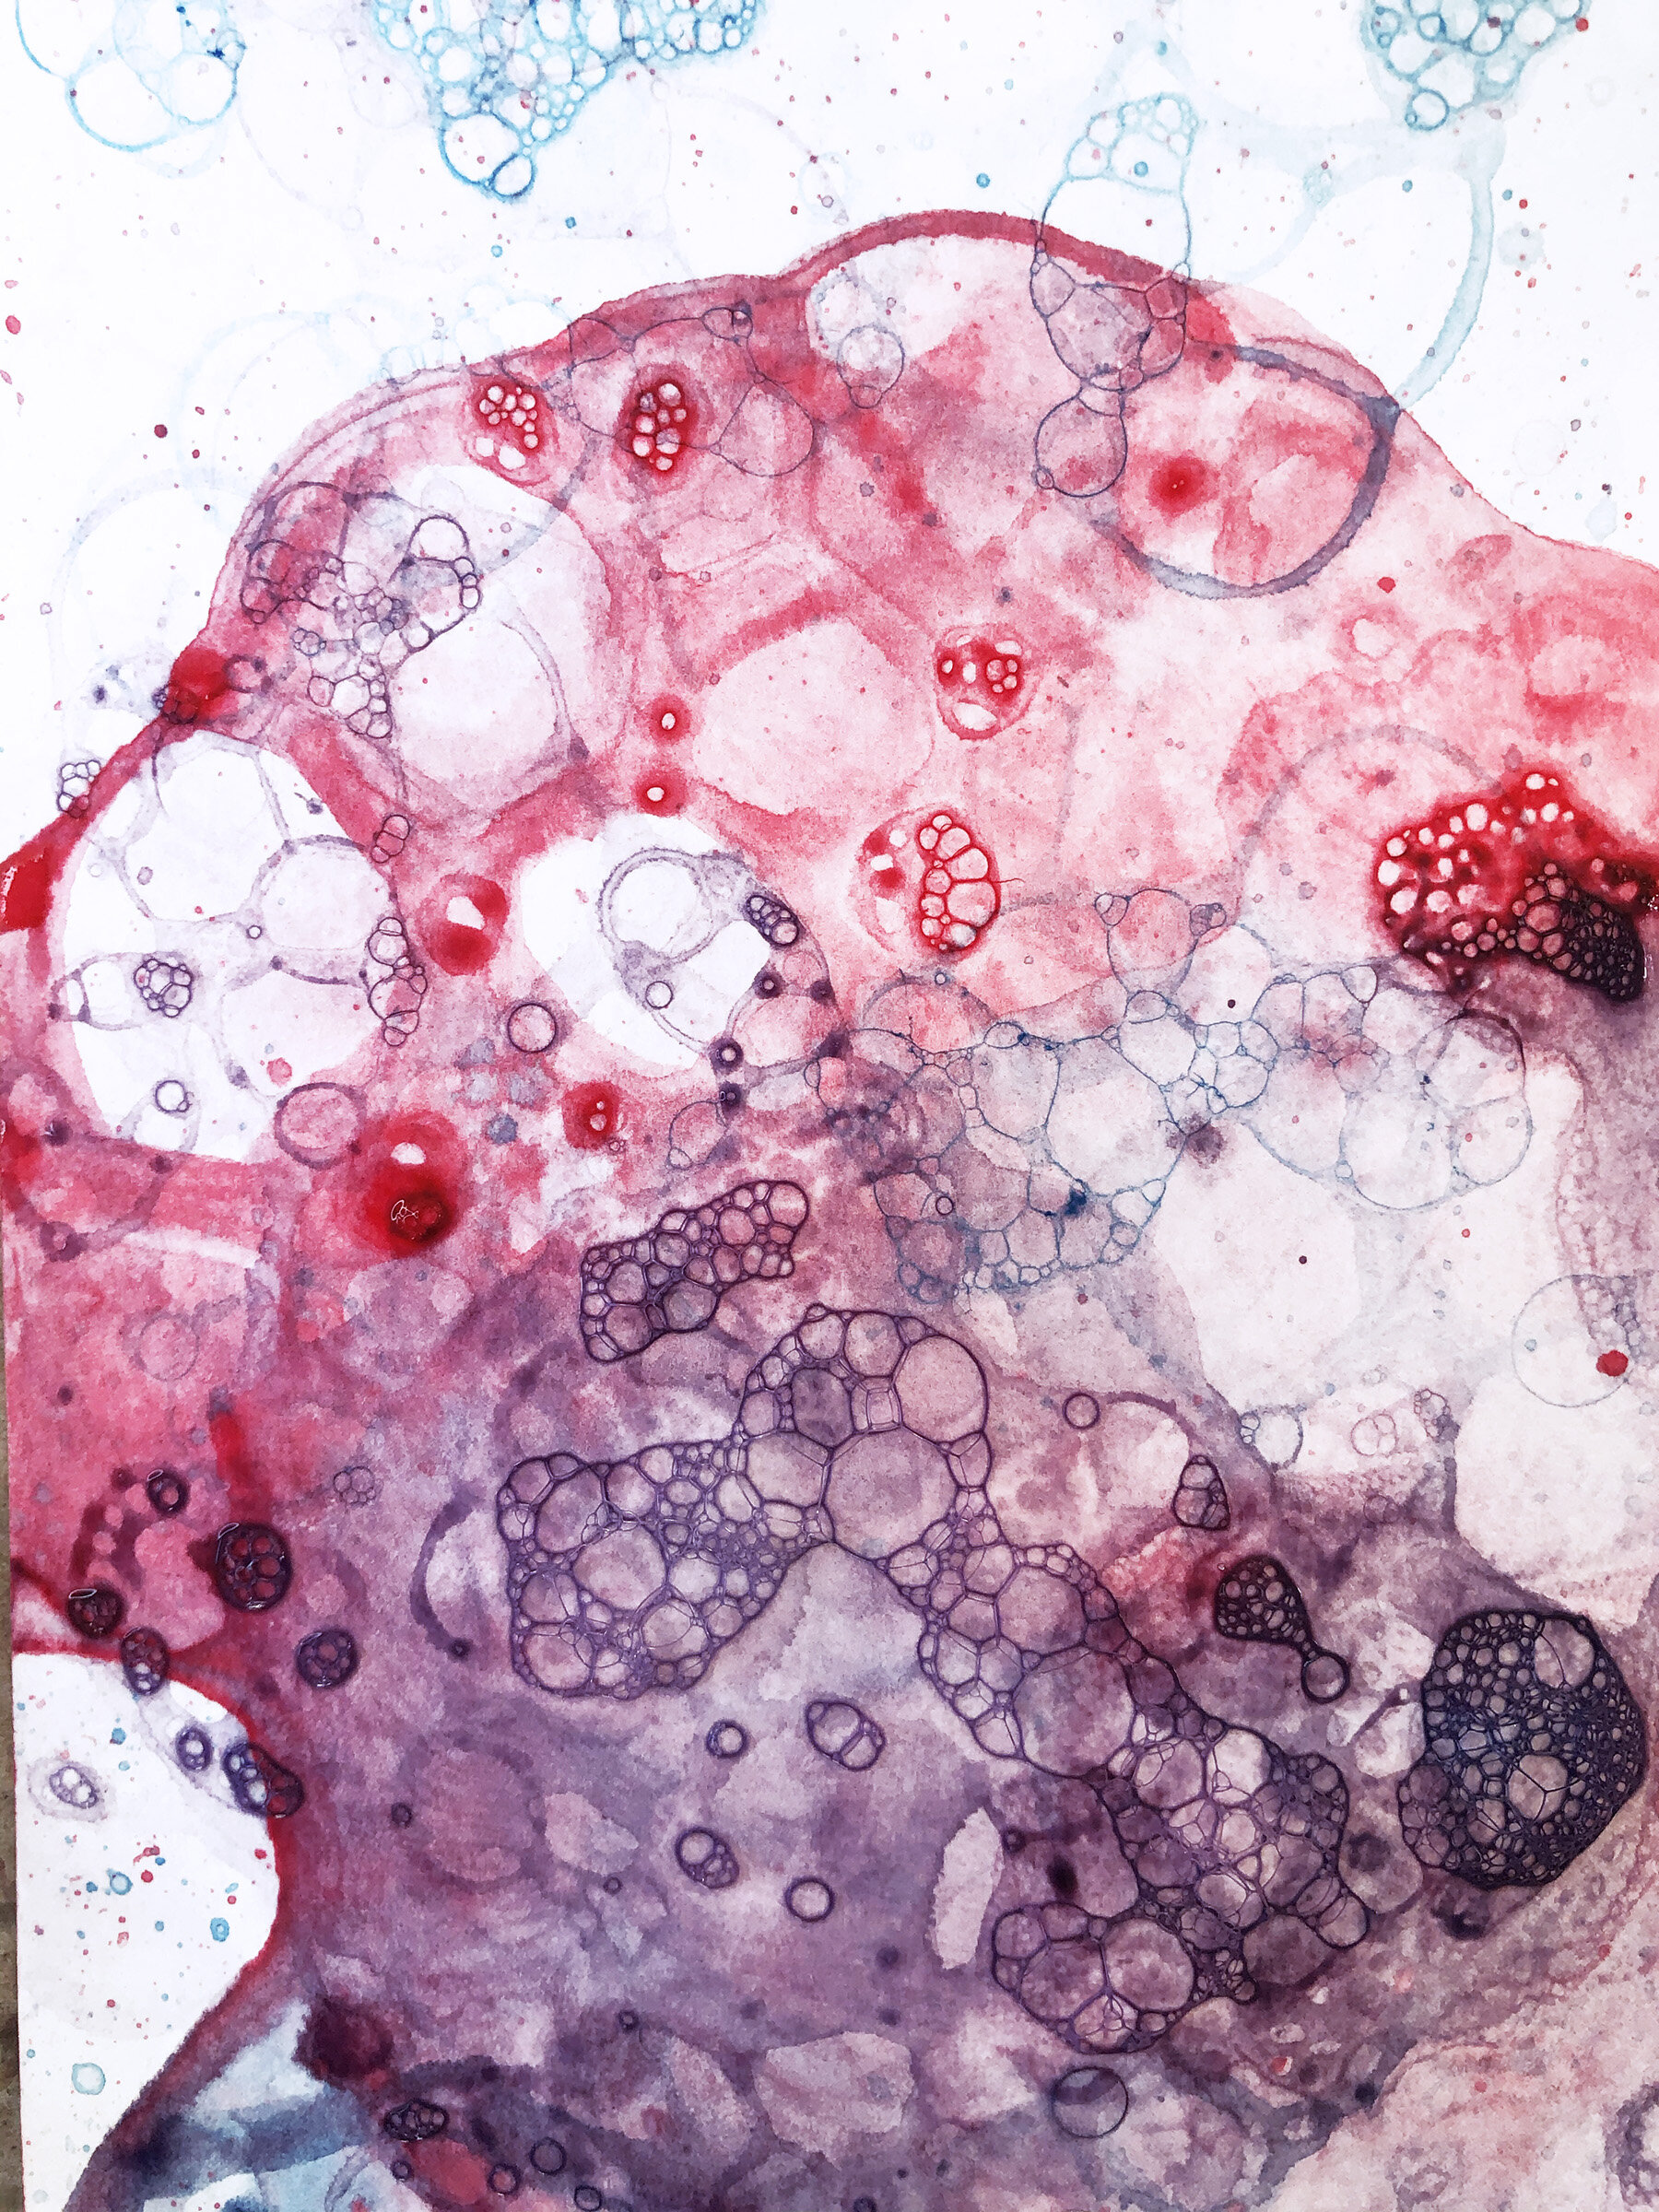
You can stop here or continue with the activity where we explore further with Art. Take some paint (washable non toxic paint is best) in another glass and add the soapy water to it. The more the paint the more vibrant your art will be. We used Red and Blue for the 4th July vibes. Now cut a thick paper to fit in your tray. You can place the glass on the paper in the tray or if your child is comfortable holding the glass in the hand, that’s fine too. Invite them to blow some bubbles (they are not going to say no for this ever!).
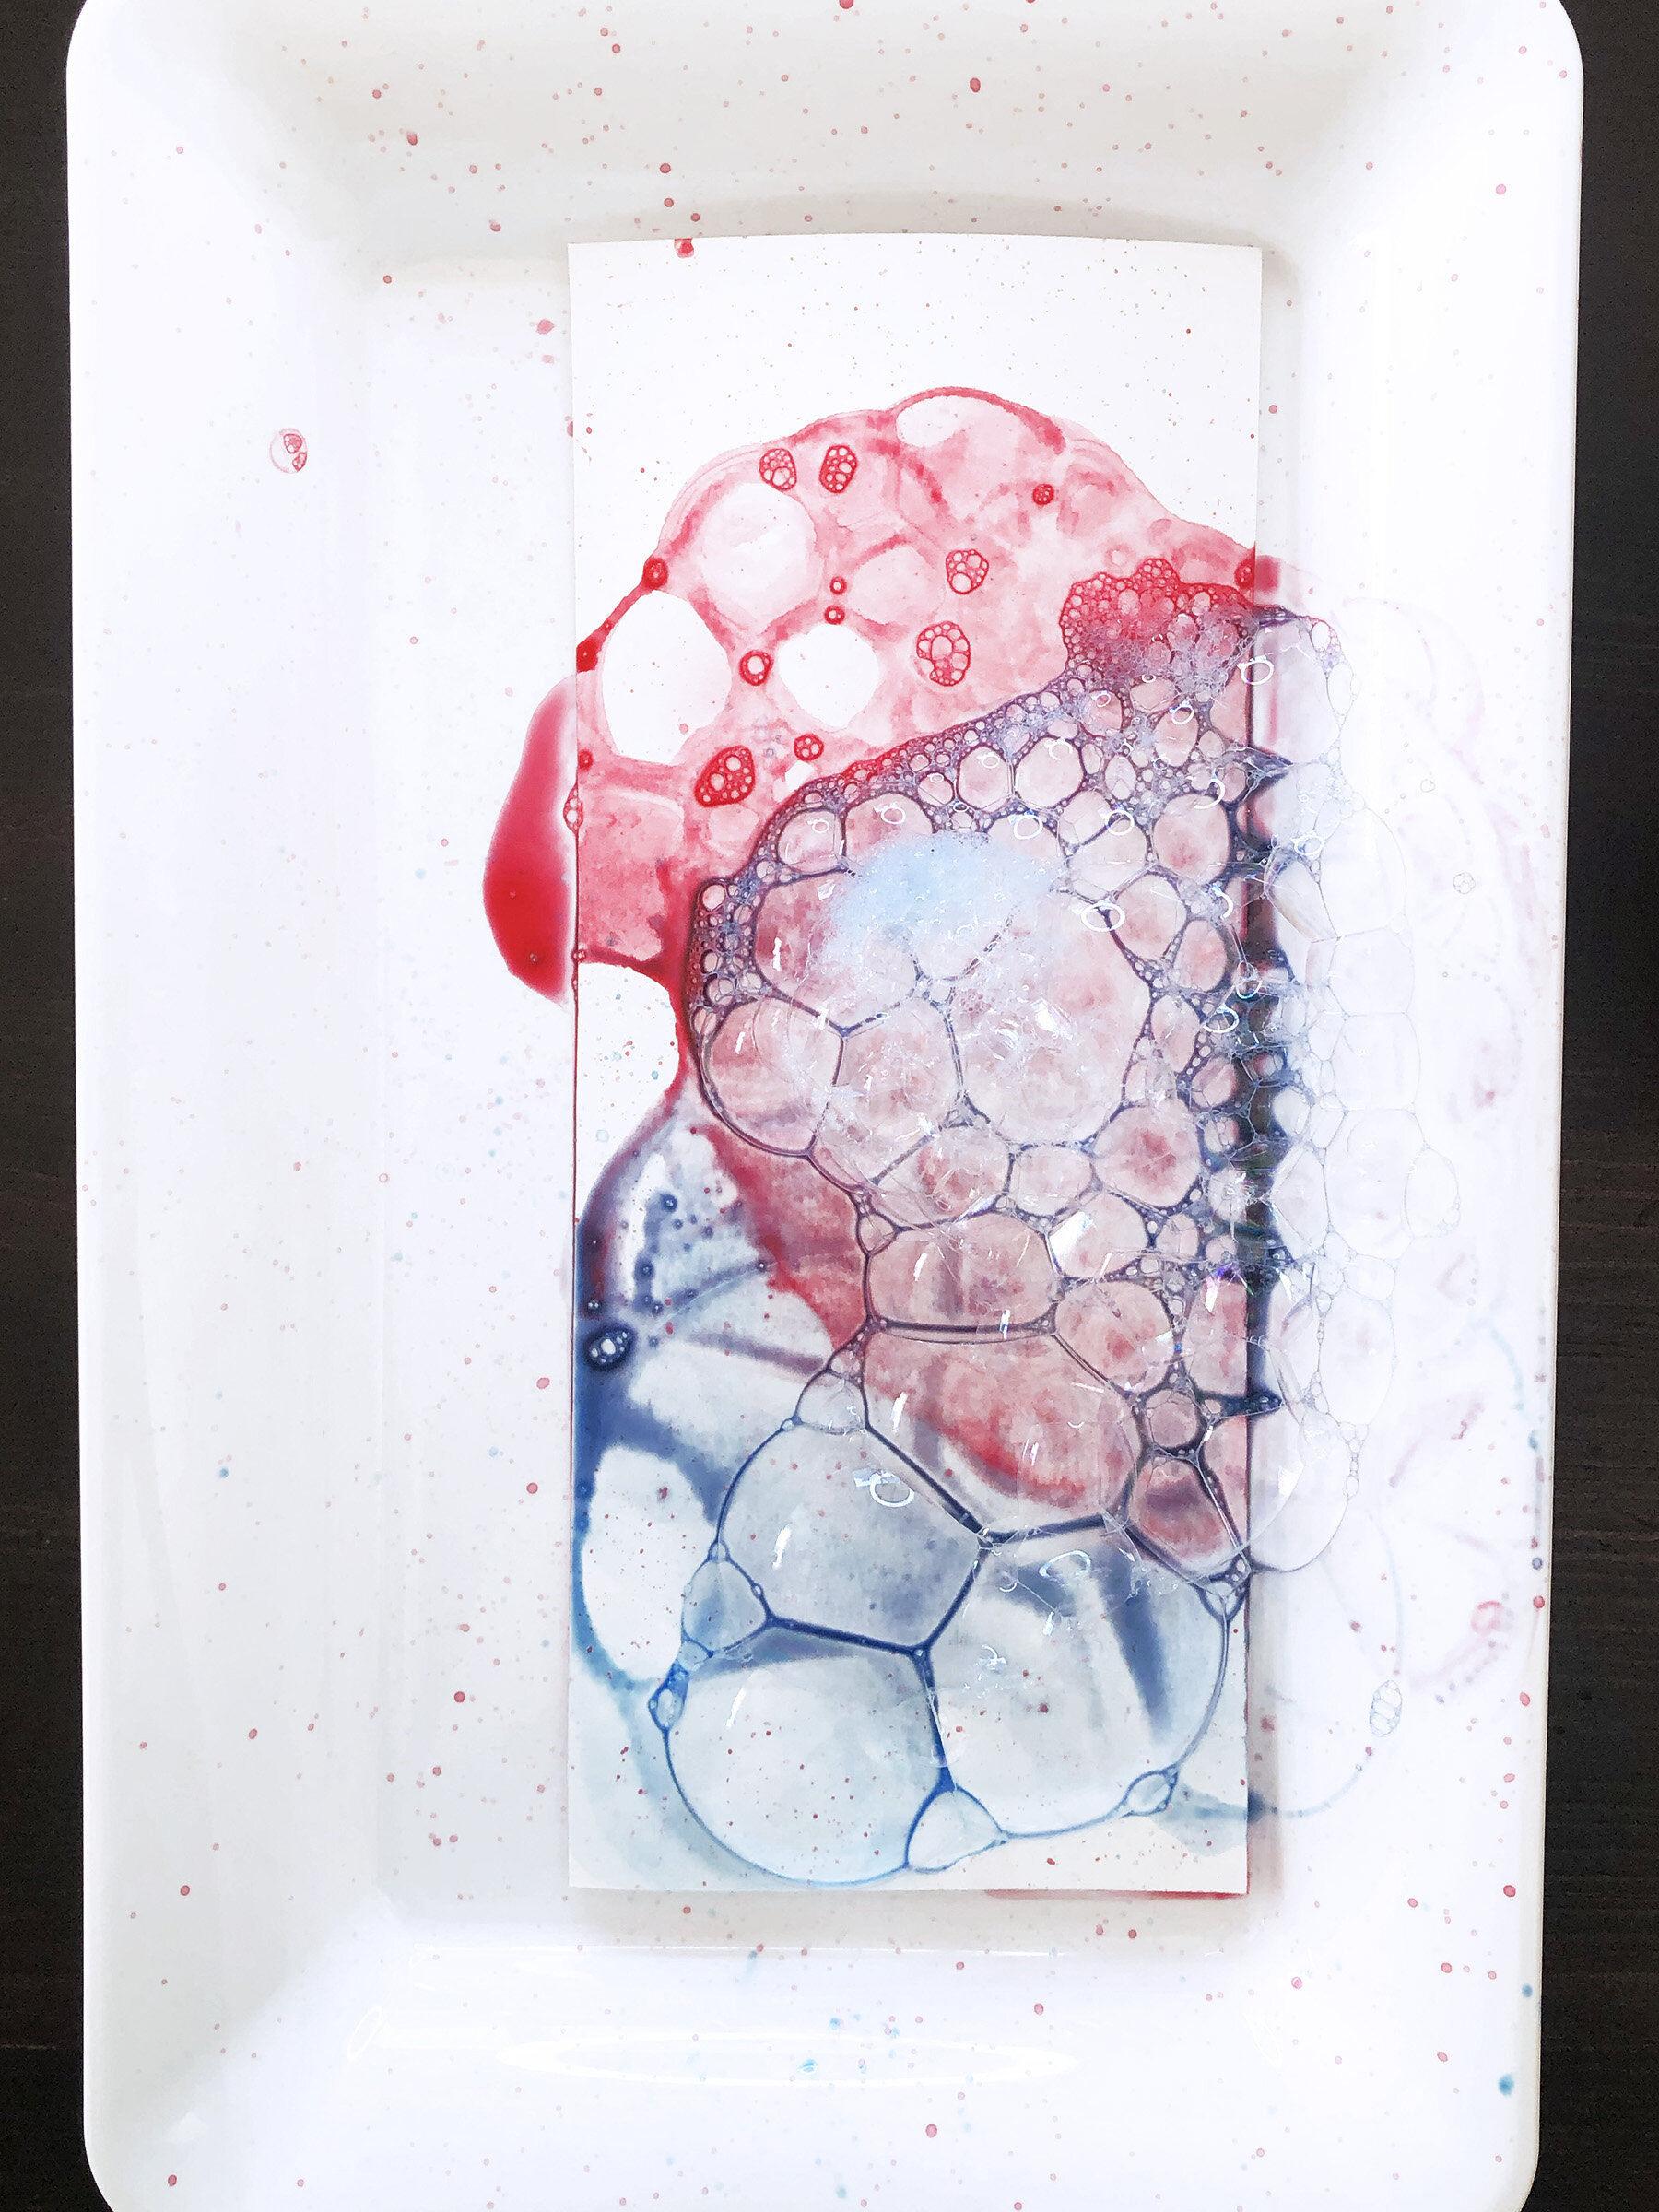
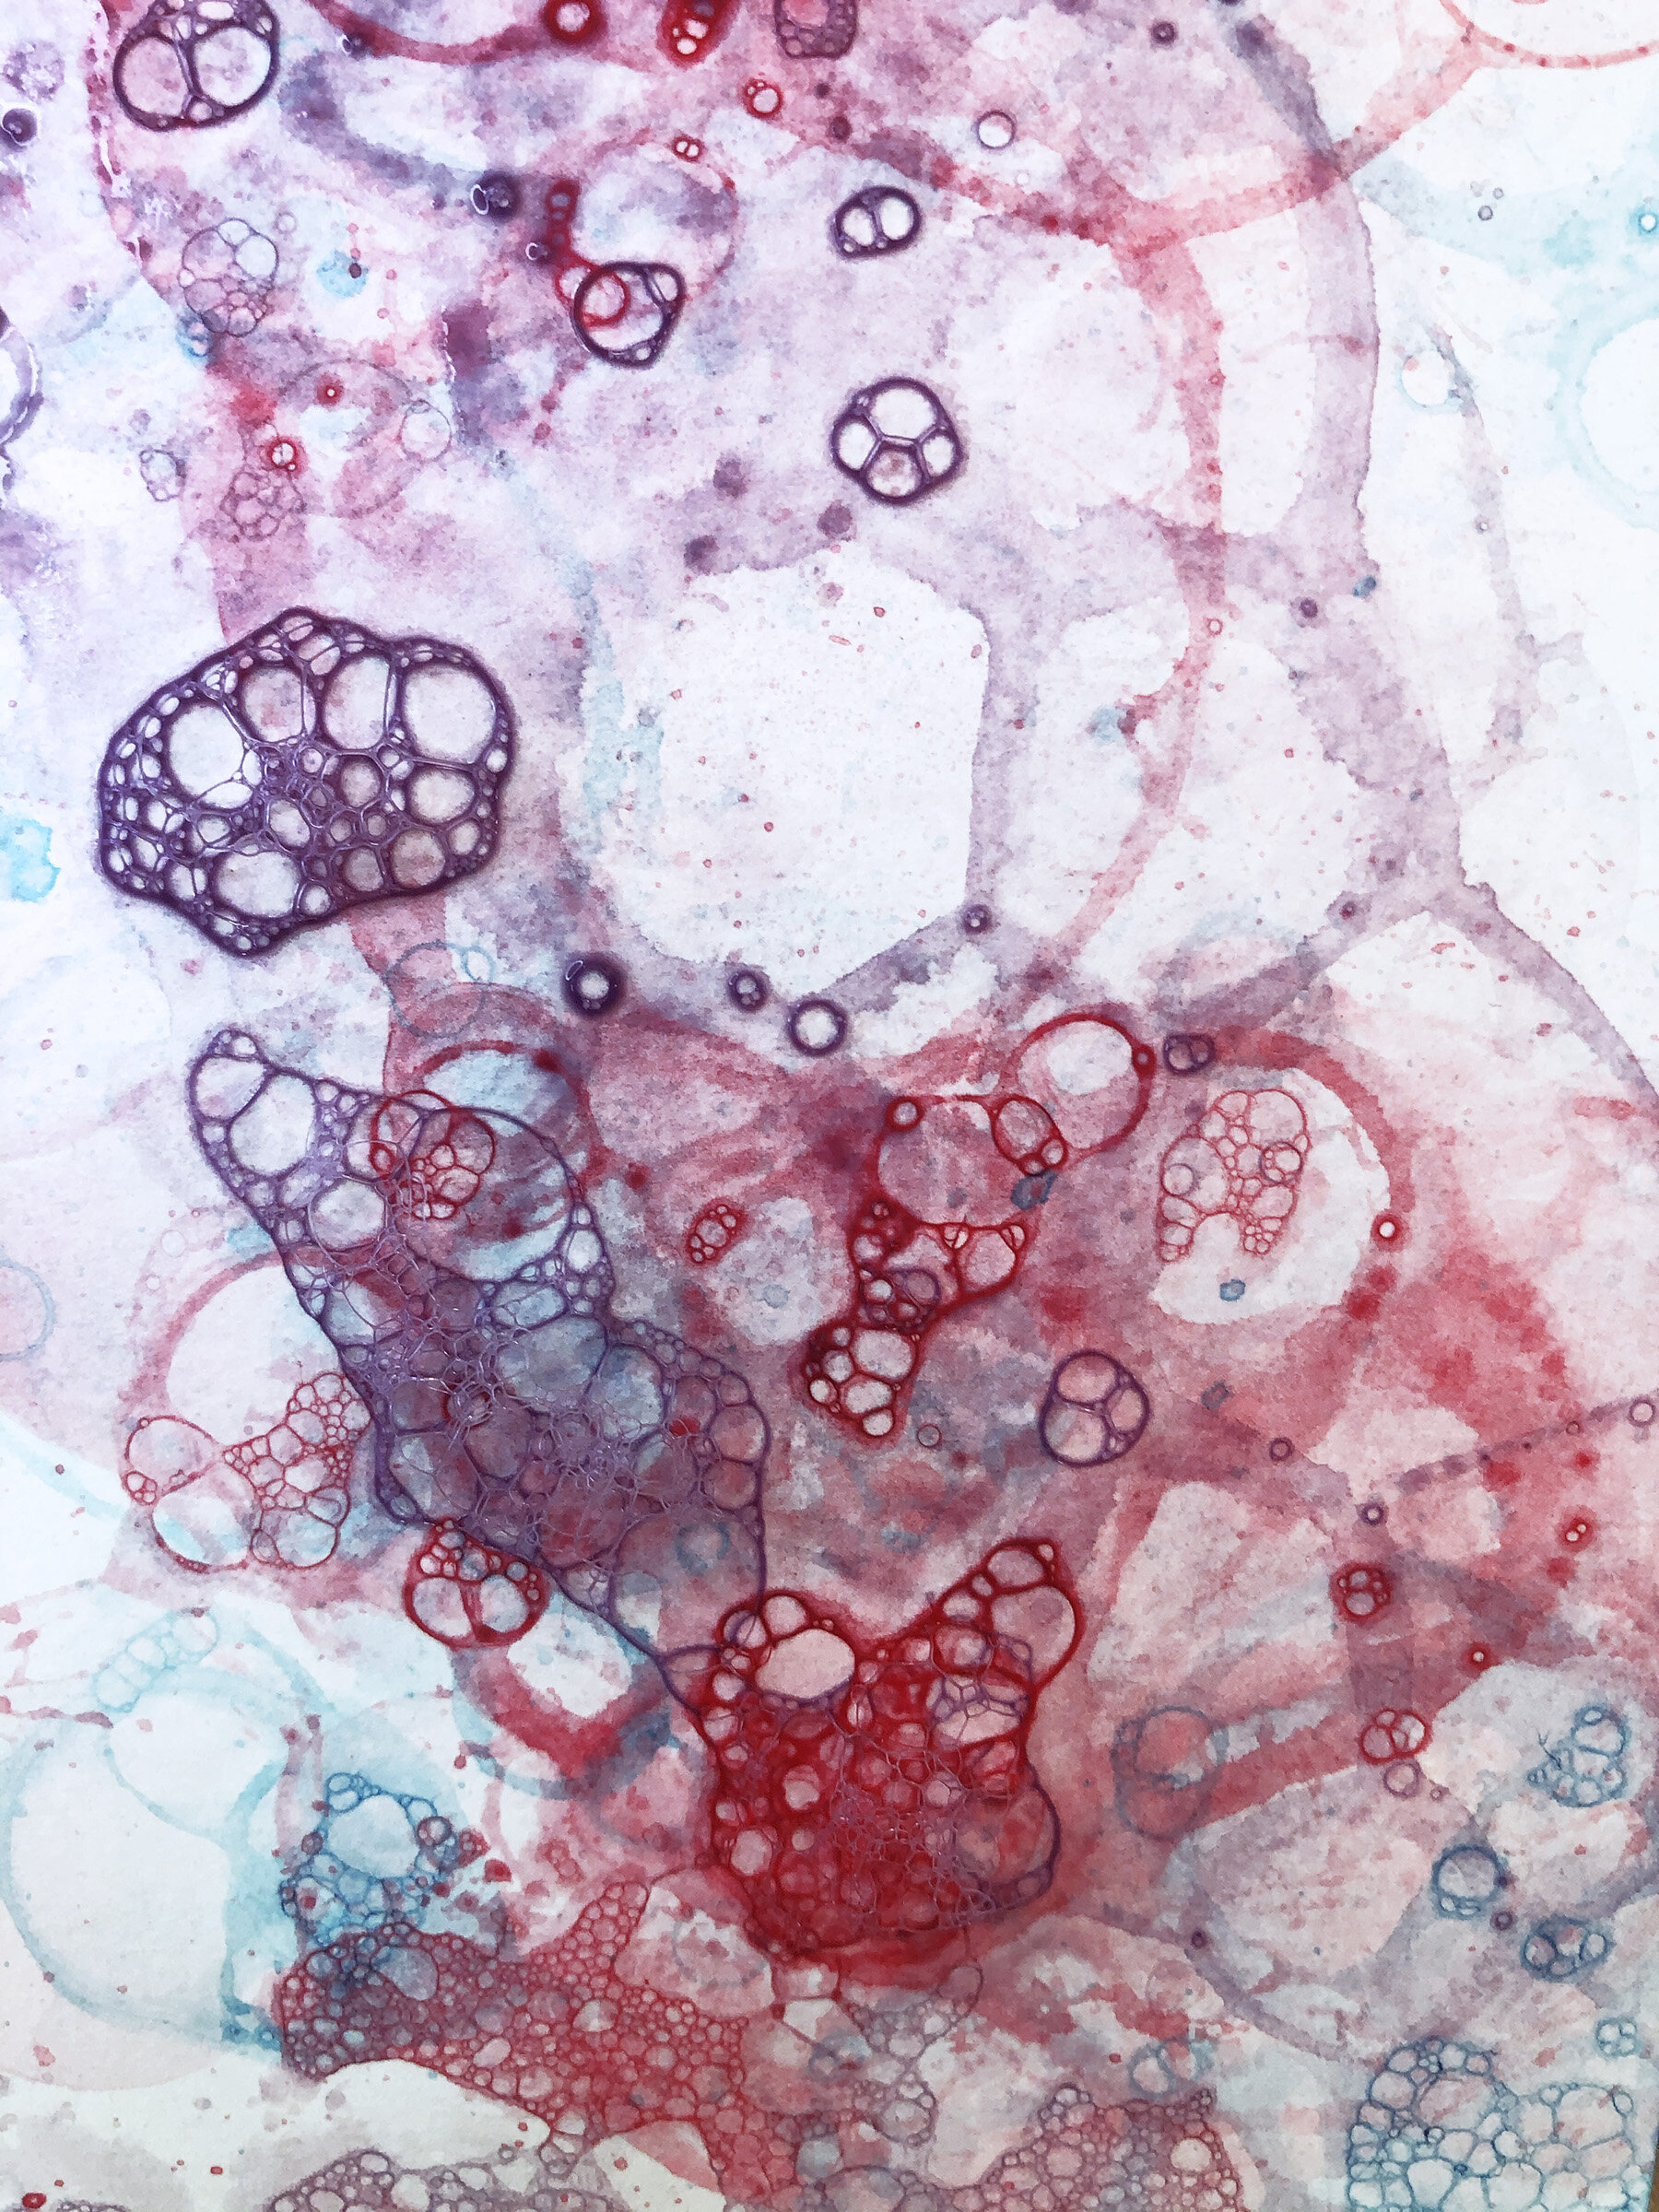
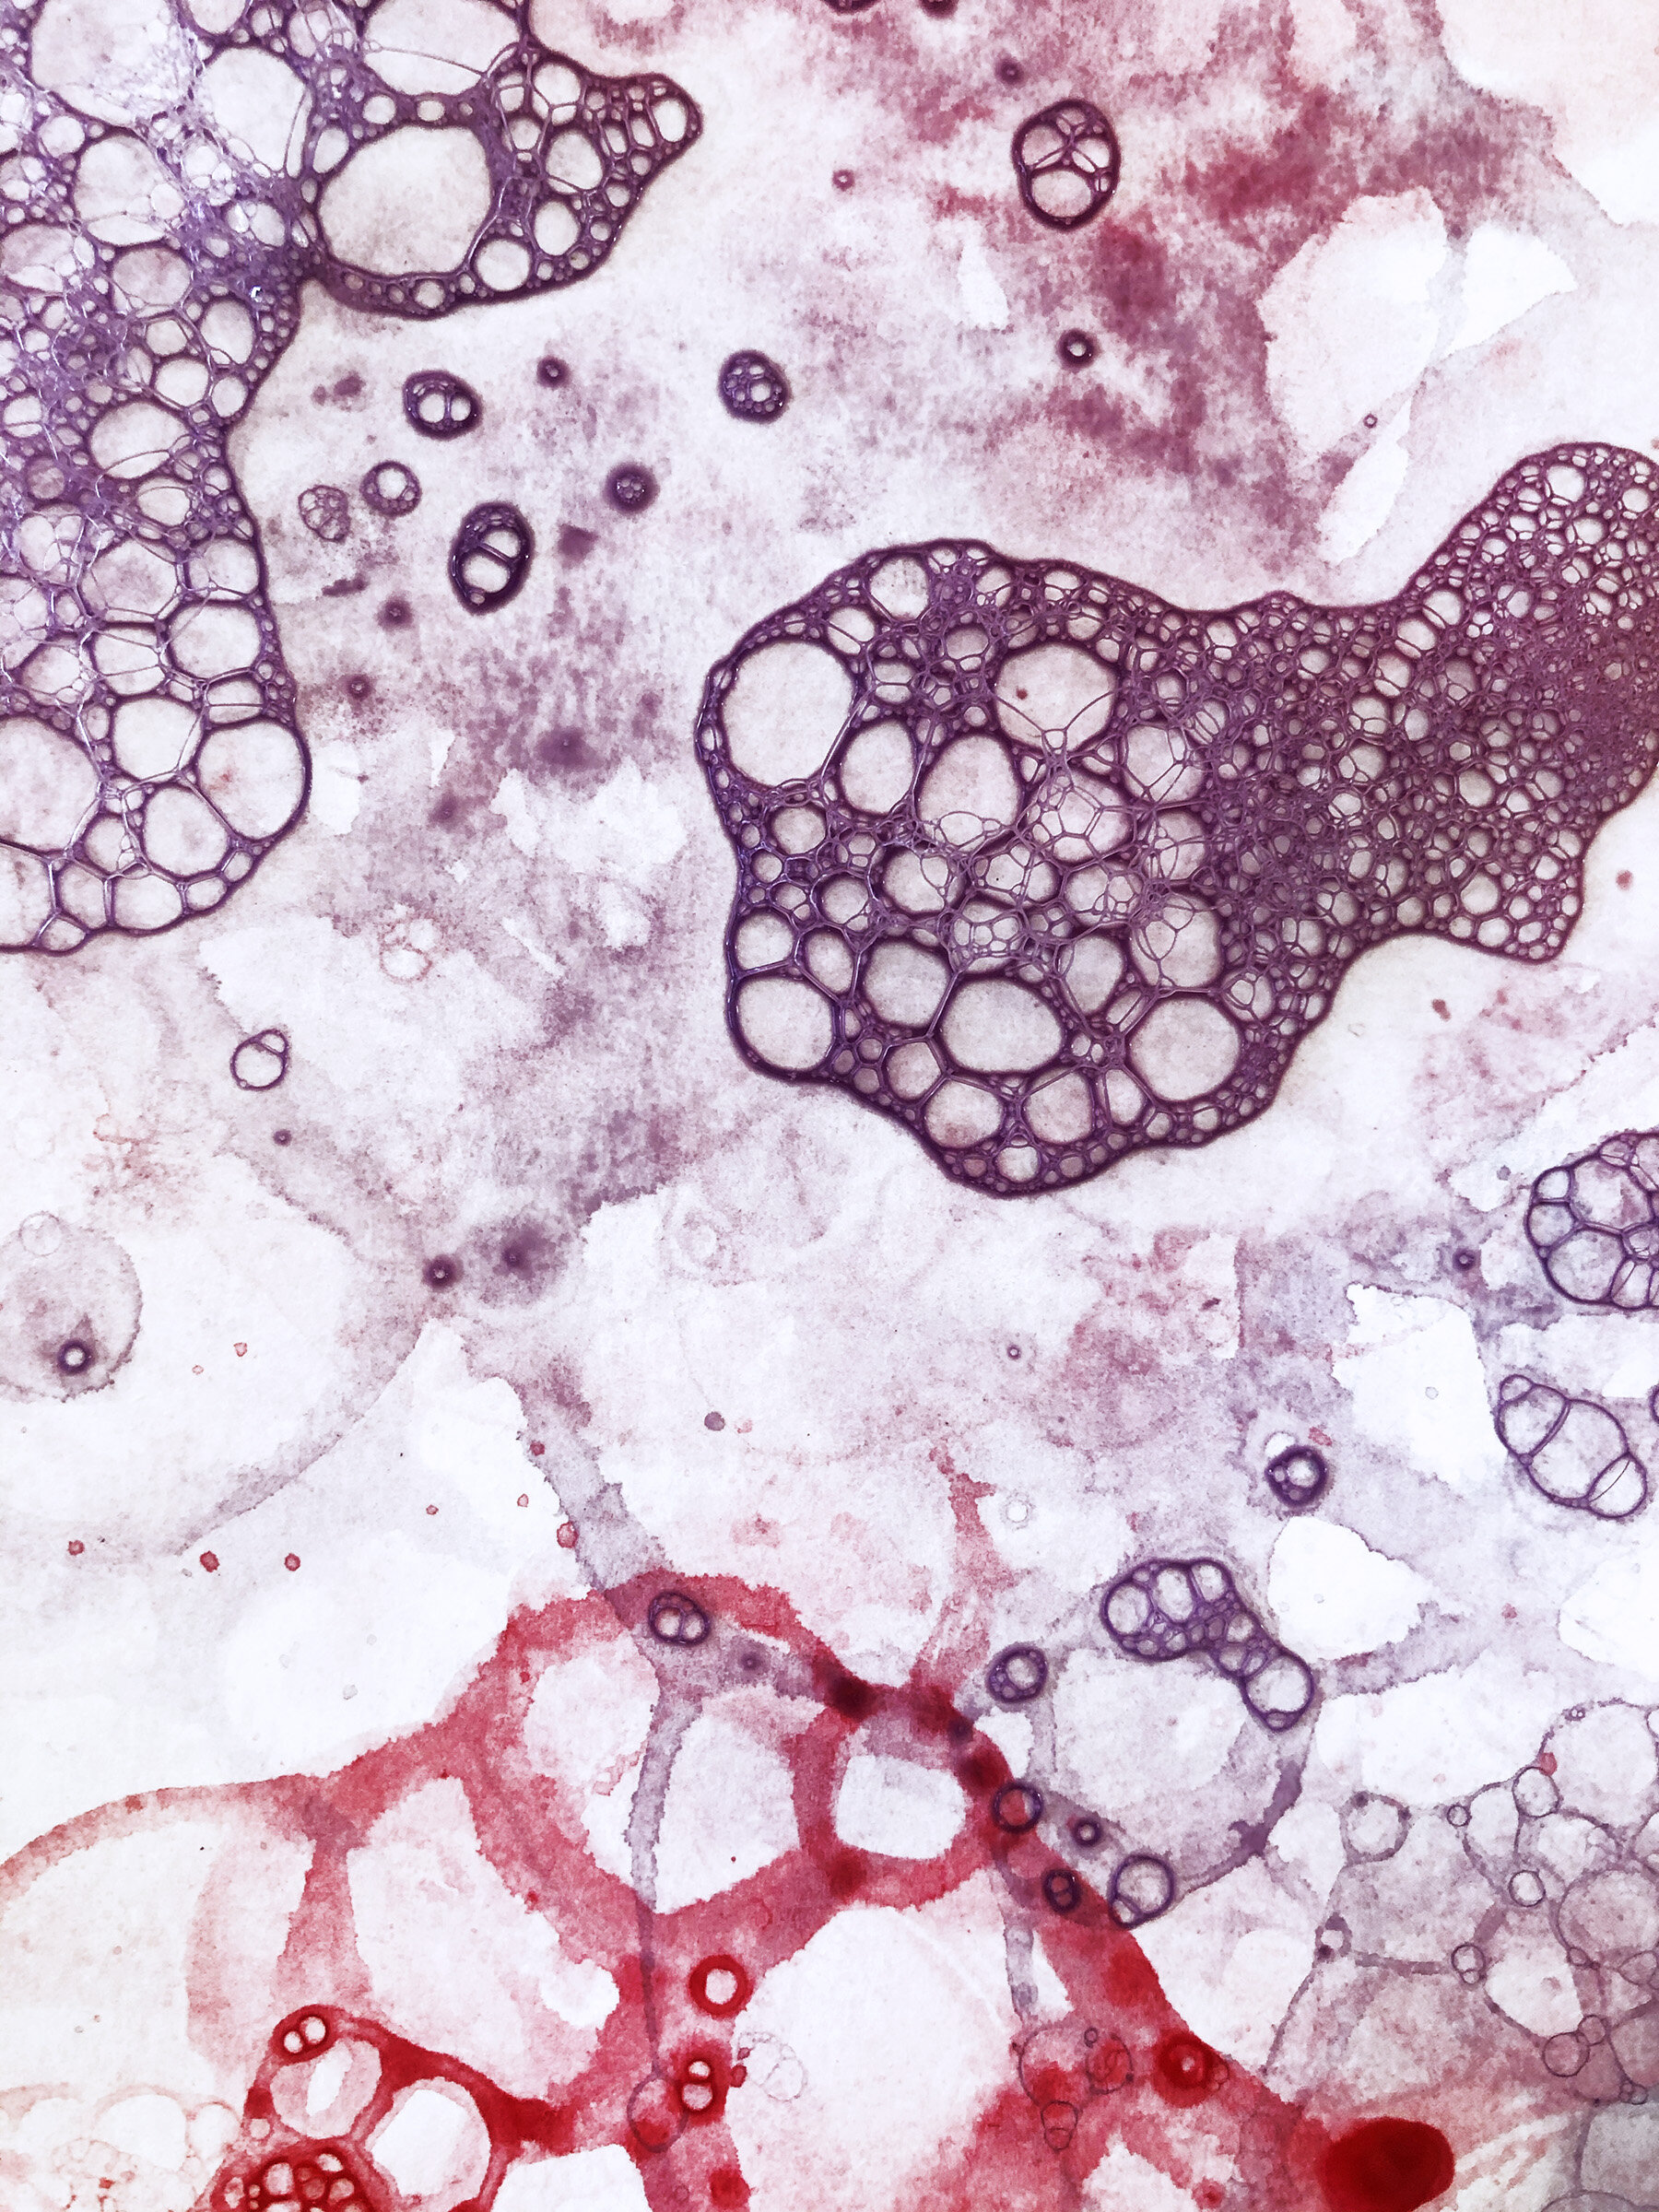

This is process art, so no one way is right. As the bubbles landed on paper, my son started to pop them (I had asked him not to pop them to see what happens; but obviously now he had to pop them). And I am glad he did not listen to me. Soon we realized it was the popping of the bubbles that gave us this wonderful print/texture on the paper. We were at it for almost an hour. And we are definitely trying this again in different colors. Don’t stress over the mess and try this with your kid. It’s easy to set up and lots of fun.
Activity 3: Water+Oil (Simple Science+Art)
Best For (3 years and up) fine motor skills, simple science, art and print making

Material Needed: Water, Shallow Baking Tray, Small Containers (for different colors), Paint Brush, Cooking Oil, Oil Color (or food color), Eye Droppers or Pipettes (Pipettes will give you smaller spots of oil), Toothpick, Thick Paper and an old Bedsheet (to cover the area).
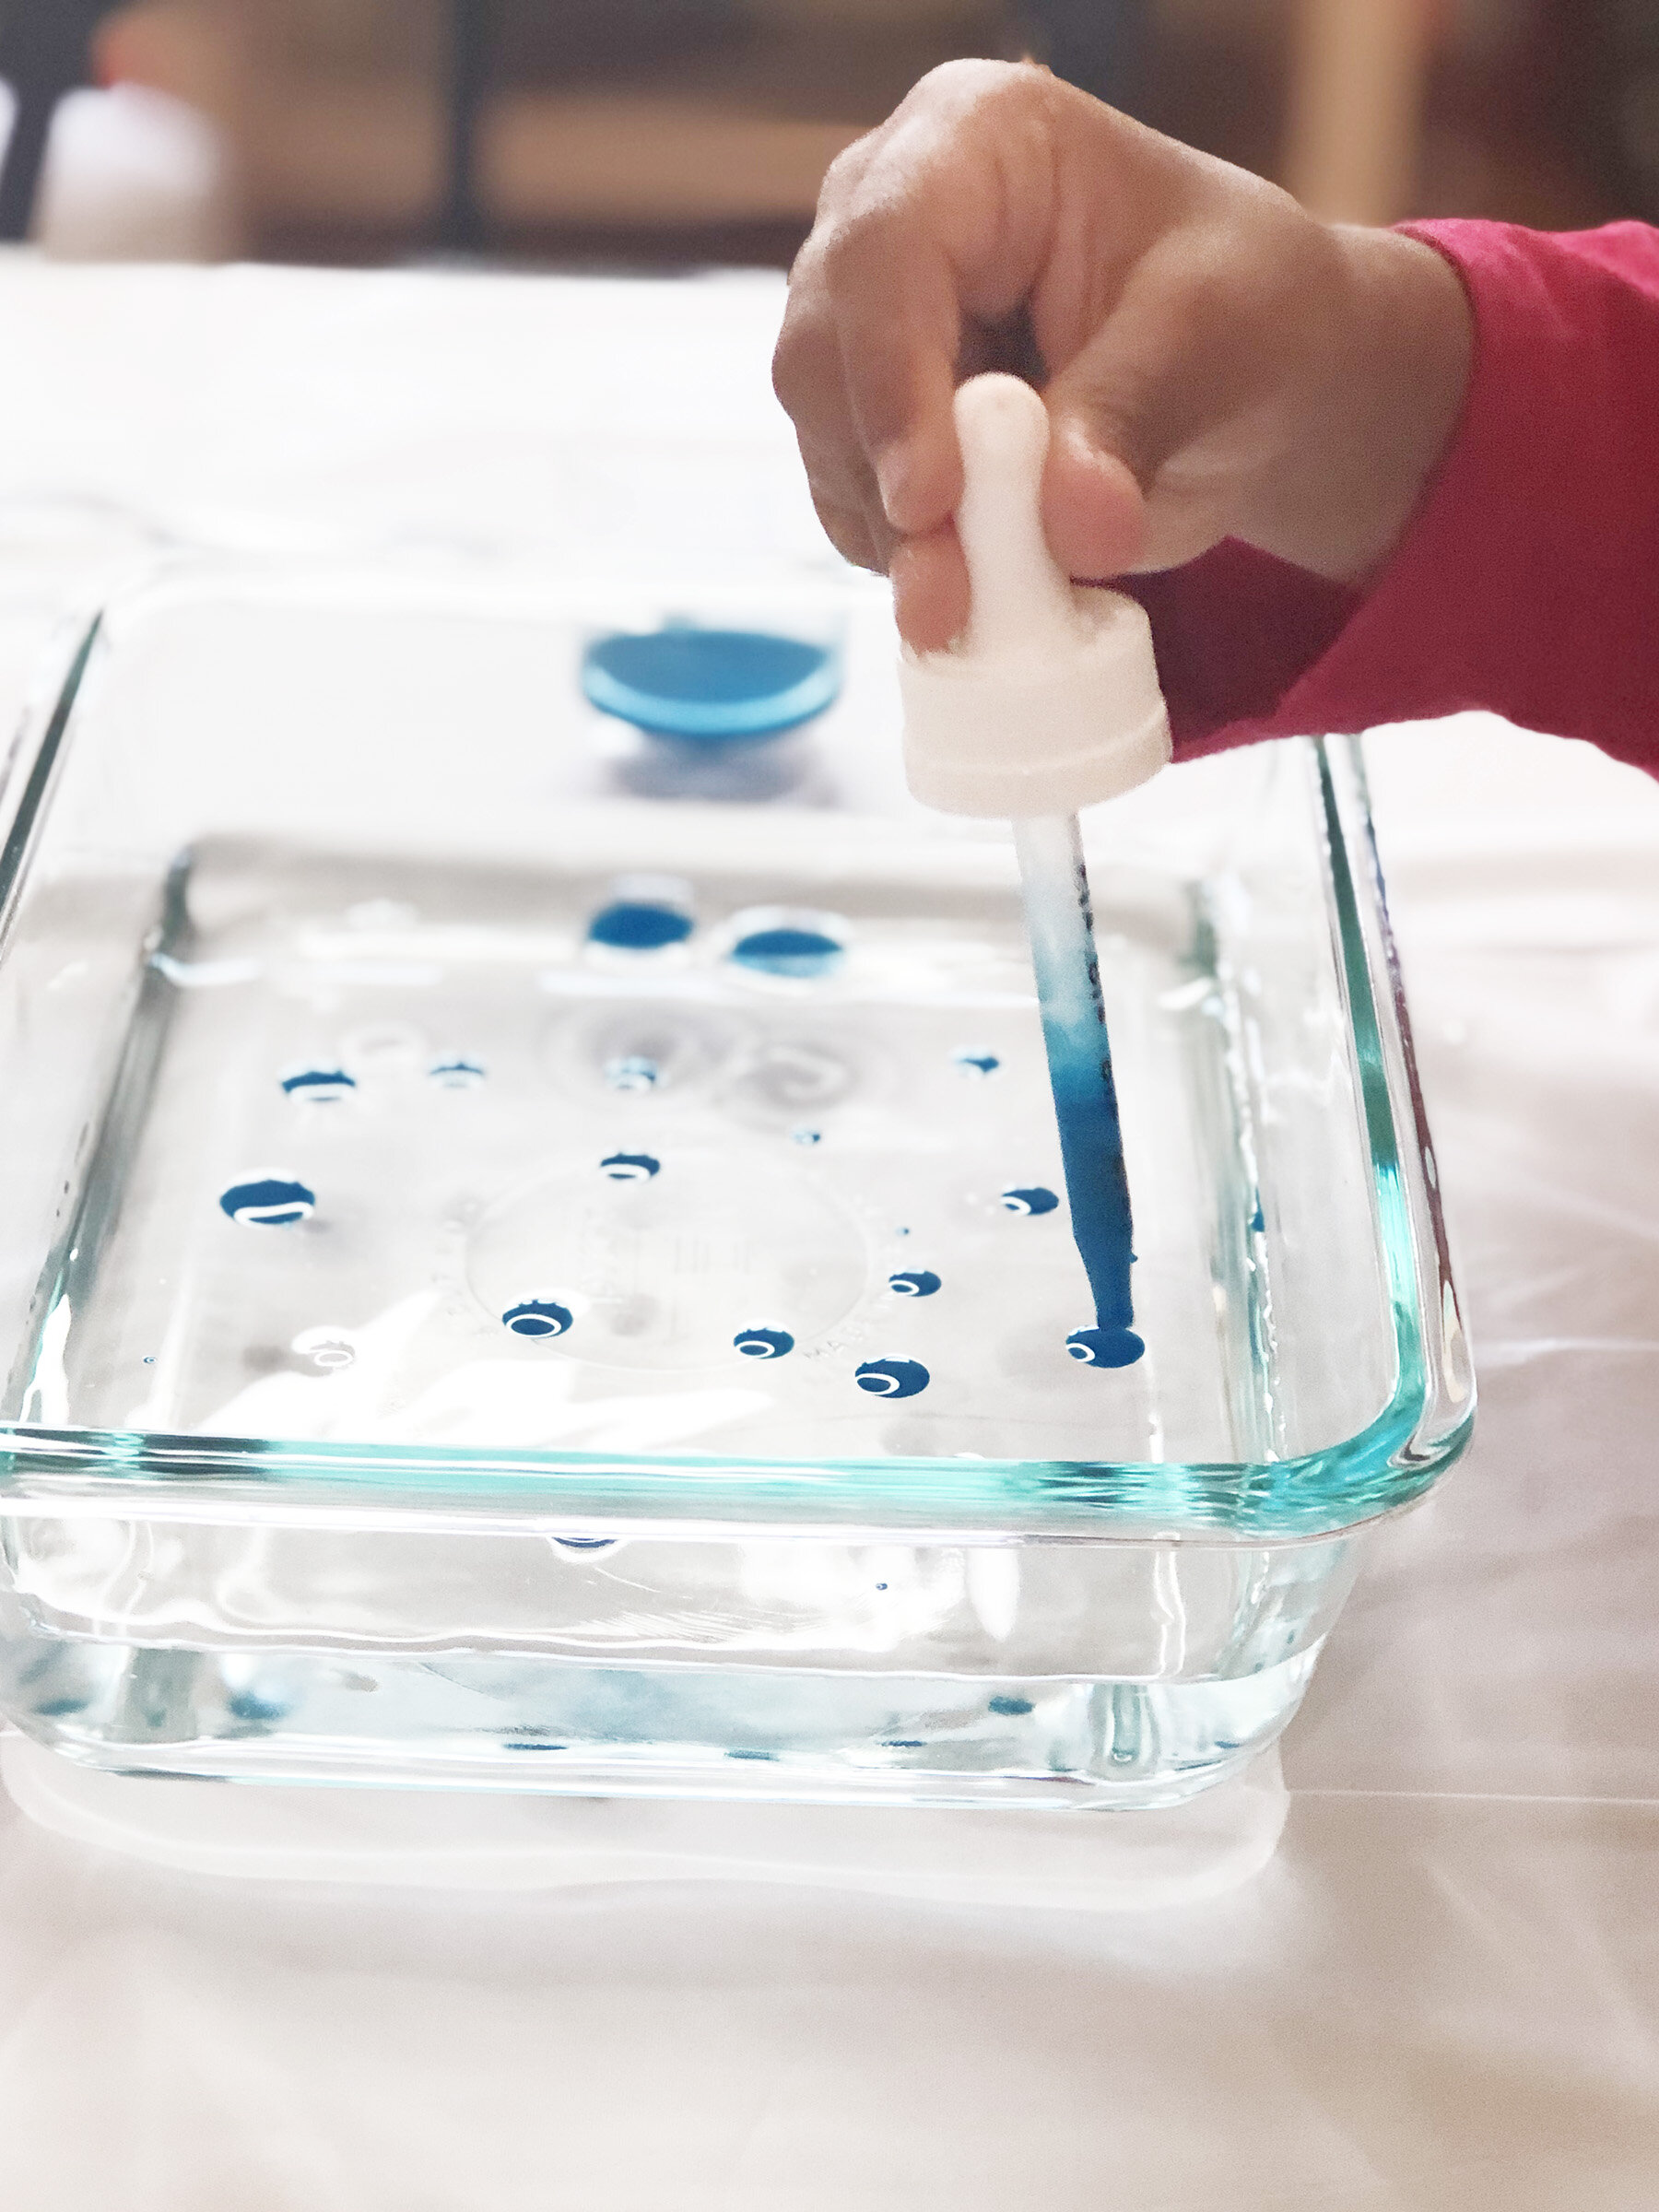
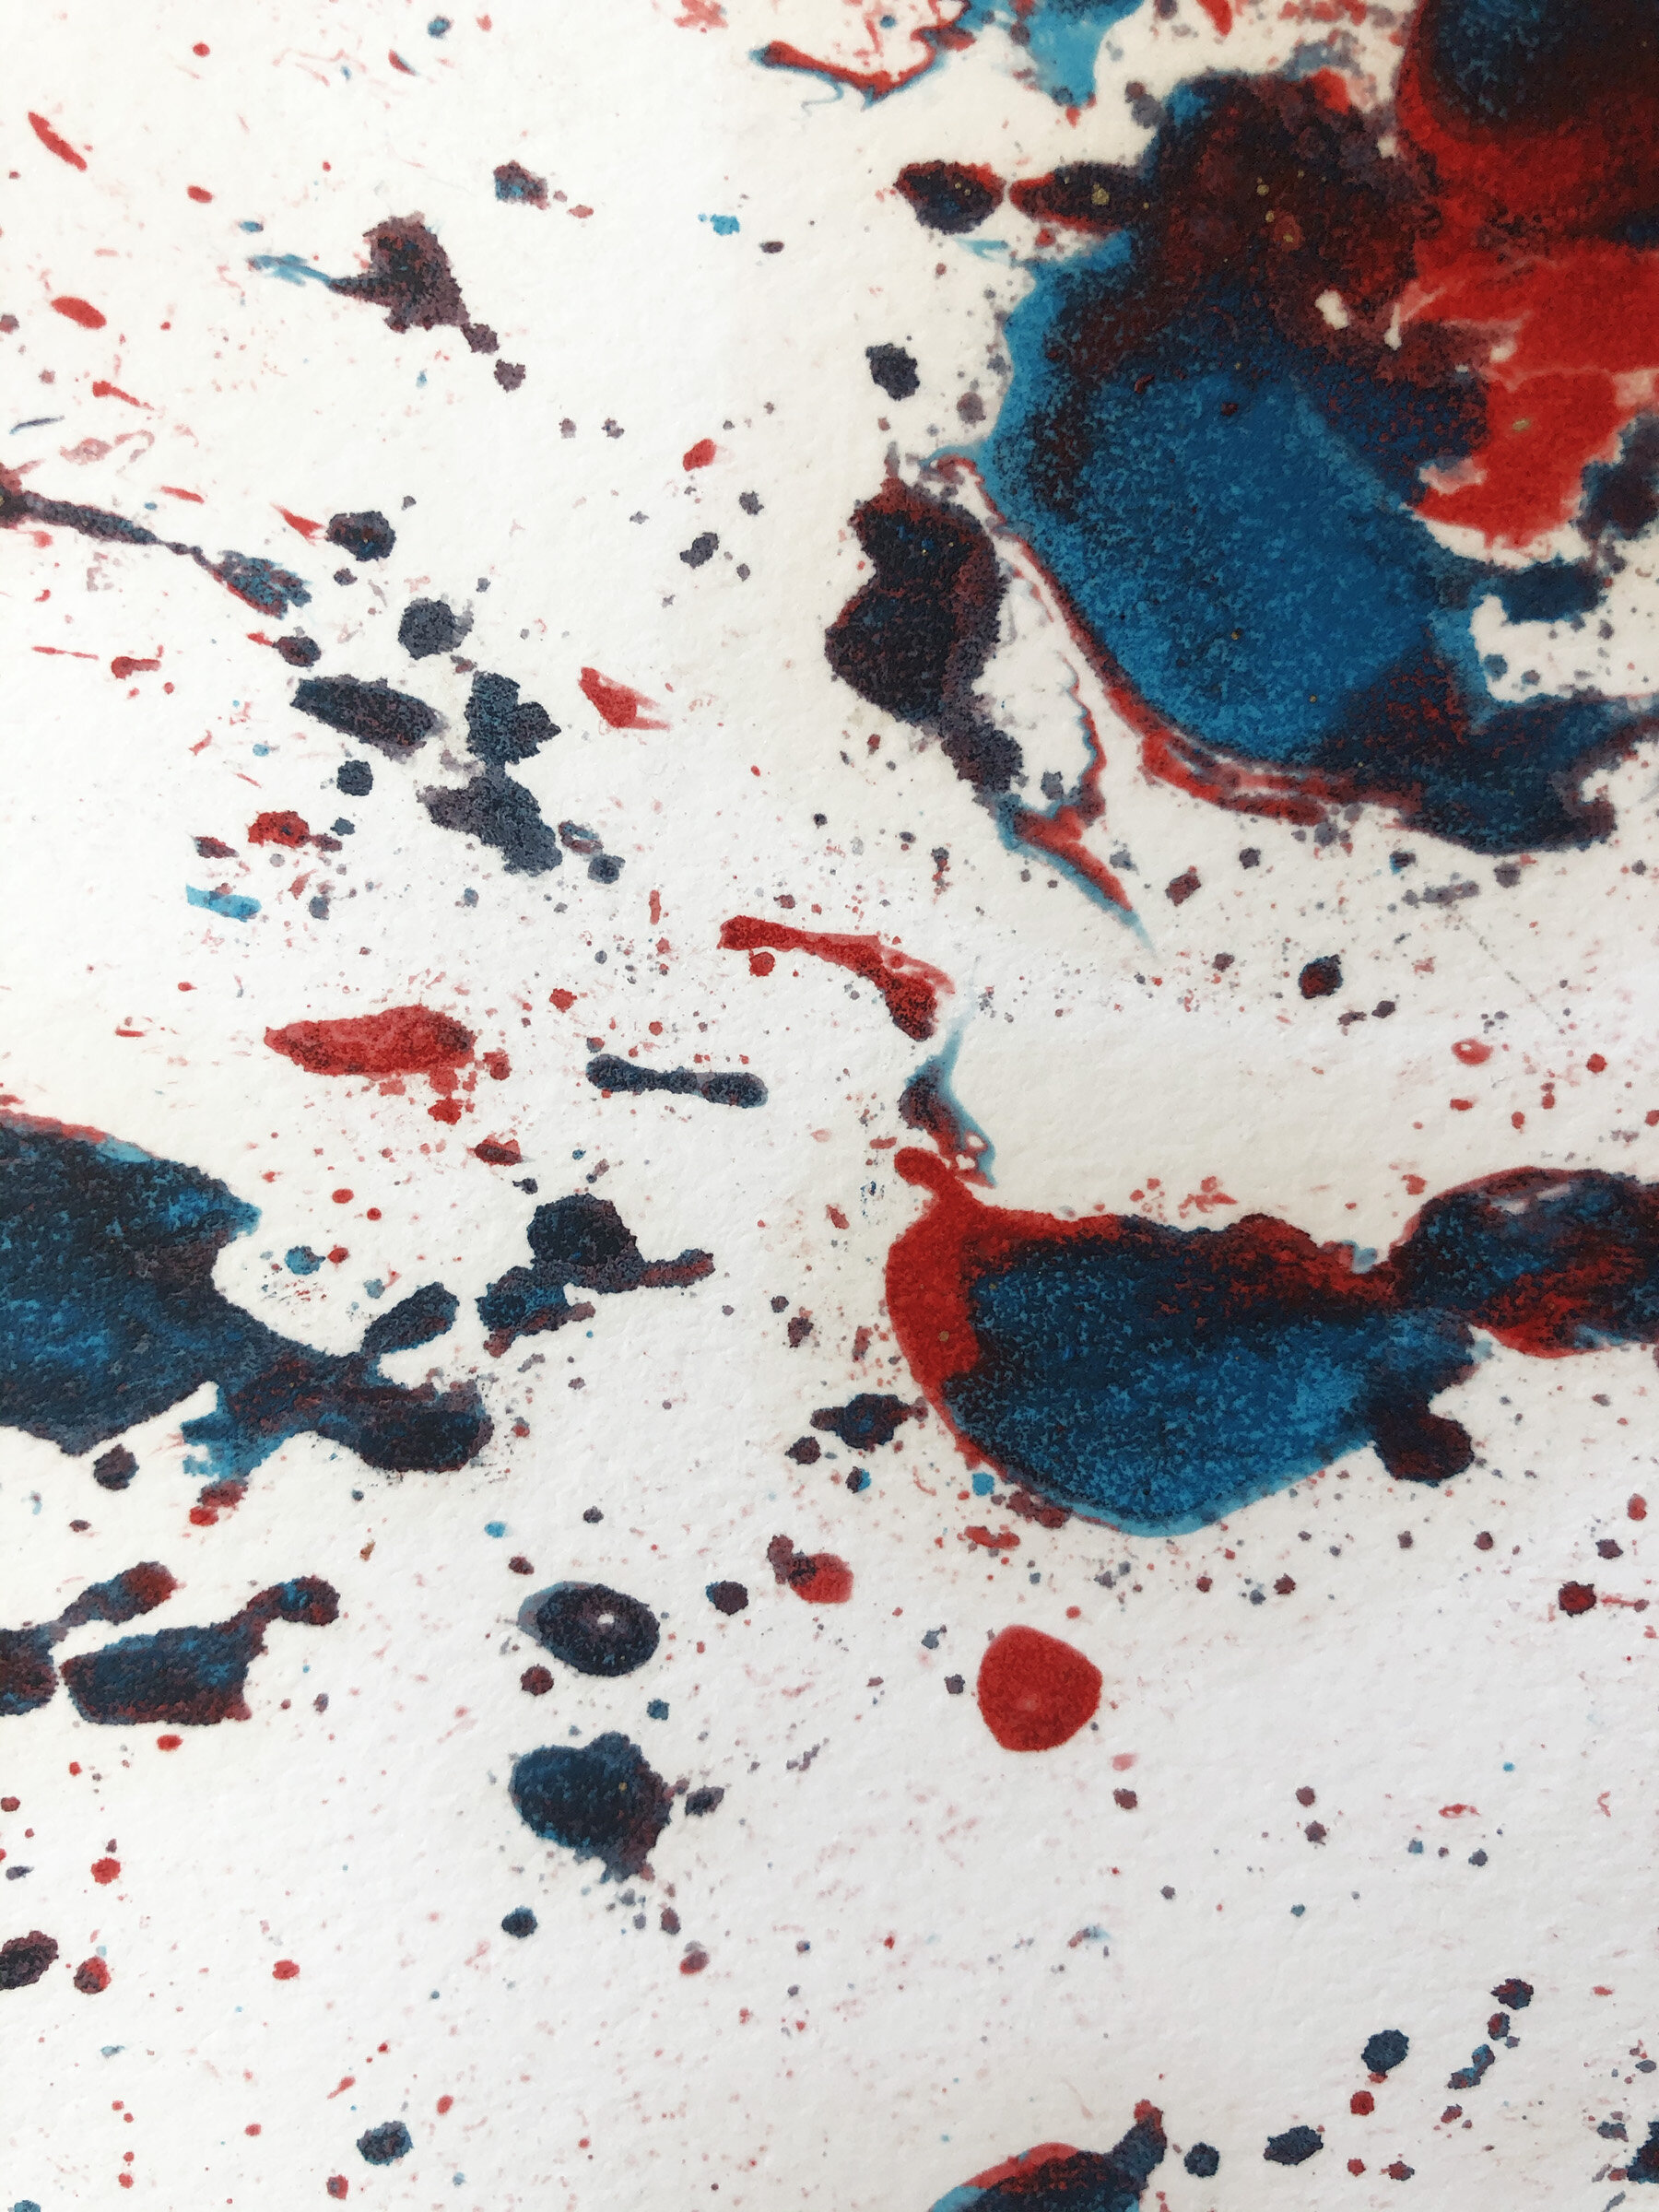
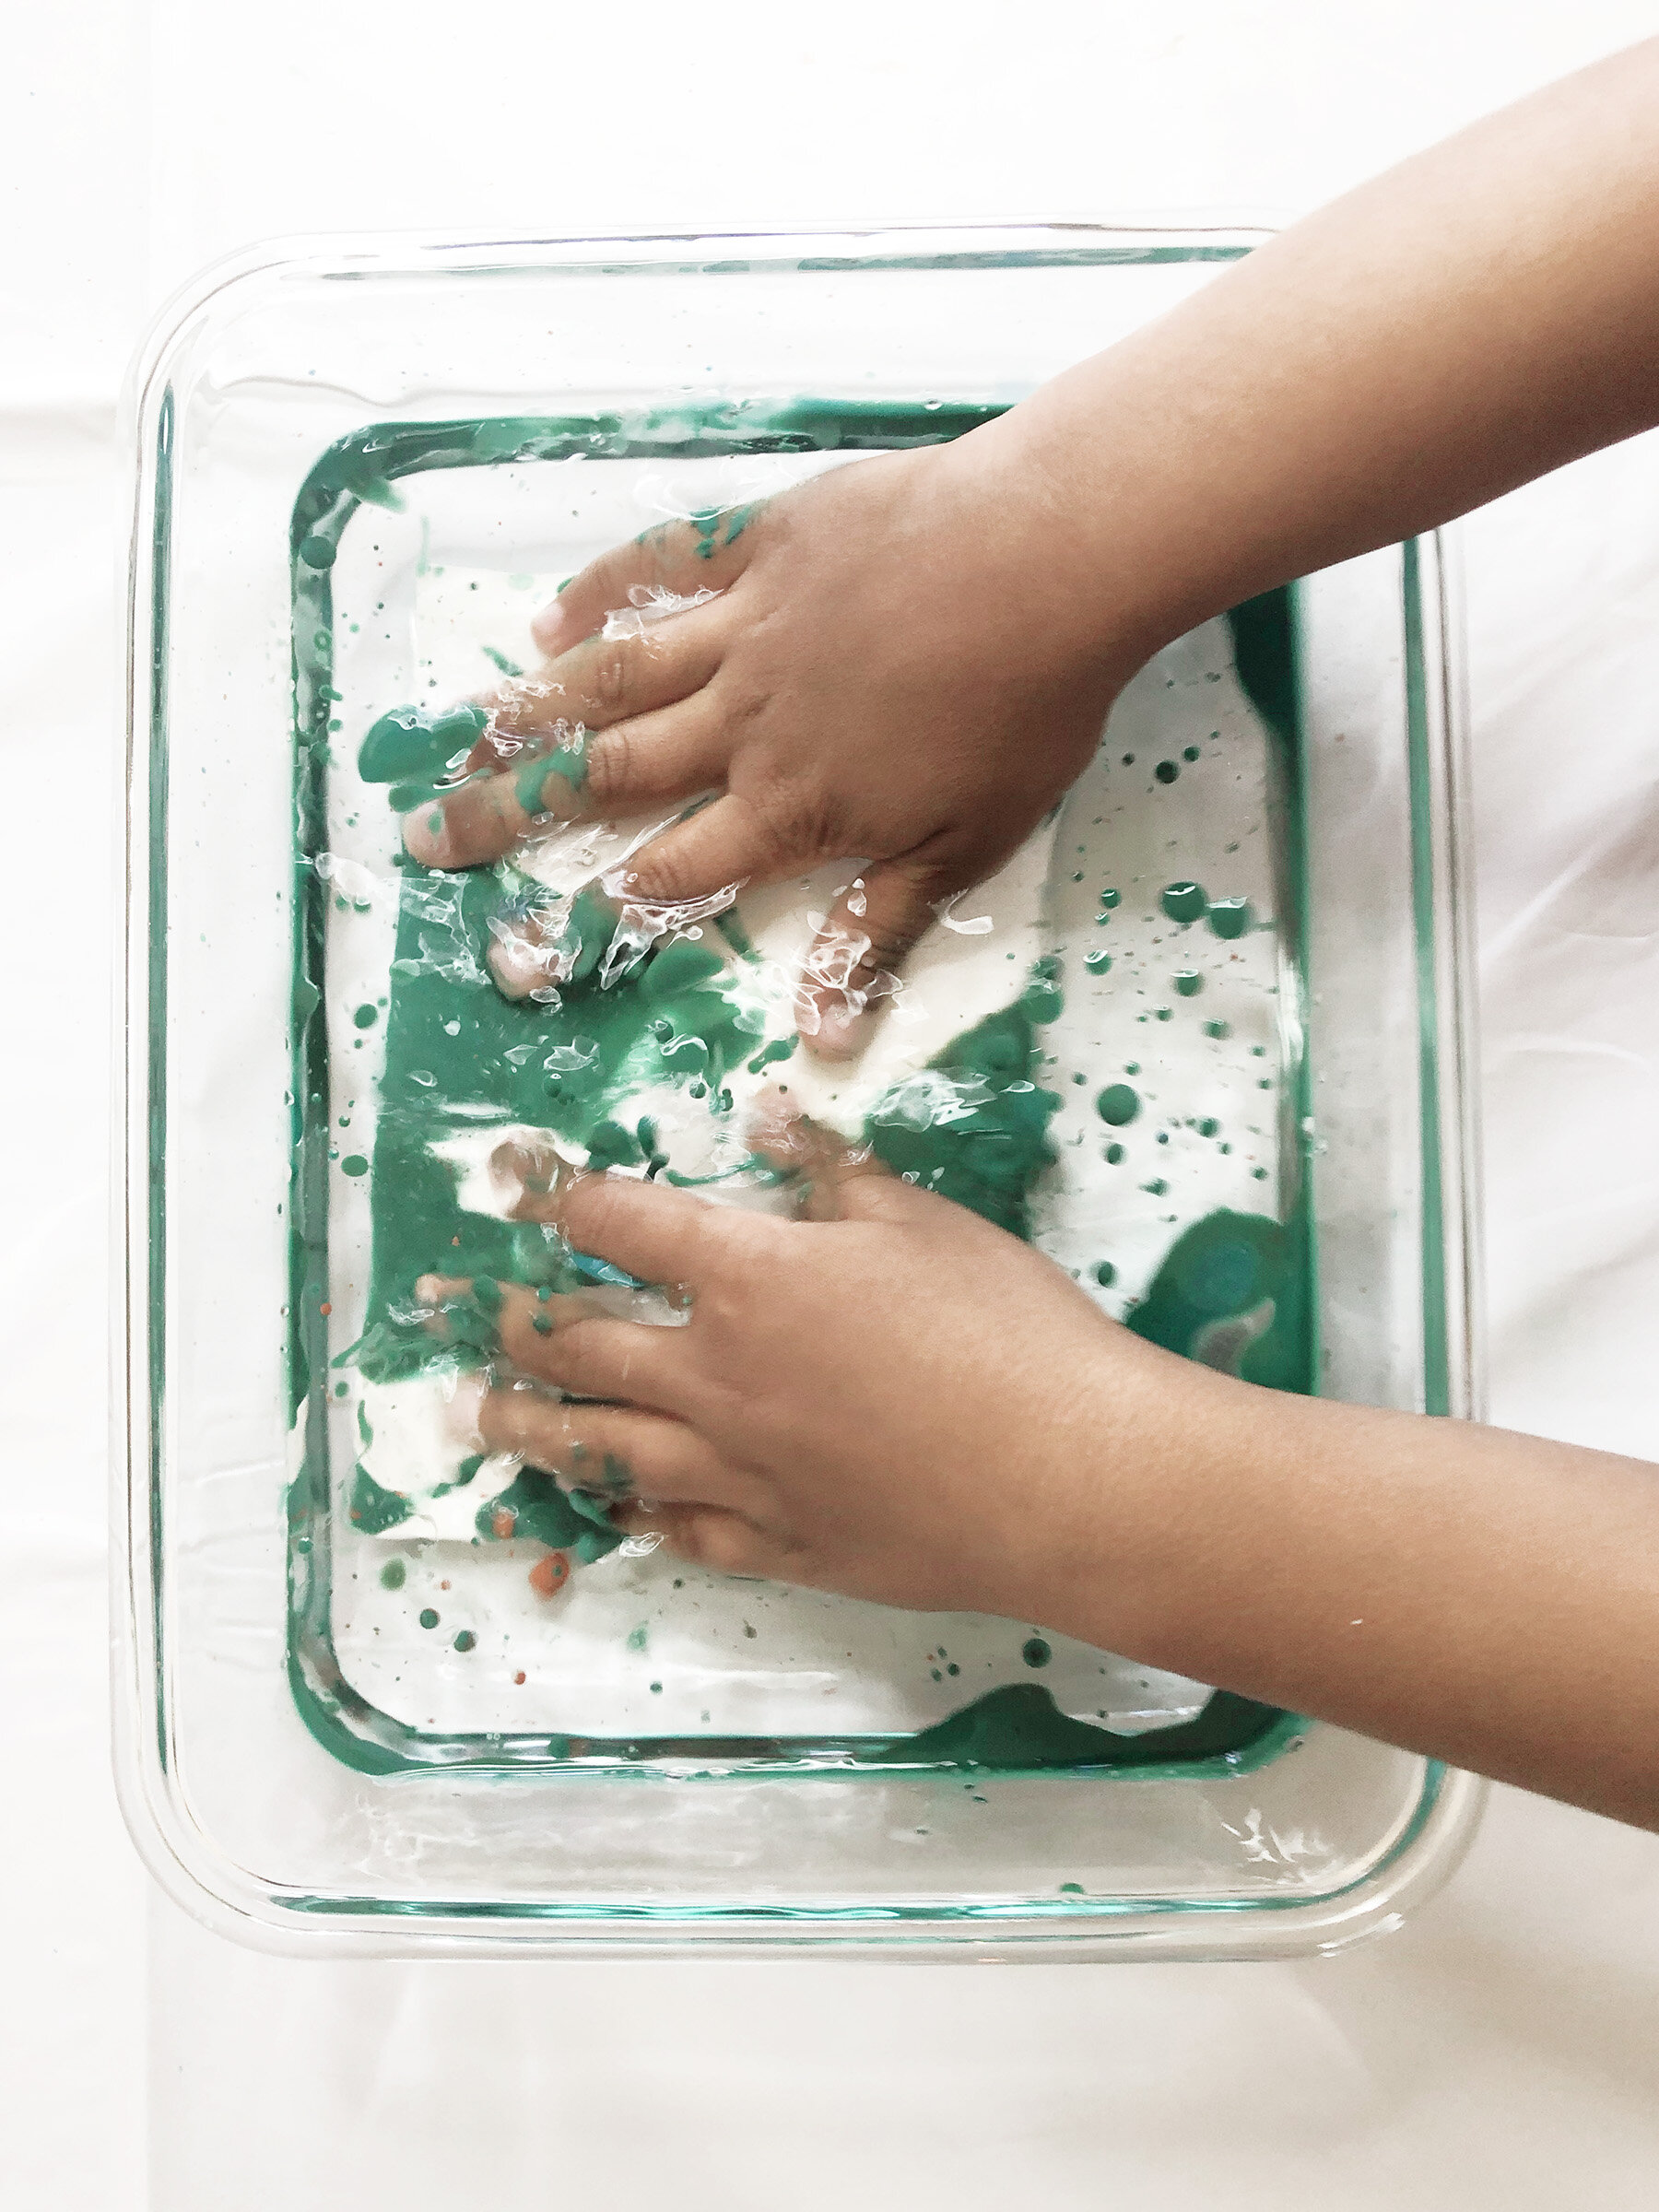
Fill half of your shallow baking tray with water and take a small bowl filled with a little cooking oil. Now invite your kid to add a few drops of oil with the eye dropper, slowly in the water. They will see that water and oil don’t mix. Honestly, I don’t know about my son but I could barely see the oil in the water as both have no color in it. So to make this more fun, we added color to the oil. I filled the bottom of small bowls with cooking oil and then added a drop or two of oil color. You can use liquid or gel food color instead of oil color. Don’t use water based paint as it will mix with the water.
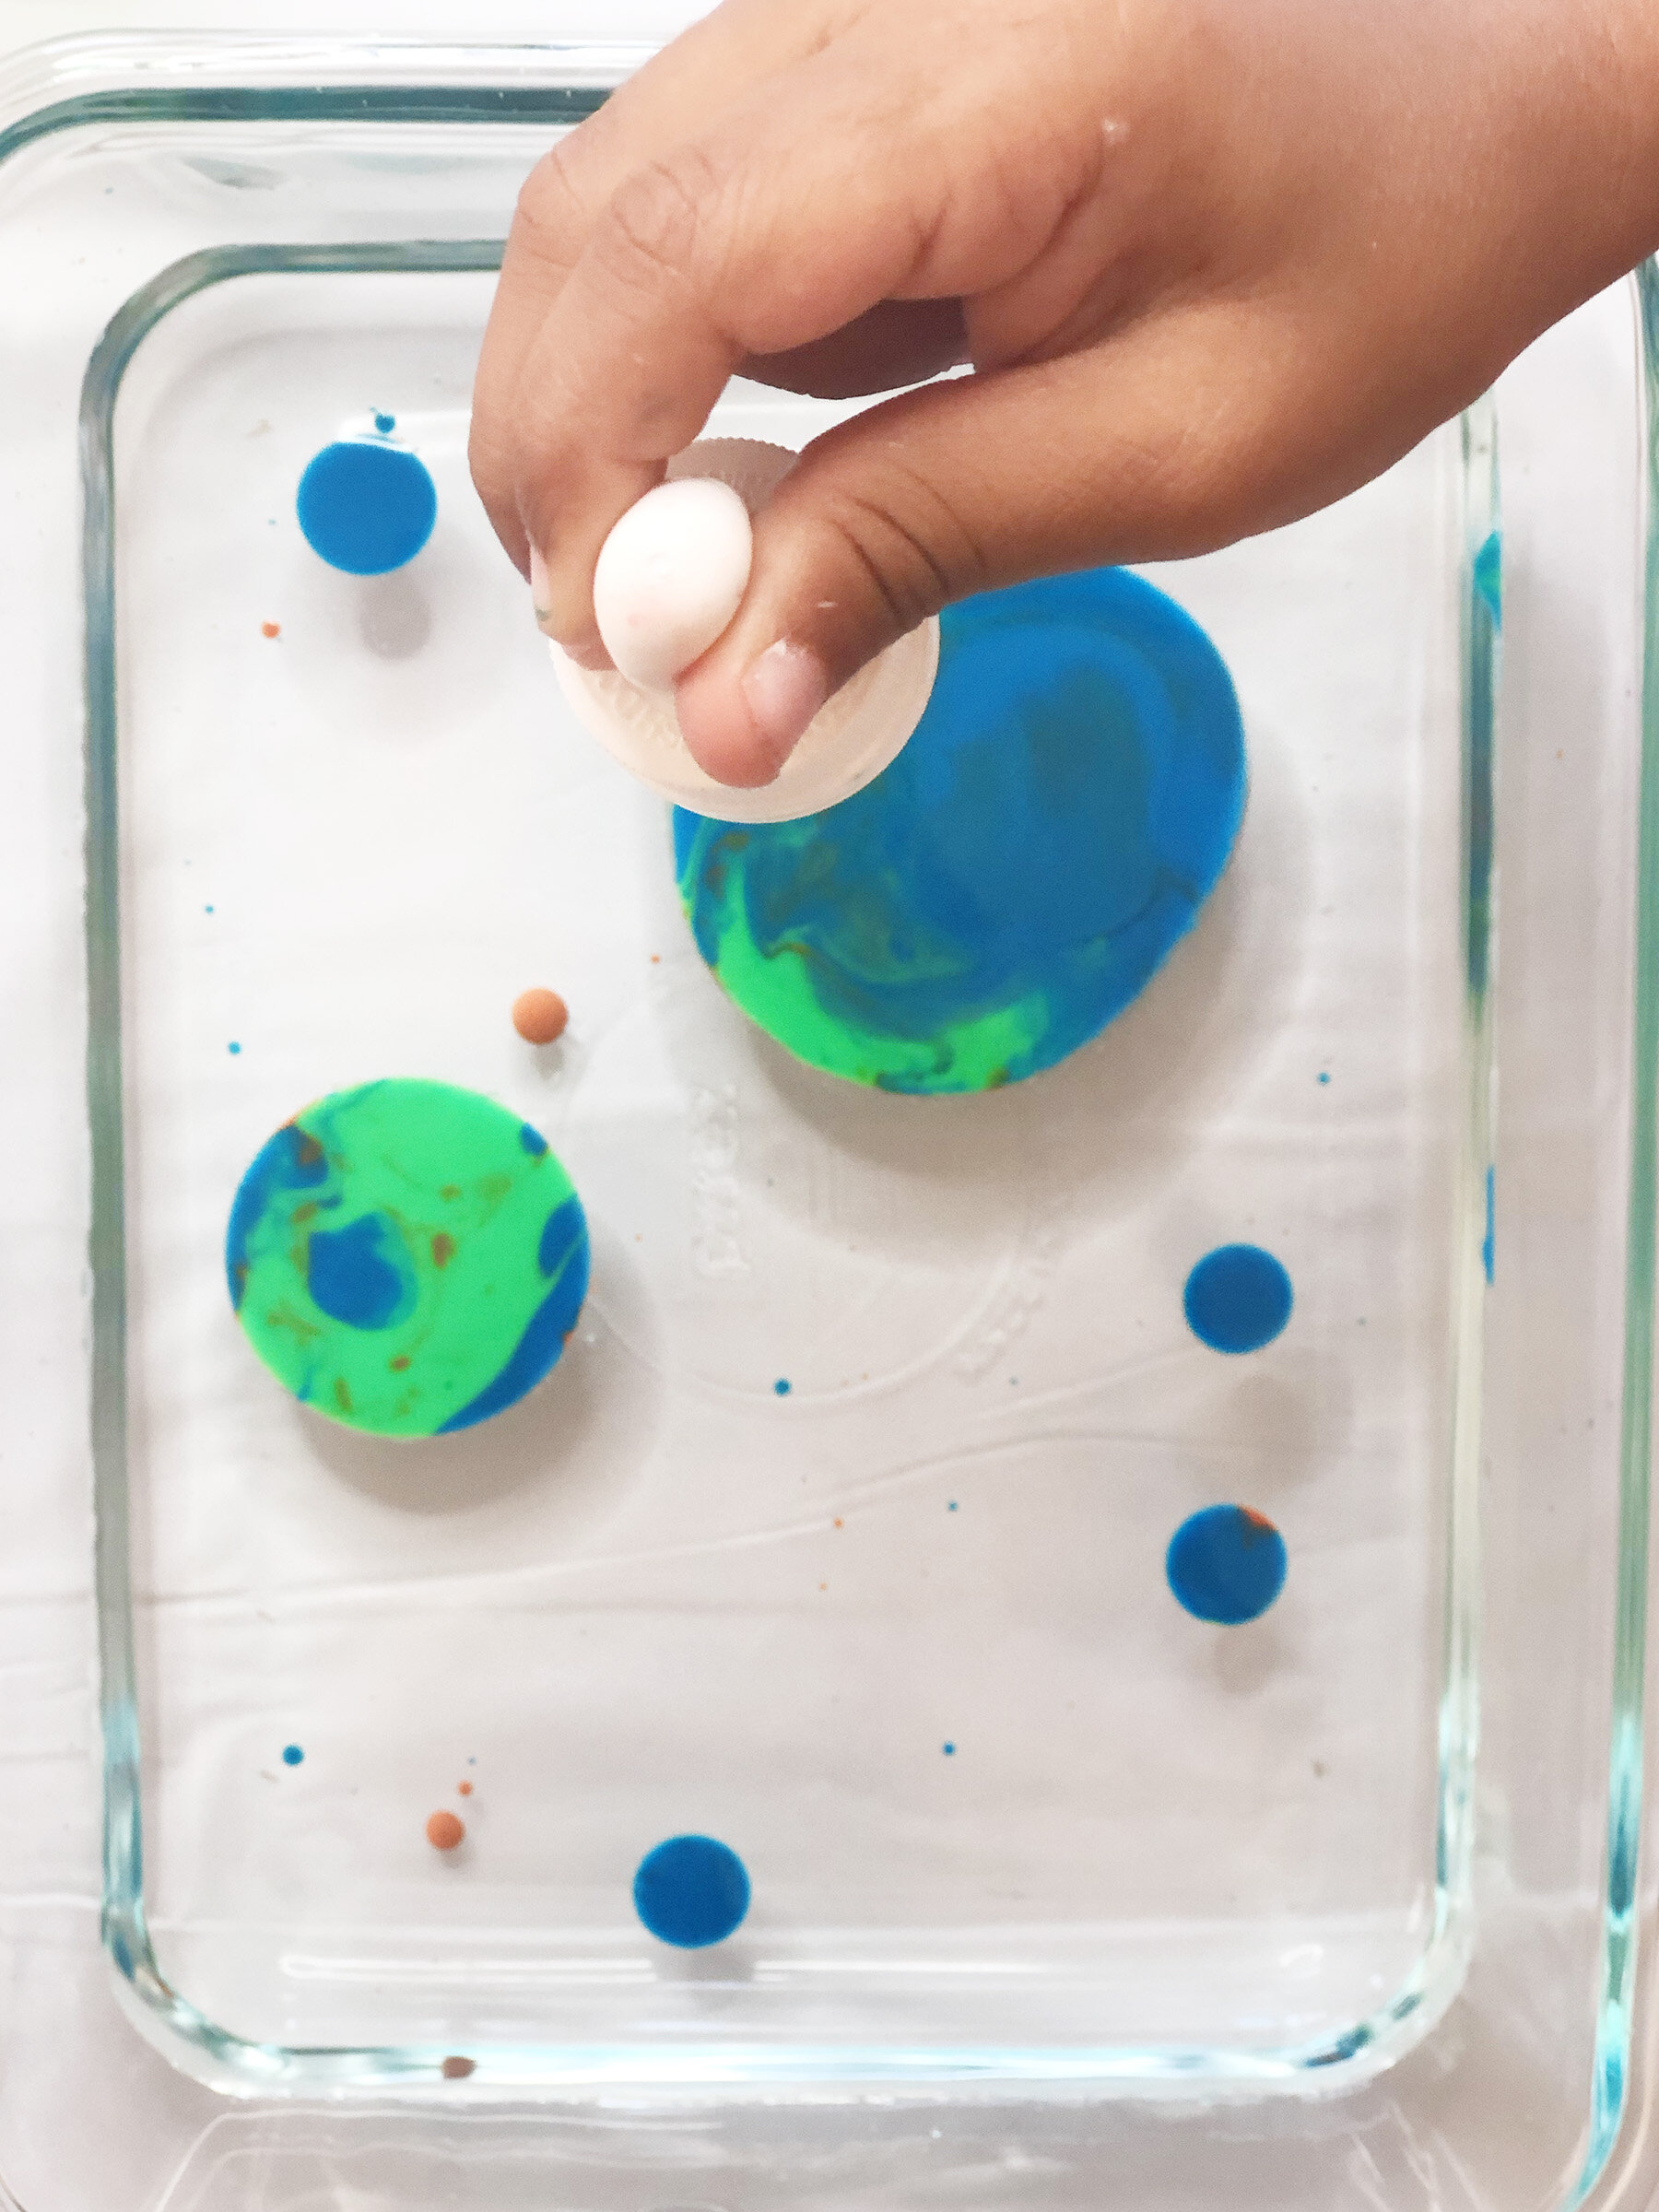
Now use these colored oils on water. It already looked fun. Keep it interactive; ask them what they see. As we added more color we saw that oil attracts oil and still doesn’t mix with water. We also noticed that oil floats on water. My son loved seeing oil blobs mixing (videos below). He said they love each other so they are hugging :)
After we were done adding all the colored oil to the water, we decided to use a toothpick to mix the oil and water manually to see what happened. We ended up just mixing all the colors in the oil. This is when my son made a note, “Water and Oil are not friends”. I thought that was a great way to sum it up and easy for kids to understand as well.
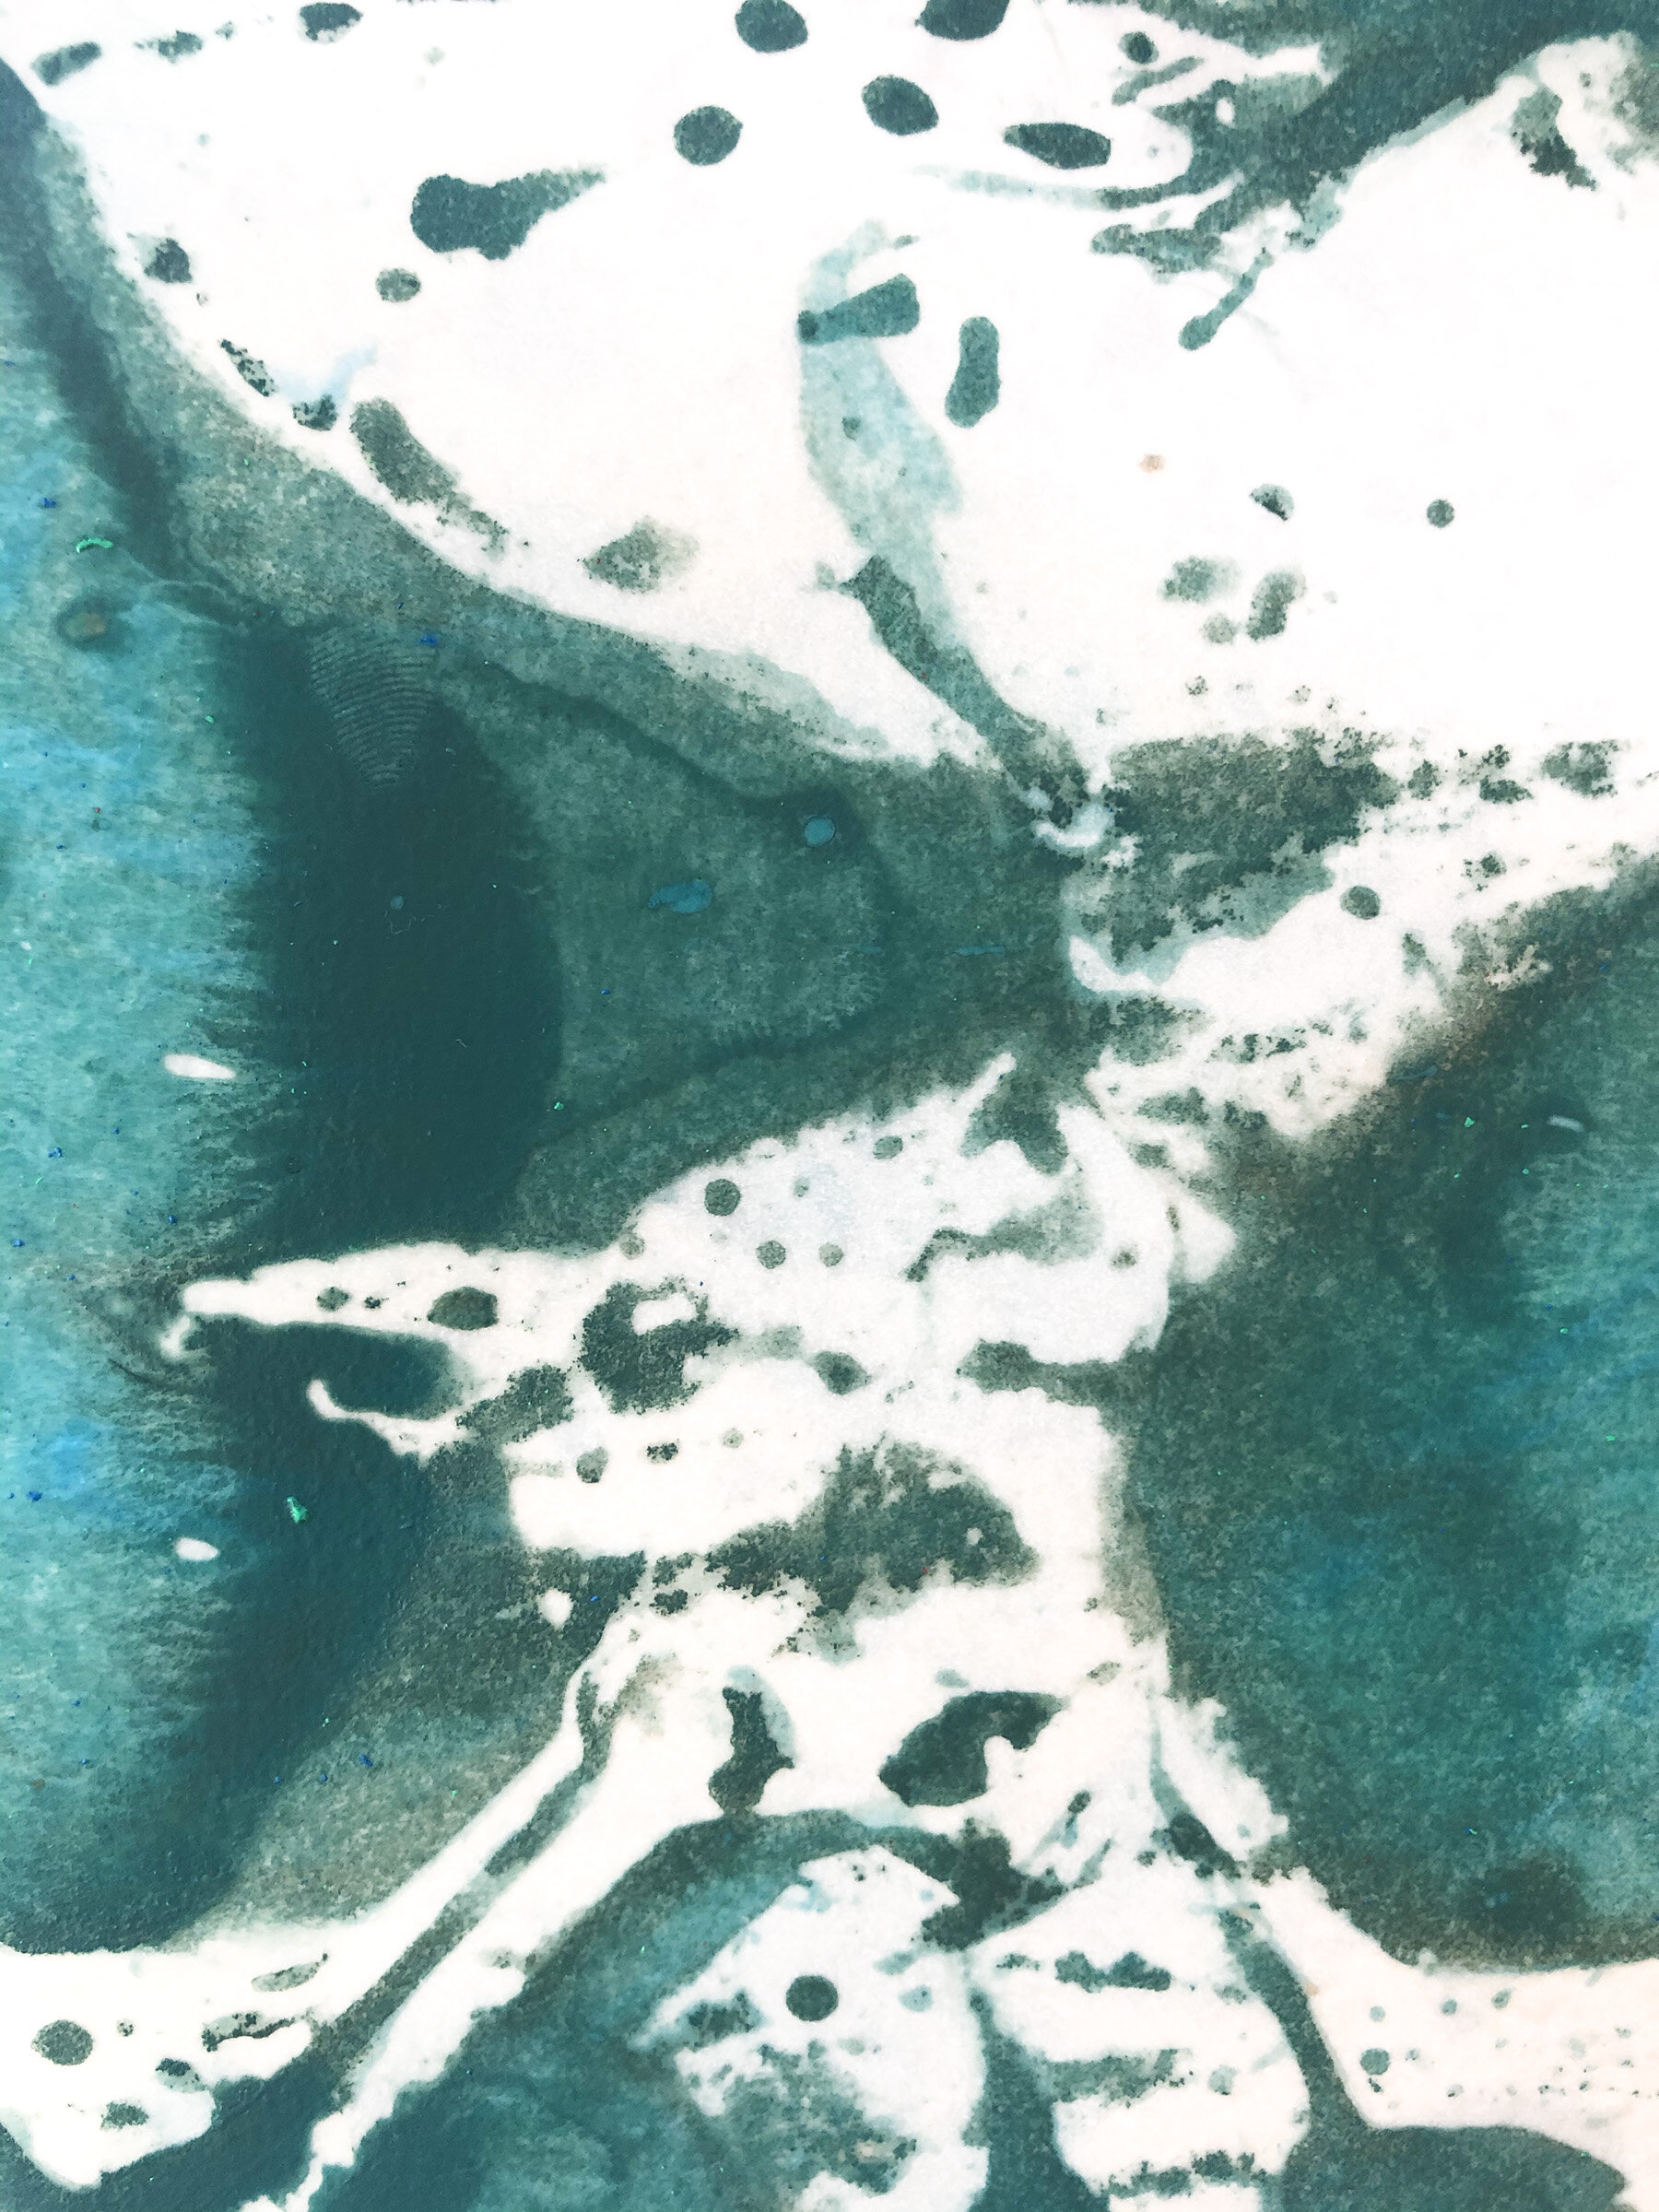
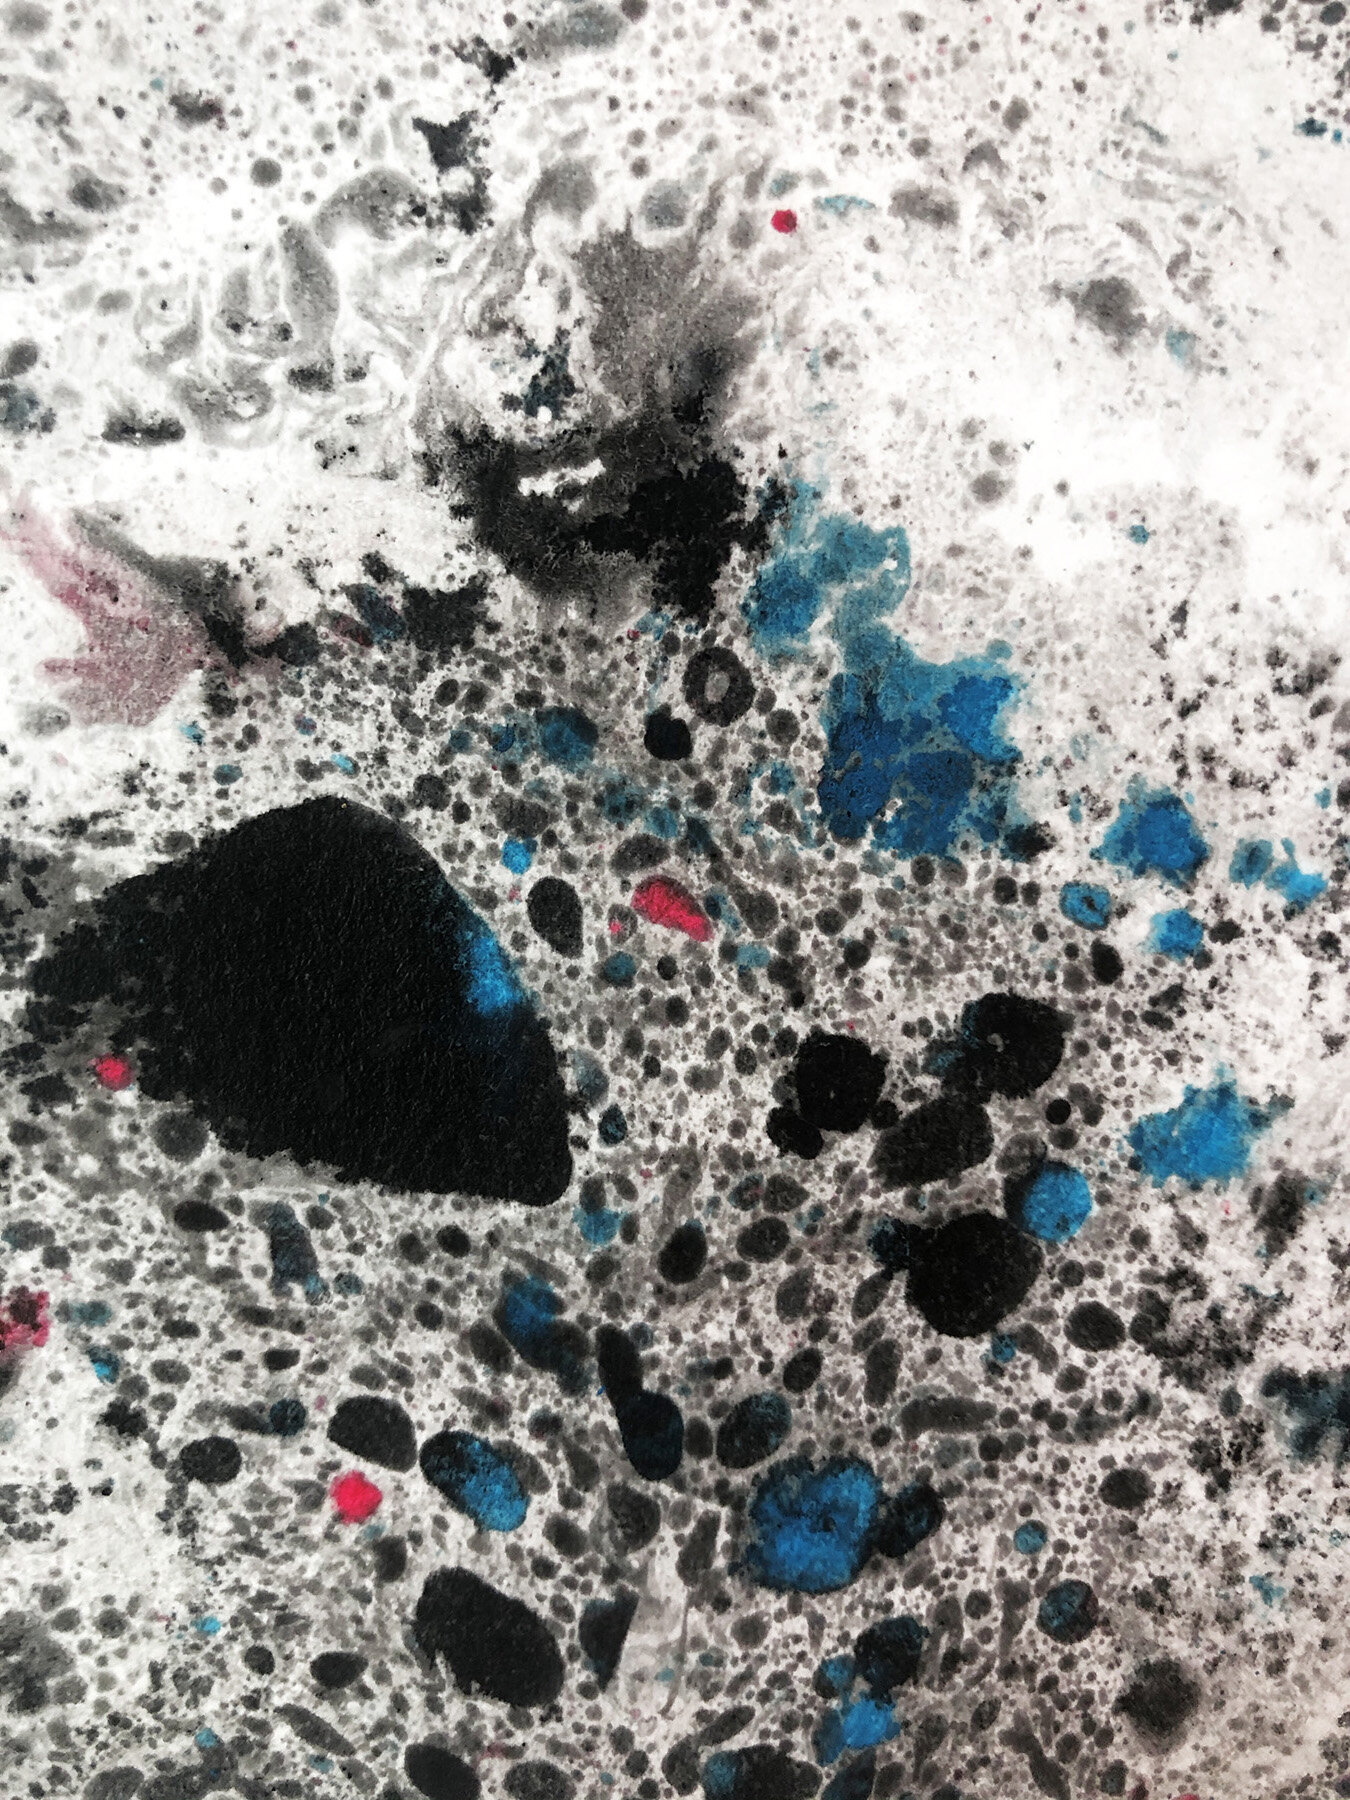
You can end your activity here. But if you like art as much as we do, you don’t want to miss out on a great opportunity. Messy Art Alert! We cut four rectangles from our thick paper. Make sure the paper you use is smaller than the baking tray you use. Now just dip the paper flat to the bottom of the tray and quickly pull it out of the water. All the oil at the surface of the water will transfer to the paper.

We wanted different colors so we emptied the water and oil and started again with fresh water and colored oil. Use a toothpick to lightly mix the colors if you want and quickly dip the paper in. You can dry these on a drying rack. It takes two to three days to dry completely. You will get beautiful marble texture on your paper. This is an ancient printmaking art from Japan called Suminagashi.
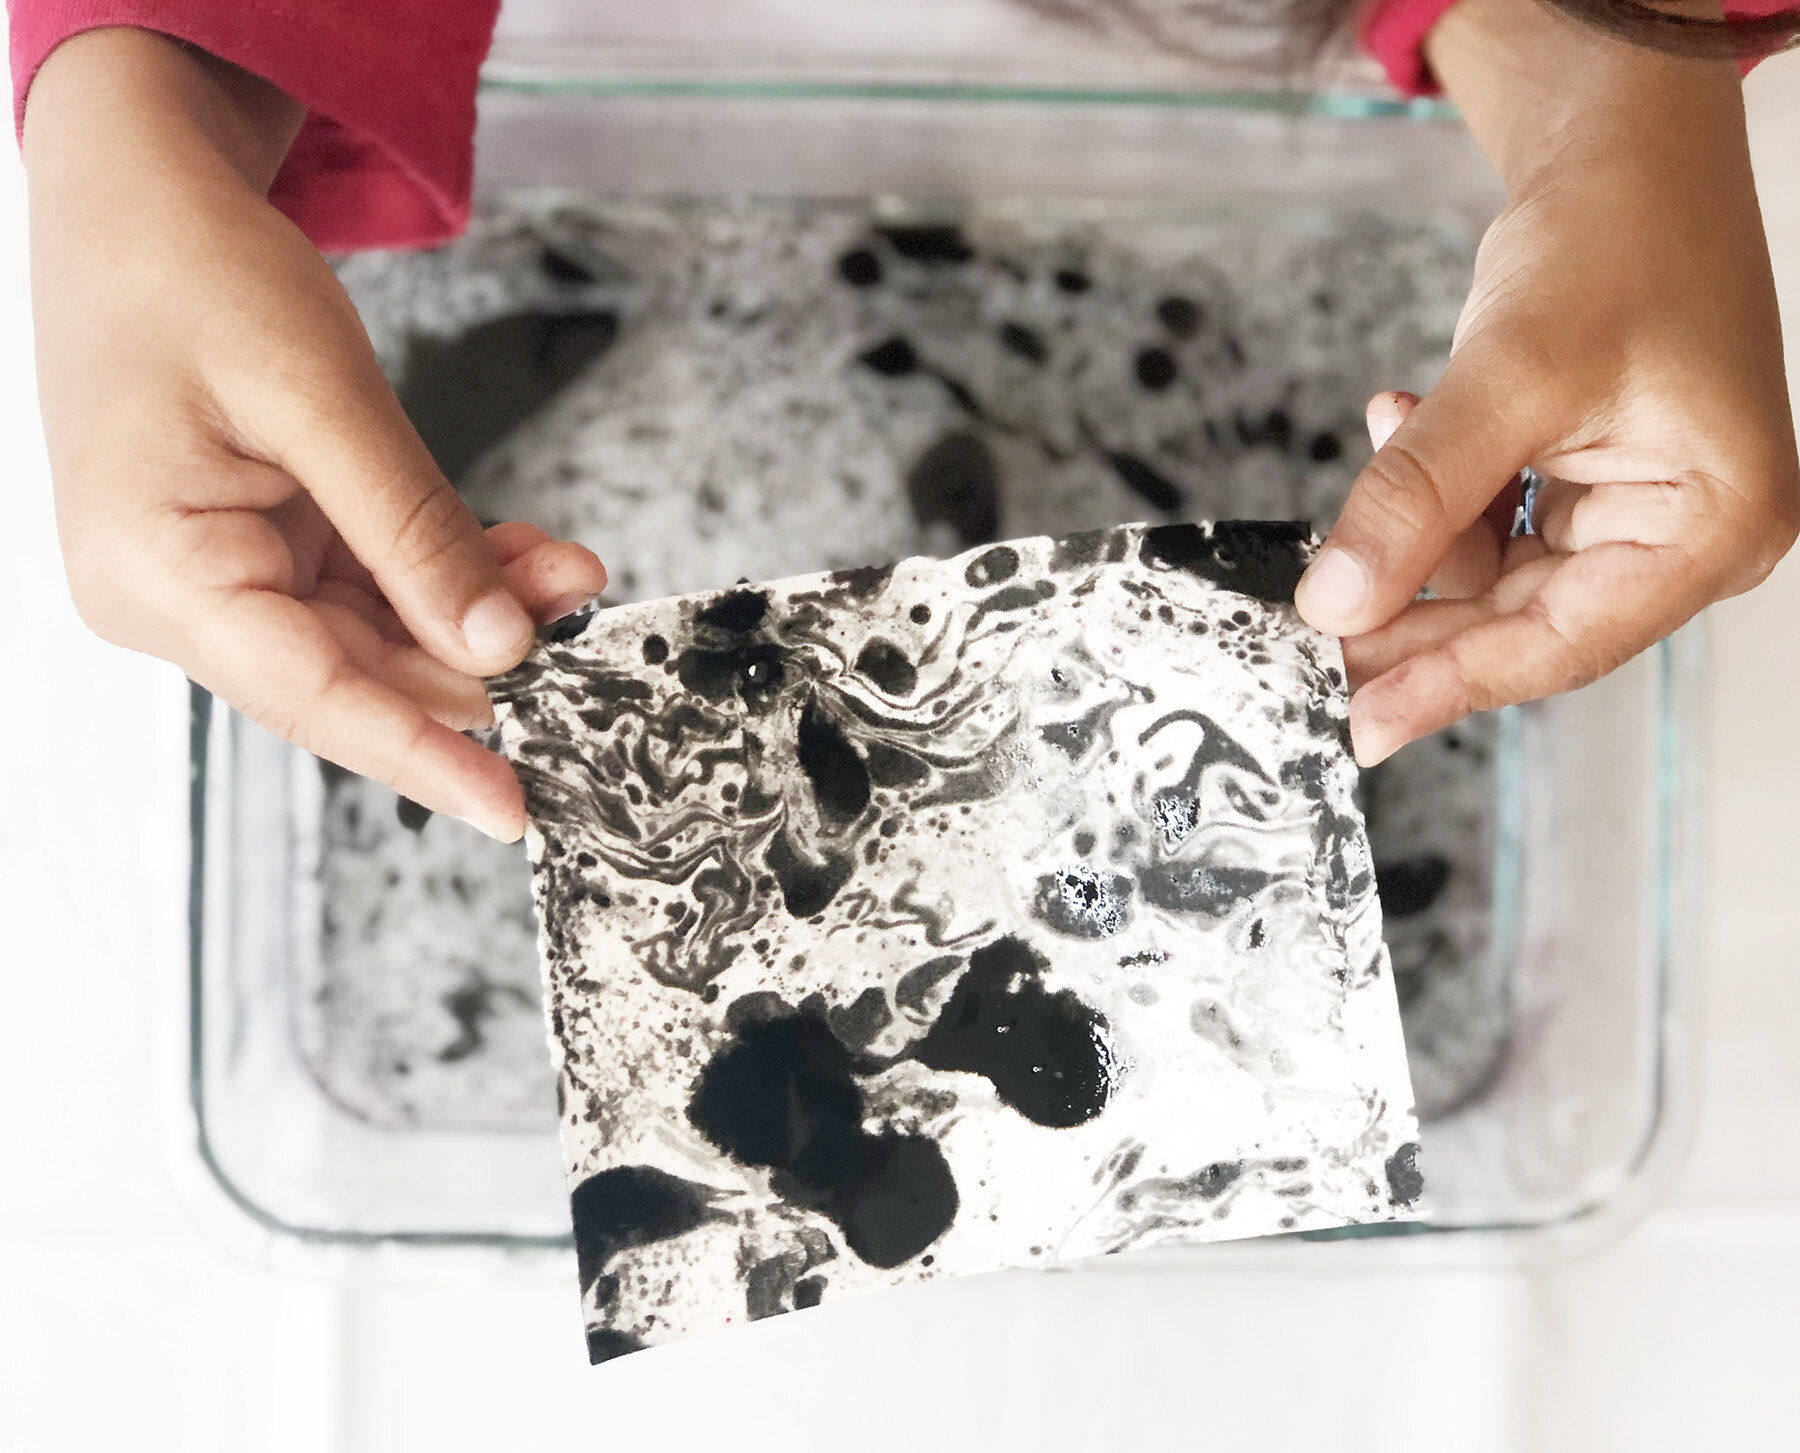
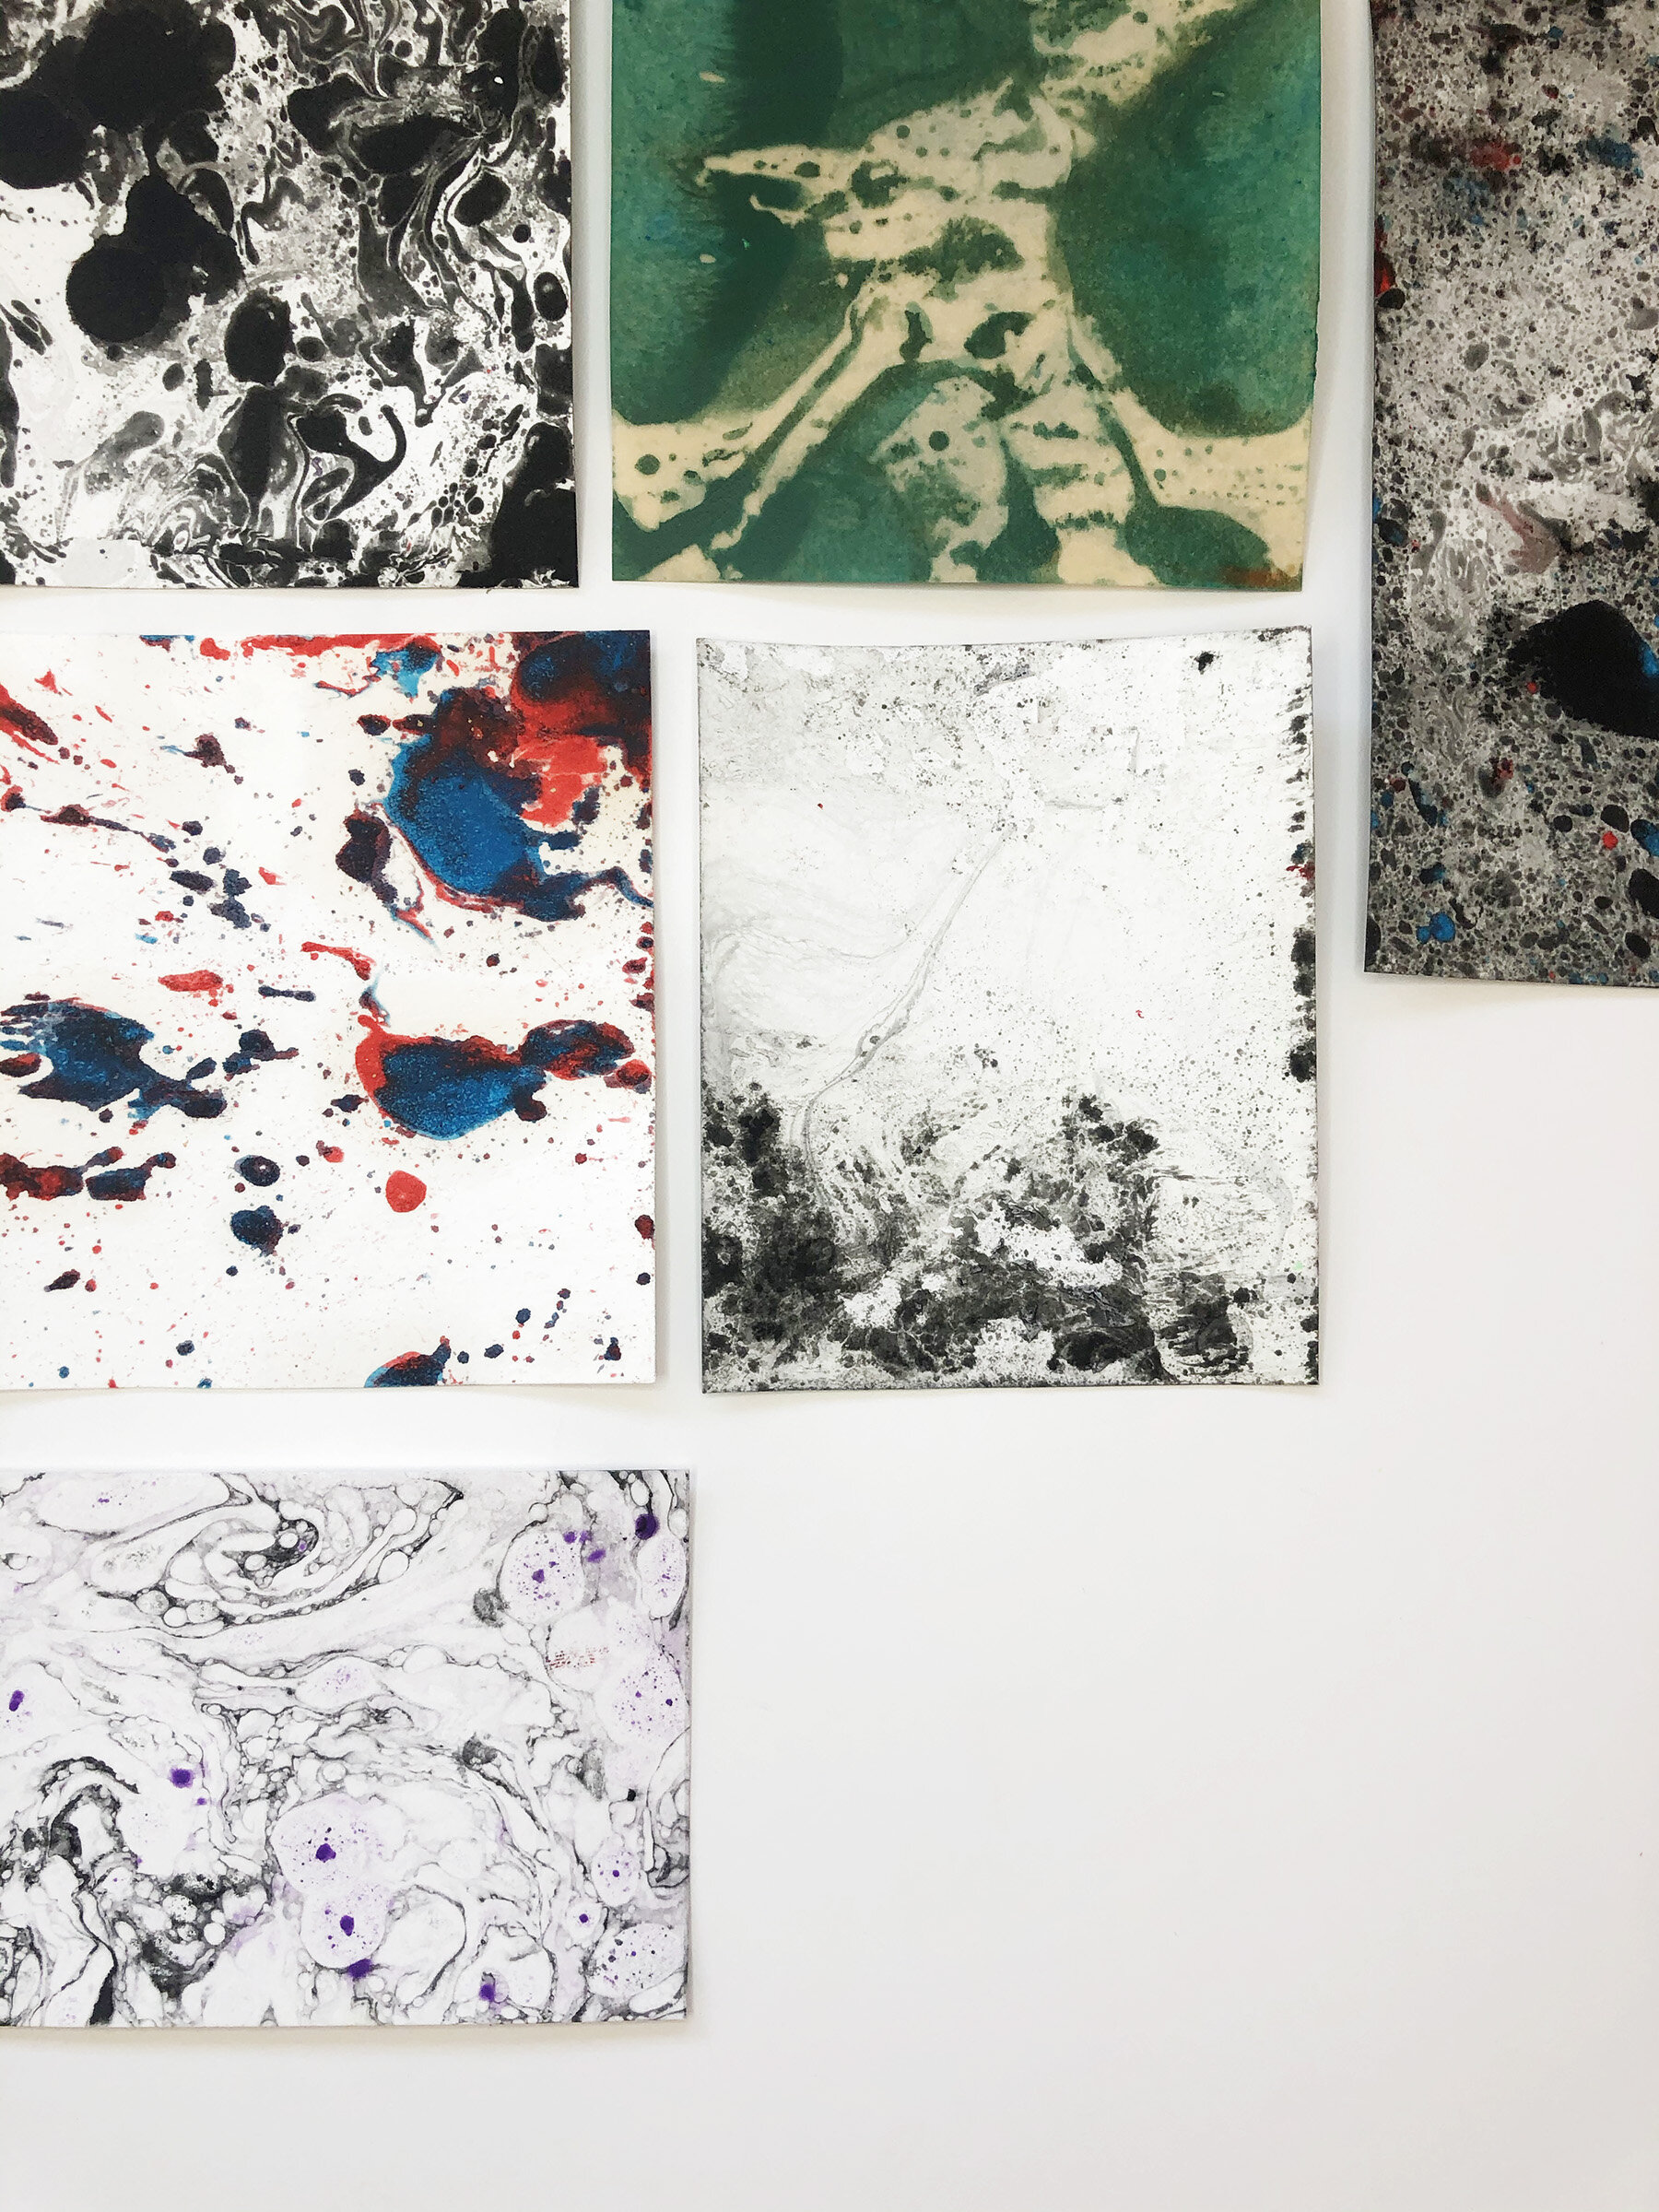
A lot of people have asked me how they can utilize these prints or what the end use of this could be. I personally always like to date these and hang it up on our art wall in my kids room. Other options are making bookmarks, gift tags, thank you cards or in this case we are going to just frame these beauties!