
It’s fall where we live and the perfect time to explore the outdoor. With leaves changing color, temperature cooling down slowly and festivities around the corner, it’s the busiest time of the year for most. So I will share some easy Fall Art & Craft ideas, that won’t take up much time to prep, but are going to be fun nevertheless.
Activity 1: Tie Dye Fall Leaves
Best for (2 year old and up) creativity, arts & crafts, decor, DIY, fine motor skills and color recognition
Material Needed: Coffee Filter, Crayola Color Pens, Spray Bottle filled with water and Fall Leaves template (Free Download at the end of this activity)
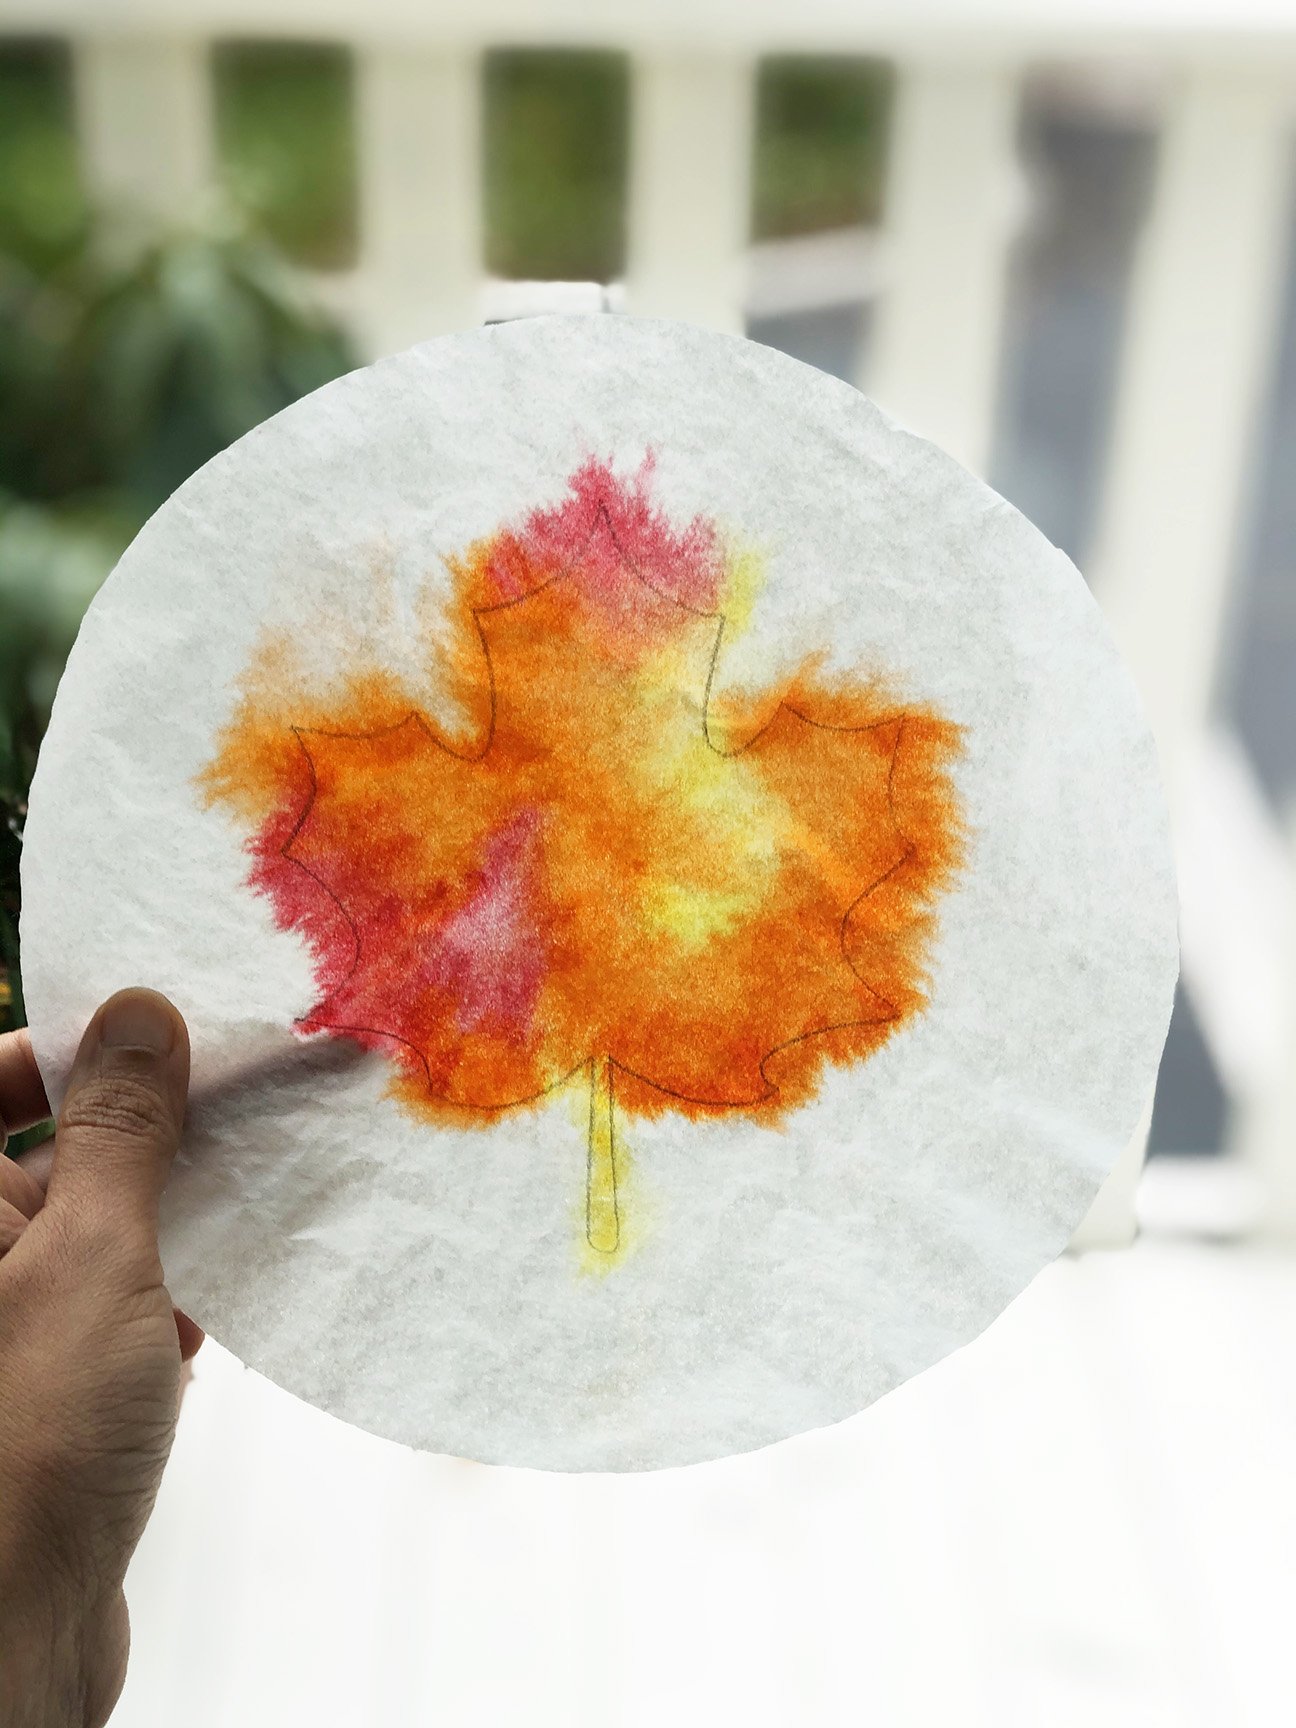
Who said Tie Dye is only for Summer? Once you try this easy activity with your kid you will want to do it every fall season! We have beautiful colored leaves in fall, but I wanted to make my own leaves so that I can use them for many more fall seasons without worrying about the leaves drying.

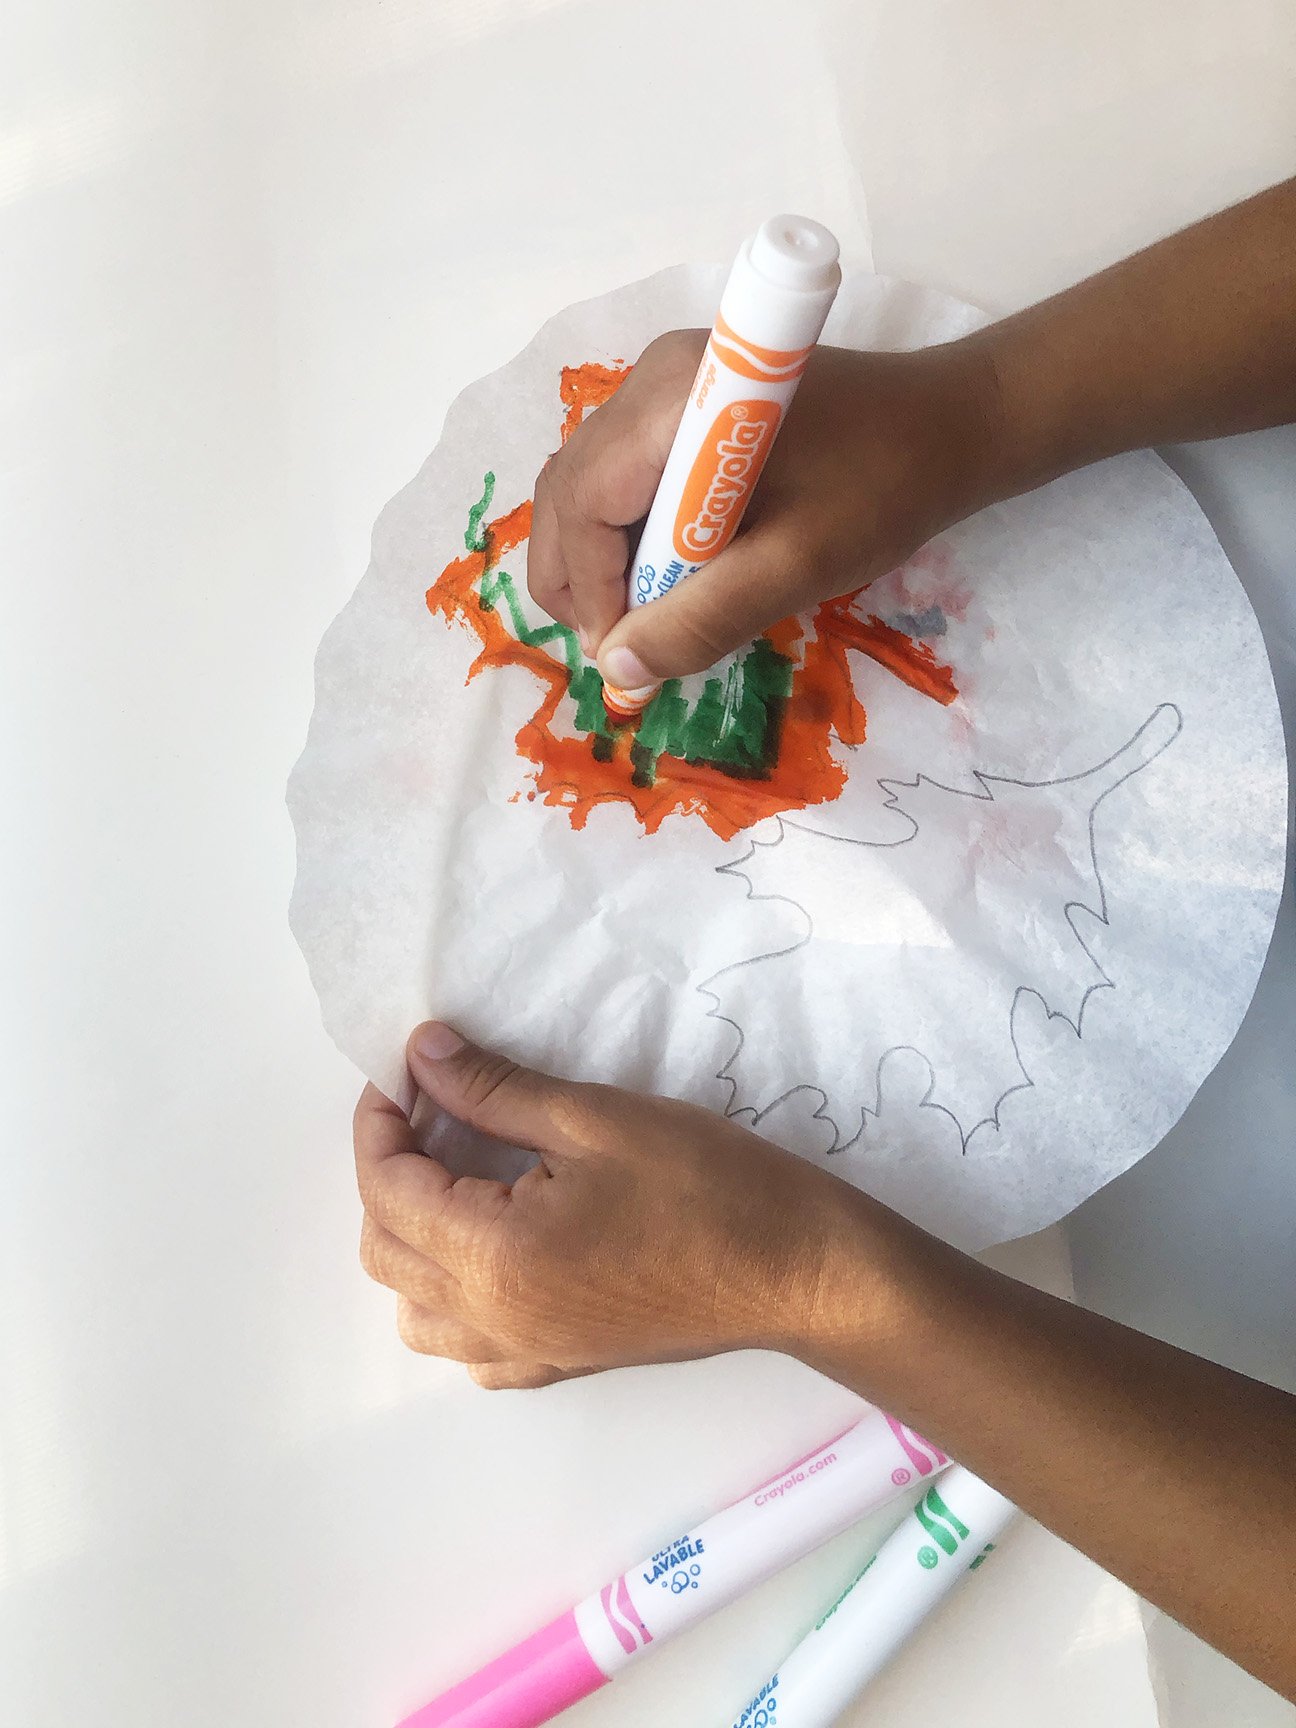
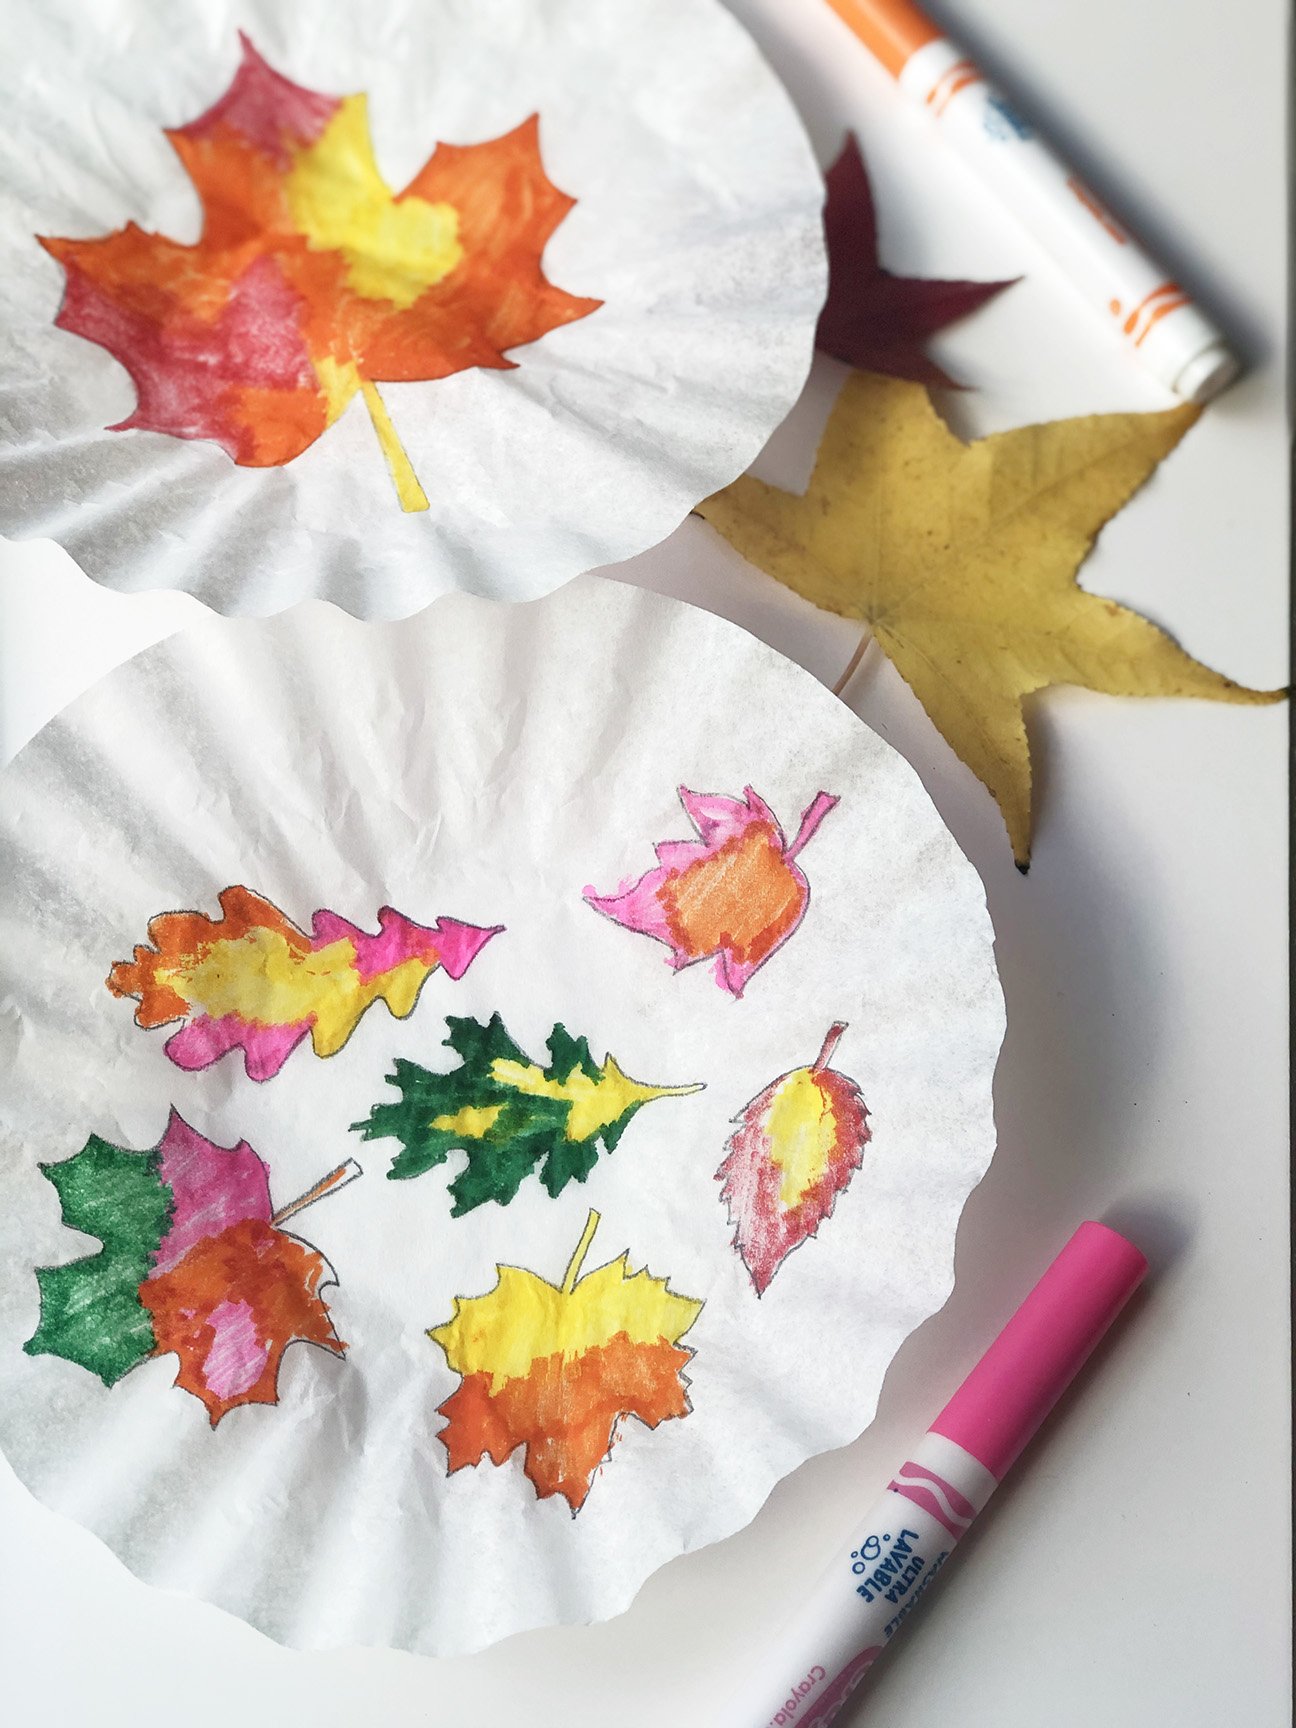
I got my coffee filters from a dollar store for a dollar! Most homes I know already use these on a daily basis. Keep some coffee filters under a heavy book for a day or two to flatten them. Then use the template below to draw your fall leaves. If you are blessed with fall leaves in your area, just get them home and trace them.
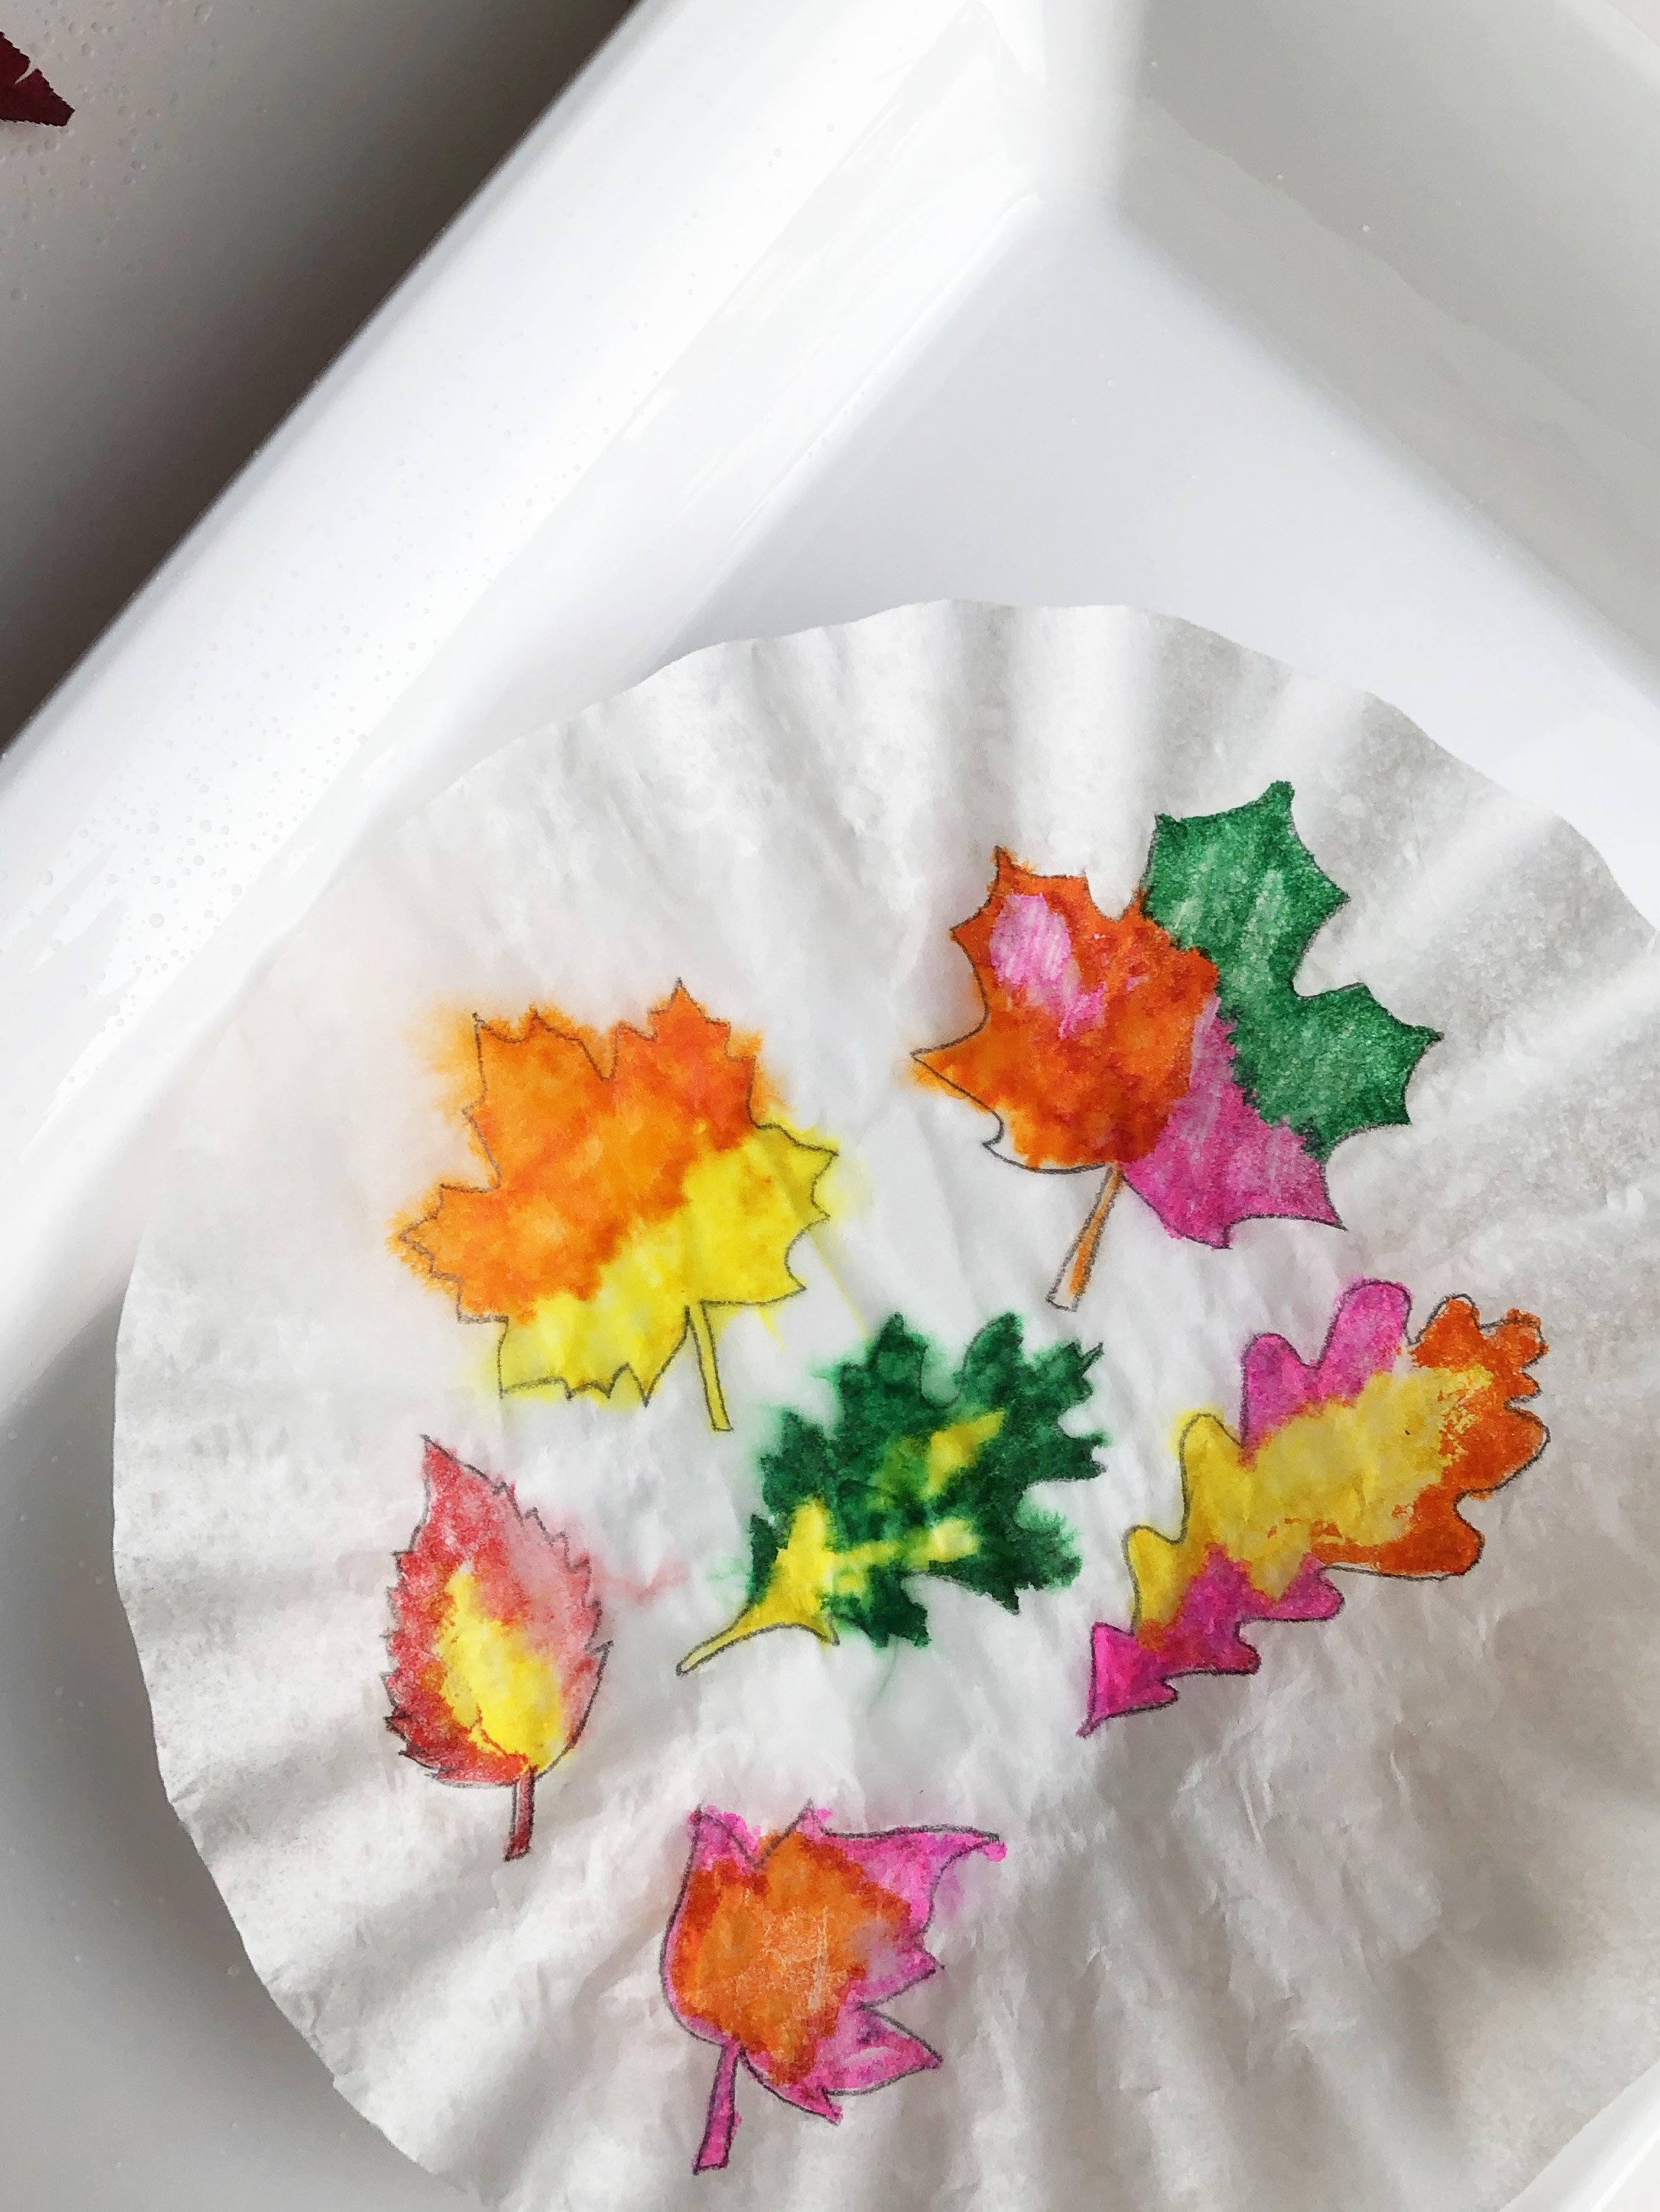

Let your kid color them as they want. We used Crayola’s washable markers in yellow, orange, red, pink and green (the colors you would see on trees in fall season). Don’t stress if they don’t color inside the lines, or color the leaf in one solid color or leave empty spaces. It won’t matter, the result will still be beautiful. Now use your spray bottle and spray water on each colored leaf. If you want muted tones, spray water generously and if you want vibrant colors, spray only a little. Spray enough to get the coffee filter just moist.
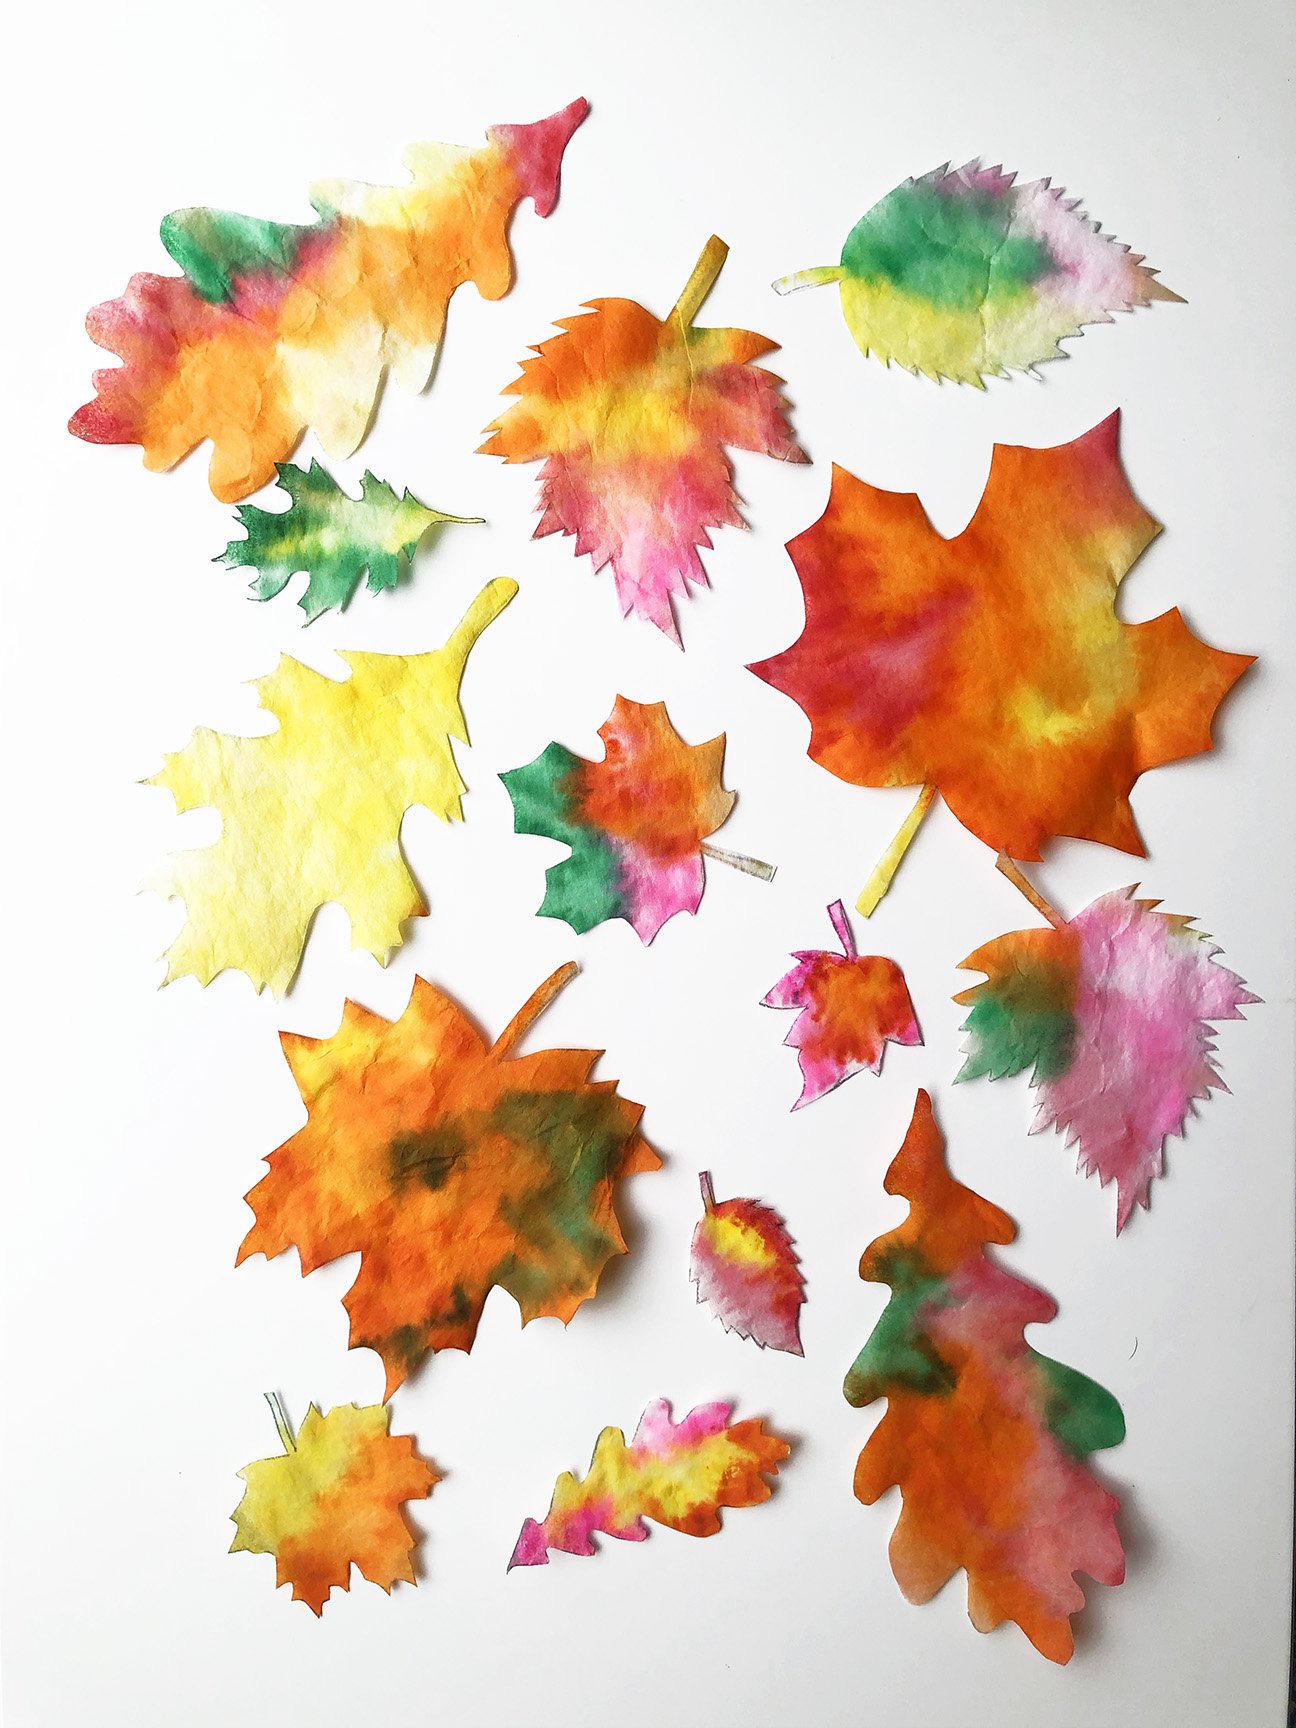
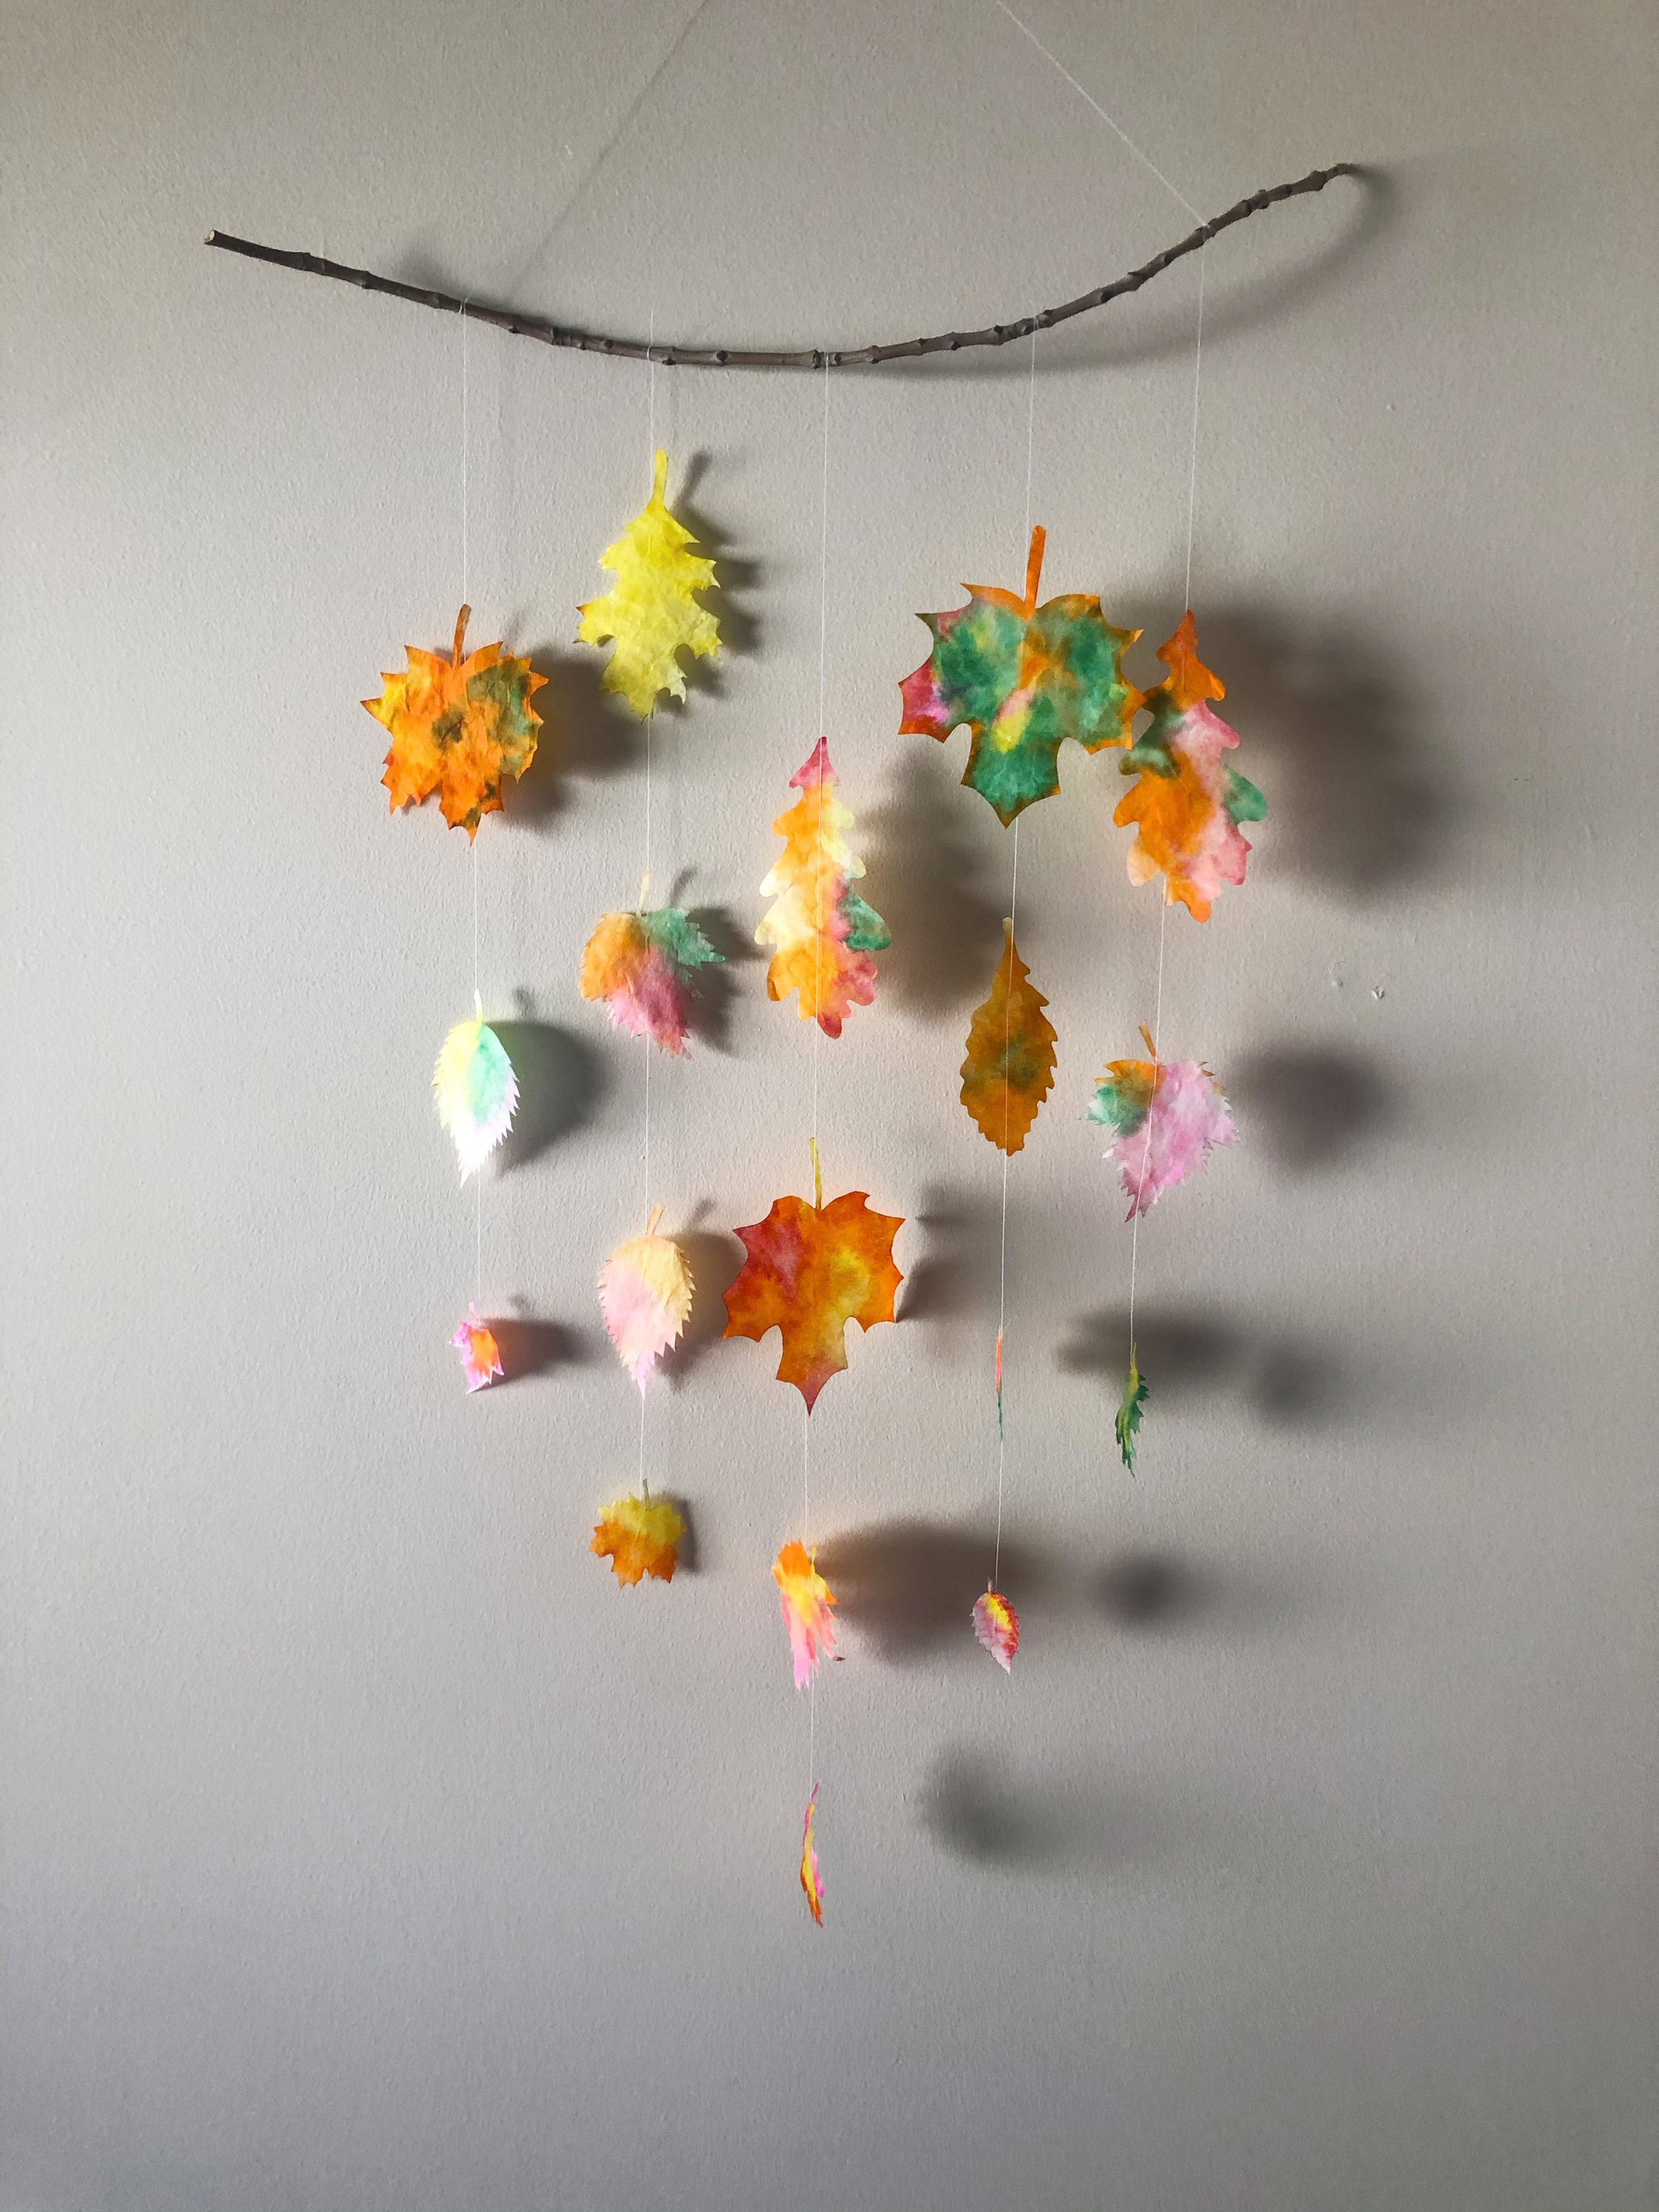
Let the filters dry. Ours dried in a couple hours. You will see how beautifully the colors blended into each other. Also the coffee filter gives you that crunchy leaf texture after its dried. Now take a scissor and cut the leaves. We made our leaves in two different sizes. The template I am sharing has three different sizes you can use. Make a pattern, bunting, frame it, use as table decor or hang it on a wall like we did. So many things you can do with them. Plus you can reuse them every fall!
Activity 2: Paper Pumpkins
Best for (3 year old and up) creativity, decor, DIY and fine motor skills
Material Needed: Paper (Fall colors), Paper Punch, Pipe Cleaner and Tea Lights (optional)
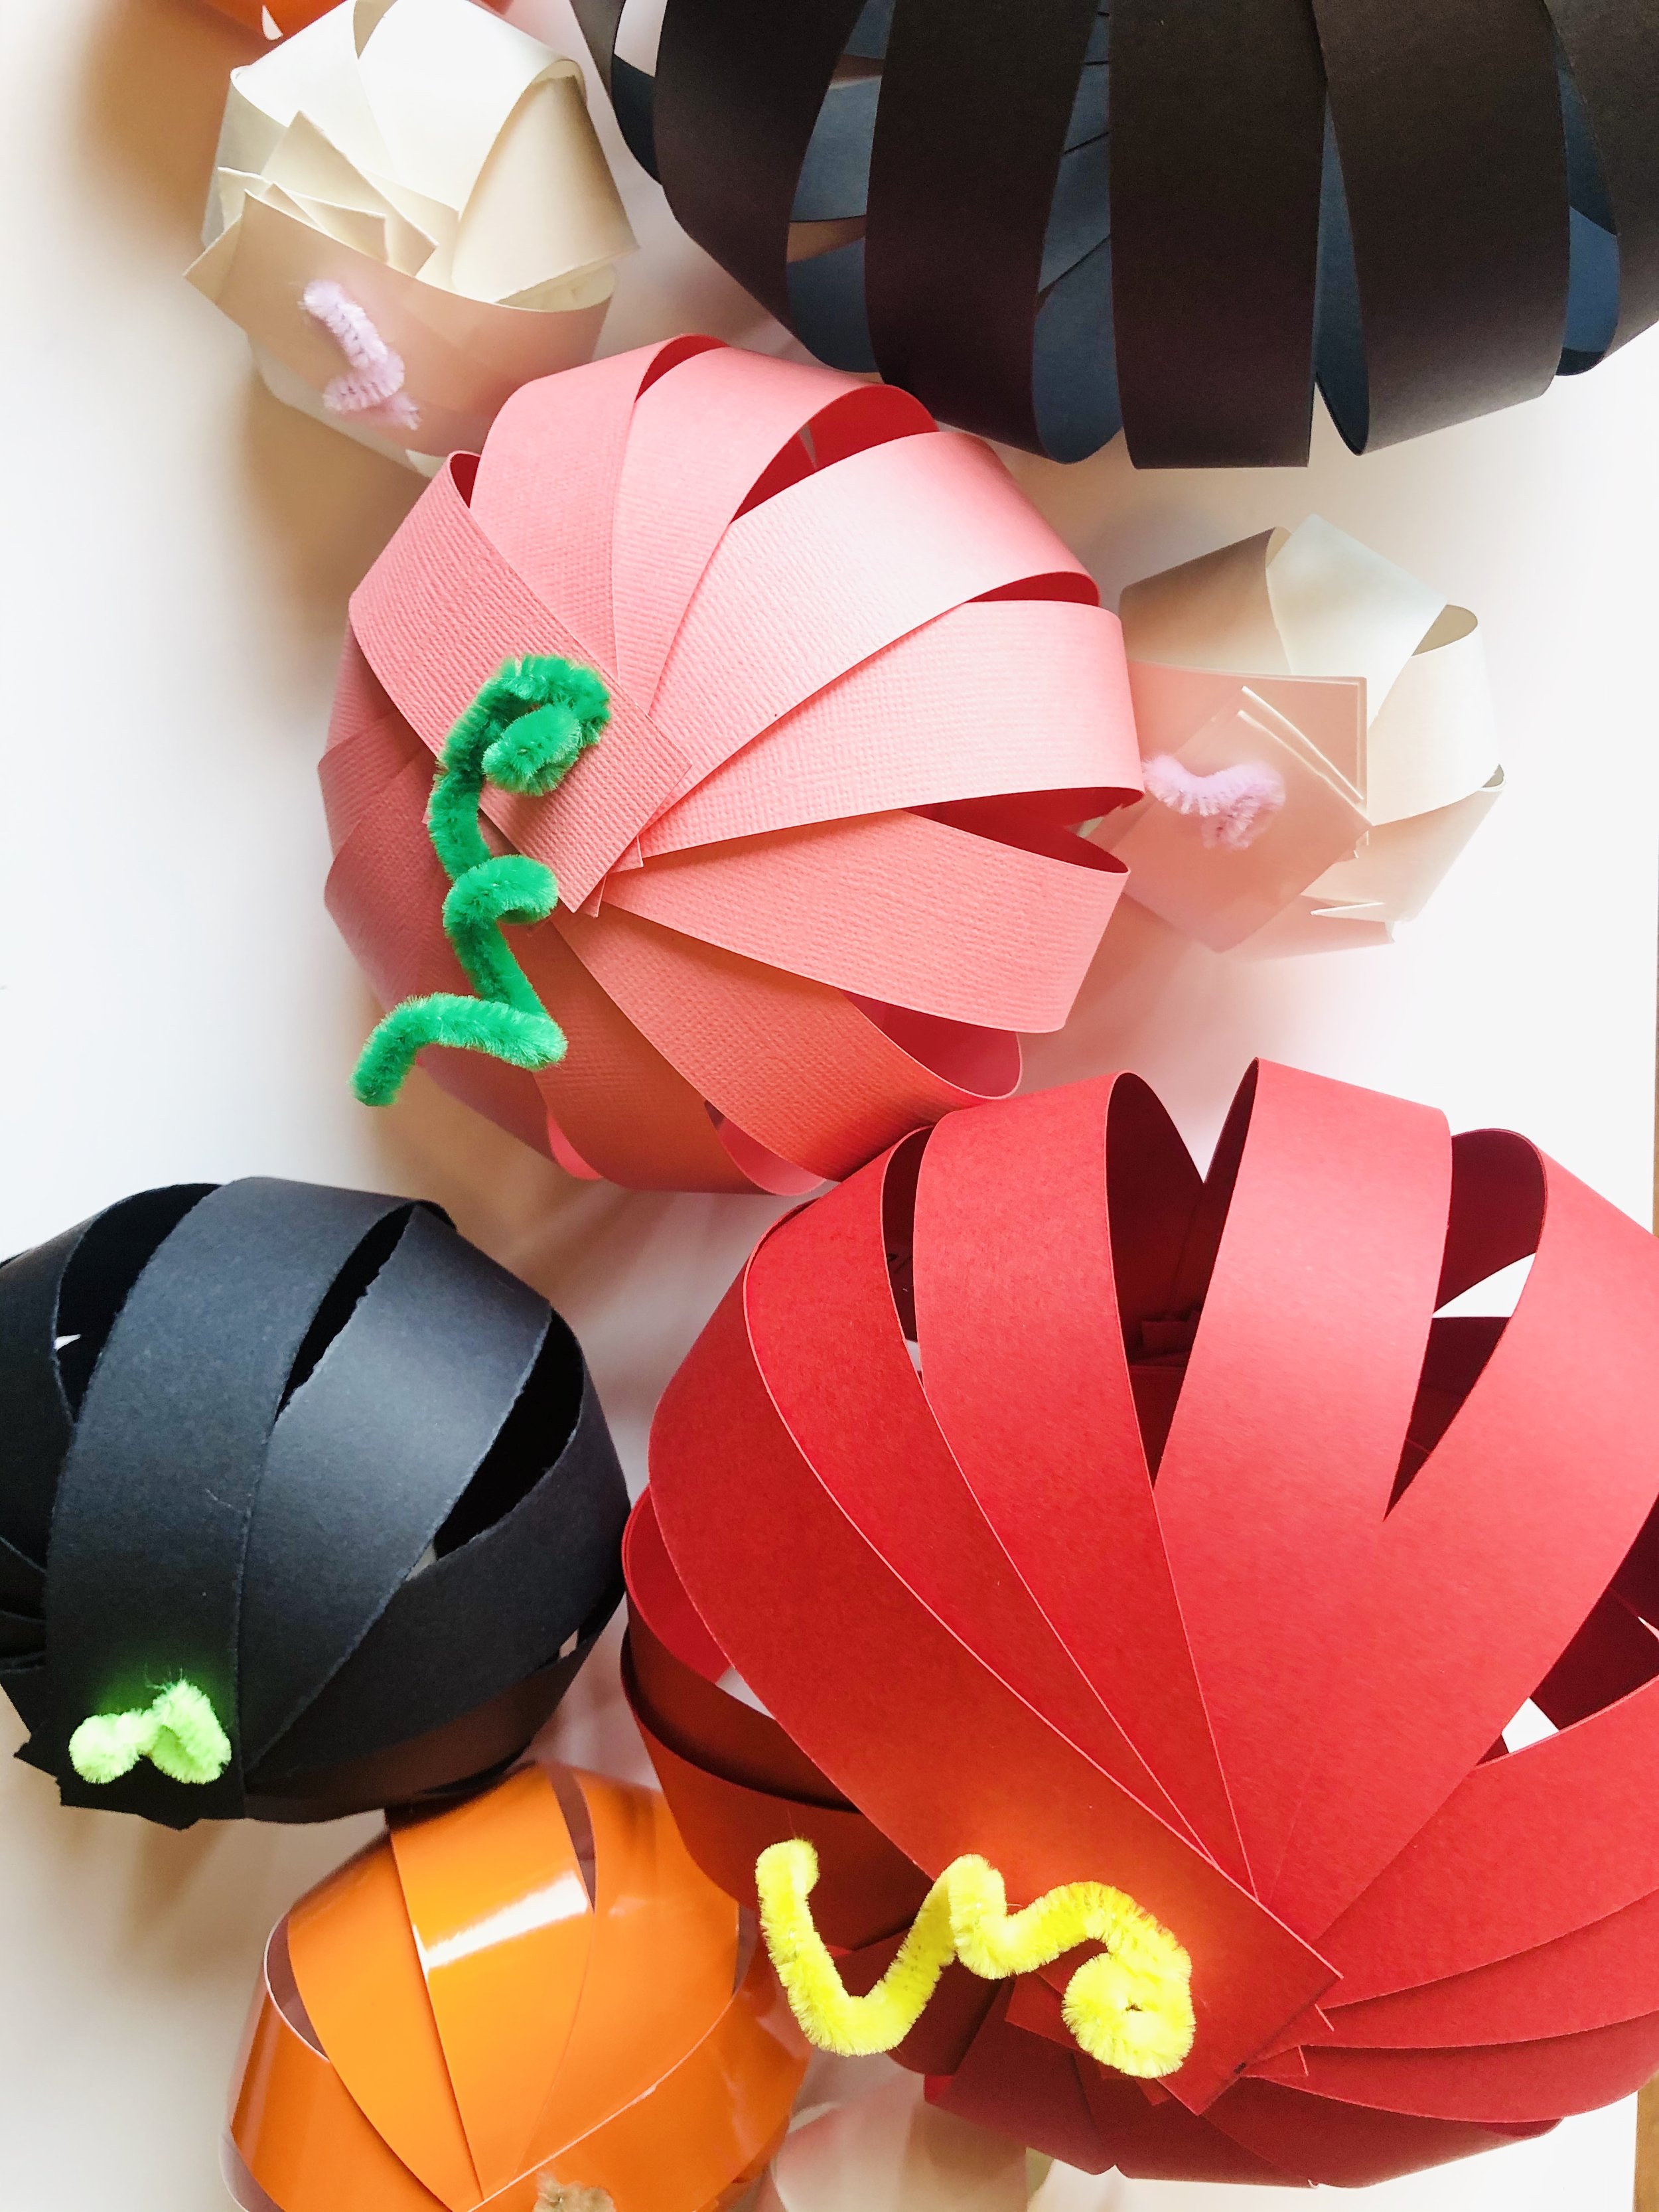
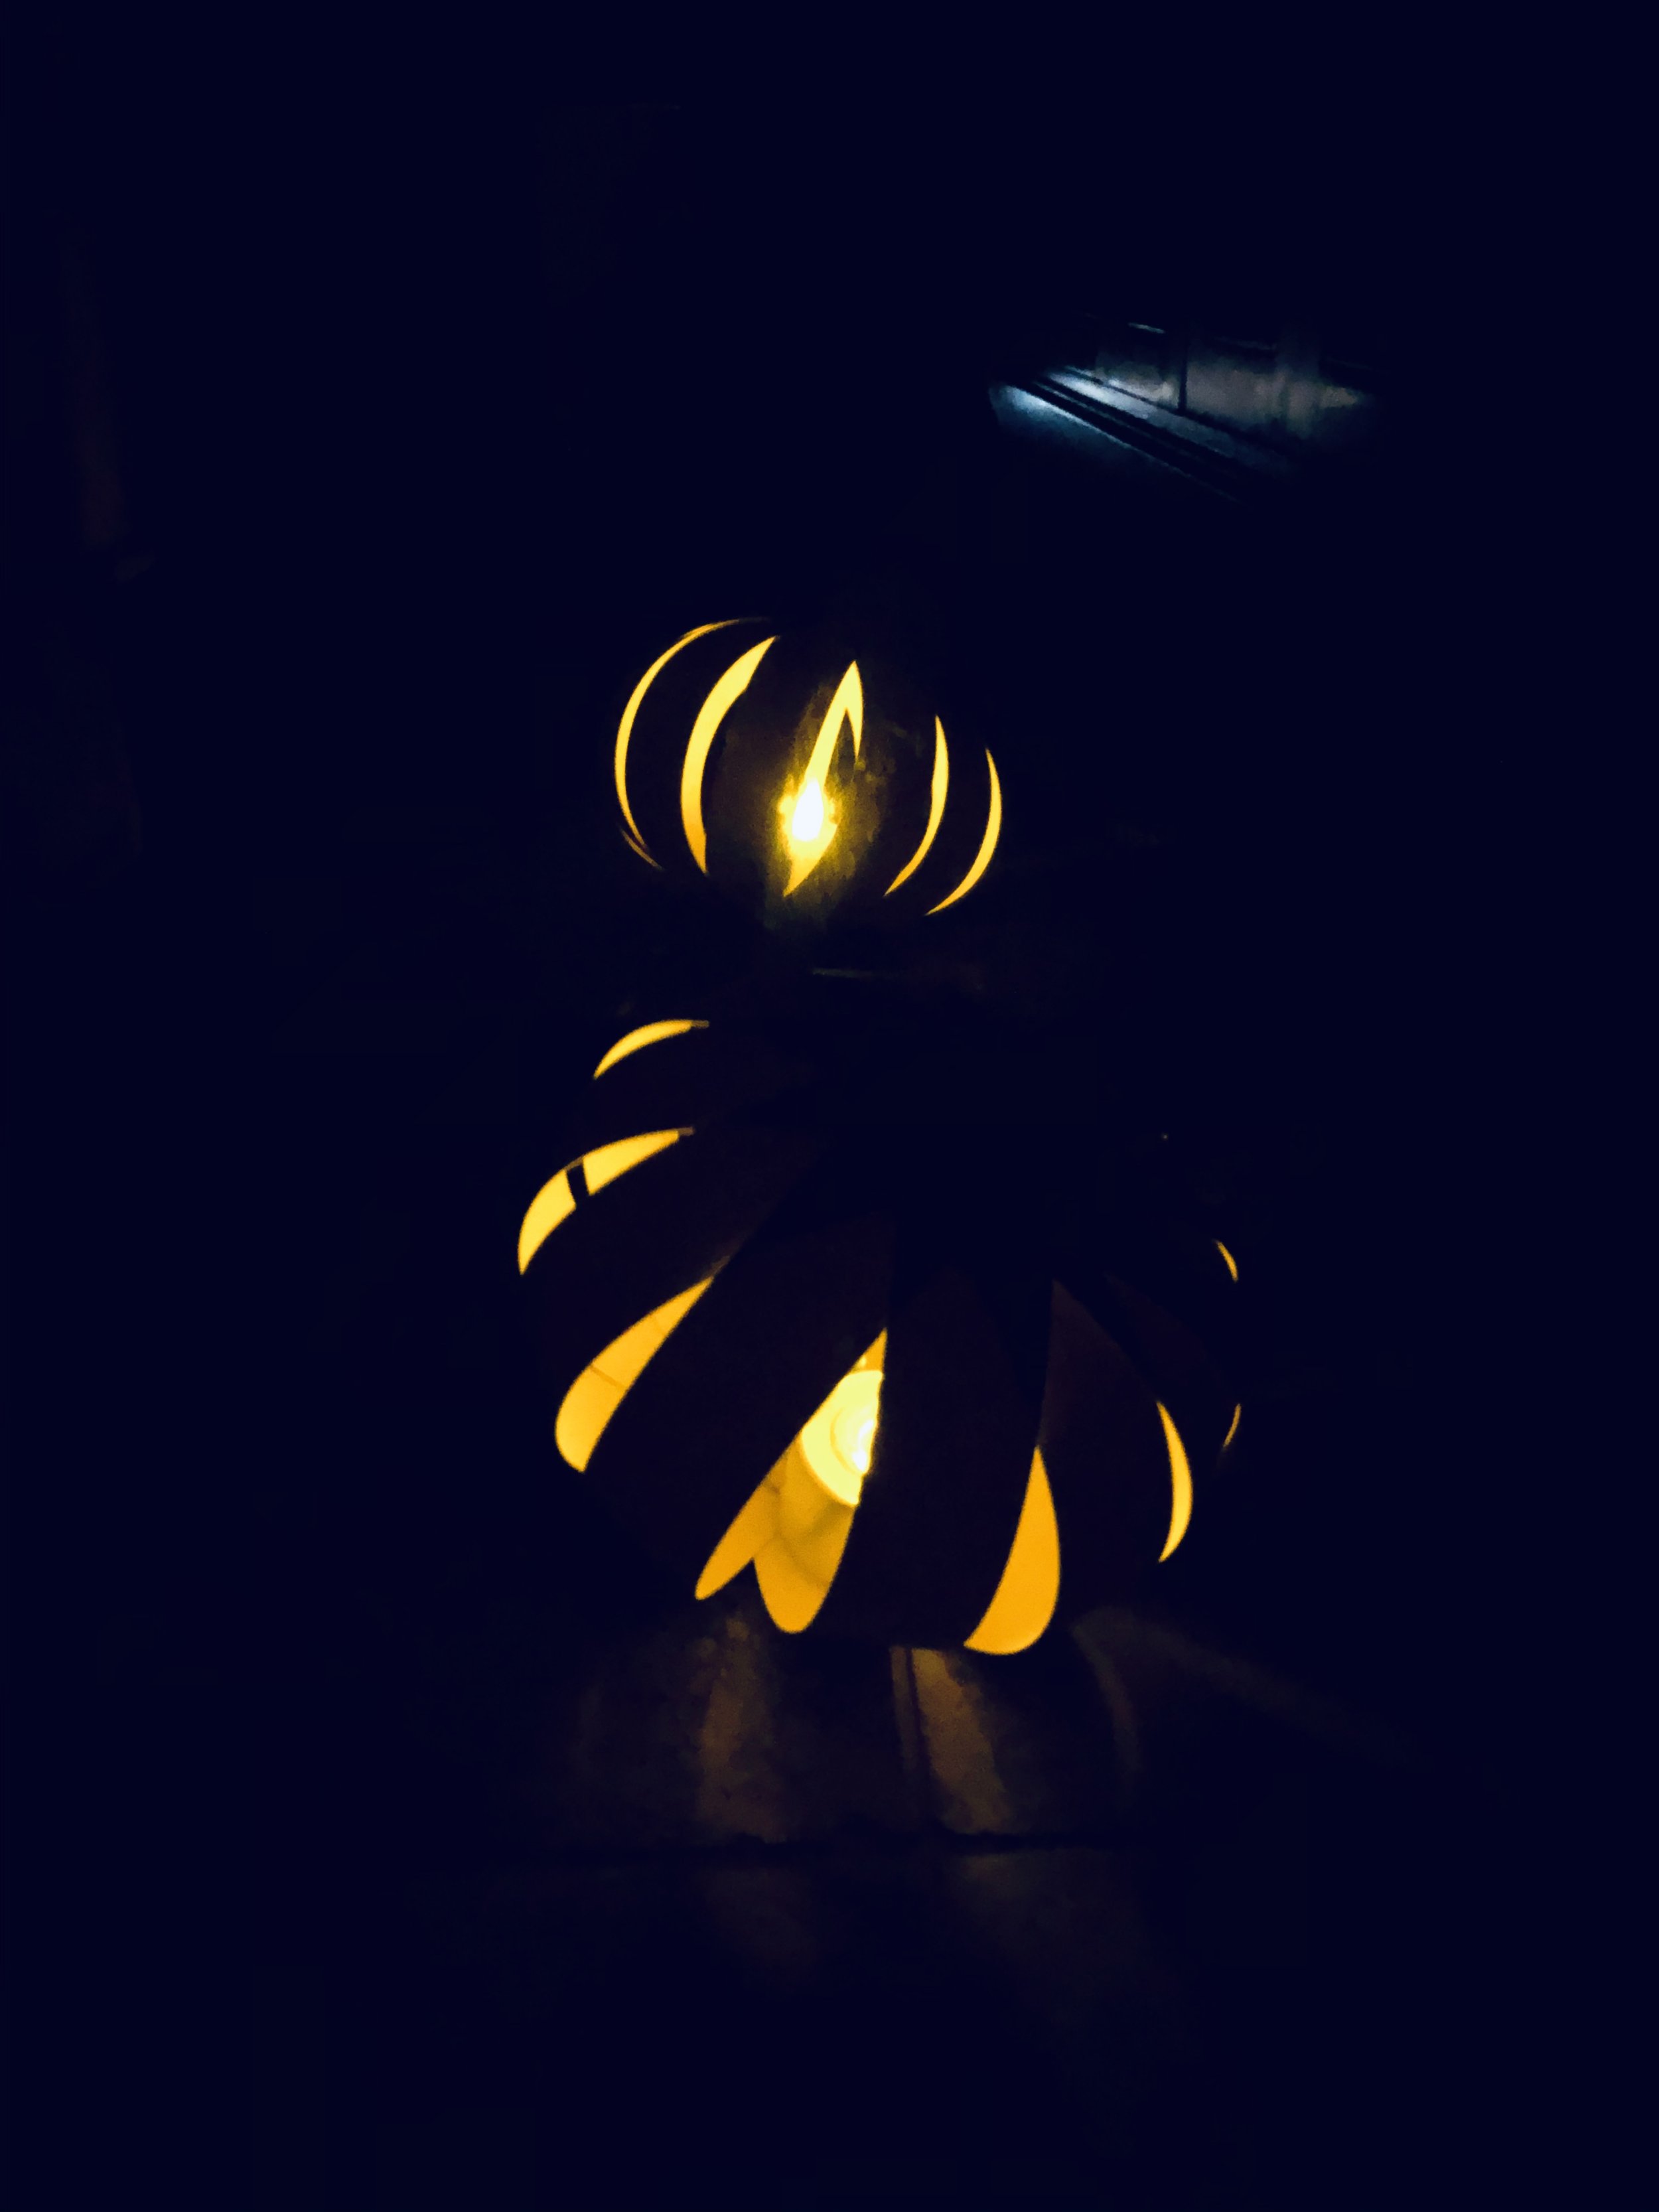
Getting dozens of pumpkins every year for decoration is not my thing. So we like to use our paper pumpkins every year. Plus they are simple and fun to make with your kiddo. These look great in warm color tones, like Orange, Red, Yellow, Pink, Brown, Black.
Cut 10 to 11 strips of 1”x8”. 1 paper of letter size or A4 size yields about 11 such strips. Punch hole on both sides of the strip. Pass the Pipe Cleaner through one side of the holes and tie a knot. This is a great way to sharpen those fine motor skills for kids.
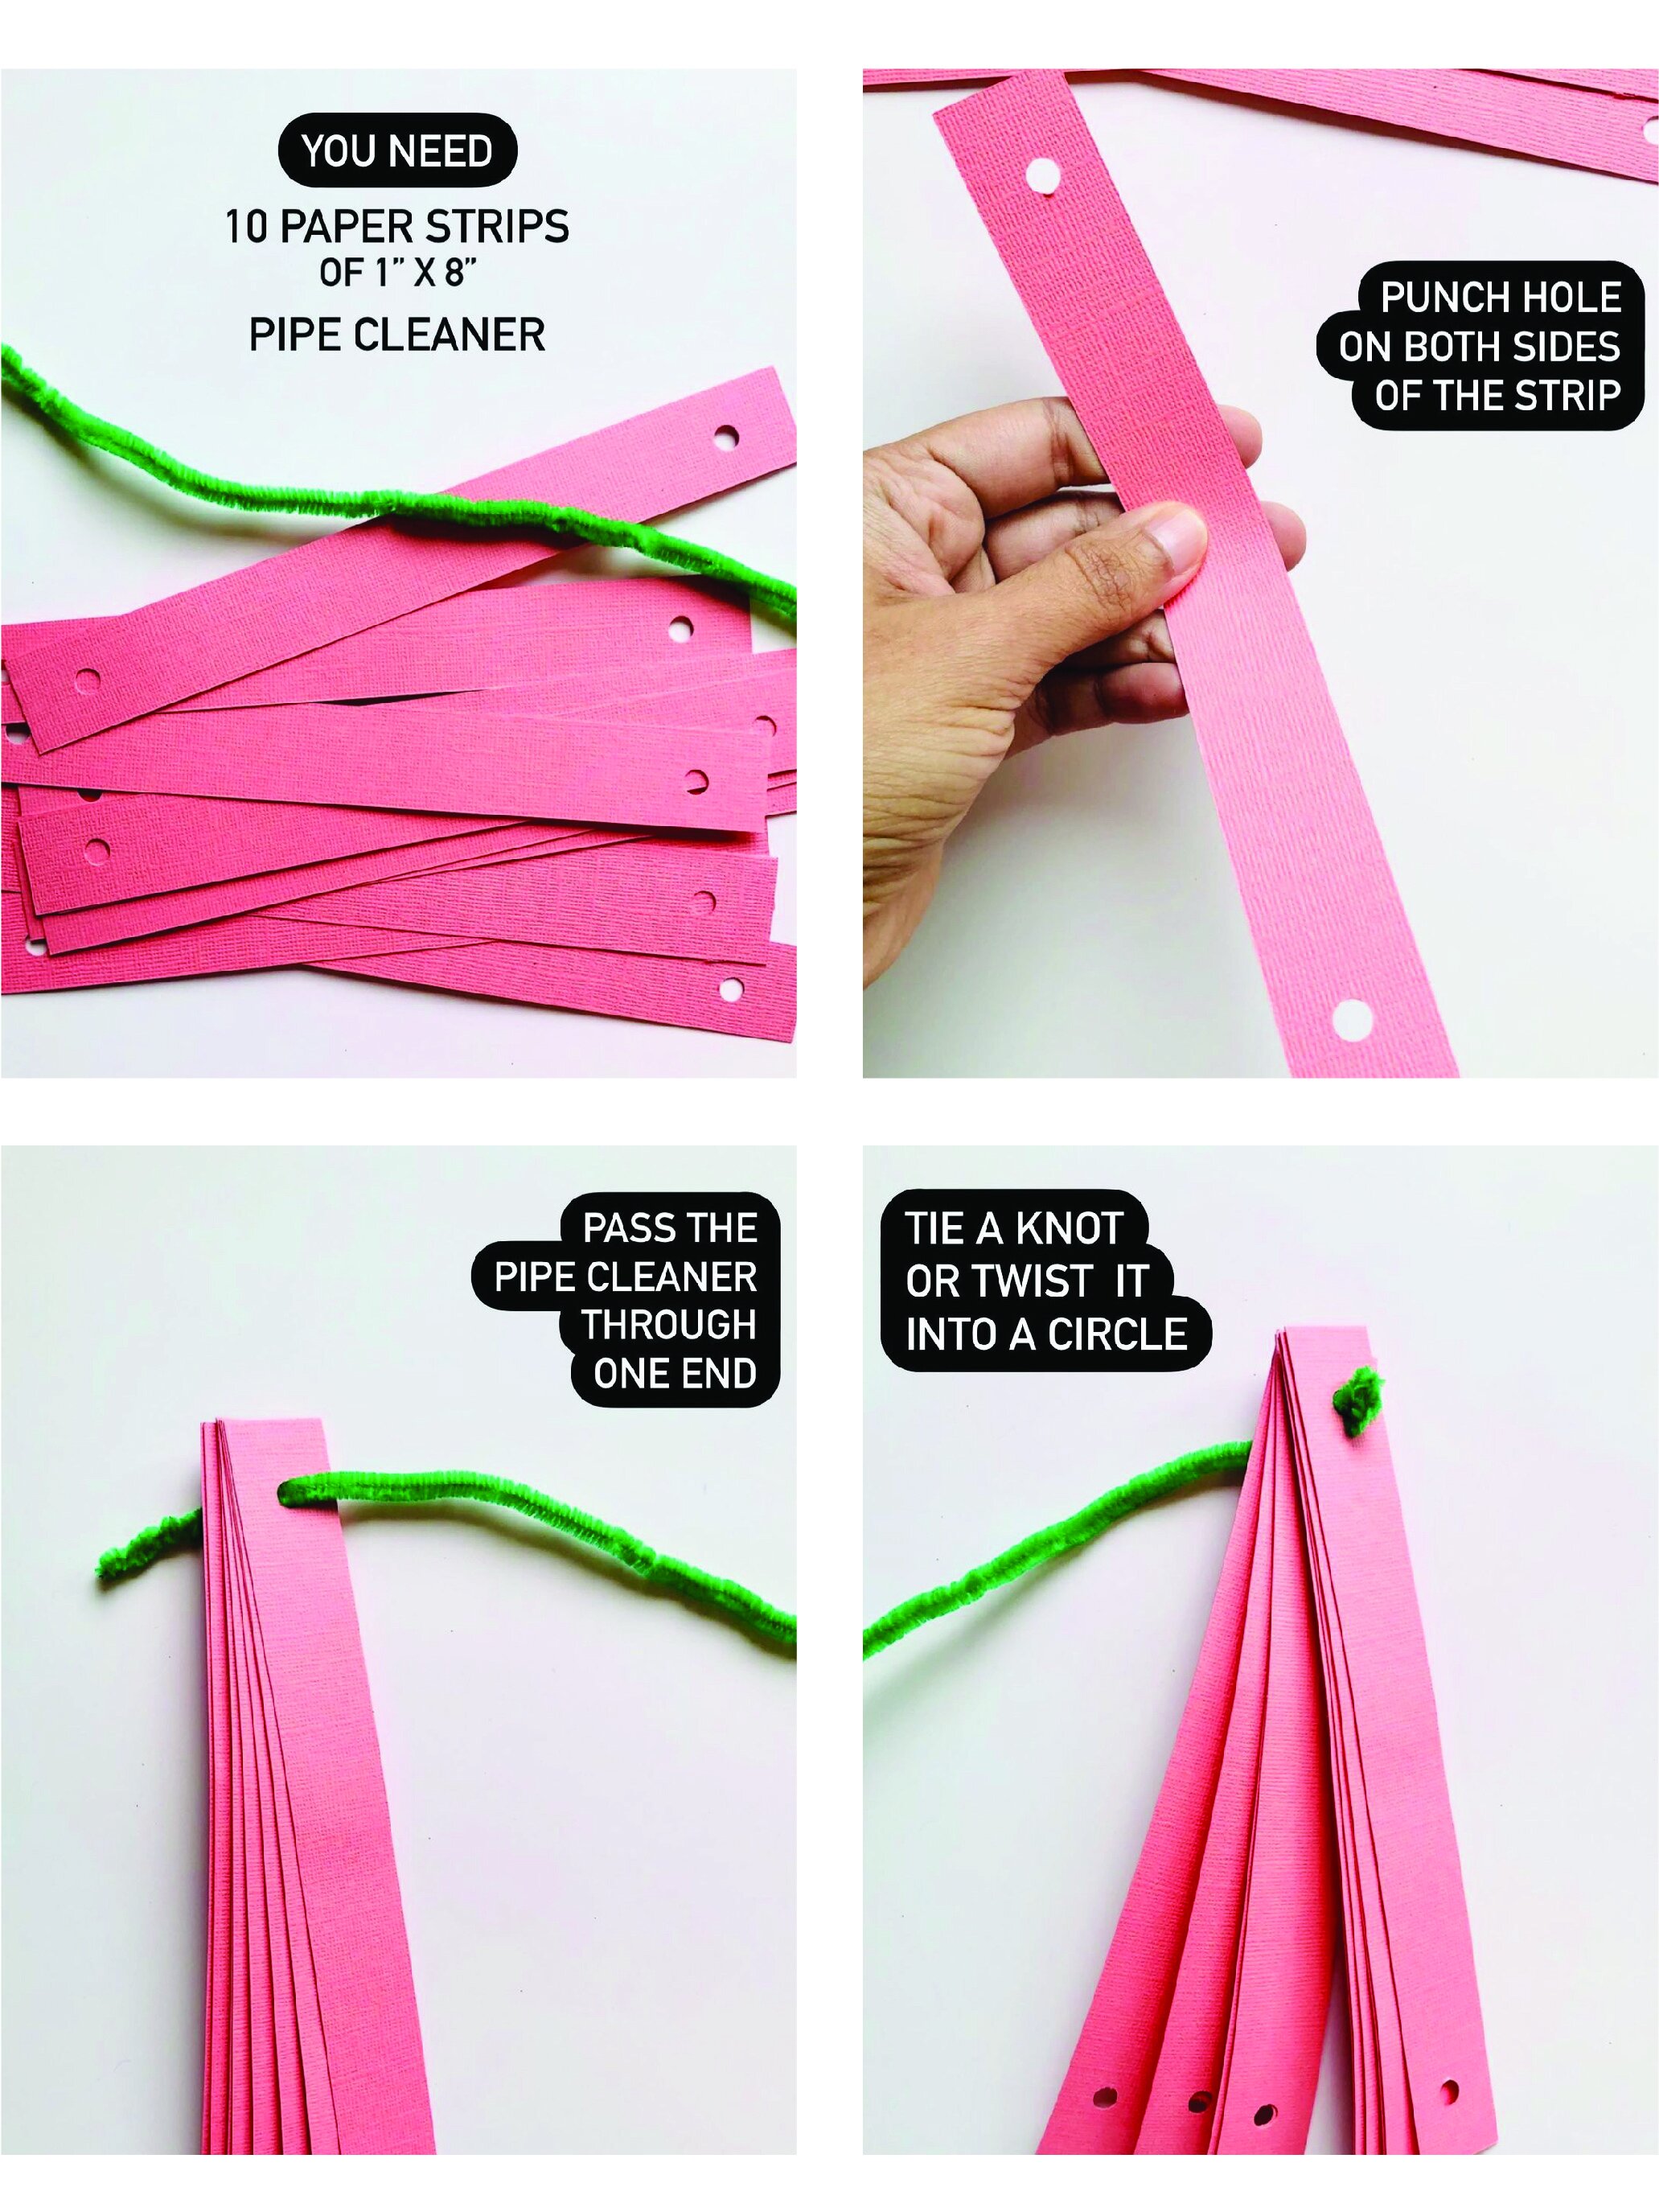
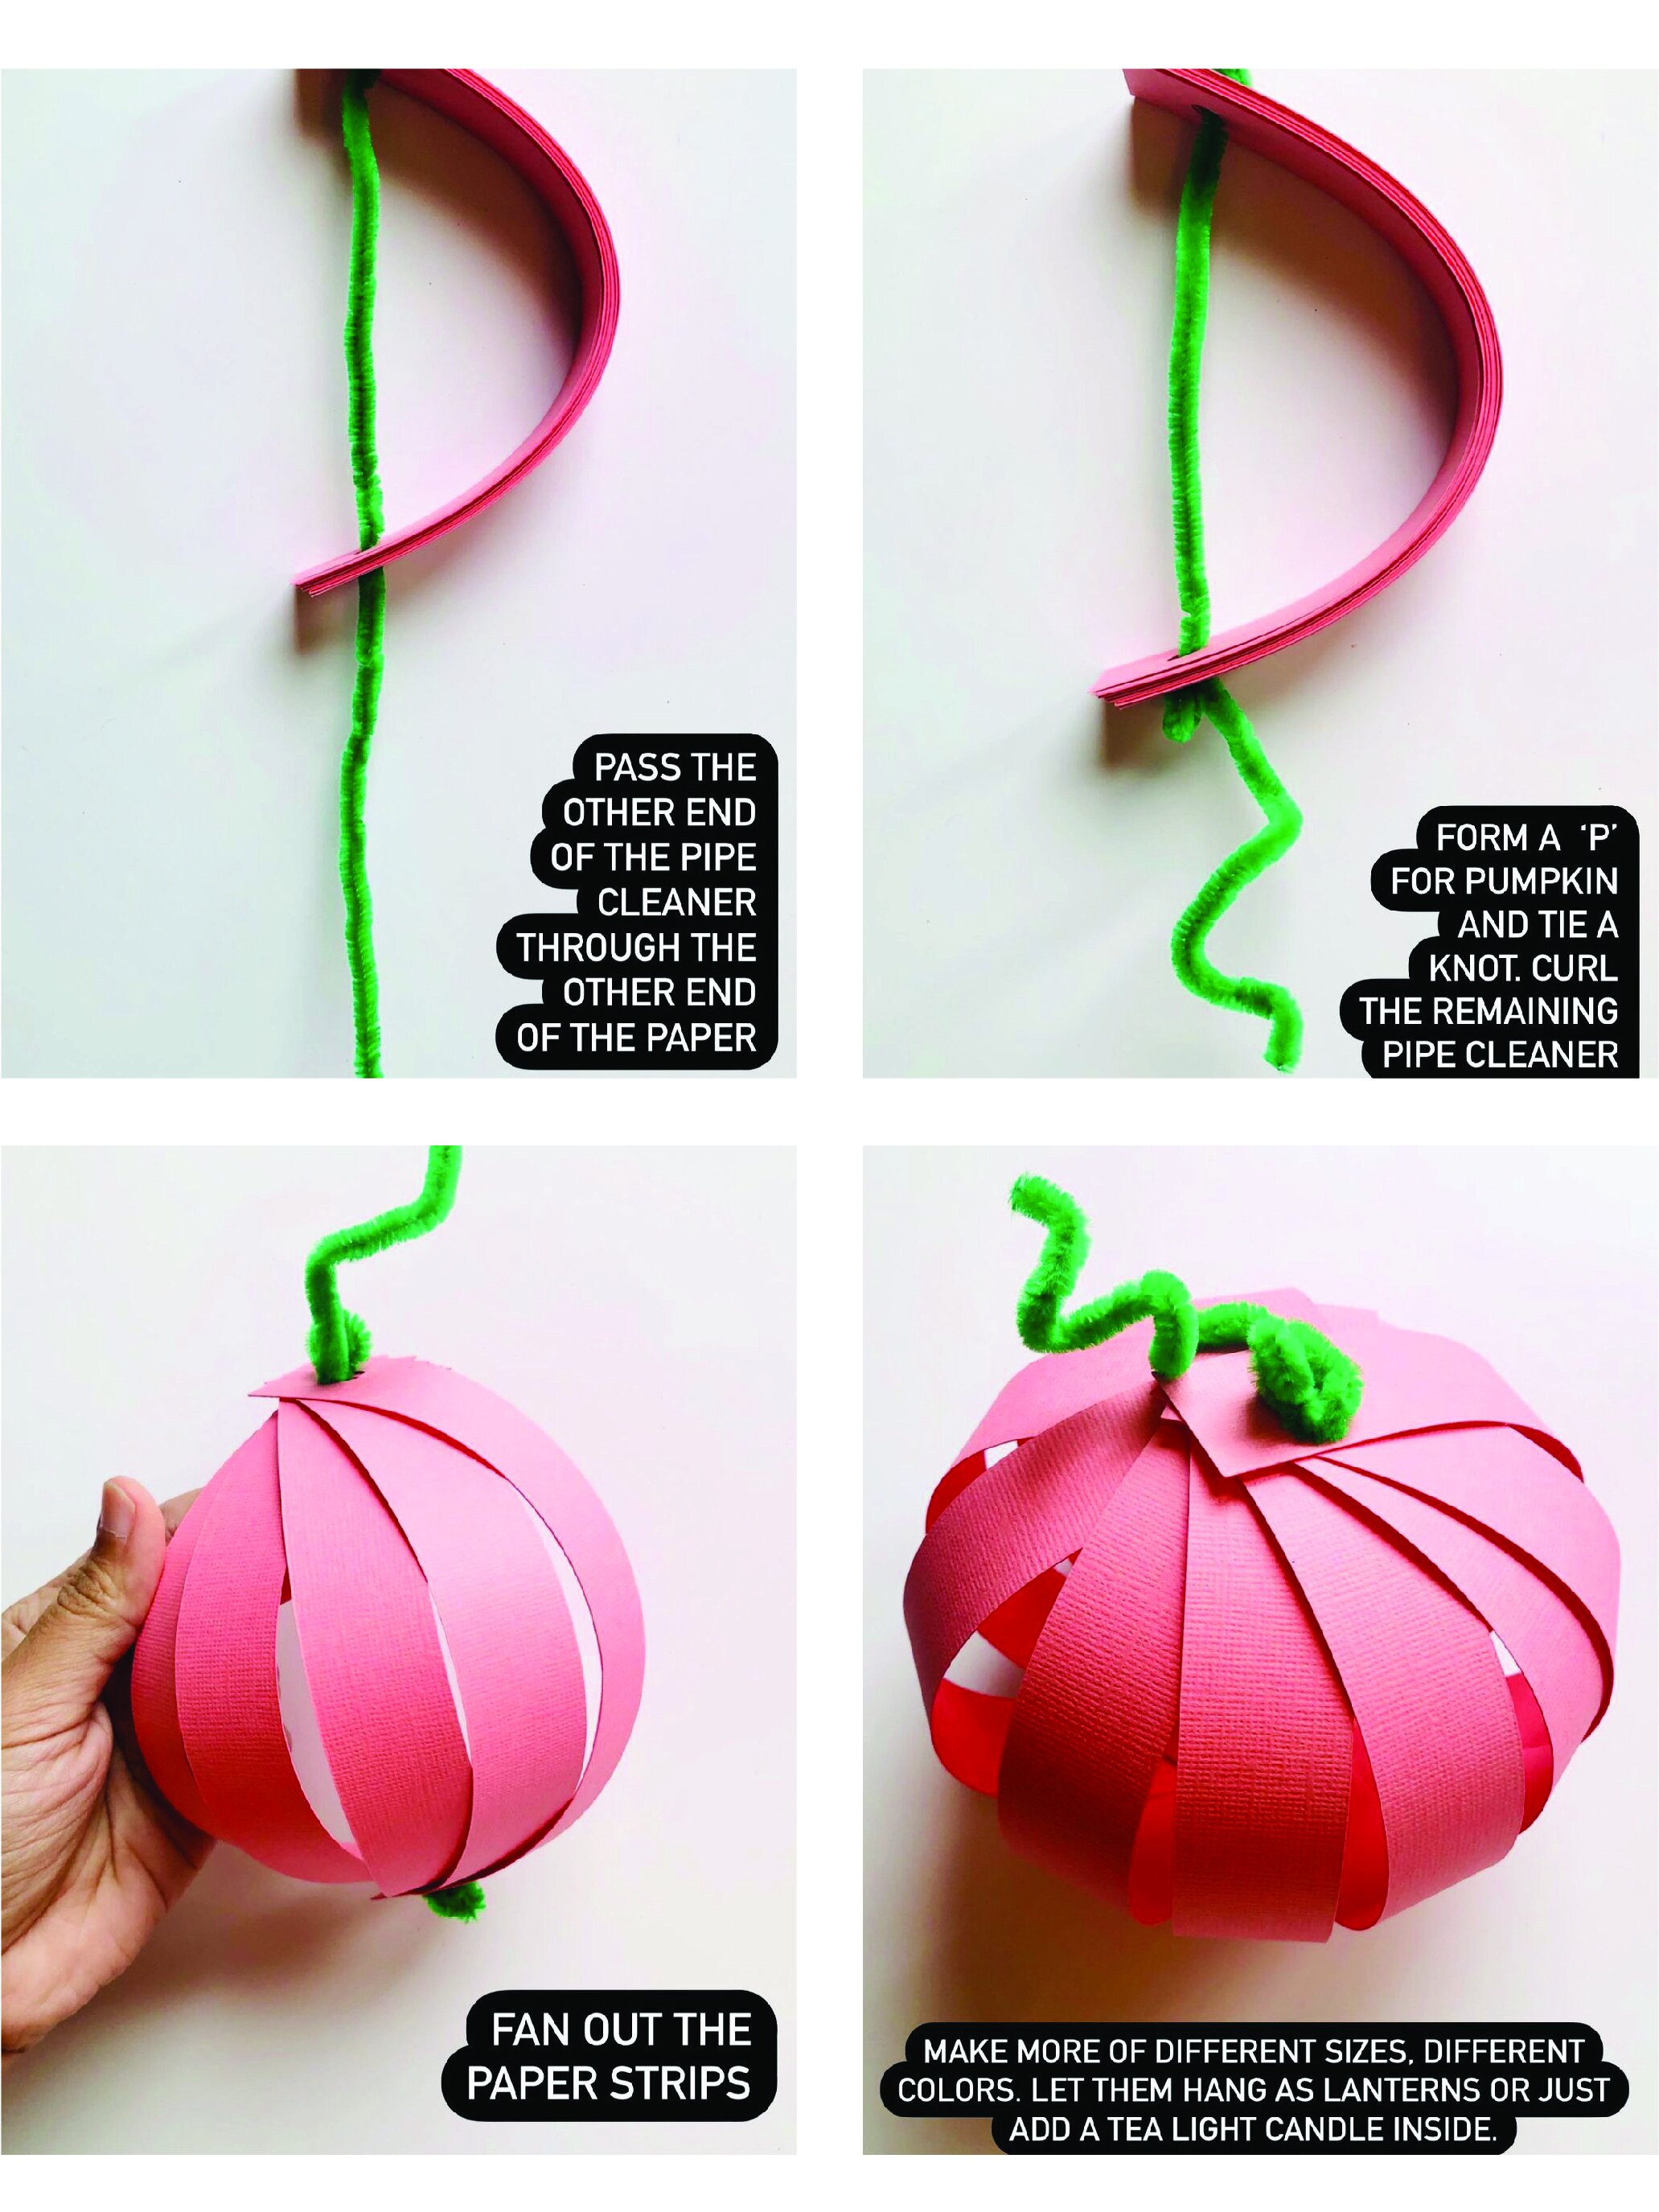
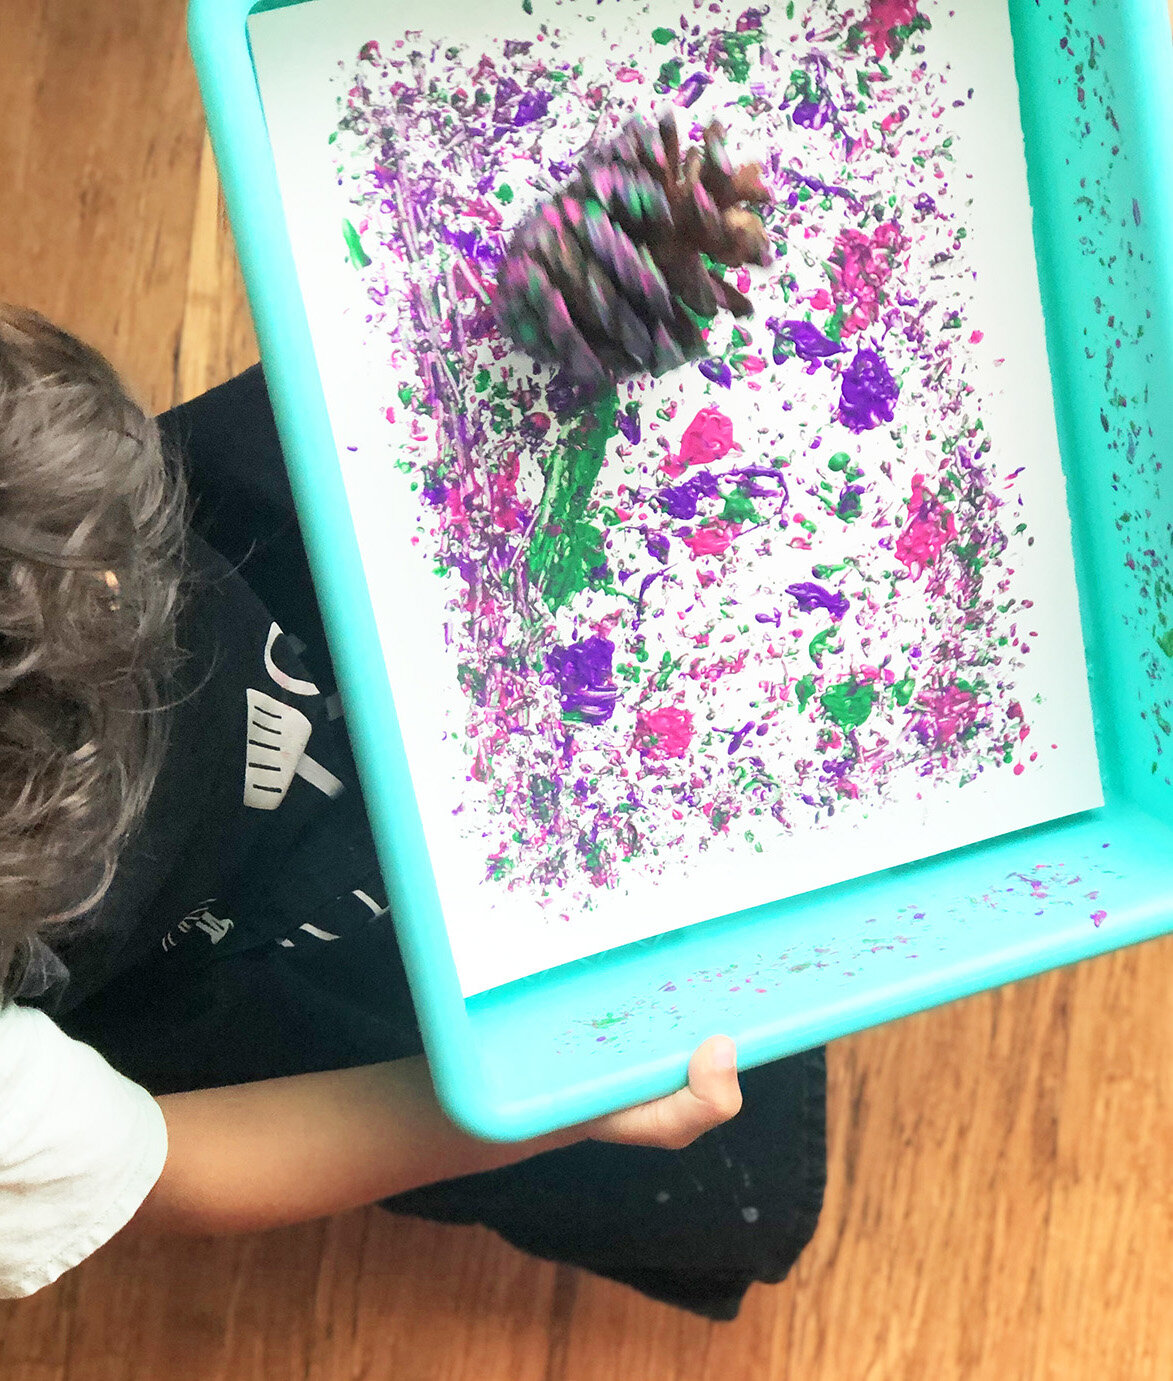
Then pass the other end of the pipe cleaner through the other side of the paper strip. Now form a ‘P’ (refer image below) and tie a knot. Curl the remaining of the pipe cleaner to form the stem. Now fan the strips one by one and you will have a cute little pumpkin! Make more in different sizes and colors and you can hang these as lanterns or add a tea light inside.
When you want to pack these away, simple untie the knot on one side of the pipe cleaner and the paper strips can lay flat for a more compact storage.
Activity 3: No Mess Pinecone Process Art
Best for (1.5 year old and up) creativity, gross motor skills and seasonal activity
Material Needed: Pinecone, Paper, Tray or Cardboard box, Paint
Pinecones are everywhere on the ground at this time of the year. So next when you go to the park or go hiking, make sure to pick a couple pinecones for your next activity. If you live in an area where you don’t have pine trees, don’t worry, this activity works just fine with a stone as well. My son loves collecting stones/rocks and we have tried this activity with a 2” stone before. Just make sure the stone is sort of smooth.
Now when using pinecones I always like to heat it in the oven for 15 minutes at 200F on a baking sheet before using it. This step is needed to make sure that the pinecone is clean and safe to use for kids. Now take a 2” deep tray (light weight) or any cardboard/ shoe box and fit your paper inside. If the paper is bigger than the tray/box please trim it accordingly. If the paper is much smaller then get a bigger paper or tape down the small paper to the bottom of the tray/box. We don’t want the paper to move too much.

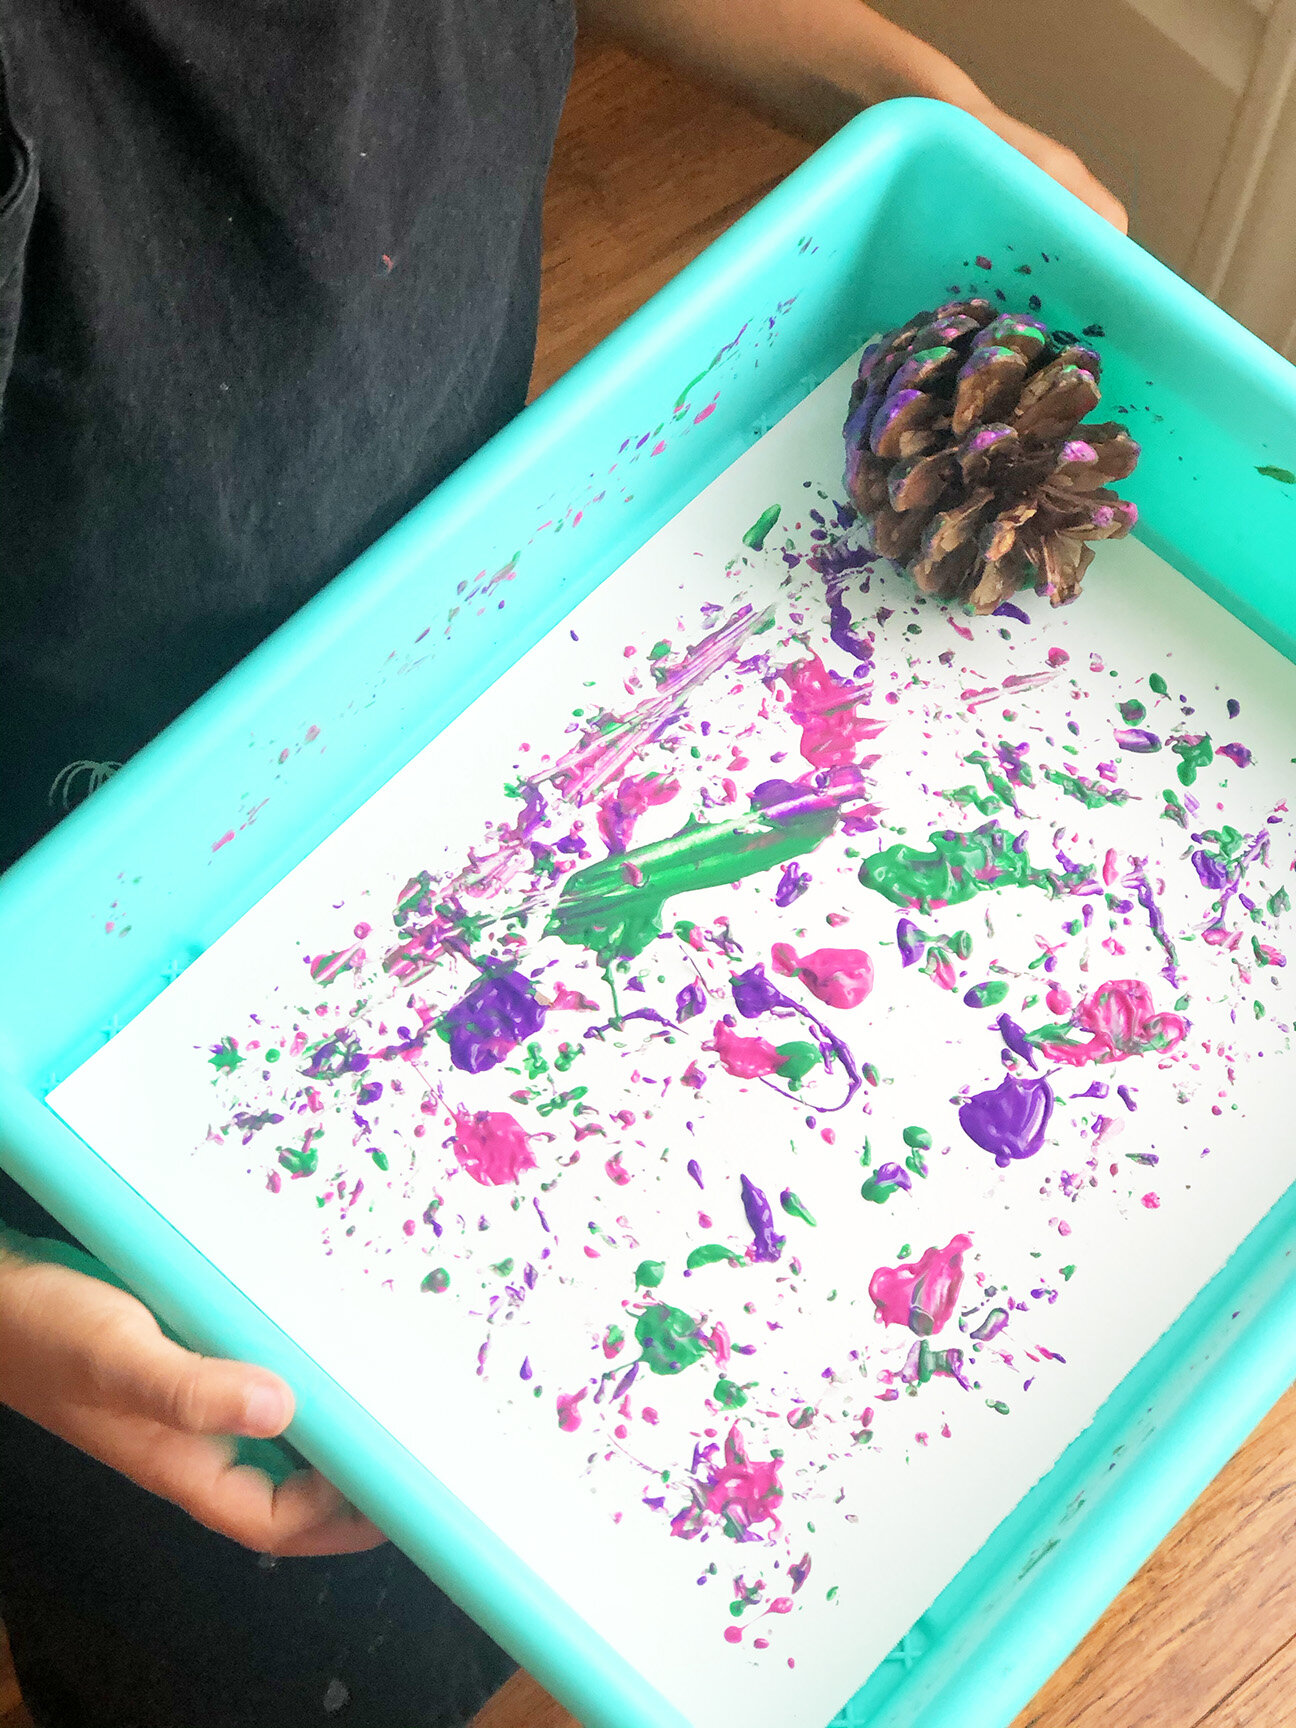
Let your kid choose any 3 to 4 colors for the activity. Scatter the colors on the paper using a paintbrush. We just poured onto the paper directly. Now place the pinecone inside the tray/box and roll with it (literally!). Roll the pinecone all over the paint by tipping the tray/box in different directions. Shake the box, make the pinecone slide, just have fun with it. We even played some music and the kiddo just went with the flow. You can stop when you are happy with how it turned out. There is no wrong way of doing this.


You will not only have a colorful art piece but also a colorful pinecone. Our colorful pinecone is going to be our new addition to the Christmas tree!